
Loading ...
Loading ...
Loading ...
ZENMUSE X5R
User Manual
10
©
2016 DJI. All Rights Reserved.
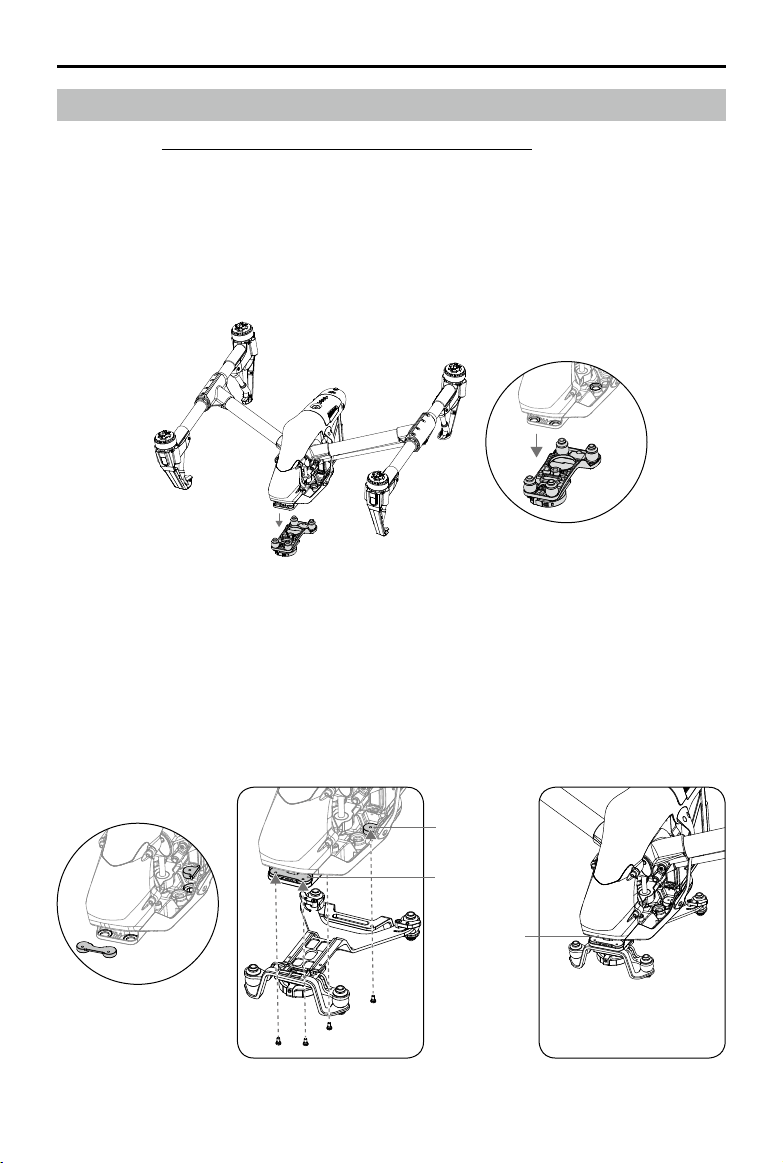
4. Attach the new gimbal mounting plate as shown below. With their flat sides facing
outwards, align the rear mounting plates with the rear bracket's screw holes. Tighten the
screws with a screwdriver.
5. Connect the 8-PIN cable and 10-PIN cable in order.
6. Place the front mounting bracket to the front bracket with its grooved side facing inwards.
Adjust the 8-PIN cable and 10-PIN cable to avoid protrusion, and then tighten the screws.
Mounting
Position
Front Mounting
Plate
Rear Mounting
Plate
Mounting the Zenmuse X5R to the Inspire 1
(Watch Video: http://www.dji.com/product/zenmuse-x5s/info#video)
Replace the Inspire 1 Gimbal Mounting Plate
1. Remove the two black dampers at the front.
2. Disconnect the 10-PIN cable and 8-PIN cable in order. Be careful not to damage the
gimbal cables.
3. Remove the other two black dampers.
Loading ...
Loading ...
Loading ...