
Loading ...
Loading ...
Loading ...
9
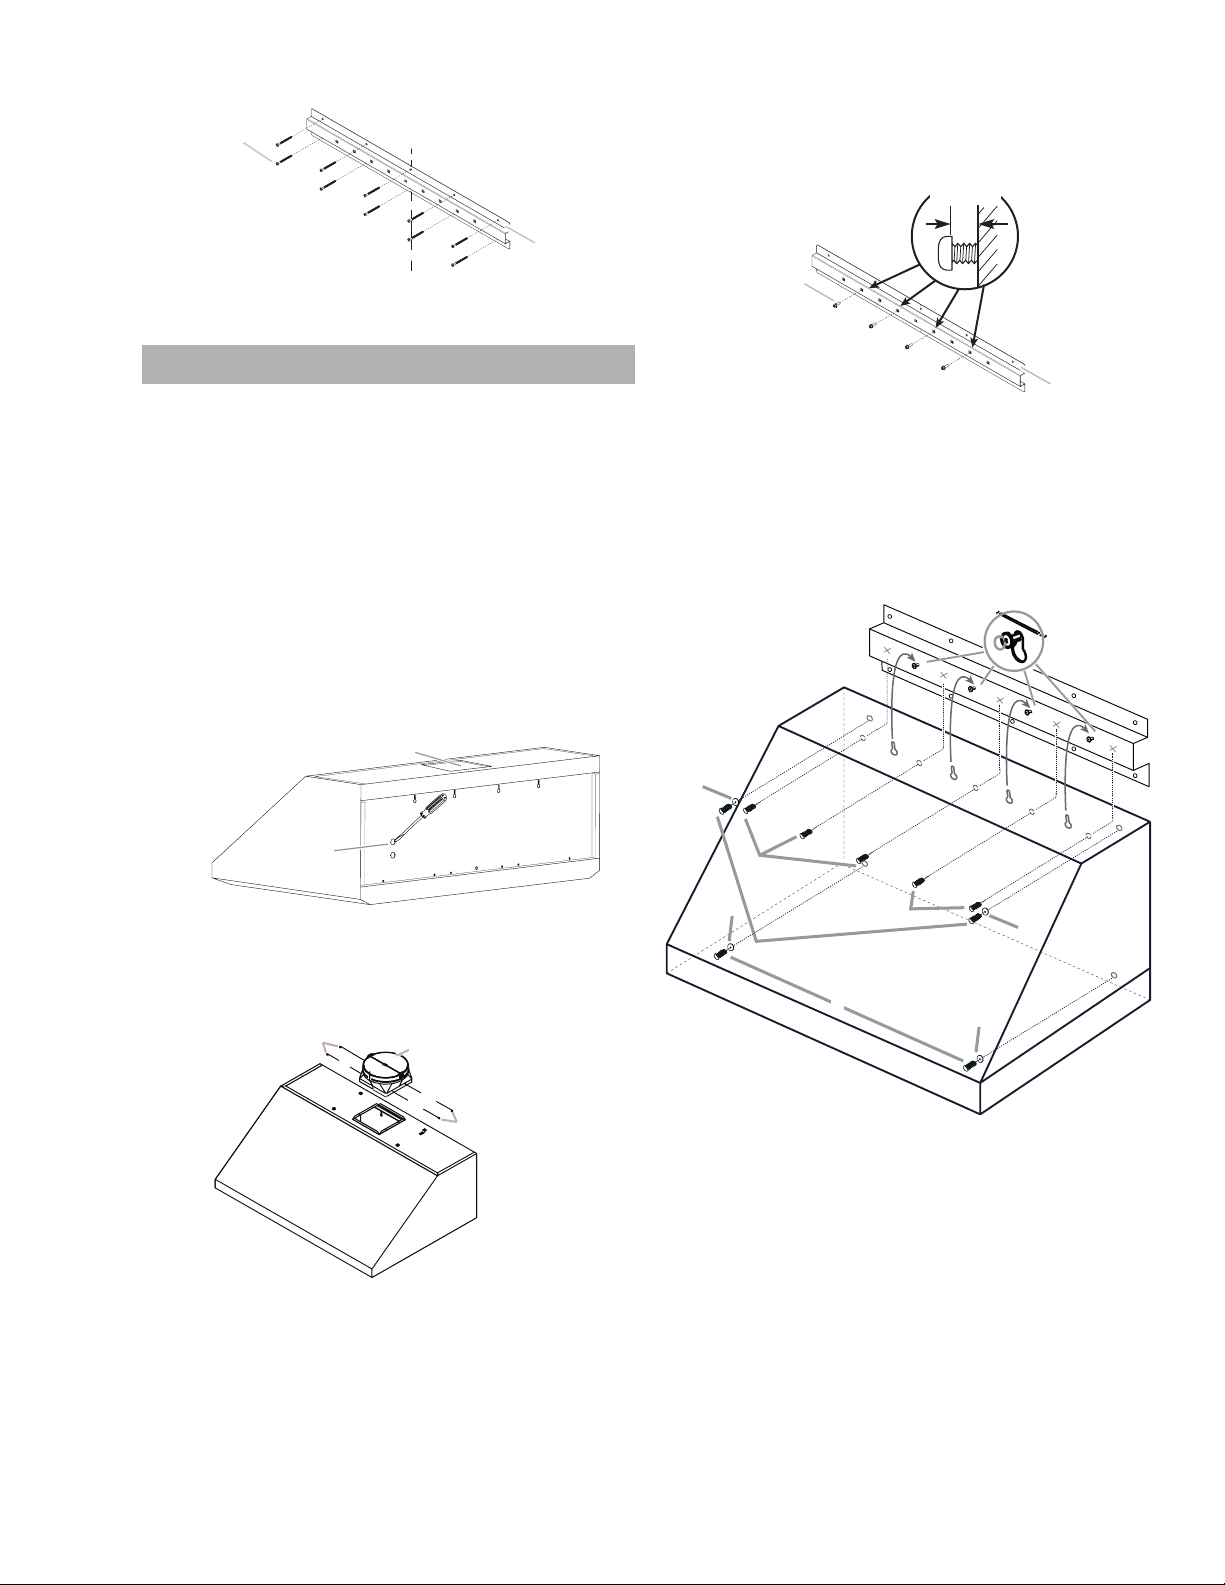
7 Place the support and fasten it with the mounting screws.
B
A
A. Front support view
B. Mounting screws
centerline
Installation
After having chosen the venting methods, proceed as follows:
• If possible, disconnect and move freestanding or slide-in
range to provide easier access to rear wall.
Otherwise put a thick, protective covering over countertop,
cooktop or range to protect from damage and debris.
Select a flat surface for assembling the unit. Cover that
surface with a protective covering and place all canopy
hood parts and hardware in it.
• Determine and mark the centerline on the wall where the
canopy hood will be installed. Select a mounting height
and mark on wall.
• Prepare duct and conduit cutouts as needed.
• Remove the duct knockouts using a flat blade screwdriver
and a small hammer. Use the screwdriver by knocking out
the knockout. Take care of sharp edges.
A. Vertical discharge
B. Knockouts
A
B
• Attach air exhaust transition over the top exhaust opening
with 4 - 4.2x19 mm screws.
A. Transition
B. 4 - 4.2x19 mm screws
A
B
B
NOTE:
The exhaust adaptor/damper can be installed up to 1 inch on
either side of the hood center to accommodate ocenter duct-
work. In extreme ocenter installations, one end of the duct
connector may need to be trimmed to clear the electrical cable
clamp.
Mounting the hood
1 Install the 4 pieces of the selected screws on the moun-
tings screws location (see the image).
NOTE: Leave a
1
⁄4” (6.4 mm) gap between the support and
the back of the screw head to slide range hood into place.
A
B
A. Front support view
B. 4- M6x16 mounting screws
1
⁄4”
(6.4 mm)
2 Fix the wiring conduit of the hood.
3 Slide the hood back against the wall. Tighten the mounting
screws. Be sure the screw heads are in the narrow neck of
the keyhole slot.
4 Drive 5 pieces of the selected screws in the lower security
screws location (see the image below).
5 Drive 2 pieces of the selected screws and washers in the
upper security screws location (see the image below).
6 Connect Ductwork to hood.
C
C
C
C
B
B
A
D
E
A. 4 M6x16 mounting screws
B. 5 M6x16 security mounting screws
C. 6.4x18 mm washers
D. Upper security screws
E. Lower security screws
Loading ...
Loading ...
Loading ...