Loading ...
Loading ...
Loading ...
GB
21
! The hob burners do not require primary air adjustment.
! After adjusting the appliance so it may be used with a
different type of gas, replace the old rating label with a new
one which corresponds to the new type of gas (these labels
are available from Authorised Technical Assistance Centres).
! Should the gas pressure used be different (or vary slightly)
from the recommended pressure, a suitable pressure regulator
must be tted to the inlet hose in accordance with current
national regulations relating to “regulators for channelled gas”.
Gas oven :
• Open the oven door (to reach the oven burner, remove
the oor);
• loosen the 2 screws which hold the oven burner in place,
remove the burner and replace the nozzles “N” with
suitable ones for the new type of gas according to the
table “Burner and nozzle characteristics”.
• re-assemble all the components, regulate the air in the
burner as well as the minimum ow of the tap.
Adjusting the low ame
• Open the door and remove the oven oor;
• put the oven knob to position maximum and light the burner;
• close the door and wait for about 15 minutes;
• put the knob to position 1 (minimum);
• remove the actual knob and regulate the adjusting screw
situated above the thermostat spindle;
• after regulating the low ame as required, with the burner
lit, change from the high to the low ame position abruptly
for a few times and close the oven door normally, making
sure that the burner does not go out.
Primary air ow control
NP
R
The oven burners and grill are tted
with the primary air control bushing
“R” (gas oven burners). The primary
air ow is controlled in an appropriate
way when the ame is stable and
even, without killing the ame when
the burner is cold or lighting the
nozzle when the burner is hot.
The flow may be adjusted by
loosening the screw “P” and moving the bushing “R” so
that the opening “X” corresponds to the values in the table
below. Once all the adjustments have been made, fasten
the bushing “R” with the screw “P”.
Burner
Opening "X" (mm)
natural gas "G20"
Opening "X" (mm)
liquid gas "G30-G31"
Oven
G
rill
6.5
5
16
12
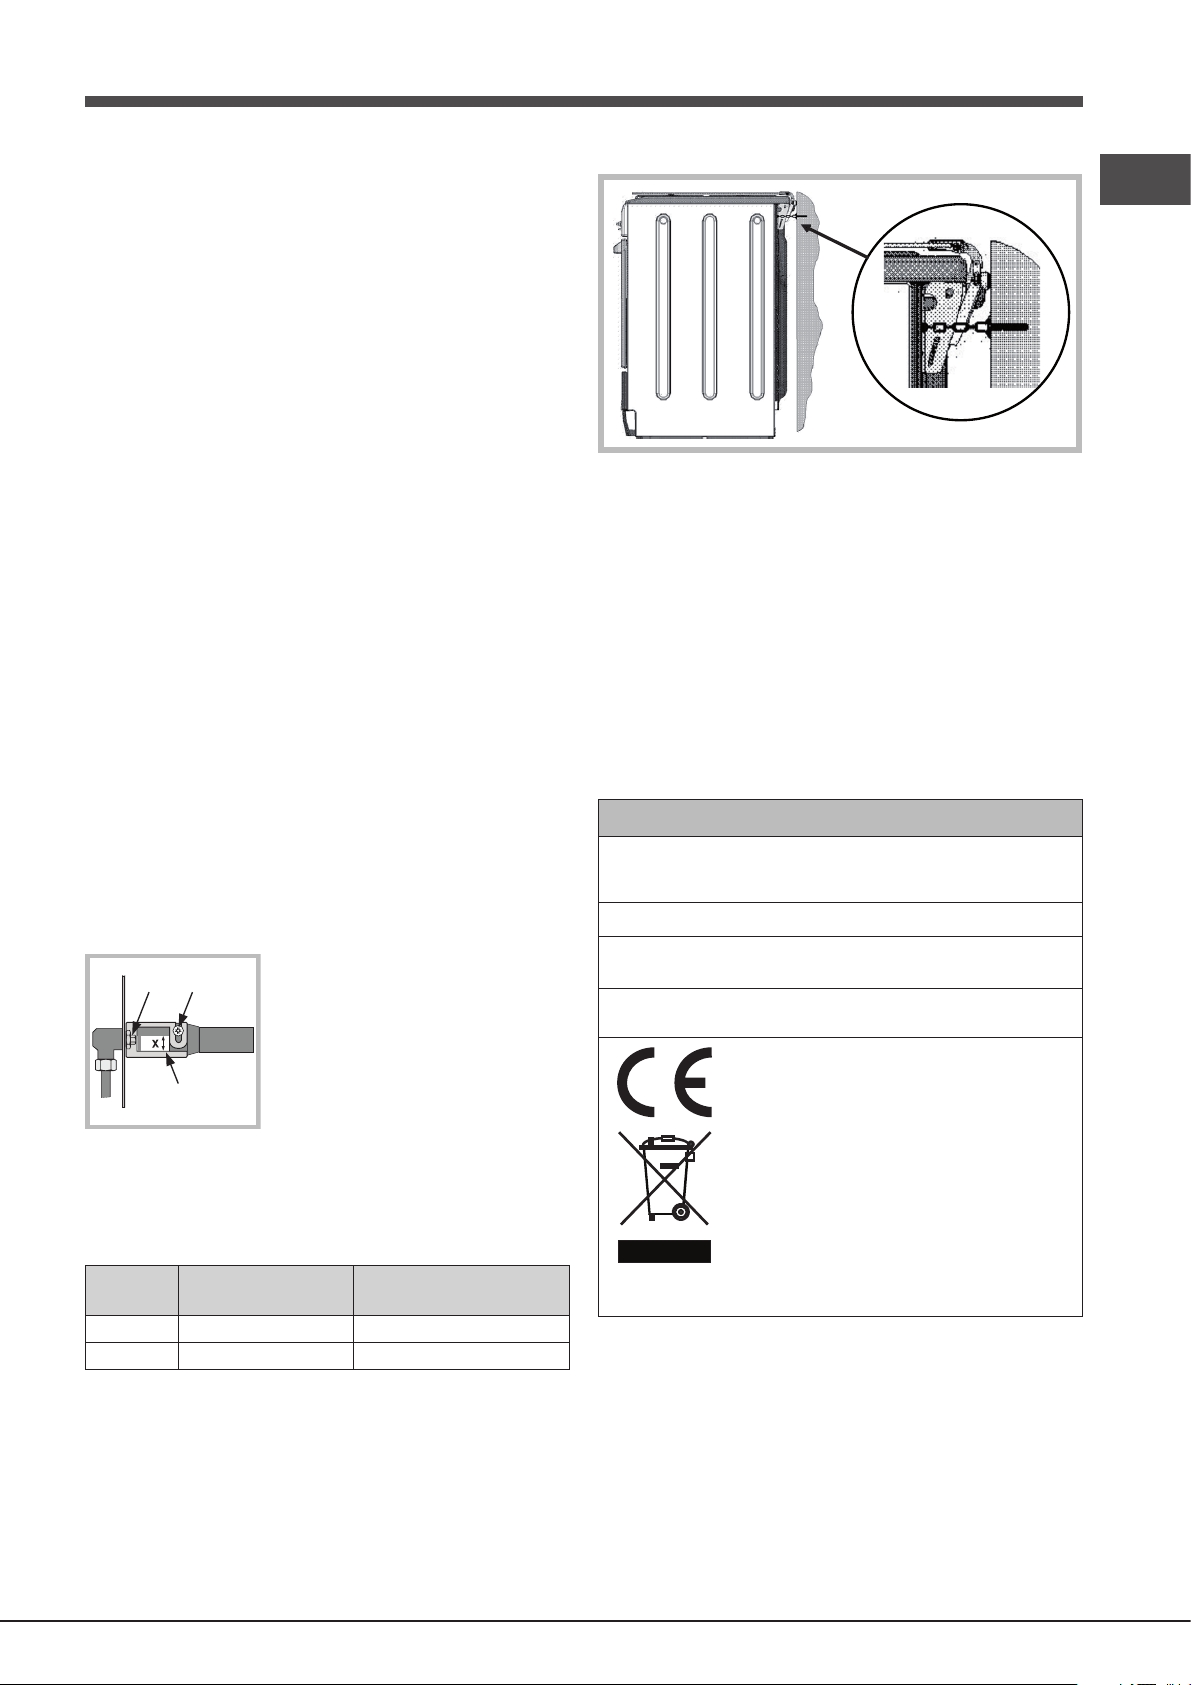
Safety Chain
! In order to prevent the appliance from overturning
accidentally, for example in case of a child climbing
onto the oven door, the safety chains MUST be installed!
The cooker is provided with safety chains that must be
xed with a screw (not supplied as accessory) on the wall
behind the appliance, at the same height as the xing point
on the appliance.
Make sure that the chains are xed in the back of the
cooker, as shown in the drawing, in such way to be tight
and parallel to the oor.
! When the installation process is complete, the chains must
be kept in tension!
TABLE OF CHARACTERISTICS
Oven
dimensions
HxLxP
33 x 54 x 38 cm
Volume
lt. 68
Voltage and
frequency
see data plate
Burners
may be adapted for use with any type
of gas shown on the data plate.
This appliance conforms to the following
European Economic Community
directives:
- 2006/95/EEC dated 12/12/06 (Low
Voltage) and subsequent amendments
- 2004/108/EEC dated 15/12/04
(Electromagnetic Compatibility) and
subsequent amendments
- 93/68/EEC dated 22/07/93 and
subsequent amendments.
- 2009/142/EEC dated 30/11/09 (Gas)
and subsequent amendments.
- 2012/19/EEC and subsequent
amendments.
Loading ...
Loading ...
Loading ...