Loading ...
Loading ...
Loading ...
25En
English
unstable installation may cause
skipping or other malfunctions.
When not using the supplied
mounting sleeve
1 Line up the holes on the
mounting bracket with the holes
on the sides of the unit to attach
the bracket.
2 Screw in one screw on each side to
hold the unit in place.
Screw
Mounting bracket
Dashboard or console
• Us
e either truss (5 mm × 9 mm) or
flush surface (5 mm × 9 mm)
s
crews, depending on the bracket
screw holes.
Using the included bracket
Check to make sure that the included
bracket matches your particular
model of vehicle and then attach it to
the unit as shown below.
Removing the unit (installed
with the supplied mounting
sleeve)
1 Remove the trim ring.
Trim ring
Notched tab
• R
eleasing the front panel allows
easier access to the trim ring.
Screw
Bracket
• When reattaching the trim ring,
point the side with the notched
tab down.
2 Insert the supplied extraction
keys into both sides of the unit
until they click into place.
3 Pull the unit out of the dashboard.
To secure the front panel
The front panel can be secured with
the supplied screw.
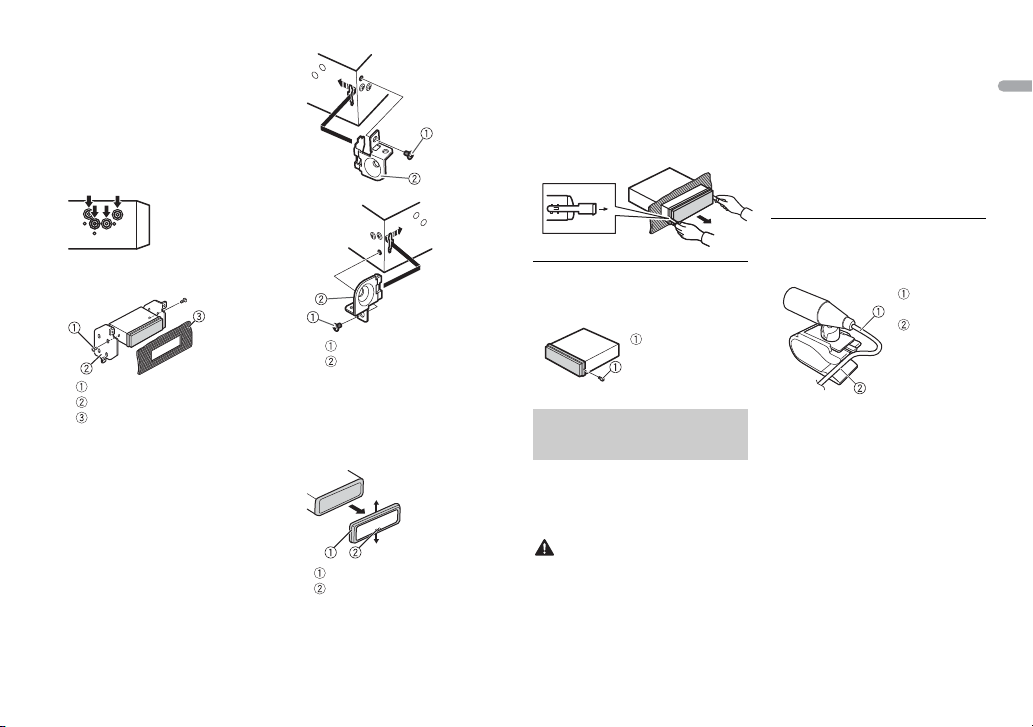
The microphone should be placed
directly in front of the driver at a
suitable distance to pick up their voice
clearly.
CAUTION
It is extremely dangerous to allow the
microphone lead to become wound
around the steering column or shift
lever. Be sure to install the
microphone in such a way that it will
not obstruct driving. It is
recommended to use the clamps (sold
separately) to arrange the lead.
NOTE
Depending on the vehicle model, the
microphone cable length may be too
short when you mount the
microphone on the sun visor. In such
cases, install the microphone on the
steering column.
To install on the sun visor
1 Fit the microphone lead into the
groove.
2 Install the microphone clip on the
sun visor.
Lowering the sun visor reduces the
vo
ice recognition rate.
Installing the
microphone
Screw
Microphone
lead
Groove
Loading ...
Loading ...
Loading ...