Loading ...
Loading ...
Loading ...
7
1 SETUP
Read the Operation Manual before setting up the Life Fitness Recumbent Bike. Place the
Recumbent Bike where it will be used before beginning the setup procedure.
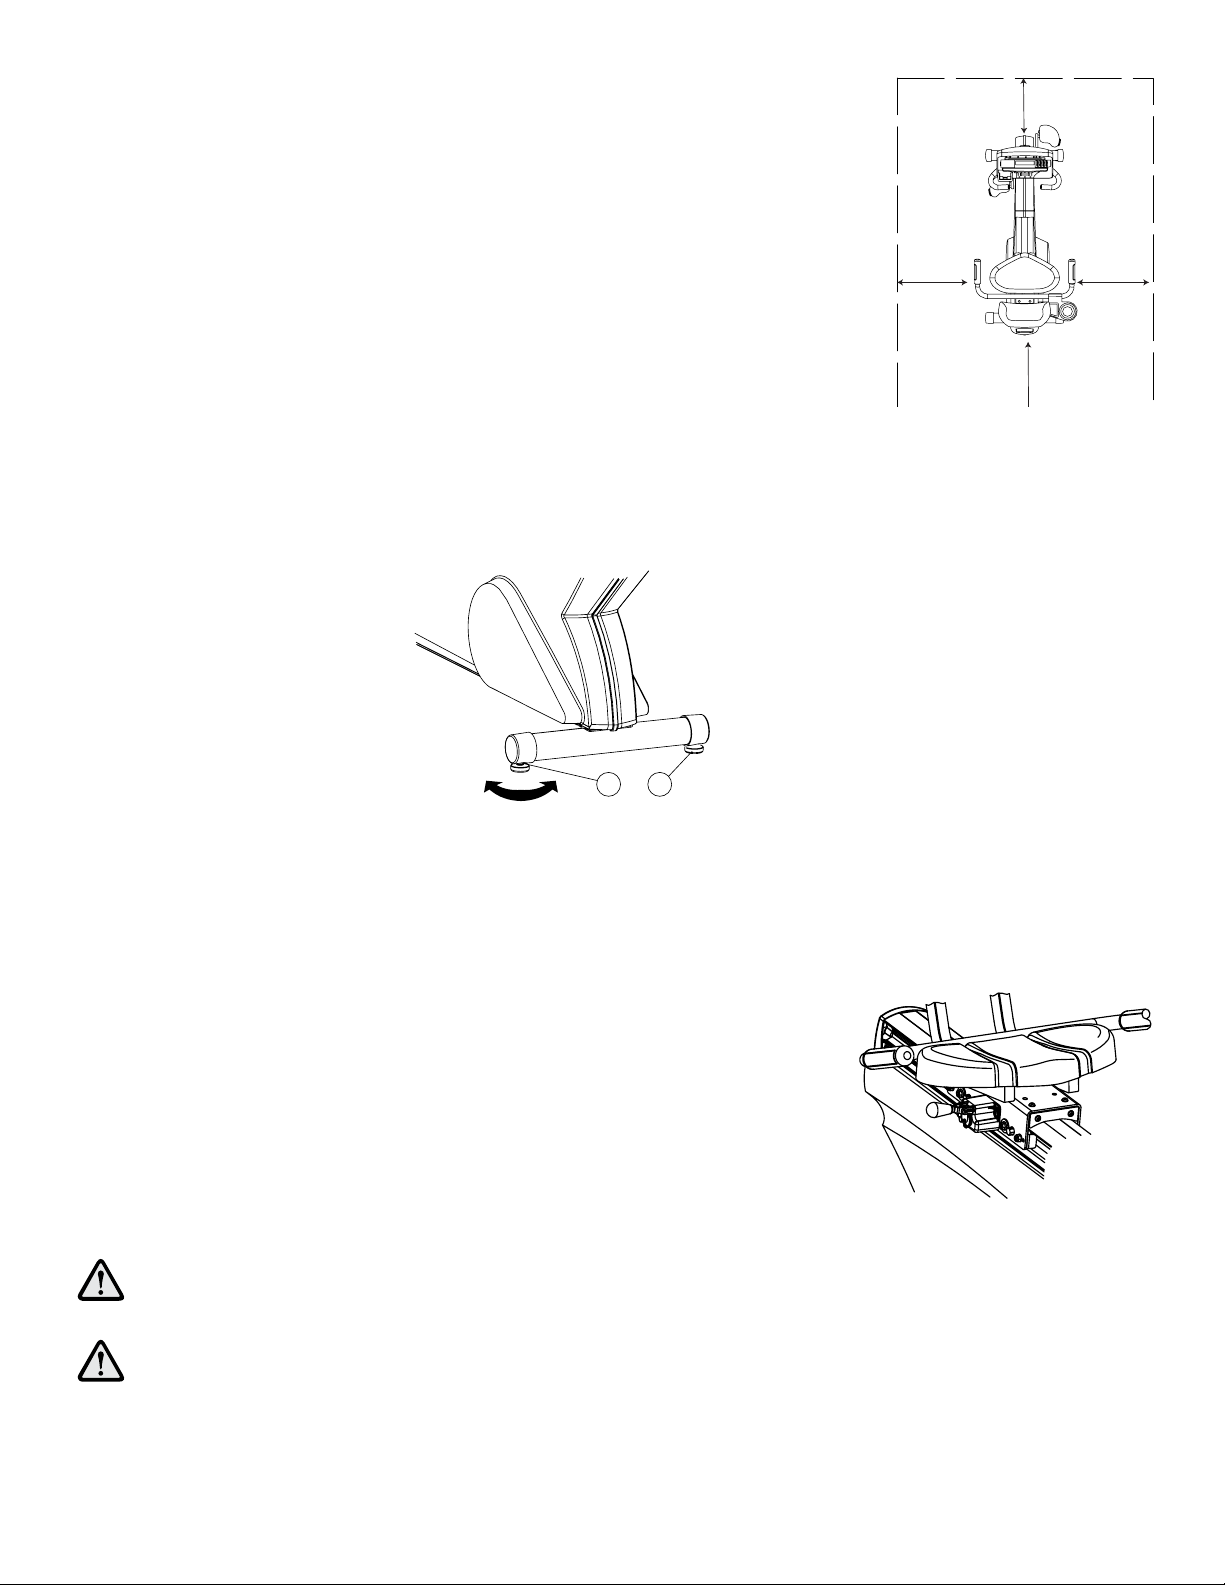
WHERE TO PLACE THE LIFECYCLE EXERCISE BIKE
Follow all Safety Instructions in Section 1.1 and move the Life Fitness Recumbent Bike
to the location in which it will be used. See Section 4, Specifications, for the dimensions
of the footprint. Allow 1 foot of clearance in front of the Life Fitness Recumbent Bike to
allow for movement of the pedal levers and at least 2 ft. (0.6 m) on the side. It should be
easy to mount the Life Fitness Recumbent Bike from the side.
H L E B
After placing the bike in position, check the unit’s stability by attempting to rock it from
side to side. Any slight rocking indicates that the unit must be leveled. Determine which foot is not resting completely
on the floor. Loosen the jam nut (A) with an open-end 9/16-inch wrench, and rotate the stabilizing foot (B) to lower it.
Verify that the bike is stable, and repeat the adjustment as necessary until the unit no longer rocks. Lock the adjustment
by tightening the jam nut against the stabilizer bar.
H A S
A properly adjusted seat is extremely important in any bike-oriented exercise activ-
ity and the Lifecycle Exercise Bike is no exception. If the seat is too close, excessive
strain will be placed on the knees and quadriceps muscles; if the seat is too far, the
resulting reaching action will irritate the feet, ankles, hips and knees.
Sit on the seat and place the balls of the feet on the pedals. An optimum position
will allow movement through the bottom of the stroke without locking the knees or
shifting in the seat. The knees should have a slight bend at the point of fullest leg
extension.
If the seat needs to be adjusted, lift the spring-loaded adjusting handle located on
the right, front side of the seat. Slide the seat forward or backward as necessary to
the proper position and release the pin to complete engagement. Gently slide the
seat forward and backward a small distance to ensure it is locked into place. Check
the seat distance again and re-adjust it if necessary.
CAUTION: Do not attempt to adjust the seat while pedaling the bike. Doing
so, or failing to insert the seat pin completely may result in an uncomfortable
workout or cause injury.
MISE EN GARDE : Ne pas essayer d’ajuster la selle pendant le pédalage.
Tout ajustage en cours de fonctionnement ou toute insertion incomplète de
la goupille de la selle pourrait nuire à l’exercice ou entraîner des blessures
B
A
2 ft. (0.6 m)
2 ft. (0.6 m)
3 ft” (1m)
3 ft” (1m)
Loading ...
Loading ...
Loading ...