
Loading ...
Loading ...
Loading ...
en Operating the appliance
8
To ensure that you can keep track of your bags and the
food that is vacuumed within them, we recommend that
you make a note on the bag of the date of the
vacuuming along with the contents.
Proceed as follows:
1. Open the glass lid.
2. Place the vacuum-sealing bag in the compartment.
Notes
– Make sure that the food is at the lowest possible
initial temperature – within the range of 1 – 8 °C
is best.
Make sure that the air outlet is not covered so that
the pump can extract the air from the
compartment.
Make sure that the centre of the bag and the ends
of the bag are lying flat on top of the heat-sealing
column. This will ensure that the heat-sealing
seam is perfectly closed.
– Make sure that the open end of the bag is
protruding over the heat-sealing column by
approx. 3 cm but that it is not touching the lid
seal.
Note: Elevate the bag if necessary using an item
such as a chopping board to prevent the bag from
sliding down.
3. Touch the 5 symbol to select a vacuum-sealing
level.
4. Touch the » symbol to select a heat-sealing time.
5. Tightly close the glass lid and hold it there.
6. Touch the Start symbol to start the vacuum-sealing
process.
The vacuum-sealing process will now start. The
vacuum-sealing level indicators will flash blue one after
the other until the value you selected has been reached.
The heat-sealing process will now start. The heat-
sealing level indicators will flash blue one after the other
until the value you selected has been reached.
At the end of the process, the chamber is ventilated and
an acoustic signal sounds. You can now open the glass
lid and remove the heat-sealed vacuum-sealing bag
from the chamber.
:Warning – Risk of burns!
The sealing bar in the vacuuming chamber becomes
extremely hot if the appliance is used frequently and
there are long heat-sealing times. Never touch the hot
sealing bar. Keep children away from the appliance.
Notes
■ At the highest vacuuming level, the process may last
up to 2 minutes. After this time, the bag is heat-
sealed and the vacuuming level that is reached
lights up.
■ After vacuuming, check the heat-sealing seam on
the bag. Carefully try to pull the seam apart. If it
comes apart, select a higher heat-sealing level the
next time. If the seam is deformed, it has become
too hot. Select a lower heat-sealing level the next
time or leave the appliance to cool.
■ If you vacuum food in bags several times in
succession, the heat-sealing column becomes
increasingly hotter. This may impair the quality of the
heat-sealing seam. After several vacuuming
processes, you should therefore select a lower heat-
sealing time or leave the appliance to cool for
approx. 2 minutes between the processes.
Heat-sealing in good time
Use this function if you only want to pack your delicate
food in a bag so that it is air-tight, without the contents
sitting too tightly against the bag.
When air is being extracted from the bag, touch the
» symbol to end the process and heat-seal the bag
early.
The appliance displays the vacuuming level until it is
reached.
At the end of the process, the chamber is ventilated and
an acoustic signal sounds. You can now open the glass
lid and remove the heat-sealed vacuuming bag from the
chamber.
Note: To heat-seal the bag, the vacuum-sealing drawer
requires a specific degree of vacuum. If you touch the
» symbol first, the vacuum-sealing drawer pumps air
out of the chamber until this degree has been reached.
The bag is then heat-sealed.
Cancelling the vacuuming process
When air is being extracted from the bag, touch the
Stop symbol to cancel the process early.
The appliance displays the vacuuming level until it is
reached.
The bag is not heat-sealed. The lid opens slightly and
the chamber is ventilated. An acoustic signal sounds.
You can now remove the vacuuming bag from the
chamber.
0LQPP
Operating the appliance en
9
Vacuuming in the container
Vacuum the food in a suitable vacuuming container in
order to preserve the food for longer.
Suitable vacuuming containers
Only use containers that are suitable for vacuuming
food. Commercially available products are different
when it comes to the quality of the food and the
material.
The vacuum hose that is enclosed with this appliance
has an inner diameter of 3 mm. To ensure that the hose
fits, you may require an adaptor for your container. In
many cases, these adaptors are already included with
the vacuuming containers.
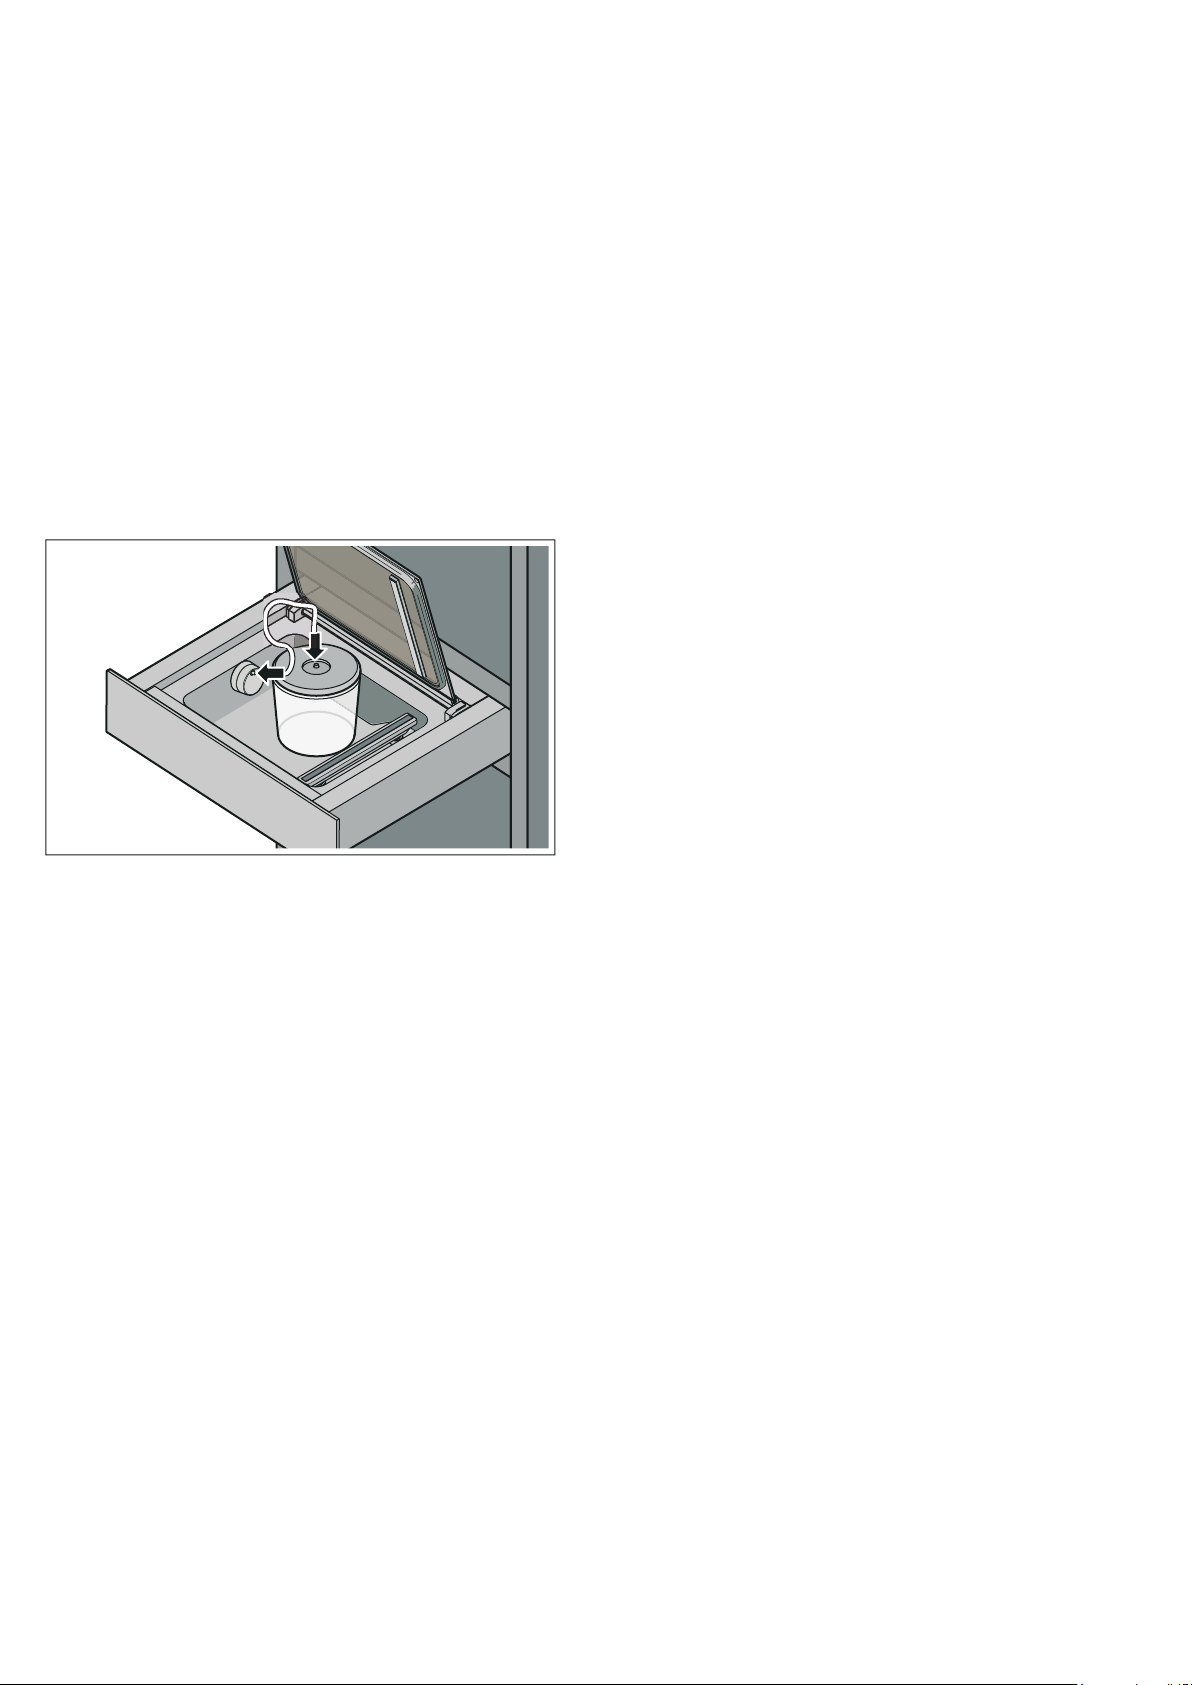
Proceed as follows:
1. Open the glass lid.
2. Plug the vacuuming adaptor into the air outlet.
3. Secure the hose to the vacuuming adaptor and the
vacuuming container.
4. Touch the 5 symbol to select a vacuum-sealing
level.
5. Touch the Start symbol to start the vacuum-sealing
process.
The vacuum-sealing process will now start. The
vacuum-sealing level indicators will flash blue one after
the other until the value you selected has been reached.
The vacuuming levels stop pulsating as soon as the
target value has been reached. The vacuuming level
that has been reached lights up and an acoustic signal
sounds. You can now detach the hose from the
container and the external vacuuming adaptor.
Note: If larger bubbles form, cancel the vacuuming
process.
Cancelling the vacuuming process
When air is being extracted from the bag, touch the
Stop symbol to cancel the process early.
The appliance displays the vacuuming level until it is
reached.
You can now detach the hose from the container and
the external vacuuming adaptor.
Carrying out the drying program for vacuum
pump
When vacuuming food, the smallest volume of water
gets into the vacuum pump system. This effect is
exacerbated when you are vacuuming liquids or
extremely moist food. For this reason, the appliance
comes with a drying function, which further removes
any liquid that gathers in the pump.
If the ¢ symbol is lit white, it is recommended that you
run a drying cycle. However, at this point, you can
continue to use the appliance as normal if you wish.
If the ¢ symbol is lit red, you must run a drying cycle.
Proceed as follows:
1. Tightly close the glass lid and hold it there.
2. Touch the ¢ symbol.
Drying will now start. It will take between 5and
20minutes. The ¢ symbol will flash blue while drying is
in progress.You can close the vacuum-sealing drawer
while drying is in progress.
At the end of the program, the chamber is ventilated
and an acoustic signal sounds. You can now open the
glass lid.
Note: It may be the case that a single drying cycle is
not sufficient. If, after one drying cycle, the ¢ and
: symbols are lit red, there is still moisture in the pump
system. Wait until the : symbol goes out and start
another drying cycle.
Loading ...
Loading ...
Loading ...