Loading ...
Loading ...
Loading ...
PL EN
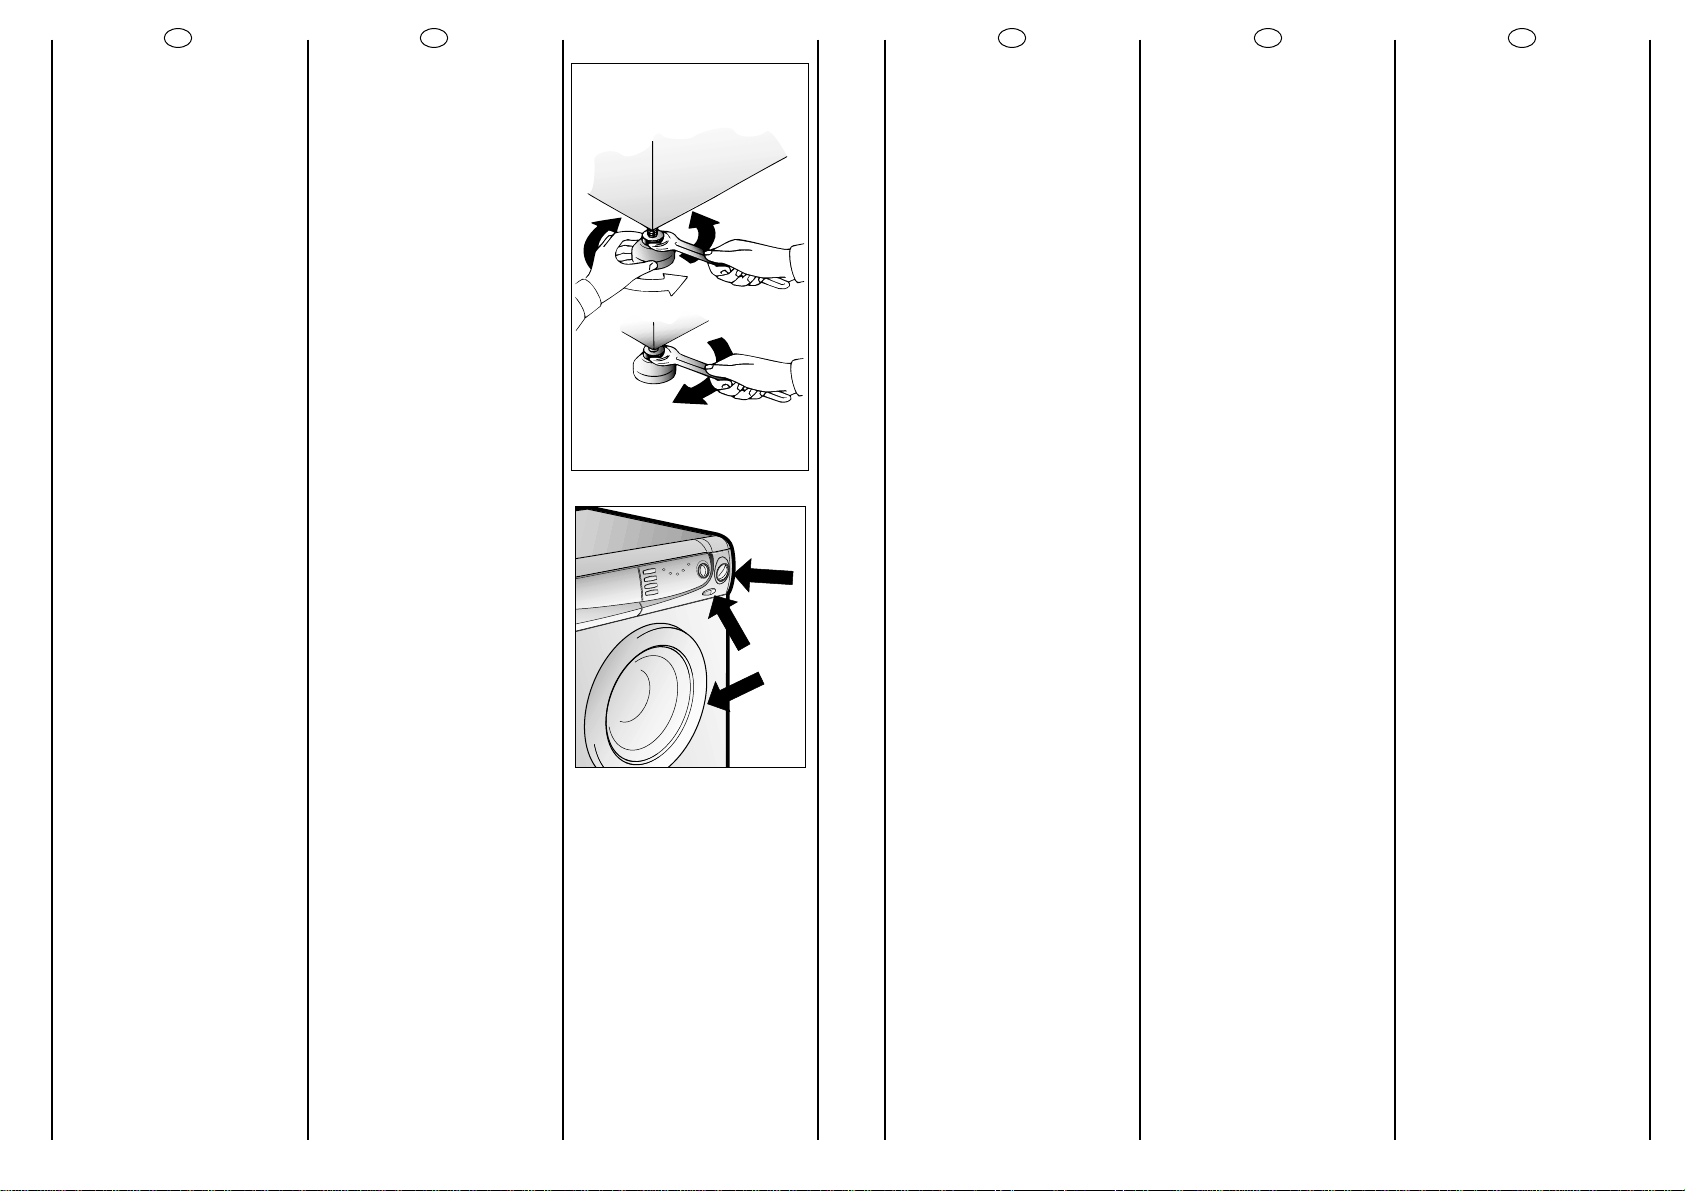
Wypoziomowaç pralkë
manipulujåc jej przednimi
nóãkami.
aa))
Przekrëciç w kierunku
zgodnym z kierunkiem
wskaz
ó
wek zegara nakrëtkë
blokujåcå n
ó
ãkë pralki.
bb))
Przekrëciç n
ó
ãkë
podnoszåc jå lub
opuszczajåc, tak aby
uzyskaç doskonaäe
przyleganie do podäoãa.
cc))
Zablokowaç n
ó
ãkë
przykrëcajåc nakrëtkë w
kierunku przeciwnym do
ruchu wskaz
ó
wek zegara, aã
bëdzie przylegaäa do dna
pralki.
Sprawdziç czy przycisk START
nie jest wciÊni´ty
Sprawdziç czy pokr´t∏o
programów jest na pozycji
OFF i czy drzwiczki sà
zamkni´te.
Wäoãyç wtyczkë kabla
zasilajåcego do gniazda
sleciowego.
Po zainstalowaniu,
urzådzenie naleãy ustawiç w
pozycji zapewniajåcej
swobodny dostëp do
kontaktu (wtyczki).
Use front feet to level the
machine with the floor.
a) Turn the nut clockwise to
release the screw adjuster of
the foot.
b) Rotate foot to raise or
lower it until it stands firmly
on the ground.
c) Lock the foot in position
by turning the nut anti-
clockwise until it comes up
against the bottom of the
machine.
Ensure that the START button
is not pressed.
Ensure that the knob is on
the “OFF” position and the
load door is closed
Insert the plug.
After installation, the
appliance must be
positioned so that the plug is
accessible.
21
20
A
B
C
FR
Mettre la machine à niveau
avec les pieds avant.
a) Tourner dans le sens des
aiguilles d’une montre
l’écrou de façon à
dévérouiller la vis du pied.
b) Tourner le pied et le faire
monter ou descendre
jusqu’à obtenir une parfaite
adhérence au sol.
c) Enfin bloquer le pied en
revissant l’écrou dans le sens
inverse des aiguilles d’une
montre et le faire adhérer au
fond de la machine.
Vérifier que le bouton
“START” ne soit pas enfoncé.
Vérifier que la manette soit
sur la position “OFF” et que le
hublot soit fermé.
Brancher la prise.
Une fois l'appareil installé, la
prise électrique doit rester
accessible.
EL
.
)
.
) ,
.
)
, o
,
.
(START)
.
OFF
.
.
M ,
.
ES
Nivele la máquina con las
patas delantares
a) Girar la tuerca en el
sentido de las agujas del
reloj para desbloquear el
tornillo del pie.
b) Girar el pie y hacerlo
bajar o subir hasta
conseguir su perfecta
adherencia al suelo.
c) Bloquear el pie girando la
tuerca en el sentido
contrario a las agujas del
reloj hasta que se adhiera al
fondo de la lavadora.
Verificar que la tecla START
no se haya seleccionado.
Verificar que el mando de
los porgramas esté en
posición OFF y que la
escotilla esté cerrada
Enchúfela.
El aparato tiene que ser
colocado de forma que el
enchufe sea accesible una
vez instalado.
Loading ...
Loading ...
Loading ...