Loading ...
Loading ...
Loading ...
18
min 50 cm
max 85 cm
+2,6 mt max
max 100 cm
min 4 cm
min 50 cm
max 85 cm
+2,6 mt max
max 100 cm
min 4 cm
EN
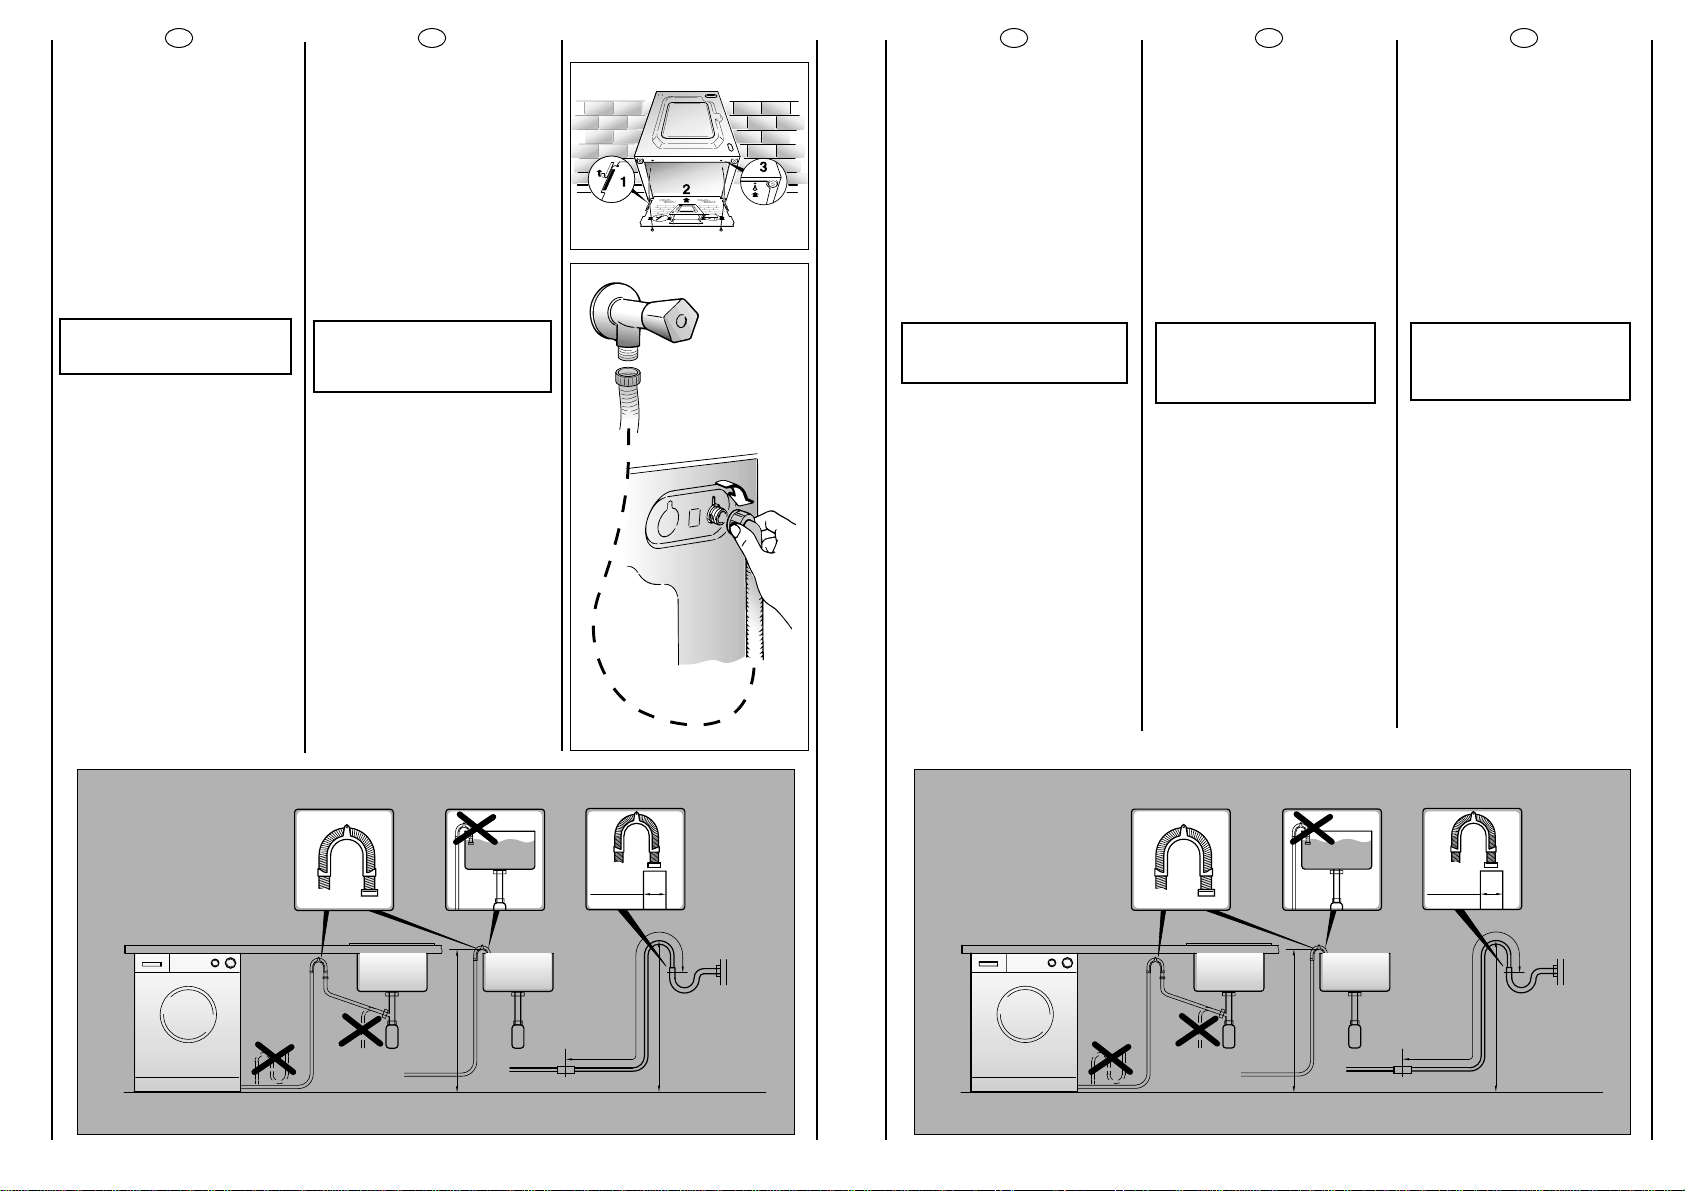
Fix the sheet of corrugated
material on the bottom as
shown in picture.
Connect the fill hose
to the tap.
The appliance must be
connected to the water
mains using new hose-sets.
The old hose-sets should not
be reused.
IMPORTANT:
DO NOT TURN THE TAP
ON AT THIS TIME.
Position the washing
machine next to the wall.
Hook the outlet tube to the
edge of the bath tub,
paying attention that there
are no bends or
contractions along the tube.
It is better to connect the
discharge hose to a fixed
outlet of a diameter greater
than that of the outlet tube
and at a height of min. 50
cm. If is necessary to use the
plastic sleeve supplied.
19
PL
Umieéciç wyciszajacy
materiaä tak jak pokazano
na rysunku.
Podäåczyç do kranu wåã
doprowadzajåcy wodë.
Urzådzenie musi byç
podäåczone do sieci
wodociågowej za pomocå
nowego zestawu wëãy
gumowych. Nie naleãy
uãywaç starego zestawu.
UUWWAAGGAA::
NNIIEE OODDKKRRËËCCAAÇÇ
JJEESSZZCCZZEE KKRRAANNUU
Przysunåç urzådzenie do
éciany. Zawiesiç wåã
odpäywowy na krawëdzi
wanny, uwaãajåc aby nie
miaä on zaäamañ i aby byä
droãny na caäej swej
däugoéci. Wskazanym jest
doäåczenie wëãa
odprowadzajåcego wodë
do staäego odpäywu o
érednicy wiëkszej niã wåã
odprowadzajåcy wodë z
pralki i znajdujåcego sië na
wysokoéci co najmniej 50
cm. W miarë potrzeby
nalezy uãyç usztywniajåcego
kolanka, dostarczonego w
komplecie wraz z pralkå.
Appliquer la feuille
supplémentaire sur le fond
comme dans la figure.
Raccorder le tuyau d’arrivée
d’eau au robinet.
L'appareil doit être relié à
l'arrivée d'eau exlusivement
avec les tuyaux fournis .
Ne pas réutiliser les anciens
tuyaux.
ATTENTION:
NE PAS OUVRIR LE ROBINET
Approcher la machine contre le
mur en faisant attention à ce
que le tuyau n’ait ni coudes ni
étranglements.
Raccorder le tuyau de vidange
au rebord de la baignoire ou,
mieux encore, à un dispositif fixe
d’évacuation,hauteur mini. 50
cm, et de diamètre supérieur au
tuyau de la machine à laver.
En cas de besoin, utiliser le
coude rigide livré avec la
machine.
FR EL
o o o
" " o
,
.
.
H
set
.
T set
.
:
.
K
,
’
.
,
50 n
.
,
.
Aplique la lamina de
polionda como se muestra
en la figura.
Conecte el tubo del agua
al grifo.
El aparato debe ser
conectado a la red
hidraulica sólo con los
nuevos tubos de carga
disponibles en dotación.
Los viejos tubos de carga no
tienen que ser reutilizados.
ATENCIÓN:
NO ABRA EL GRIFO.
Acerque la lavadora a la
pared procurando que no
se formen curvas o
estrangulamientos, fije el
tubo desagüe al borde de
la pila.
o mejor aún, a un desagüe
fijo, con un diámetro mayor
que el del tubo de la
lavadora, a una altura
mínima de 50 cm.
En caso necesario, utilice la
curva rígida adjunta.
ES
Loading ...
Loading ...
Loading ...