www.eureka.com 1
Thank you for purchasing your new Eureka vacuum!
Important instructions
For easy assembly, please
take a few moments to read
this owner’s guide.
If you have questions about your
new vacuum, please contact our
ENILPLEH ecivres remotsuc
at 1-800-282-2886.
We’re here to help!
Eureka stands by our
Clean Promise seal.
Learn more at
www.eureka.com/cleanpromise
www.eureka.com
Owner’s Guide
NES100 Series
Corded stick vacuum cleaner; household type
SAFETY GUIDELINES - DEFINITIONS
It is important for you to read and understand this manual.
The information it contains relates to protecting YOUR SAFETY and PREVENTING
PROBLEMS. The symbols below are used to help you recognize this information.
DANGER: Indicates an imminently hazardous situation which, if not
avoided, will result in death or serious injury.
WARNING: To avoid all risks of re, electrocution or injury, when using
an electrical appliance, make sure you follow the safety measure below:
READ CAREFULLY ALL THE RECOMMENDATIONS BEFORE USING YOUR
VACUUM CLEANER
CAUTION: Indicates a potentially hazardous situation which, if not
avoided, may result in minor or moderate injury.
NOTICE: Used without the safety alert symbol indicates potentially
hazardous situation which, if not avoided, may result in property damage.
2
IMPORTANT SAFETY INSTRUCTION
When using an electrical appliance, basic
precautions should always be followed,
including the following:
READ ALL INSTRUCTIONS
BEFORE USING THE
APPLIANCE.
WARNING: Before
using this appliance, read and follow
all warnings and instructions in this
manual, even if you are familiar with
this product.
This appliance is not intended for use by
persons (including children) with reduced
physical, sensory or mental capabilities,
or lack of experience and knowledge,
unless they have been given supervision
or instruction concerning use of the
appliance by a person responsible for
their safety. Young children should be
supervised to ensure that they do not play
with the appliance.
POLARIZATION INSTRUCTION
To reduce the risk of electric shock, this
appliance has a polarized plug (one blade
is wider than the other). This plug will t
in a polarized outlet only one way. If the
plug does not t fully in the outlet, reverse
the plug. If it still does not t, contact a
qualied electrician to install the proper
outlet. Do not change the plug in any way.
Safety Direction
Please read this instruction manual
carefully before rst use. It is advisable
to keep this instruction manual for future
reference.
DO NOT vacuum water, wet objects,
liquids, ashes, hot coals, cigarette butts,
matches or any hot, smoking or burning
objects, etc.
DO NOT pick up ammable or
combustible materials (i.e. lighter uid,
petrol, kerosene, etc.) or use in the
presence of explosive liquids or vapor.
DO NOT pick up toxic material (i.e.
chlorine bleach, ammonia, drain cleaner,
etc.)
DO NOT vacuum Toner (for laser printer,
copy machines etc.) as there is a risk of
re and explosion.
DO NOT vacuum plaster, cement etc. as
the lter can become blocked.
DO NOT use vacuum without all the lters
tted.
DO NOT store or use the appliance near
high temperature areas.
DO NOT run over the power cord with the
vacuum cleaner.
DO NOT use vacuum cleaner if it is
blocked. Turn off and clear all blockages
before continuing.

3
DO NOT use vacuum cleaner with blocked
lters. Clean or replace lters before
continuing. (refer to User Maintenance
section).
DO NOT use vacuum cleaner if the
appliance malfunctions, sounds abnormal,
smells, smokes, is dropped or damaged
in any manner or any breakage is found
during operation.
DO NOT misuse the cord. Never pull the
appliance by the cord or pull to disconnect
it from the outlet. Instead, grasp the plug
and pull to disconnect.
DO NOT use vacuum cleaner to pick
up large, hard, or sharp objects such as
glass, nails, screws, coins, etc. that are
likely to cause damage.
DO NOT leave unattended when plugged
in and/or switched on.
DO NOT use vacuum cleaner if it has
been dropped, damaged, left outdoors, or
dropped into liquid (water etc.)
DO NOT close door on cord, or pull cord
around sharp edges or corners.
DO NOT handle the plug or vacuum
cleaner with wet hands.
DO NOT put any objects into openings.
DO NOT use with any openings blocked
and do not restrict airow.
DO NOT operate the appliance with
a damaged cord or plug. If the supply
cord is damaged, it must be replaced
by the manufacturer, its service agent
or similarly qualied persons in order to
avoid a hazard.
DO NOT use without lters in place.
DO NOT attempt to modify this product in
any way.
DO empty the dust cup and clean the
lters regularly for optimal operation of the
vacuum.
DO keep hair, loose clothing, ngers, feet
and body parts away from openings or
moving parts.
DO disconnect the appliance from the
mains supply before connecting the
exible suction hose.
DO turn off controls before you connect
or disconnect the appliance to or from the
mains supply.
DO disconnect the appliance from the
power supply when not in use, before
changing the lters, cleaning the
lters or connecting/disconnecting the
accessories.
DO use only on dry, indoor surfaces.
DO use only as described in this manual.
Use only manufacturer’s recommended
attachments.
DO keep cord away from heated surfaces.
DO keep all openings free of dust, lint.
hair, and anything that may reduce airow.
DO use extra care when vacuuming on
stairs.
DO keep your work area well lit.
DO store your appliance indoors in a cool,
dry area.
DO ensure children and babies cannot
play with plastic bags or any packaging
materials.
DO operate the appliance from a power
source of the same voltage, frequency
and rating as indicated on the product
identication plate.
If this appliance is used by a third party,
DO supply the instruction manual with
it. No liability can be accepted for any
damage caused by non-compliance with
these instructions or any other improper
use or mishandling of appliance. This
product has not been designed for any
uses other than those specied in this
manual.
DO NOT modify the polarized plug to t a
non-polarized outlet or extension cord.
Keep appliance on a level surface.
ONLY for domestic use.
Industrial or commercial use invalidates
the warranty.

4
IMPORTANT SAFETY INSTRUCTION CONT.
READ AND SAVE THESE INSTRUCTIONS
Symbols
• The labels on your tool may include the following symbols.
The symbols and their denitions are as follows:
V .......................volts
A .......................amperes
Hz .....................hertz
W ......................watts
min ....................minutes
or AC ............alternating current
or DC .........direct current
n
o
...................... no load speed
......................Class I Construction
......................earthing terminal (grounded)
......................safety alert symbol
.......................Class II Construction (double insulated)
.../min or rpm .....revolutions or reciprocations per minute
Transporting your Vacuum
To move your vacuum cleaner from room to room, unplug the unit and either push
the appliance or carry using the carry handle.
Never pull or carry the vacuum cleaner by its cord.
• When using an extension cord, be
sure to use one heavy enough to carry
the current your product will draw. An
undersized cord will cause a drop in
line voltage resulting in loss of power
and overheating.
The following table shows the correct
size to use depending on cord length
and nameplate ampere rating. If in
doubt, use the next heavier gauge. The
smaller the gauge number, the heavier
the cord.
Minimum Gauge for Cord Sets
Volts Total Length of Cord in Feet
120V 0-25 26-50 51-100 101-150
(0-7,6m) (7,6-15,2m) (15,2-30,4m) (30,4-45,7m)
240V 0-50 51-100 101-200 201-300
(0-15,2m) (15,2-30,4m) (30,4-60,9m) (60,9-91,4m)
Ampere Rating
More
Than
Not more
Than
American Wire Gauge
0 - 6 18 16 16 14
6 - 10 18 16 14 12
10 - 12 16 16 14 12
12 - 16 14 12 Not Recommended

1
CAUTION: Do not plug in your vacuum cleaner until you
are familiar with all instructions and operating procedures.
Product View
2
3
4
5
12
11
7
8
9
6
10
5
1. Hand Grip
2. Cord Wrap
3. Power Cord
4. Handle
5. Quick Release Button
6. Hand Vacuum Grip
7. Power On/Off
8. Dust Cup Latch
9. Filter
10. Dust Cup
11. Removable Floor Nozzle
12. Crevice Tool
WARNING: Do not operate cleaner with damp or wet
lters or without vacuum bags and all lters in place.
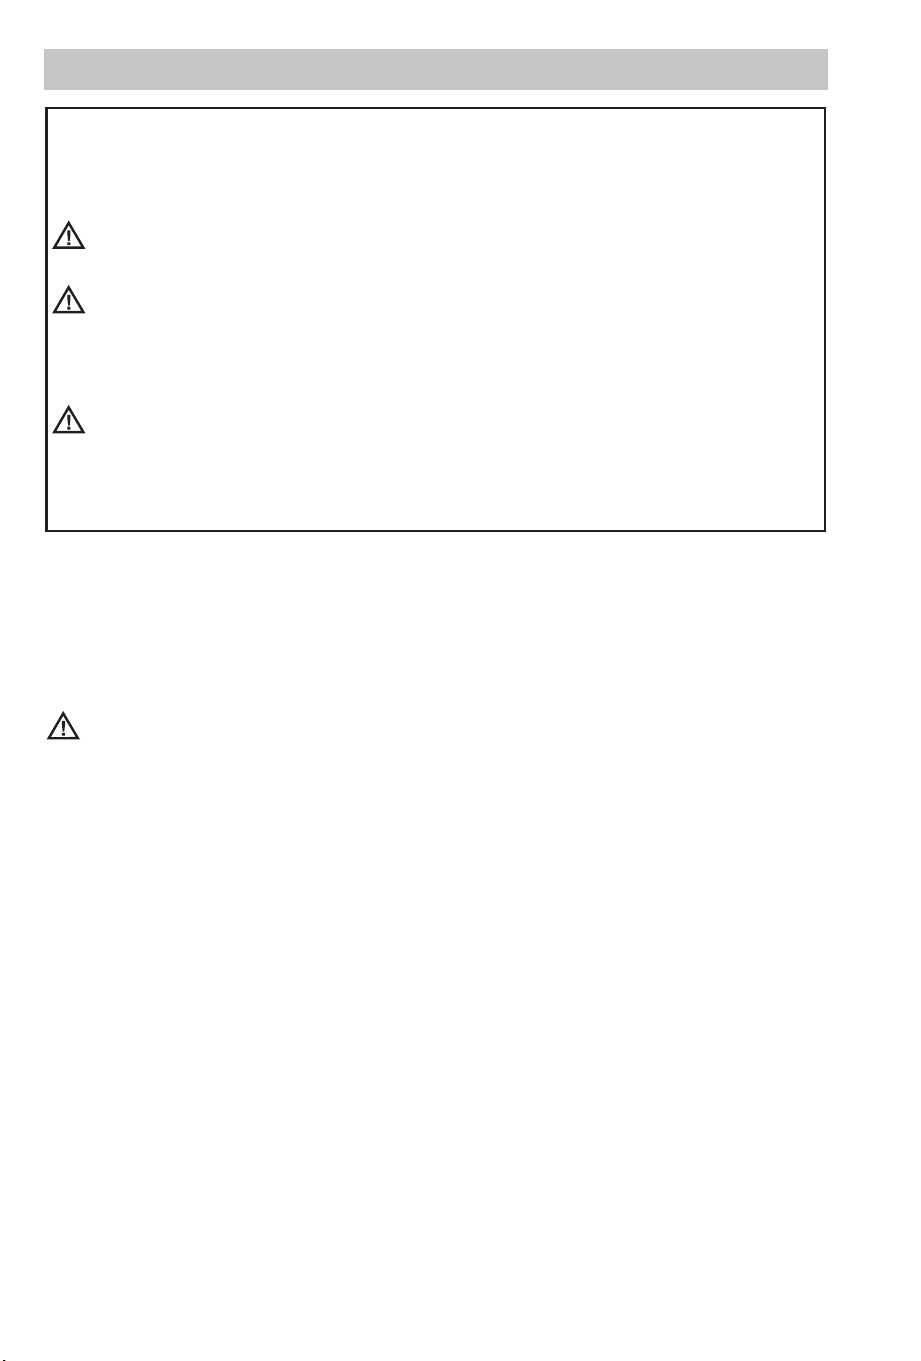
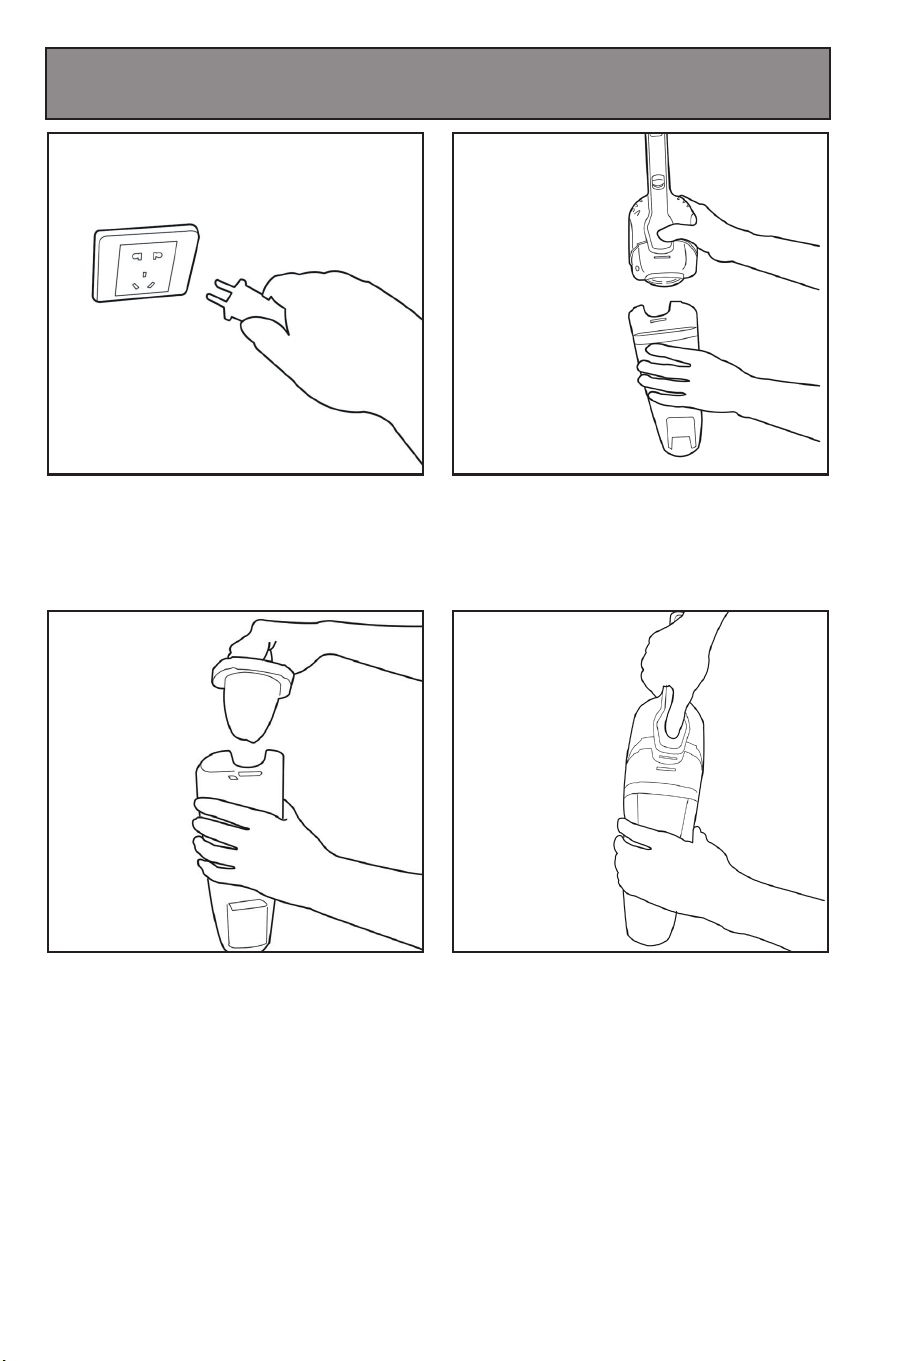
Assembly/Operation
6
Press the quick release button at the
base of the hand vacuum grip and insert
the handle, making sure it is all the way
inserted into the body of the vacuum.
Attach the oor nozzle by inserting it into
the opening at the bottom of the dust cup.
Press rmly to secure in place.
As a Hand Vacuum
Press the button at the base of the hand
vacuum grip and pull the handle away from
the unit.
As a Multi-Purpose Vacuum:
The oor nozzle may be used with the hand
vacuum to clean wider surfaces. To attach the
oor nozzle to the hand vac, insert it into the
opening a the bottom of the dust cup. Press
rmly to secure in place.
WARNING: To avoid injury, turn vacuum OFF and unplug
cord from wall when not in use.
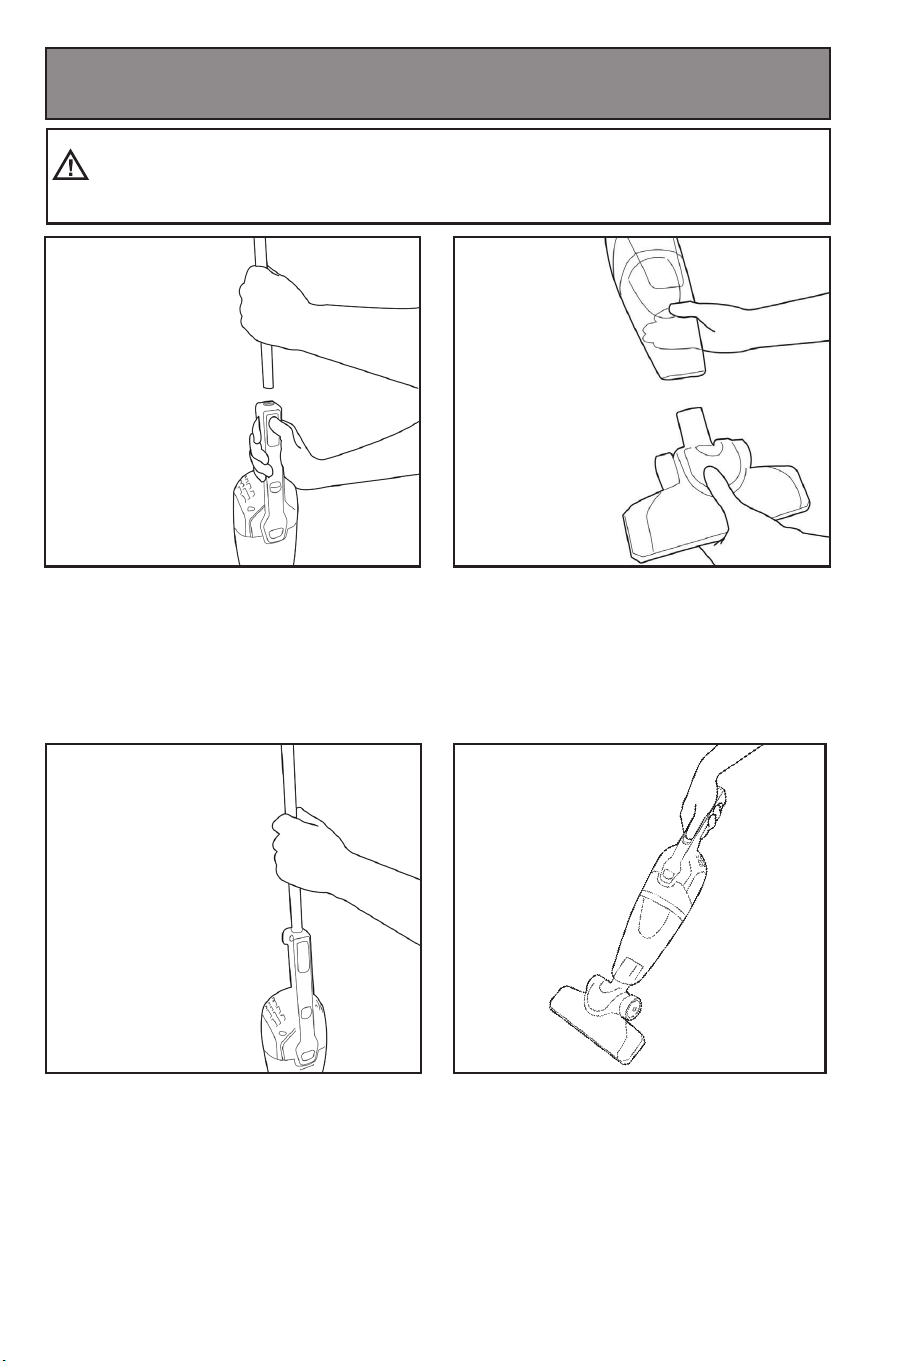
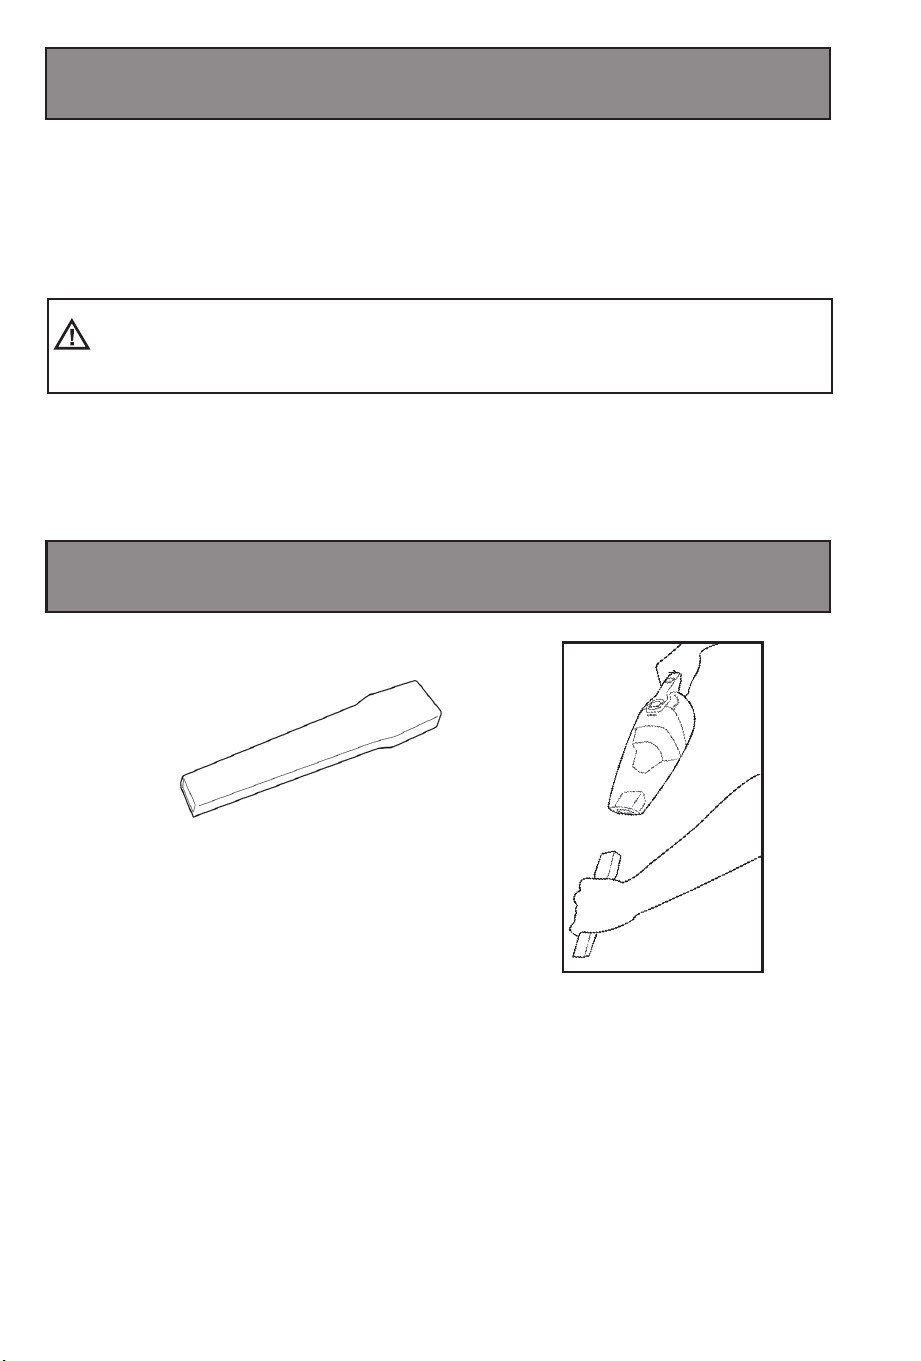
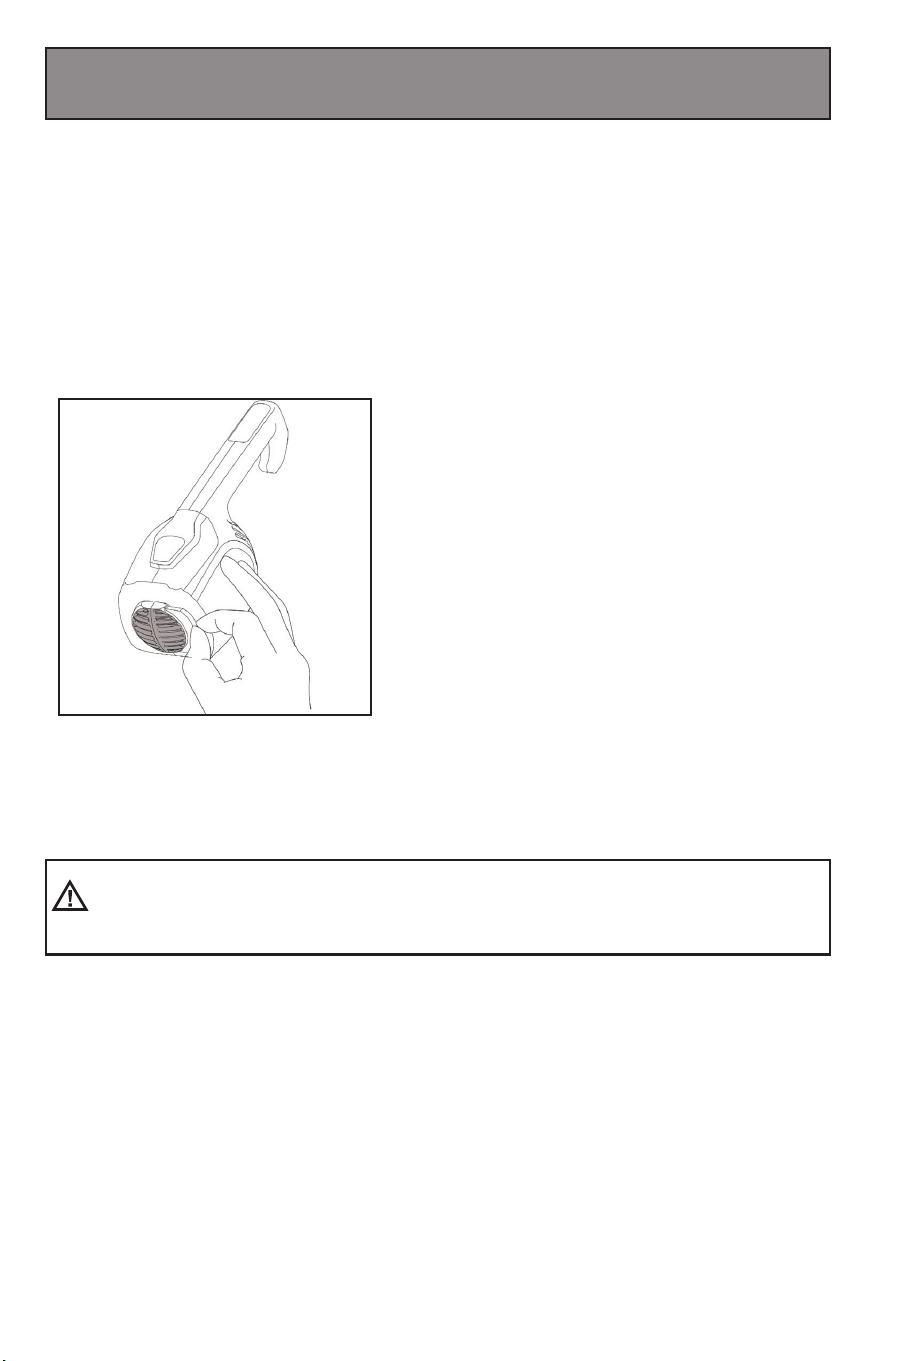
7
Crevice Tool
Power cord storage
1. Turn vacuum off (O).
2. Unplug power cord by grasping the polarized plug,
NOT the cord, and disconnect from outlet.
3. Loop power cord around cord wrap on the handle.
4. Clip molded plug to power cord to secure.
You can insert crevice tool
to extend the distance.
Assembly/Operation
Accessories
Maintenance And Care - Emptying and Cleaning
8
1. Turn Vacuum off (O). Then, unplug
vacuum.
3. Gently pull dust cup away from the hand
vacuum grip and remove the lter as
shown. Empty into waste container.
5. Replace lter. Attach dust cup to vacuum
by depressing latch and securely tting
onto hand grip. Make sure dust cup is
correctly secured.
4. The dust cup may be rinsed with warm
water and a mild detergent if needed.
The dust cup must be thoroughly dried
before replacing.
2. To remove dirt from the dust cup
and lter, hold the vacuum vertically.
Depress and hold button on top of the
vacuum to release the dust cup as the
shown.
Maintenance And Care - Cleaning Vacuum And Tools
CAUTION: Never operate your vacuum cleaner without the
lter in place. Doing so may damage the motor and void the warranty.
9
To maintain suction and cleaning performance, you can check pre-motor lters regularly,
if needed, pull it out and clean with warm water and a mild detergent. The lter must be
thoroughly dried before put back. Replace with black side facing out.
DO NOT clean the vacuum cleaner, components or accessories using
petroleum or any other ammable liquid or solvents, etc.
Clean only the outside of the vacuum cleaner.
Use only a moist cloth and mild detergent for cleaning the vacuum cleaner,
components and accessories.
After cleaning, wipe off the moisture on vacuum cleaner, components and
accessories with a dry cloth.
DO NOT place accessories, tools or components in a dishwasher.
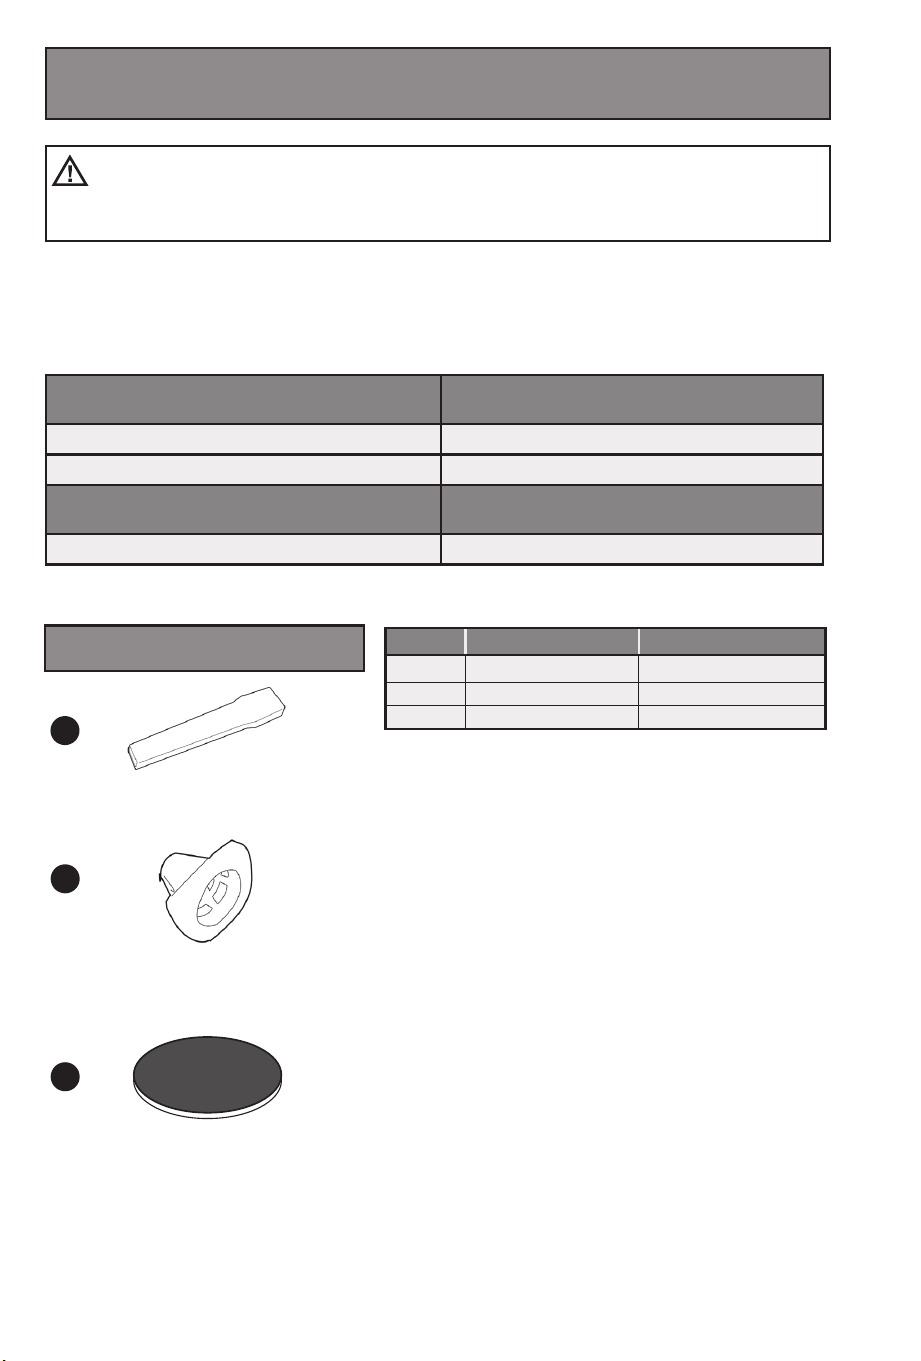
Replacement Parts
1
10
WARNING: To reduce the risk of electric shock, turn power
OFF and disconnect plug from electrical outlet before performing maintenance or
troubleshooting to the vacuum cleaner.
2
3
Item: Part No.: Part Name:
1 ST0101 Crevice Tool
2 ST0102 Filter
3 ST0106 Pre-Motor Filter
Troubleshooting
Vacuum cleaner won’t run: Possible causes Remedies
1. Vacuum cleaner is not plugged in rmly
2. Blown fuse/tripped breaker
1. Check electrical outlet
2. Check/replace fuse or reset breaker
Vacuum cleaner won’t vacuum effectively:
Possible causes
Remedies
1. Filter clogged, wet or dirty. 1. Follow instructions for cleaning.
2. Dust cup clogged. 2. Follow instructions for emptying.
Dust blows out of air vent:
Possible causes
Remedies
1. Filter not properly secured to lter frame. 1. Follow instructions for replacing lter above.
11
The Eureka one-year limited warranty
Midea America Corp. (“Eureka”), subject to the
terms and conditions herein, warrants this vacuum
cleaner to be free from defects in material and
workmanship for a term of one year from the date
of original purchase when used in accordance with
the Eureka operating and maintenance instructions
and under normal household usage. This warranty
is granted only to the original purchaser and
members of immediate household, and is applicable
only to original purchases from Eureka authorized
resellers.
What Eureka will do:
Eureka will, at its option, repair or replace a
defective vacuum or vacuum part that is covered
by this warranty. Repairs may be performed using
new or refurbished parts that meet or exceed
elects to replace the vacuum, the replacement may
be a reconditioned unit. Depending on availability
of products, Eureka reserves the right to provide
you with a replacement product that is the same
or similar, or substitute equivalent of the original
product. As a matter of warranty policy, Eureka will
not refund the consumer’s purchase price.
This warranty does not cover:
muucav dna muucav eht fo raet dna raew lamroN •
parts that require replacement under normal use
light bulbs, brush-roll, bristles, impellers and
cleaning.
:morf gnitluser snoitcnuflam ro segamaD •
improper or unreasonable use or maintenance,
abuse, negligence, failure to follow instructions
contained in any written materials that accompany
the product, deterioration by reason of excess
moisture, corrosive atmosphere, lightning, power
surges, connections to improper voltage supply,
unauthorized alteration, or other external causes
such as extremes in temperature or humidity,
accidents, misuse, or acts of God. This warranty
also does not cover damage resulting from repair
or attempted repair by anyone other than Eureka
or an authorized Eureka Warranty Station. This
warranty is not applicable to any product that has
been altered or on which the serial number has
erasing, or forging any proof-of-purchase
documents voids any applicable product warranty.
Obtaining warranty service:
To obtain warranty service you must contact the
Eureka Service Team, toll free, at 1-800-282-2886
or email [email protected], to discuss
the warranty claim and procedures to be followed.
All warranty claims must include submission of
proof-of-purchase documentation. For additional
information, you may also visit www.eureka.com.
Shipping charges:
You will be responsible for any initial shipping and
insurance charges if the defective product(s)
must be shipped for warranty service or warranty
evaluation; however, Eureka or a Eureka Authorized
Warranty Station will pay the return shipping
charges if repairs are covered by the warranty.
When returning parts for repair, you must include
the model, type and serial number located on the
rating plate. If any product submitted for warranty
service is found to be ineligible, an estimate
of repair cost will be furnished and the repair
performed only if requested by the owner and upon
receipt of payment or acceptable arrangements for
payment.
Further limitations and exclusions:
Any warranty that may be implied in connection with
your purchase or use of the vacuum, including any
warranty of Merchantability or any warranty of
Fitness For A Particular Purpose is limited to the
duration of this limited warranty. Some states do not
allow limitations on how long an implied warranty
lasts, so the above limitations may not apply to you.
Your relief for the breach of this warranty is
limited to the relief expressly provided above. In
no event shall the manufacturer be liable for any
consequential or incidental damages you may incur
in connection with your purchase or use of the
vacuum. Some states do not allow the exclusion or
limitation of incidental or consequential damages,
so the above limitation or exclusion may not apply
to you.
also have other rights, which may vary by state.
Midea America Corp.
200 Rivers Edge Drive
Medford, MA. 02155
USA