Loading ...
Loading ...
Loading ...
3
PRO-1000HD / PRO-800HD
Before Proceeding
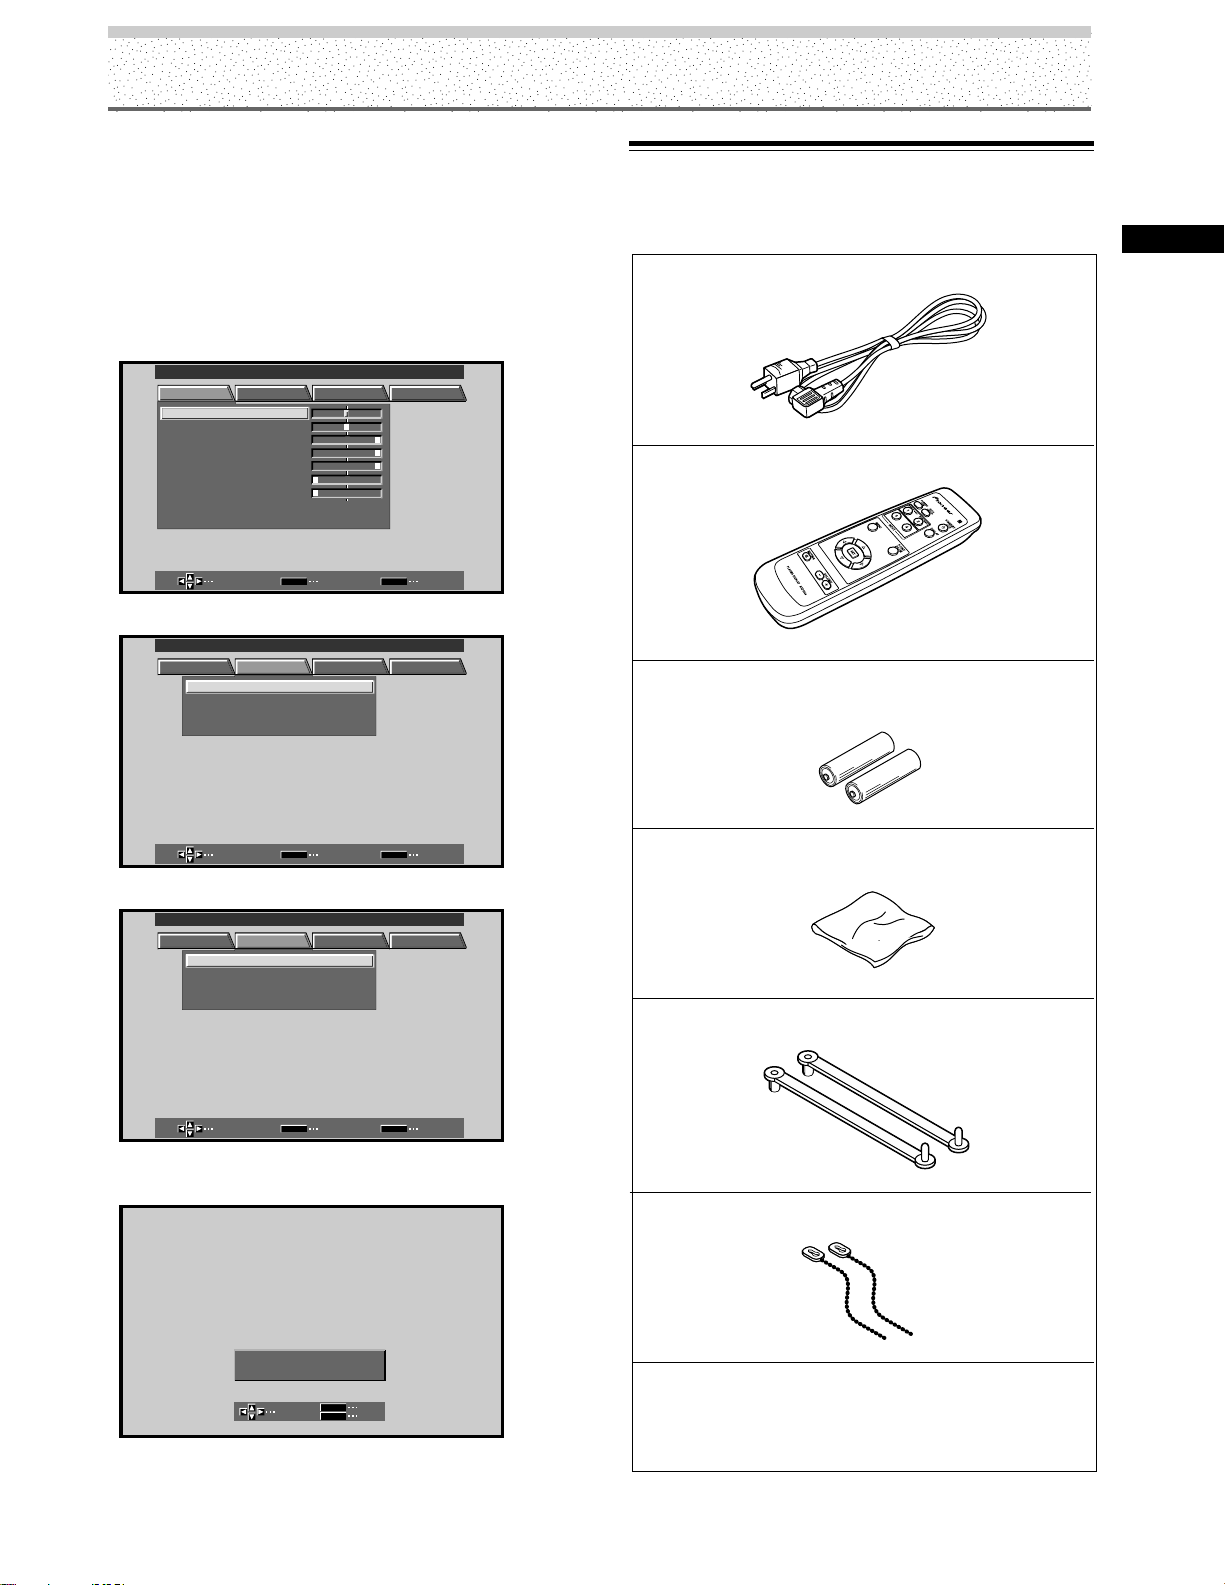
Checking Supplied Accessories
Check that the following accessories were supplied.
1 Power cord
2 Remote control unit
3 AA (R6) batteries (x 2)
4 Cleaning cloth (for wiping front panel)
5 Speed clamps (x 2)
6 Bead bands (x 2)
Before Proceeding
S
-
V
I
D
E
O
VIDEO
÷ Operating Instructions
÷ Warranty
The following example is an actual operation that shows
how one might set the horizontal and vertical positions of
the screen. The screens shown at each step are provided
as a visual guide to confirm that the procedure is
proceeding as it should. Please familiarize yourself with this
process before continuing on with the rest of this manual.
1 Press MENU to display the menu screen.
MAIN MENU INPUT1
SELECT ENTER EXIT
SET
MENU
PICTURE SCREEN SET UP OPTION
:
0
:
6
+
+
+
0
:
60
:
60
:
0
:
0
CONTRAST
:
0
BR
RLEVEL
IGHT.
.
GLEVEL.
BLEVEL.
H ENHANCE.
V ENHANCE.
RSETE
2 Press 3 to select SCREEN.
SELECT ENTER EXIT
SET
MENU
PICTURE SCREEN SET UP OPTION
:
00
POSIT ION
CLOC HASEK/ /
:
00
/
P
RSETE
MAIN MENU INPUT1
3 Press 5/∞ to select the item to be adjusted.
SELECT ENTER EXIT
SET
MENU
PICTURE SCREEN SET UP OPTION
:
00
POSIT ION
CLOC HASEK/ /
:
00
/
P
RSETE
MAIN MENU INPUT1
4 Press SET to display the adjustment screen for the
selected item.
ADJUST
SET
EXIT
SET
MENU
POH. S I T ION
:
0
POV. SI T ION
:
0
5 Press 5/∞/2/3 to adjust the value.
Loading ...
Loading ...
Loading ...