Loading ...
Loading ...
Loading ...
GB
English - P 5
Installing your wine cabinet
When unpacking your cabinet, make sure that there are no traces of
impact or deformation and that there are no surface defects.
Carefully remove all of the protections and adhesive strips from the
packaging around your wine cabinet.
Open the door and make sure all components are intact.
Release the electrical lead.
Move your cabinet to its final location.
The place you have selected for your cabinet should:
- Be unencumbered and well ventilated,
- Enable a minimum 10 cm space between the wall and the back of the cabinet,
- Be well away from any heat source,
- Not be too damp (laundry, pantry, bathroom, etc.),
- Have a solid and flat floor,
- Have a standard and accessible electricity supply (standard socket to
country standards, linked to ground with differential trip),
- It is NOT recommended to use a multi-socket or extension lead.
ecommendation
important
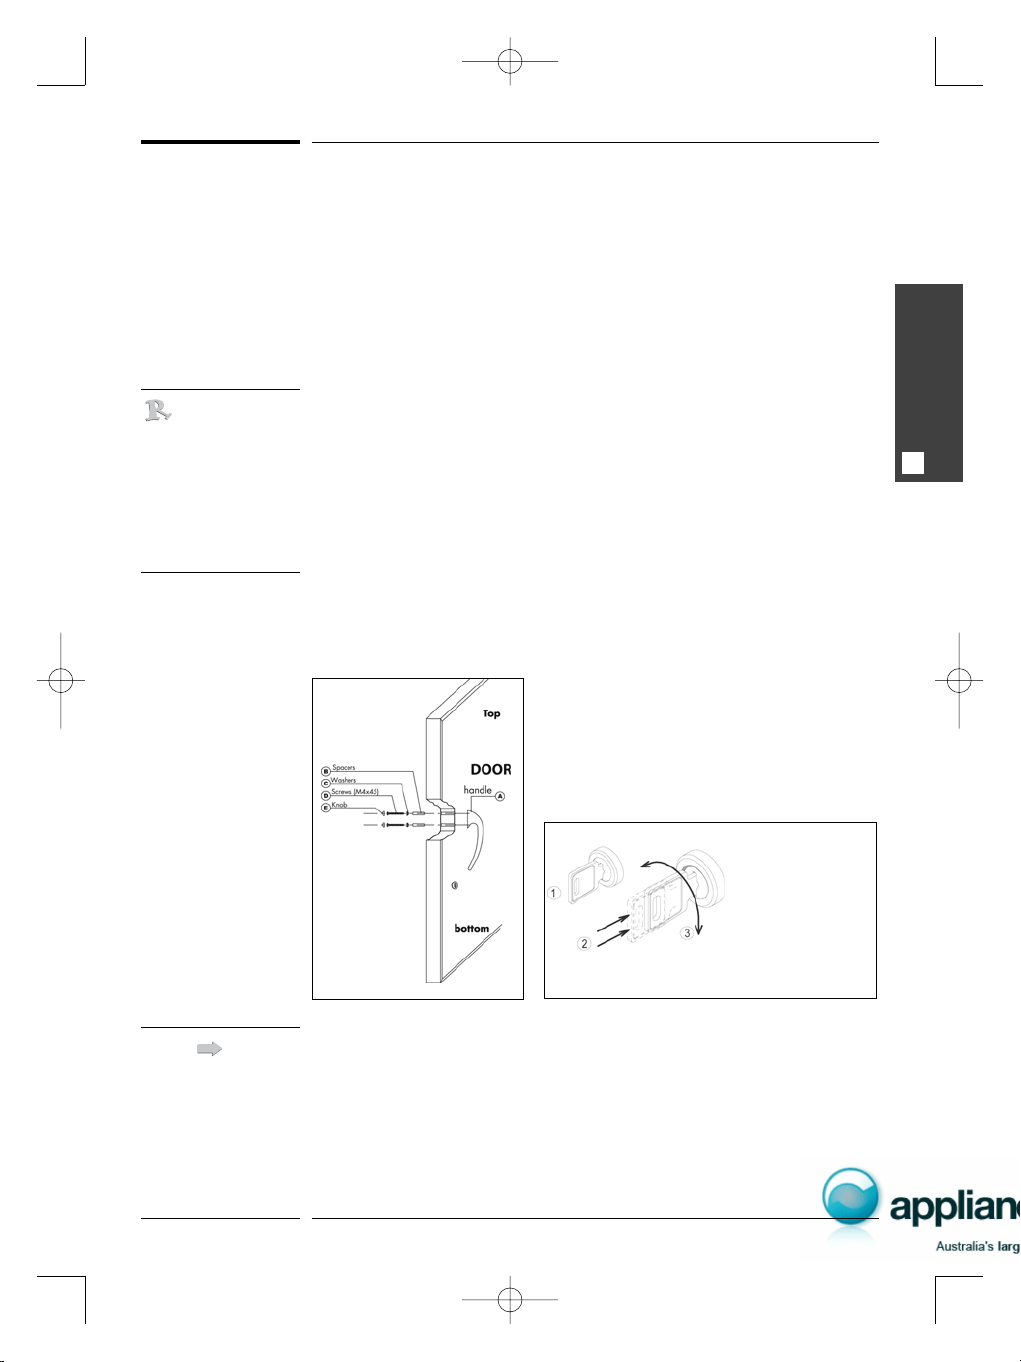
IInnssttaalllliinngg tthhee hhaannddllee
Installing the handle of your wine cabinet is carried out in the following
manner:
- Introduce the two spacers (B) into the
holes on the inside panel of the door.
- Add the two washers (C)
- Using a screwdriver, secure the handle
(A) with the two screws (D).
- Clip the two knobs (E) onto the washers.
As a security
measure, the lock
works on a
double movement
system. The key
should be pushed
inward and
turned at the
same time.
In order for you to level off your cabinet as easily as possible, it is
equipped with 4 adjustable feet. However, we do recommend that
you tighten the back feet to the maximum and use the front feet
to create a level (a spirit level is recommended for this operation).
WAIT 48 HOURS BEFORE PLUGGING IN THE CABINET
Should you need to move your cabinet, never tilt it more than 45° and
always sideways, on the side that the electrical cable comes out (right
hand side when looking at the cabinet).
Notice Elégance 5L.qxd 11/07/07 11:17 Page 21
Loading ...
Loading ...
Loading ...