Loading ...
Loading ...
Loading ...
9
Make sure that dairy foods, meat and poultry are completely
defrosted before cooking.
Operating the Ovens
Fan Oven
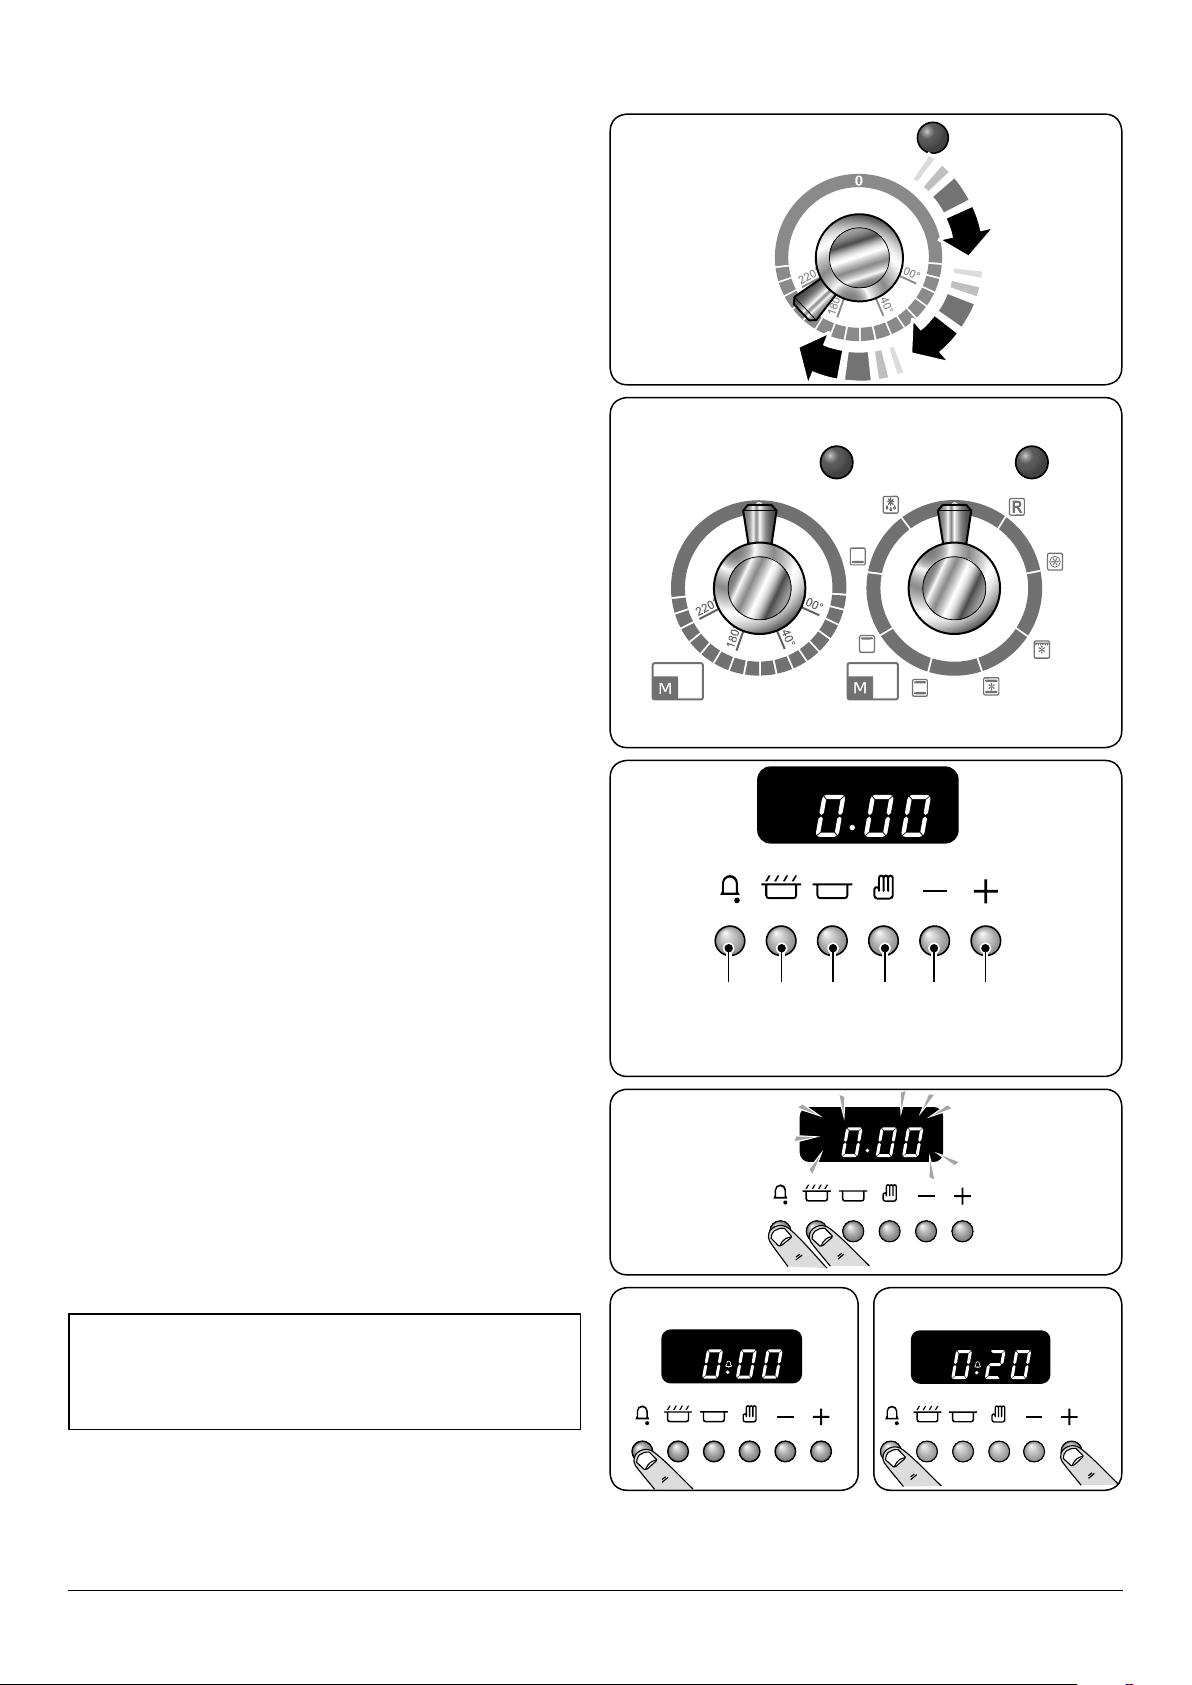
Turn the oven knob to the desired temperature (Fig.2-18).
The oven indicator light will glow until the oven has reached
the temperature selected. It will then cycle on and o during
cooking.
Multi-function Oven
The multi-function oven has two controls: a function selector
and a temperature setting knob (Fig.2-19).
Turn the function selector control to a cooking function. Turn
the oven temperature knob to the temperature required
(Fig.2-18).
The oven heating light will glow until the oven has reached
the temperature you selected. It will then cycle on and o
during cooking.
The Clock
You can use the clock to turn the left-hand oven on and o.
The clock must be set to the time of day before the oven
will work.
Note: When using the timer functions, rst set the clock as
required before setting the oven temperature and selecting
the oven function (multi-function ovens only).
Setting the Time of Day
The 6-button LCD clock is shown in Fig.2-20. When the
clock is rst connected the display ashes ( 0.00 ) and (
G
)
alternately.
Press and hold both the [C] and [D] buttons down
(Fig.2-21). Now press the [+] button (or the [–] button) until
the correct time shows.
Do not forget that it is a 24-hour clock.
If you need to reset the cooker, turn o the power supply and
wait for a couple of minutes and start again.
Setting the Minute Minder
Press and hold the [C] button (Fig.2-22), and then press the
[+] button until the length of time you want to cook for is
shown (Fig.2-23).
You can check the time remaining by pressing [C]. When the
beeper sounds cancel it by pressing [C].
• The ‘cook period’, which is the length of time you
want the oven to cook for.
• The ‘stop time’, which is the time of day you want the
oven to stop cooking.
To Stop the Oven Automatically
Press and hold the Stop Time [E] button (Fig.2-24) and then
press the [+] button (or [–] button) until the required ‘stop
time’ shows (Fig.2-25). AUTO will show in the display.
ArtNo.235-0004 -
Classic DL oven 1
Fig.2-18
ArtNo.235-0003 - Classic DL MF knobs
Temperature
Function
Fig.2-19
ArtNo.302-0001 - 6-button clock
ArtNo.302-0003 - 6BC
minute minder setting 1
ArtNo.302-0004 -
Minute minder setting 2
Fig.2-21
Fig.2-22 Fig.2-23
ArtNo.302-0002 - 6BC annotated
ABCDEF
Fig.2-20
A – Minute minder, B – ‘Cook’ time, C – ‘Stop’ time,
D – Manual, E & F – Time setting buttons
Loading ...
Loading ...
Loading ...