Loading ...
Loading ...
Loading ...
CONTENTS
Accessories
Names of
Parts
Before You
Begin
Changing
Needles and
Light Bulb
Threading
Stitch
Samples and
Needle Chart
Changing
Presser Feet
Basic
Sewing
Caring for
Your
Machine
Trouble
Shooting
18
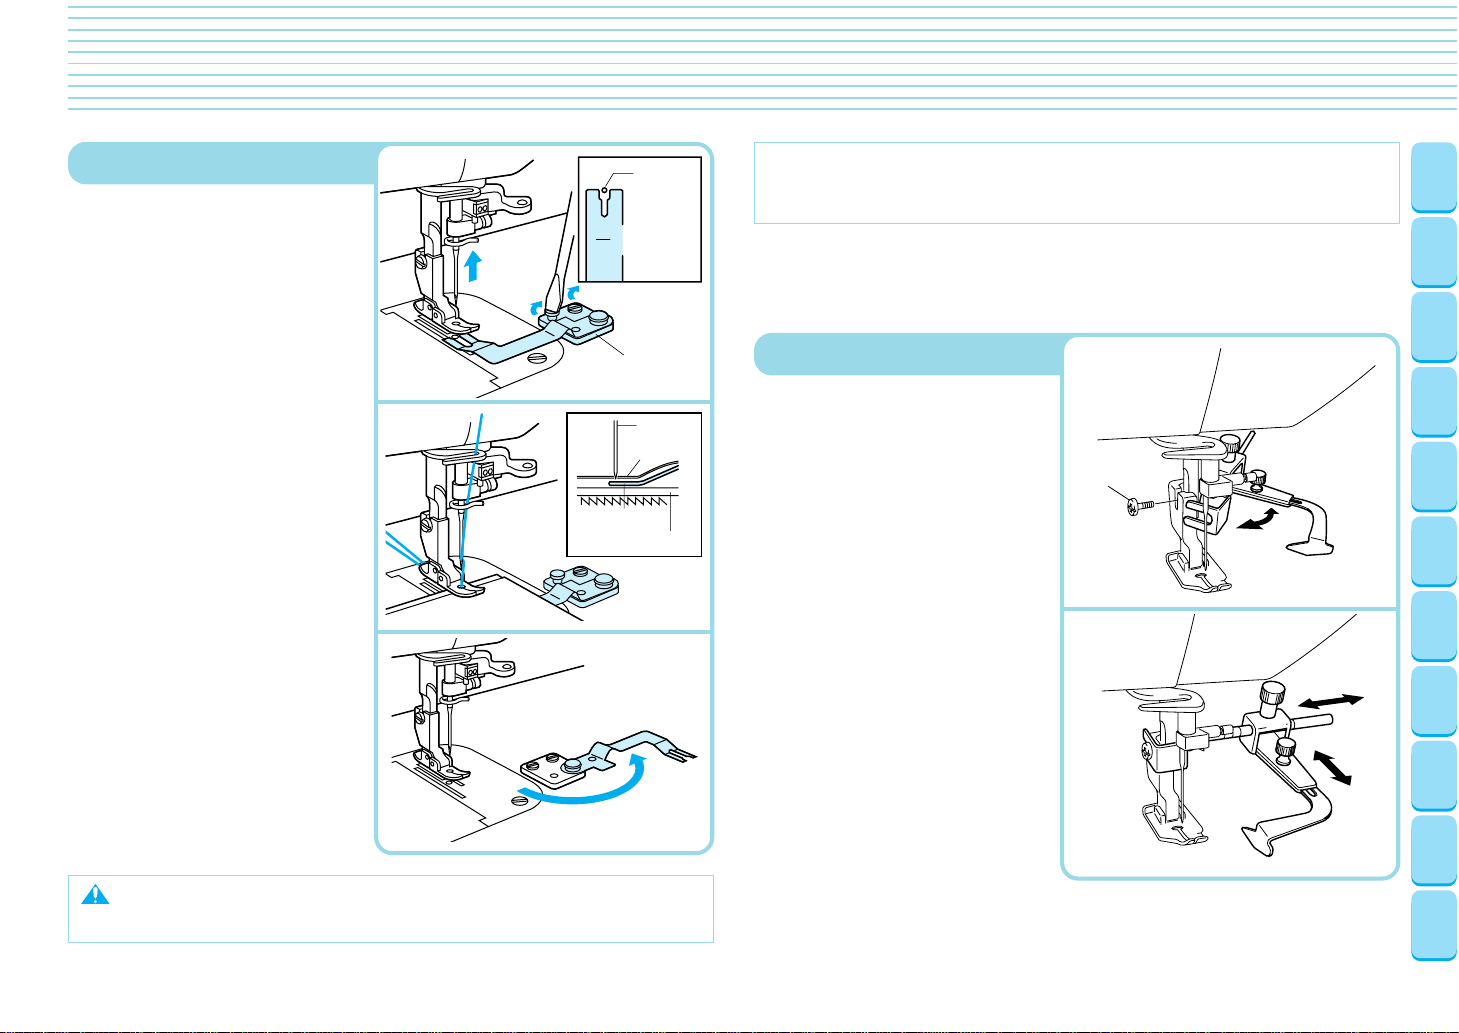
Seam Guide
1 Tighten the screw securely with a
screwdriver since it might other-
wise loosen due to vibration.
1
Installation
Adjustment
To be able to adjust the position of
the foot towards the arrow.
Lining
1 Raise needle and foot.
2 Move separator so it sits under
presser foot.
3 Make sure it is lined up so that
the needle passes through the
slot of the separator without hit-
ting the plate itself.
4 Secure liner plate in place with
lining plate screws.
5 Set pressure of sewing feet and
feed position to pin feeding posi-
tion.
6 Pull thread until lower needle
catches fabric.
✽ Sew 2-3 reinforcement stitches.
7 When not using separator, it can
be swung off to the side as illus-
trated in drawing.
Fabric
Separator
Needle
Separator
Needle
Separator
Lining
Velvets
Note
• Lighten the presser foot pressure slightly when using the fabric separator.
• Use the separator to neatly sew 2 hard to manage fabrics together by keeping
them from interacting with one and other before the needle sews them to-
gether in a perfect seam.
Loading ...
Loading ...
Loading ...