Loading ...
Loading ...
Loading ...
CONTENTS
Accessories
Names of
Parts
Before You
Begin
Changing
Needles and
Light Bulb
Threading
Stitch
Samples and
Needle Chart
Changing
Presser Feet
Basic
Sewing
Caring for
Your
Machine
Trouble
Shooting
13
Basic Sewing (1)
Basic Sewing
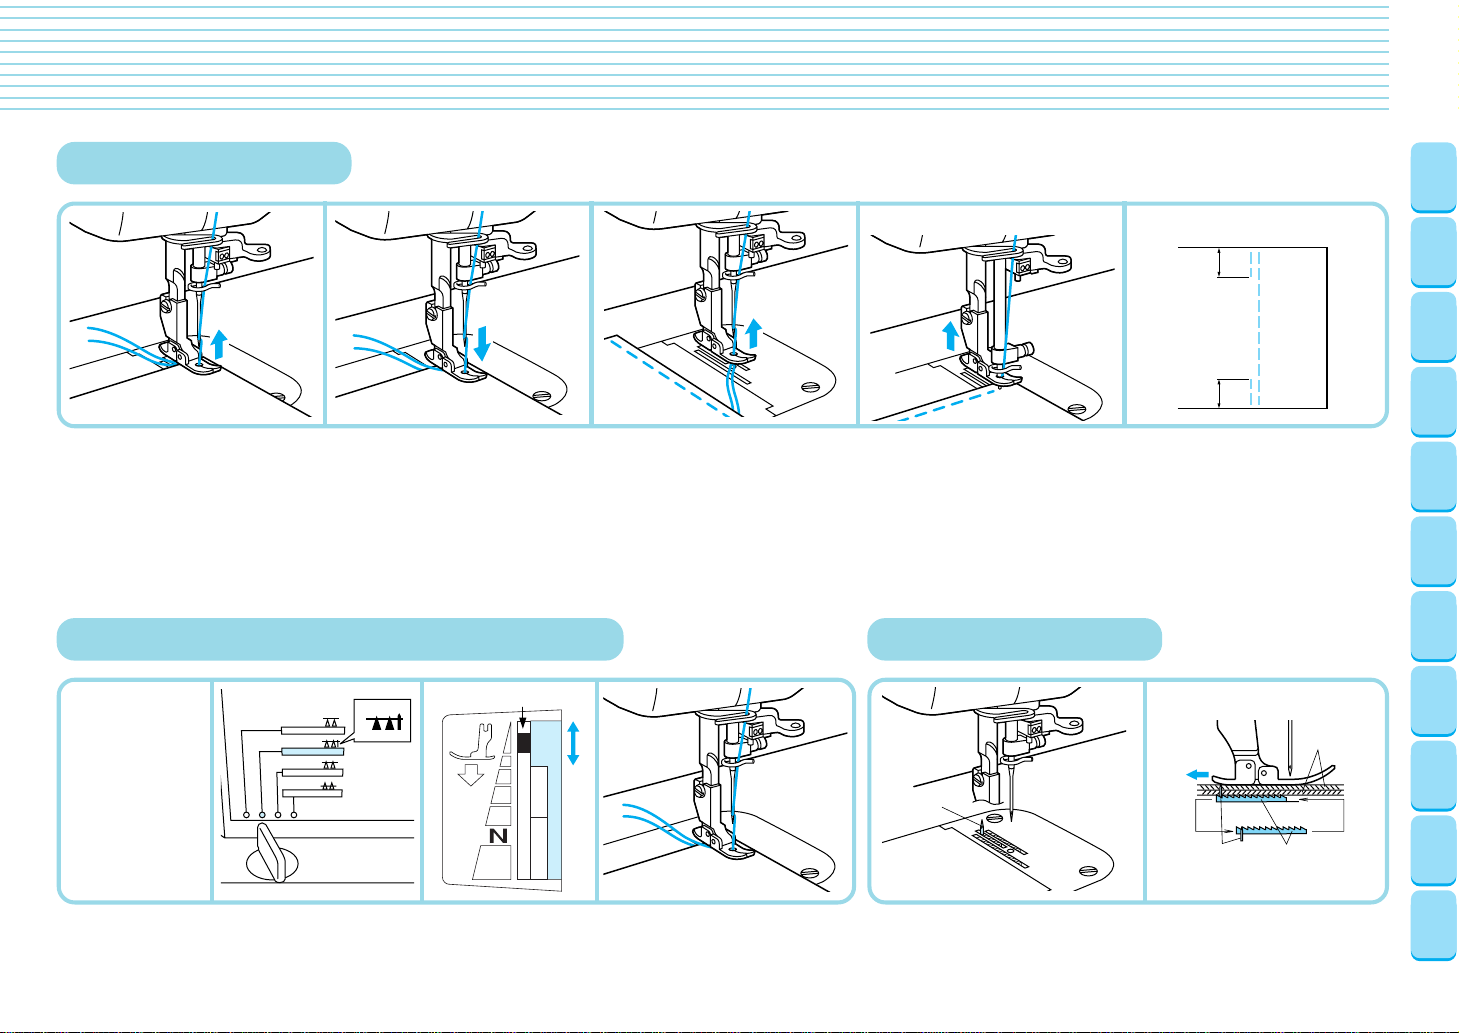
1 Lift foot, pull about 15 cm of upper
and bobbin thread under and behind
foot, and position fabric under foot.
2 Lower foot.
3 While needle is pierced all the way
through fabric, step gently on foot
controller.
4 Raise needle to highest position.
5 Lift foot, remove fabric and cut
thread.
✽ When using thread trimmer:
4 Push thread trimmer button (this will
cause the upper and bobbin threads
to be cut automatically and the
needle to stop in a raised position.)
5 Lift presser foot and remove fabric.
1 Make sure needle is pierced all the
way through fabric.
2 Lift presser foot, and turn fabric us-
ing needle as an axis.
3 Lower foot continue sewing.
✽ At the beginning of a seam, sew a
few stitches with the hand wheel, hit
the reverse stitch button and sew a
few stitches back to reinforce your
seam, then go back to normal sew-
ing and finish the seam. Do the
same at the end of a seam.
Before
sewing.
Begin
sewing.
Finish
Sewing.
✽
When changing sewing directions.
Reinforcement stitches
1 cm
1 cm
Pin Feeding (for hard-to-handle fabrics)
✽ The above fabrics
can be sewed
neatly by sewing
by pin feeding.
Pin Feeding Unit
The feed pin passes up through all layers of fabric moving with the feed dog’s motion
to feed all layers of the fabric evenly.
✽ For safety, the feed pin is automatically lowered when presser foot is raised.
Fabric:
Velvet
Quilt
Synthetic Suede
Knit
Coading
Others
1
Move feed adjustment knob
to pin feeding position.
2 Adjust pressure ad-
justment dial until in-
dicator needle is in
the right position.
3 Gently pull thread until feed pin
catches fabric and sew.
Feed Pin
Feed Pin
Fabric
Feed Dog
Indicator Needle
Loading ...
Loading ...
Loading ...