Loading ...
Loading ...
Loading ...
33
Shooting still images
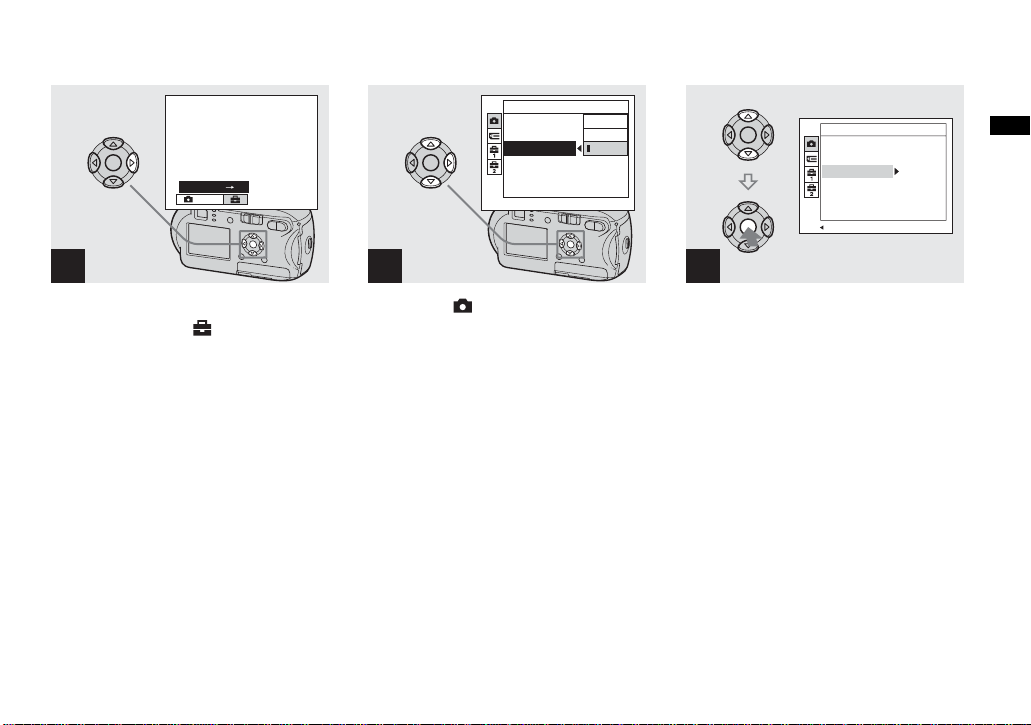
, Press Bon the control button
to advance to , then press B
again.
The Setup screen appears.
, Select (Camera) with v on
the control button, then press
B.
Select [Date/Time] with v/V on
the control button, then press
B.
, Select the date and time setting
with v/V on the control button,
then press z.
Day&Time: Inserts the date and the time of
shooting into the image
Date: Inserts the year, the month and the
date of shooting into the image
Off: Does not insert date/time data into the
image
After the setting has been completed, press
MENU so that the menu disappears and
shoot your image.
• When you chose [Date], the date will be
inserted in the order set in “Setting the date and
time” (page 17).
• This setting is maintained even when the power
is turned off.
2
Mode
Setup
3
Camera
AF Mode:
Digital Zoom:
Date/Time:
Red Eye Reduction
:
AF Illuminator:
Auto Review:
Day&Time
Date
Off
4
PAGE SELECT
Single
Precision
Date
Off
Off
Auto
Camera
AF Mode:
Digital Zoom:
Date/Time:
Red Eye Reduction
:
AF Illuminator:
Auto Review:
Loading ...
Loading ...
Loading ...