Loading ...
Loading ...
Loading ...
31-2000815 Rev. 0 13
9
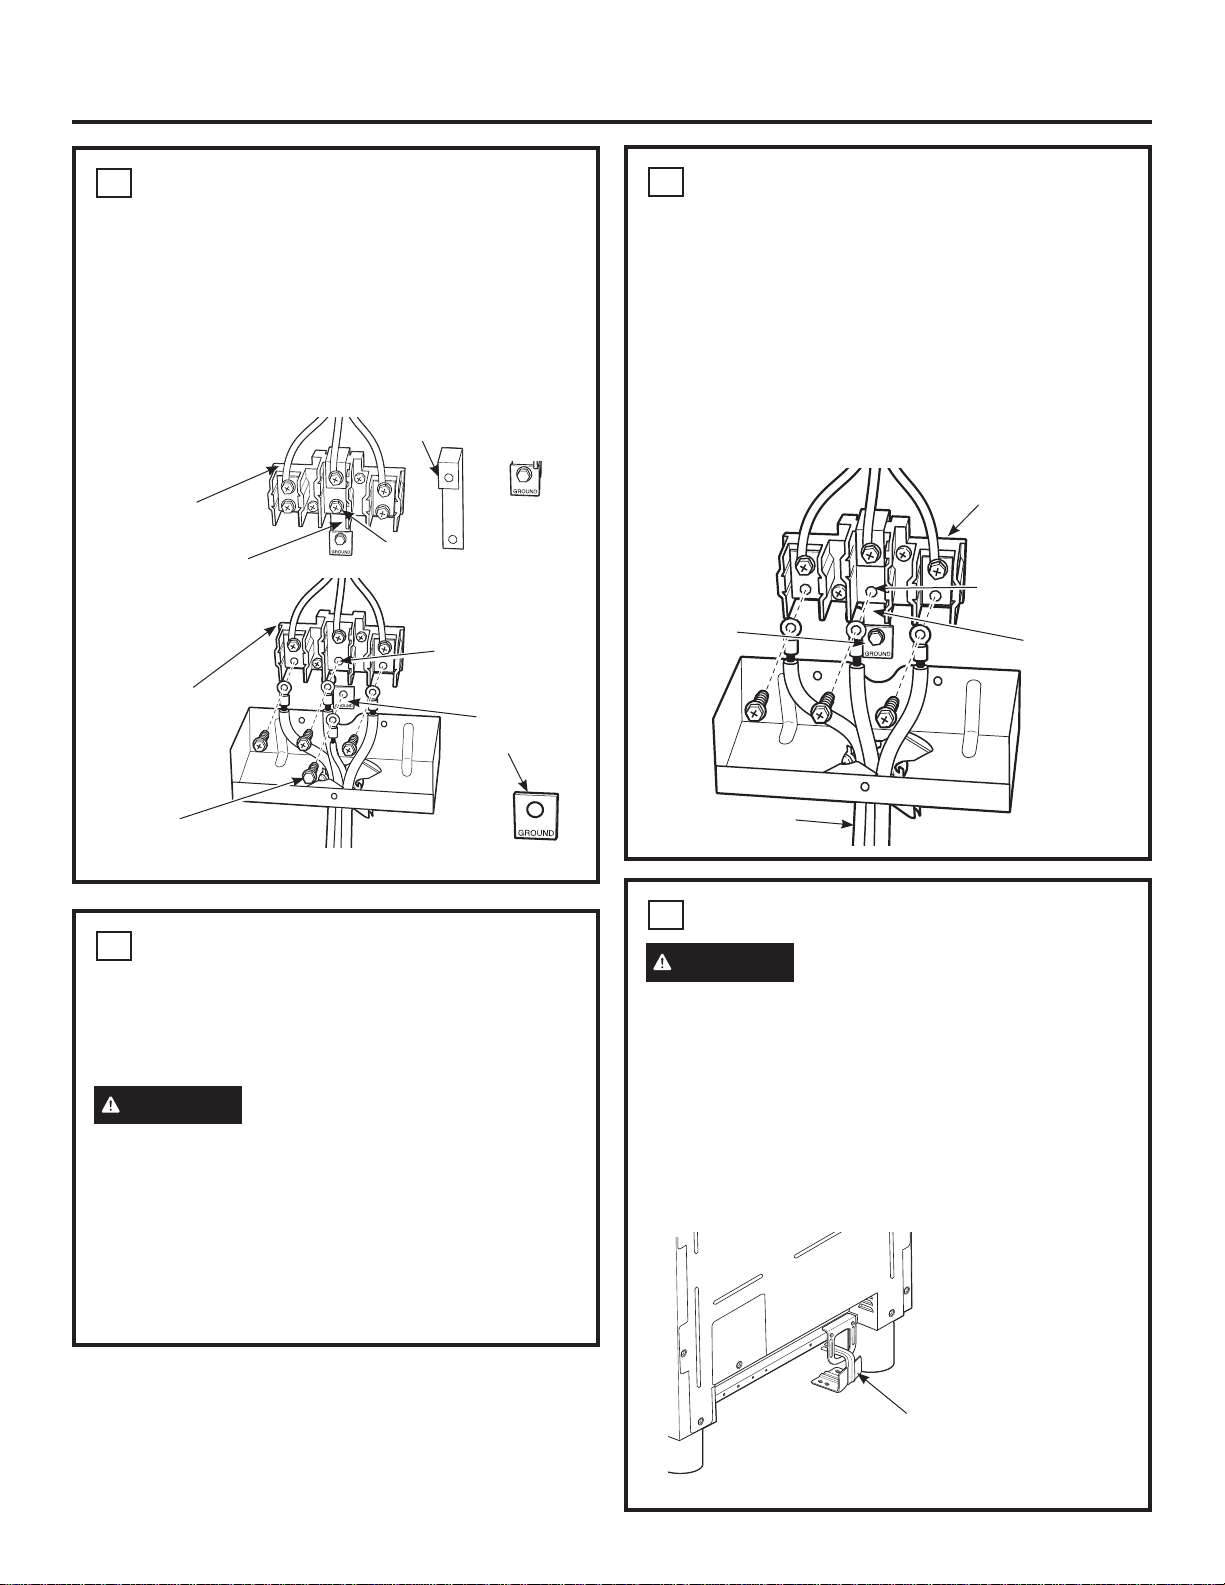
ROLL RANGE INTO POSITION
WARNING
The Anti-Tip Bracket must be
properly installed to prevent tipping of the range.
Failure to do so can cause serious damage or injury.
Ŷ&KHFNWREHVXUHWKHDSSOLDQFHUXQQHUVDUH
beneath the wheels.
Ŷ7KHUDQJHLVVKLSSHGZLWKWKHZKHHOVLQWKHGRZQ
SRVLWLRQ&DUHIXOO\UROOWKHUDQJHLQWRSRVLWLRQEHLQJ
careful not to entangle or pinch the power cord and
IOH[LEOHJDVWXELQJ
Ŷ5HPRYHWKHUXQQHUVEHQHDWKWKHUDQJH
Be sure Anti-Tip
Bracket is engaged
with the brace on
the range.
Installation
7
4-WIRE POWER CORD
INSTALLATION (Cont.)
ŶInsert the 3 terminal screws (removed earlier)
through each power cord terminal ring and into the
lower terminals of the terminal block. Be certain that
WKHFHQWHUZLUHZKLWHQHXWUDOLVFRQQHFWHGWRWKH
center lower position of the terminal block. Tighten
screws securely into the terminal block.
8
3-WIRE POWER CORD
INSTALLATION
NOTE: A 4-wire cord is connected to the range at the
factory. Use the following steps to change the range
to a 3-wire cord.
WARNING
The neutral or ground wire of the
power cord must be connected to the neutral terminal
located in the center of the terminal block. The power
leads must be connected to the lower left and the
lower right terminals of the terminal block.
Ŷ5HPRYHWKHJURXQGVWUDSORFDWHGDWWKHULJKWVLGH
of the terminal block) and connect between the
center lower portion of the terminal block to the
frame of the range.
8
3-WIRE POWER CORD
INSTALLATION (Cont.)
Ŷ5HPRYHWKHORZHUWHUPLQDOVFUHZVIURPWKH
terminal block. Insert the 3 terminal screws through
each power cord terminal ring and into the lower
terminals of the terminal block. Be certain that
WKHFHQWHUZLUHZKLWHQHXWUDOLVFRQQHFWHGWRWKH
center lower position of the terminal block. Tighten
screws securely into the terminal block.
DO NOT REMOVE THE GROUND STRAP
CONNECTION.
Before
After
Terminal
Block
Terminal
Block
Neutral
Terminal
Neutral Terminal
Ground Strap
Ground Plate
(grounding to
range)
Ground
Screw
Ground Strap
or
Ground
Strap
Terminal Block
(appearance may vary)
Neutral
Terminal
Power Cord
Ground
Plate
Loading ...
Loading ...
Loading ...