Loading ...
Loading ...
Loading ...
12 31-2000815 Rev. 0
Installation
6
ELECTRICAL CONNECTIONS
WARNING
This appliance must be properly
grounded.
WARNING
$OOQHZFRQVWUXFWLRQVPRELOH
KRPHVUHFUHDWLRQDOYHKLFOHVDQGLQVWDOODWLRQVZKHUH
ORFDOFRGHVGRQRWDOORZJURXQGLQJWKURXJKQHXWUDO
require a 4-conductor UL-listed range cord.
WARNING
7RSUHYHQWILUHRUVKRFNGRQRWXVH
DQH[WHQVLRQFRUGZLWKWKLVDSSOLDQFH
WARNING
7RSUHYHQWVKRFNUHPRYHKRXVH
fuse or open circuit breaker before beginning
installation.
We recommend you have the electrical wiring and
hookup of your range connected by a qualified
HOHFWULFLDQ$IWHULQVWDOODWLRQKDYHWKHHOHFWULFLDQVKRZ
you how to disconnect power from the range.
<RXPXVWXVHDVLQJOHSKDVH9$&RU
9$&KHUW]HOHFWULFDOV\VWHP,I\RX
FRQQHFWWRDOXPLQXPZLULQJSURSHUO\LQVWDOOHG
connectors approved for use with aluminum wiring
must be used.
(IIHFWLYH-DQXDU\WKH1DWLRQDO(OHFWULFDO
&RGHUHTXLUHVWKDWQHZFRQVWUXFWLRQQRWH[LVWLQJ
utilize a 4-conductor connection to an electric range.
:KHQLQVWDOOLQJDQHOHFWULFUDQJHLQQHZFRQVWUXFWLRQ
PRELOHKRPHUHFUHDWLRQDOYHKLFOHRUDQDUHDZKHUH
local codes prohibit grounding through the neutral
FRQGXFWRUUHIHUWRWKHVHFWLRQRQIRXUFRQGXFWRU
branch circuit connections.
Check with your local utilities for electrical codes which
apply in your area. Failure to wire your oven according
to governing codes could result in a hazardous
FRQGLWLRQ,IWKHUHDUHQRORFDOFRGHV\RXURYHQPXVW
be wired and fused to meet the National Electrical
&RGH1)3$1R±ODWHVWHGLWLRQDYDLODEOHIURPWKH
National Fire Protection Association.
This appliance must be supplied with the proper
YROWDJHDQGIUHTXHQF\DQGFRQQHFWHGWRDQLQGLYLGXDO
SURSHUO\JURXQGHGDPSIRU´UDQJHVDPS
for 36” and 30” ranges) branch circuit protected by a
circuit breaker or time-delay fuse.
Use only a 3-conductor or a 4-conductor UL-listed
range cord. These cords may be provided with ring
terminals on wire and a strain relief device.
6
ELECTRICAL CONNECTIONS (Cont.)
$UDQJHFRUGUDWHGDWDPSVZLWKPLQLPXP
volt range is required. A 50 amp range cord is not
UHFRPPHQGHGEXWLIXVHGLWVKRXOGEHPDUNHGIRU
use with nominal 1
3
»8” diameter connection openings.
Care should be taken to center the cable and strain
relief within the knockout hole to keep the edge from
damaging the cable.
NOTE:8VHRIDXWRPDWLFZLUHOHVVRUZLUHGH[WHUQDO
VZLWFKHVWKDWVKXWRIISRZHUWRWKHDSSOLDQFHVDUHQRW
recommended for this product.
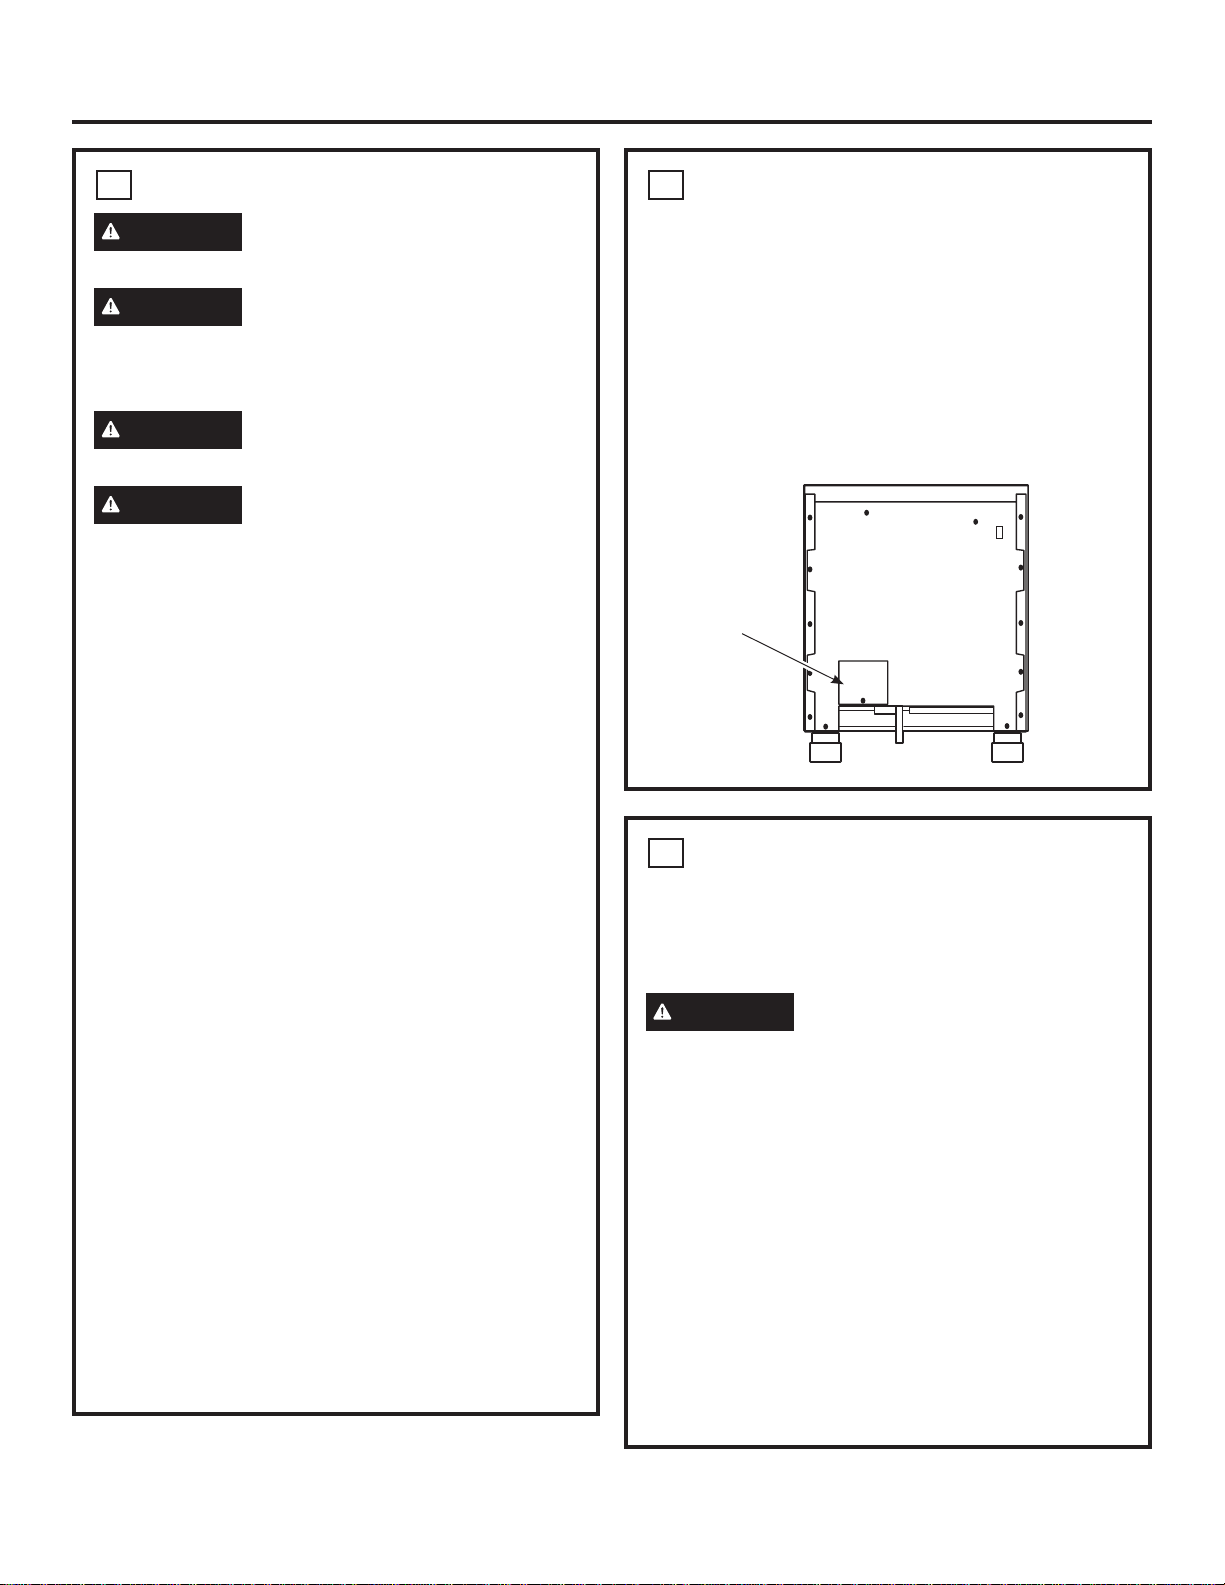
7
4-WIRE POWER CORD
INSTALLATION
NOTE: A 4-wire cord is connected to the range at the
IDFWRU\8VHWKHIROORZLQJVWHSVWRFKDQJHDQH[LVWLQJ
installation from a 3-wire cord back to a 4-wire cord.
WARNING
The neutral wire of the supply circuit
must be connected to the neutral terminal located
in the lower center of the terminal block. The power
leads must be connected to the lower left and the
lower right terminals of the terminal block. The 4th
grounding lead must be connected to the frame of the
range with the ground plate and the ground screw.
ŶRemove the 3 lower terminal screws from the
terminal block. Remove the ground screw and
ground plate and retain them.
ŶRemove the ground strap.
DO NOT DISCARD THE GROUND STRAP OR
ANY SCREWS.
ŶInsert the one ground screw into the power cord
JURXQGZLUHWHUPLQDOULQJWKURXJKWKHJURXQGSODWH
and into the frame of the range.
The access
plate is on
the back of
the range.
Loading ...
Loading ...
Loading ...