Loading ...
Loading ...
Loading ...
11
ENGLISH
INSTALLATION INSTRUCTIONS
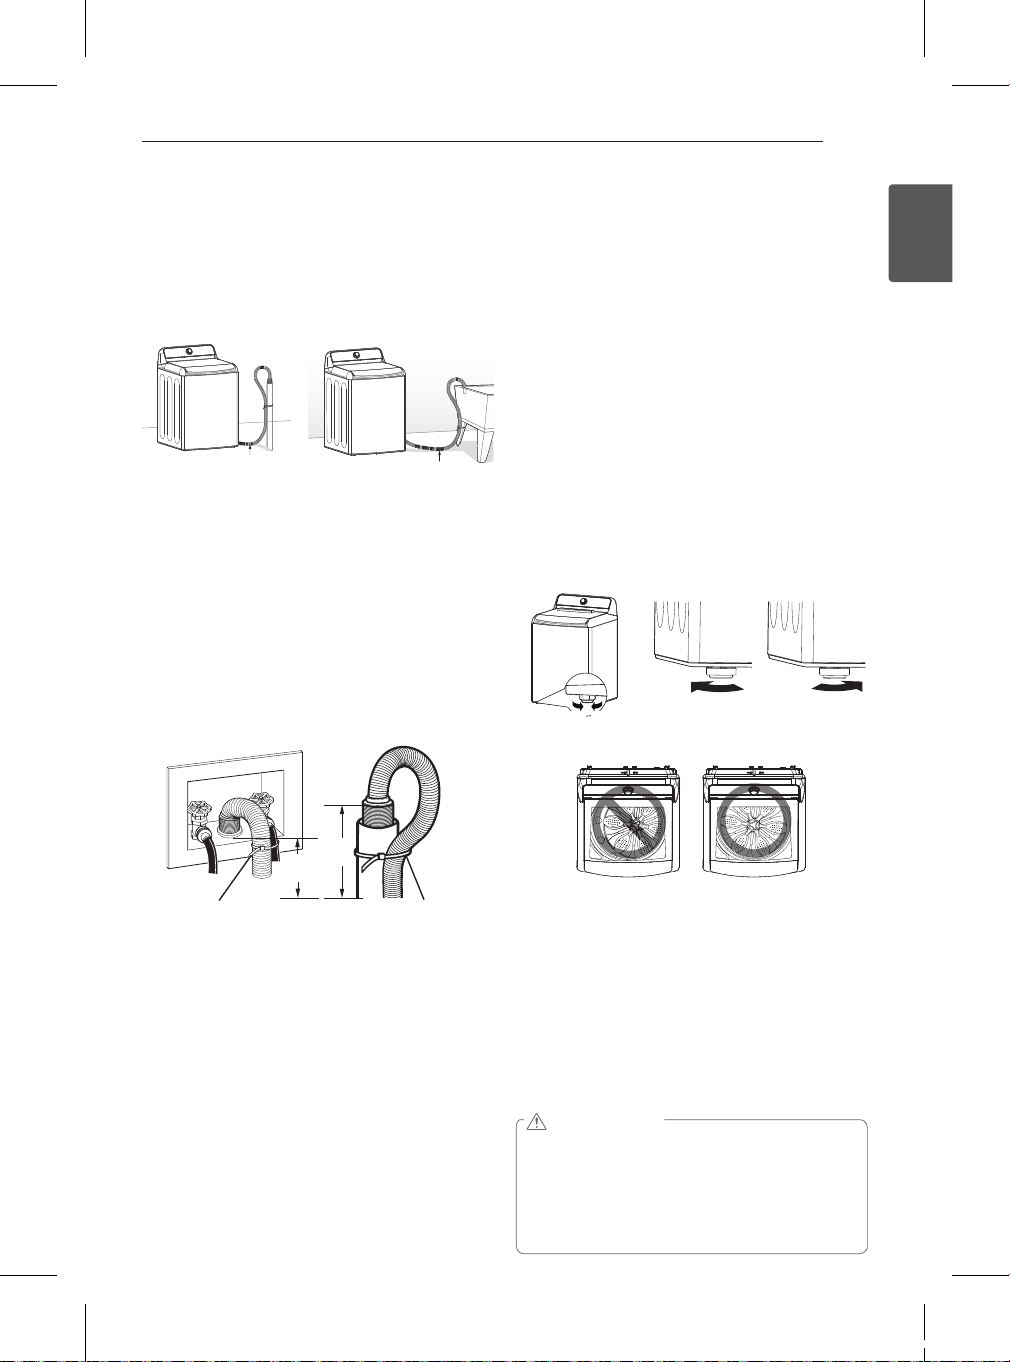
CONNECTING THE DRAIN HOSE
y The drain hose should always be properly secured.
Failure to properly secure the drain hose can result in
flooding and property damage.
y The drain must be installed in accordance with any
applicable local codes and regulations.
y Make sure that the drain hose is not stretched,
pinched, crushed, or kinked.
OPTION 1: STANDPIPE
Bend the outlet end of the drain hose to form a U
shape. Insert the end of the drain hose into the drain.
If the drain is large enough for the flange on the hose
to fit inside, then do not insert the flange more than
1-2 inches into the drain. Use the tie strap included
with the installation materials in the foam block in
the tub to secure the drain hose to the drain.
If the water valves and drain are built into the wall,
fasten the drain hose to one of the water hoses with
the tie strap (ribbed side on inside).
If your drain is a standpipe, fasten the drain hose to
the standpipe with the tie strap provided.
NOTE:
y Normal height of the end of the hose should be ap-
proximately 35”~47” (0.9~1.2 m) from the floor.
y Do not install the end of the drain hose lower than
29 in. (73.7 cm) or higher than 96 in. (243.8 cm)
above the bottom of the washer or more than 60
in. (152.4 cm) away from the washer.
y Never create an airtight seal between the hose
and the drain with tape or other means. If no air
gap is present, water can be siphoned out of the
tub resulting in poor wash/rinse performance or
clothing damage.
OPTION 2: LAUNDRY TUB
Bend the end of the drain hose to the desired shape
and support it on the edge of the laundry tub. Use
the tie strap to secure the drain hose in place.
Drain Hose
Tie Strap
39”
(99 cm)
39”
(99 cm)
Tie Strap
Drain Hose
LEVELING THE WASHER
The tub of your new washer spins at very high
speeds. To minimize vibration, noise, and move-
ment, the floor must be a level, solid surface.
NOTE:
• Adjust the leveling feet only as far as necessary to
level the washer. Extending the leveling feet more
than necessary can cause the washer to vibrate.
• Before installing the washer, make sure that the
floor is clean, dry and free of dust, dirt, water
and oil so the washer feet cannot slide easily.
Leveling feet that move or slide on the floor can
contribute to excessive vibration and noise due
to poor contact with the floor.
All four leveling feet must rest solidly on the floor. Attempt
to rock the washer from corner to corner to make sure
that all four leveling feet are in firm contact with the floor.
1. Position the washer in its final location, taking special
care not to pinch, strain, or crush the water and drain
lines. Place a level across the top of the washer.
2. Adjust the leveling feet. Turn clockwise to raise
the washer or counterclockwise to lower it.
3. To make sure that the washer is properly level, open the
lid and look from above to see if the tub is centered. If
the tub is NOT centered (as shown in the drawing with
the X through it), readjust the front feet. If you have a
level, check your washer with the level.
y To check if the washer is level from side to side, place a
level on the back edge of the lid.
y To check if the washer is level front to back, place a
level at the side of the washer on the edge where the
cabinet side meets the top cover. Do not place the level
on the top of the lid. Using these surfaces will result in
the washer being unlevel.
RaiseLower
RaiseLower
y
Using the washing machine without leveling it may
result in malfunction caused by the production of excess
vibration and noise.
y
Use the leveling feet only when you level the washing
machine.
If you raise the leveling feet unnecessarily, it
may cause abnormal vibration of the washing machine.
WARNING
Raise Lower
MFL39760288_E_A5.indd 11 2017. 9. 14. 오후 4:04
Loading ...
Loading ...
Loading ...