Loading ...
Loading ...
Loading ...
21
SD-AS10
Preparation for Use
- General control / Setting the clock -
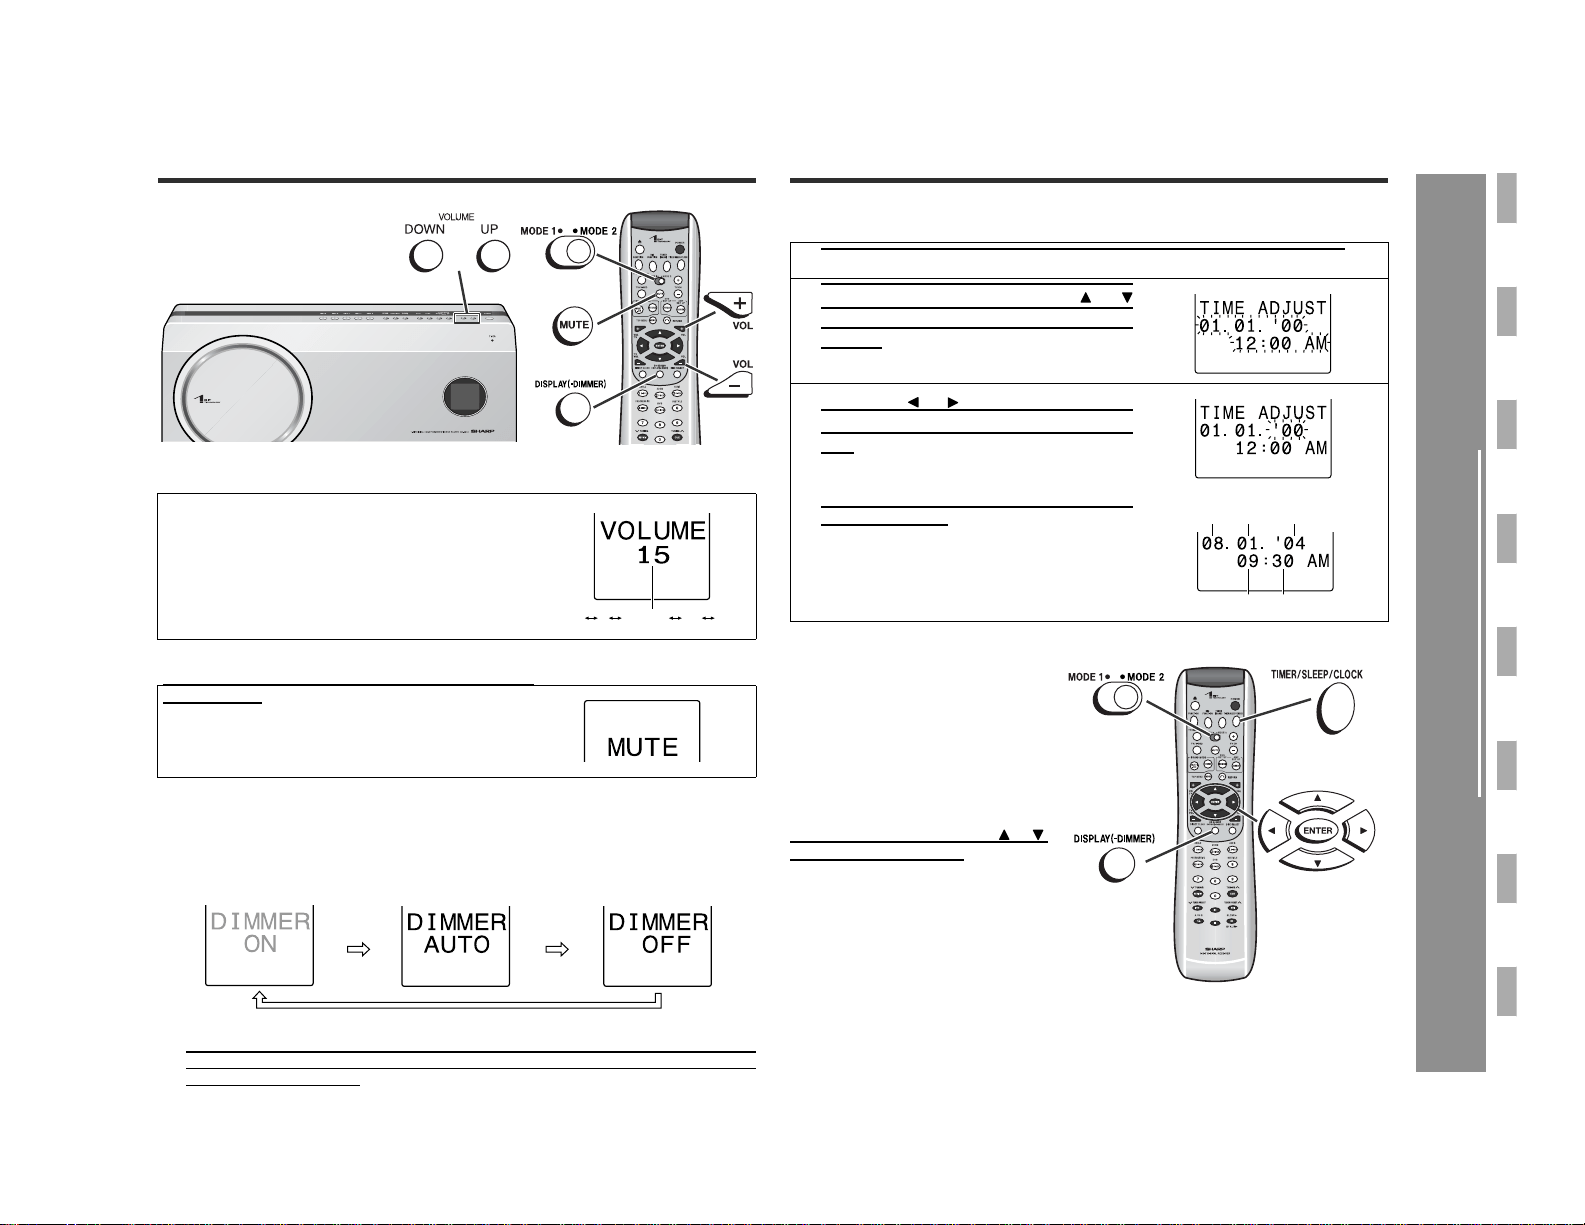
General control
" Volume control
" Muting
" To change the display brightness (2 levels)
Set the MODE 1/MODE 2 switch to MODE 2 and hold down the DISPLAY (-DIMMER)
button for 3 seconds or more.
Each time you press, brightness changes.
Setting the clock
By setting the unit to the correct time, you can use it not only as a clock but also for
timer playback.
Main unit operation:
Press the VOLUME UP button to increase the volume
and the VOLUME DOWN button for decreasing.
Remote control operation:
Press the VOL + button to increase the volume and
the VOL - button for decreasing.
The volume is muted temporarily when pressing the
MUTE button.
! Press again to restore the volume.
! The mute status is canceled when you adjust the
volume.
Dimmed (*) Brightened
(*) After approx. 5 seconds of DVD playback, the display dims and the original bright-
ness returns when you stop playback. The brightness remains unchanged during
playback of other media.
0 1 2
...
38 39 40
1 Turn on the unit, and press the TIMER/SLEEP/CLOCK button.
2 Within 10 seconds, press the or
button to select the date and time in-
dicator and then press the ENTER
button.
3 Press the or button to adjust the
year and then press the ENTER but-
ton.
Set "Month", "Date", "Hour" and "Minute"
in the same way.
! The 12-hour display will appear.
(AM 12:00 - PM 11:59)
! The time disappears after approx. 2 sec-
onds.
To confirm the time display:
Set the MODE 1/MODE 2 switch to
MODE 2 and hold down the DIS-
PLAY (-DIMMER) button for 3 sec-
onds or more.
The time display will appear for
about 5 seconds.
[When the power is on]
Press the TIMER/SLEEP/CLOCK
button.
Within 10 seconds, press the or
button to select the time.
The time display will appear for
about 10 seconds.
Note:
Unplugging the unit or power failure
will clear the clock setting.
Readjust the clock.
MonthDate Year
Hour Minute
Loading ...
Loading ...
Loading ...