Loading ...
Loading ...
Loading ...

5
MODEL: RJ43-SQ-6T
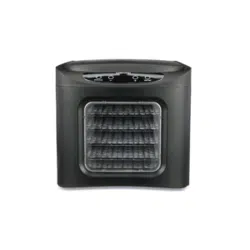
Control Panel - all features and functions of the dehydrator can be controlled from this
panel.
TIME/TEMP Button - toggles between time or temperature settings.
Window Door - swings out from left to right to easily access the food trays. Make sure all
trays are fully pushed back before you open or close the door.
Drying Trays - Six plastic trays are designed to hold and support significant quantities of
food to dry. The racks are perforated to allow air to circulate for drying and to allow any
moisture or debris to fall to the drip pan.
Protective Food Sheet - You may dry fragile or thinly sliced foods. The protective food
sheet has smaller perforations that will allow these foods to stay intact while they are dried.
Use this feature to dry rolled fruit or fruit leather. Always place the protective food sheet
together with a drying tray. Lightly coat the protective food sheet with cooking spray before
adding fruit or other fragile foods for drying. The spray will help assist foods to slip off easily
after they have been dried.
Drip Pan - catches drips of moisture or debris from food while drying. This pan will help
keep the interior of the dehydrator clean.
BEFORE FIRST USE
1. Place the unit on a level, flat surface that is clean and dry.
2. Wash the drying trays and protective food sheet in a warm soapy water. Dry thoroughly.
3. Use a soft, damp cloth to clean the exterior of the dehydrator and door. Dry with a paper
towel or soft cloth.
4. Plug the dehydrator into an electrical outlet. Display will show "0000".
5. Turn on the unit as a dry-run for 30 minutes before you attempt to dehydrate food. This
prepares the interior for your initial use. Smoke or odors are normal during the initial
preparation drying time.
SETTING TIME AND TEMPERATURE SETTING TO START
1. Place prepared foods on the Drying Trays (see food preparation tips) and securely close
door. Do not overload the drying trays with food.
2. Food should be placed on drying trays in single layers ONLY, not touching or overlapping
in any way.
3. Insert the plug into a grounded electric outlet.
4. Check your recipe instructions or the chart in this manual to set your desired temperature
and time (See Page 10).
5. Press "TIME/TEMP" to set time and temperature, then press "START/STOP" to begin
dehydrating.
OPERATING INSTRUCTIONS
Loading ...
Loading ...
Loading ...
