Loading ...
Loading ...
Loading ...
7
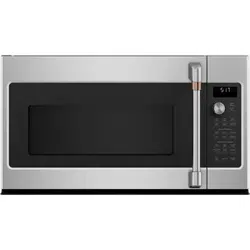
TOOLS YOU WILL NEED
DQG3KLOOLSV
screwdriver
3HQFLO
5XOHURUWDSHPHDVXUH
and straight edge
Carpenter square
RSWLRQDO
7LQVQLSVIRUFXWWLQJ
GDPSHULIUHTXLUHG
Electric drill with
3
»16s,
1
»2s
and
5
»8s drill bits
+DPPHURSWLRQDO
Stud finder or
Filler blocks or scrap
wood pieces, if needed
for top cabinet spacing
(used on recessed
bottom cabinet
LQVWDOODWLRQVRQO\
Gloves
Saw (saber, hole or
NH\KROH
/HYHO
Duct and masking
tape
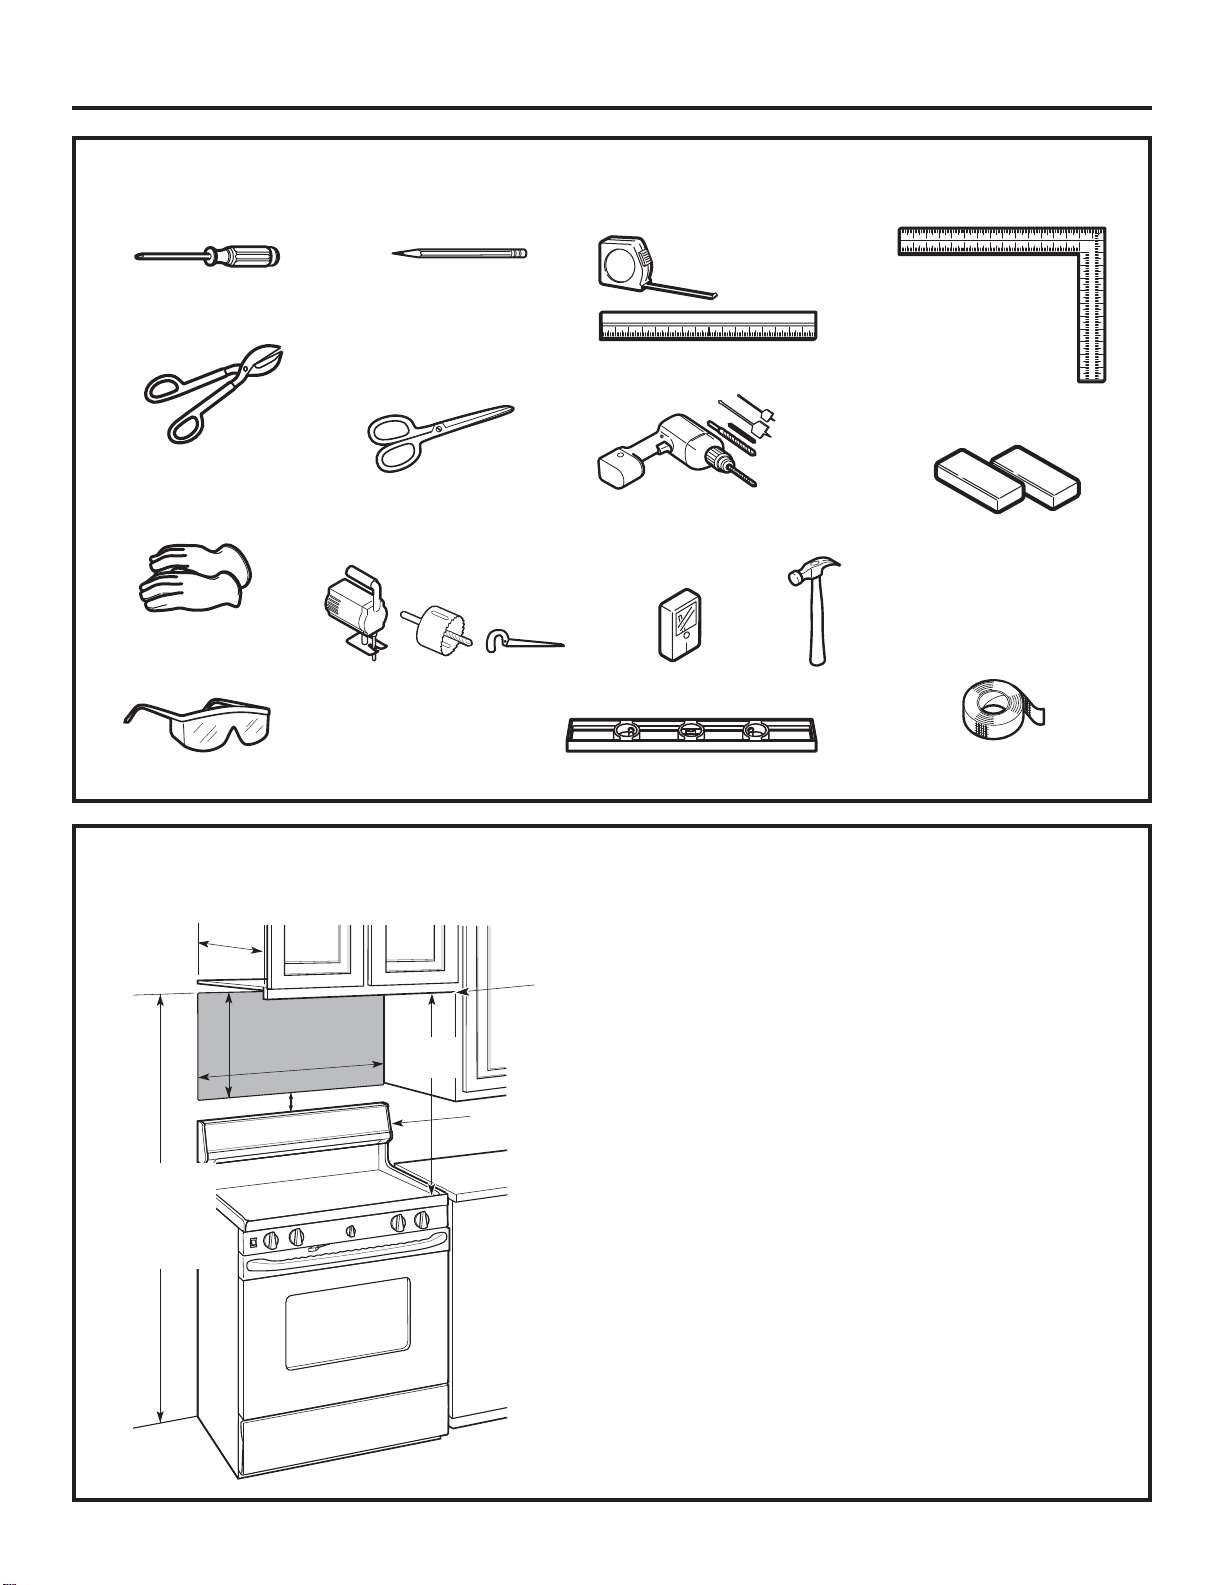
MOUNTING SPACE
NOTES:
7KHVSDFHEHWZHHQWKHFDELQHWVPXVWEH
30s wide and free of obstructions.
• If the space between the cabinets is greater
than 30sD)LOOHU3DQHO.LWPD\EHXVHGWRILOO
in the gap between the microwave oven and
the cabinets. Your Owner’s Manual contains
WKHNLWQXPEHUIRU\RXUPRGHO
7KLVPLFURZDYHRYHQLVIRULQVWDOODWLRQRYHU
ranges up to 36s wide.
,I\RXDUHJRLQJWRYHQW\RXUPLFURZDYHRYHQ
WRWKHRXWVLGHVHH+RRG([KDXVW6HFWLRQIRU
exhaust duct preparation.
• When installing the microwave oven beneath
smooth, flat cabinets, be careful to follow the
instructions on the top cabinet template for
power cord clearance.
• Models with top venting grilles: Do not
allow cabinetry or other objects to block the
airflow
of the vent.
13” max: for standard installation, 15”
cabinet depth requires additional steps using
an additional installation kit JX15BUMPWW/
BB.
Backsplash
66s or More
from the
Floor to the
7RSRIWKH
Microwave
30s
2s
30s
min.
16
1
»2s
Bottom Edge
of Cabinet
1HHGVWR
be 30s or
More from
the Cooking
Surface
Installation Instructions
Scissors
(to cut template, if
QHFHVVDU\
6DIHW\JRJJOHV
13s
PD[
Minimum
distance from
door hinge side
to adjacent wall
should
equal 3/4”
Loading ...
Loading ...
Loading ...