Loading ...
Loading ...
Loading ...
13
USE TOP CABINET TEMPLATE
FOR PREPARATION OF TOP
CABINET
You need to drill holes for the top support screws, a
hole large enough for the power cord to fit through,
and a cutout large enough for the exhaust adaptor.
CHECK BLOWER MOTOR
ORIENTATION
7KHEORZHUIDQEODGHRSHQLQJVKRXOGEHIDFLQJWKH
WRSRIWKHPLFURZDYH,IWKHIDQRSHQLQJLVDOUHDG\
facing the top of the microwave, skip to Step A5.
Otherwise, continue to Step A4 to adjust the motor
orientation.
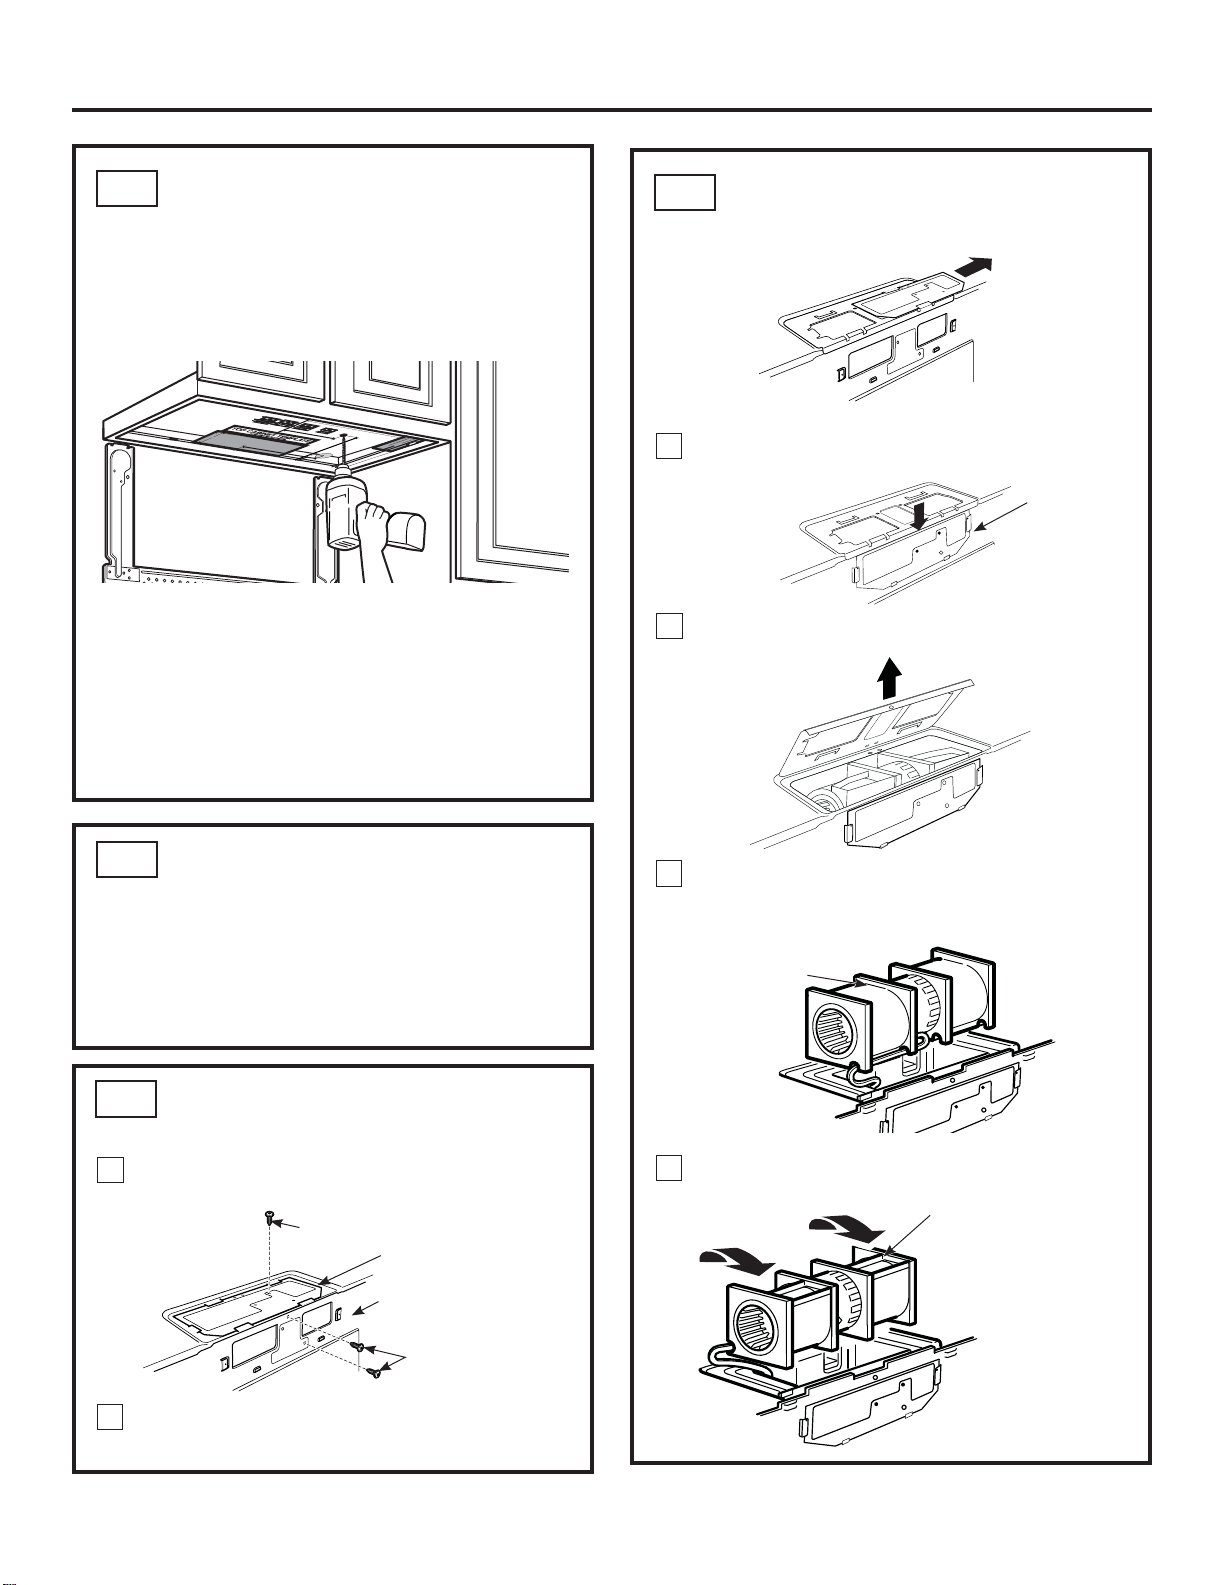
ADAPTING BLOWER FOR
OUTSIDE VENTILATION
5HPRYHDQGVDYHWKHVFUHZVWKDWKROGWKHEORZHU
motor to the microwave oven.
5HPRYHDQGVDYHWKHPHWDOEORZHUVKLHOGRQWKH
WRSRIWKHPLFURZDYHE\VOLGLQJLWULJKW
ADAPTING BLOWER FOR
OUTSIDE VENTILATION (Cont.)
Attached the metal blower shield to the backside
RIWKHPLFURZDYHRYHQE\VOLGLQJLWGRZQ
2SHQWKHEORZHUGRRUE\OLIWLQJLWXSDWWKHEDFNRI
the microwave oven.
&DUHIXOO\SXOORXWWKHEORZHUXQLW7KHZLUHVZLOO
H[WHQGIDUHQRXJKWRDOORZ\RXWRDGMXVWWKH
blower unit.
5ROOWKHEORZHUXQLWÛVRWKDWWKHIDQEODGH
openings are facing the top.
A2.
A3.
A4.
A4.
5HDGWKHLQVWUXFWLRQVRQWKH723&$%,1(7
7(03/$7(
7DSHLWXQGHUQHDWKWKHWRSFDELQHW
• Drill the holes, following the instructions on the
723&$%,1(77(03/$7(
NOTE: Wear safety goggles when drilling holes
in the cabinet bottom.
Installation Instructions
1
3
4
5
6
2
Back of Oven
Blower Motor
Screws
%ORZHU3ODWH
BEFORE: Fan
Blade Openings
Facing Forward
AFTER: Fan
Blade Openings
Facing Up
Blower
Shield
5ROO
127(0DNH
sure wires
remain routed
in the grooves
of the motor
frame.
Blower Motor
Screw
Loading ...
Loading ...
Loading ...