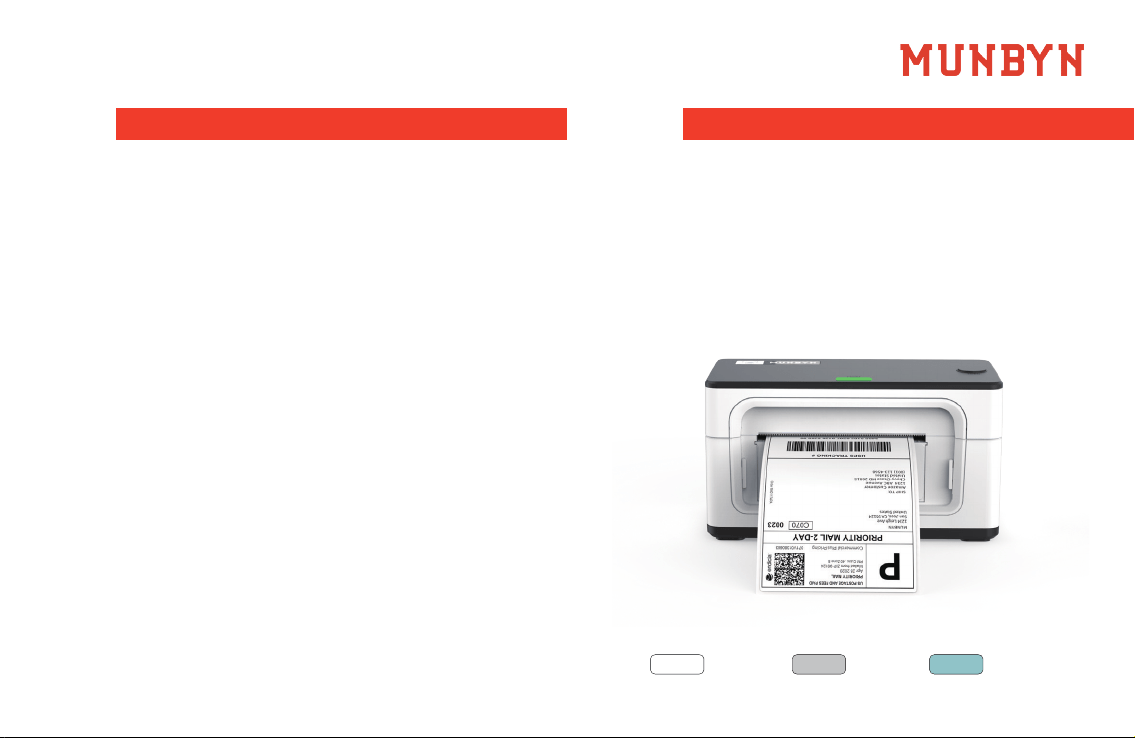
Logistics Label Printer
Version:2.0.1
USER GUIDE
Focus on
Every Powerful
Moment
White Gray Green
Product Introduction
Quick Printer Connection
Label Setup
Driver Download
Windows Driver Installation
Mac Driver Installation
“FEED” Button Instruction
LED Status
FAQ
Specifications
Support
1
2
2
3
3
6
10
11
11
13
13
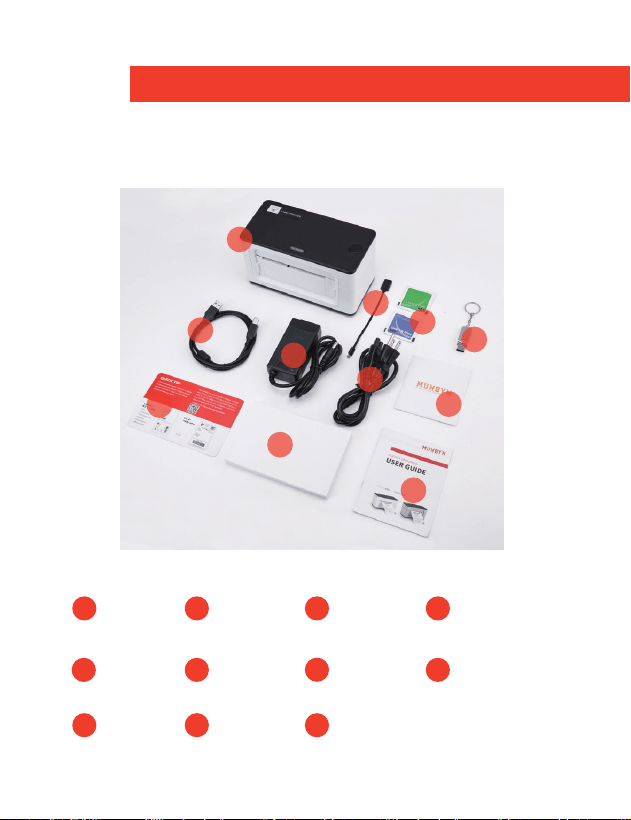
What's in the box?
1
CONTENTS PRODUCT INTRODUCTION
Printer
Labels
Power
dapter
Power
Cable
User manual
After-sale
Card
USB
Flash drive
Alcohol
Pad
MAC
Adapter
USB
Cable
Card
1
1
2
2
3
3
4
4
8
8
11
11
10
10
6
6
7
7
9
9
5
5
Product Introduction
Quick Printer Connection
Label Setup
Driver Download
Windows Driver Installation
Mac Driver Installation
“FEED” Button Instruction
LED Status
FAQ
Specifications
Support
1
2
2
3
3
6
10
11
11
13
13
What's in the box?
1
CONTENTS PRODUCT INTRODUCTION
Printer
Labels
Power
dapter
Power
Cable
User manual
After-sale
Card
USB
Flash drive
Alcohol
Pad
MAC
Adapter
USB
Cable
Card
1
1
2
2
3
3
4
4
8
8
11
11
10
10
6
6
7
7
9
9
5
5
2 3
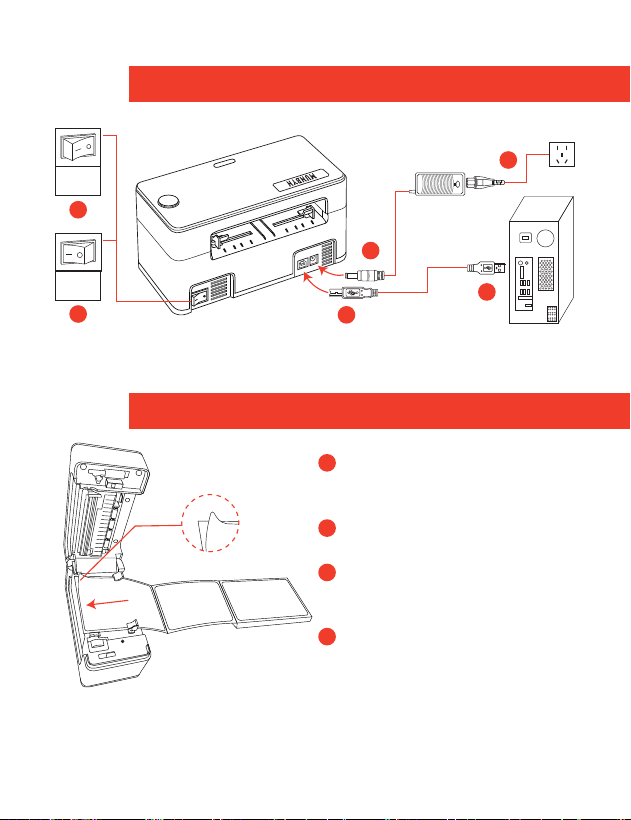
QUICK PRINTER INSTALLATION
LABEL SETUP
Facing the front of the
printer, press the cover open
button to open the top cover.
Install the label paper with
the holders on both sides.
Finish the label paper
installation, and then close
the cover.
For new label paper, do the
label size calibration again.
1. Turn on the printer.
2. Press FEED button and hold on.
3. Release the button when you hear one ‘Di’ sound.
4. Then, the printer will calibrate the label size.
Support downloading driver files via USB flash drive or down-
load link.
Printer driver download link: https://munbyn.biz/941d
Tutorial video:
For Windows : https://munbyn.biz/941win
For Mac OS: https://munbyn.biz/941mac
Printer head (TPH) will be very hot after printing,
Please do not touch the printer head or parts around it .
Note: Please connect to the computer first and then turn on
the printer.
Note: Before using the printer to print labels, please calibrate
the paper size.
1
6
2
4
5
3
Note:Please use the power adapter provided by MUNBYN.
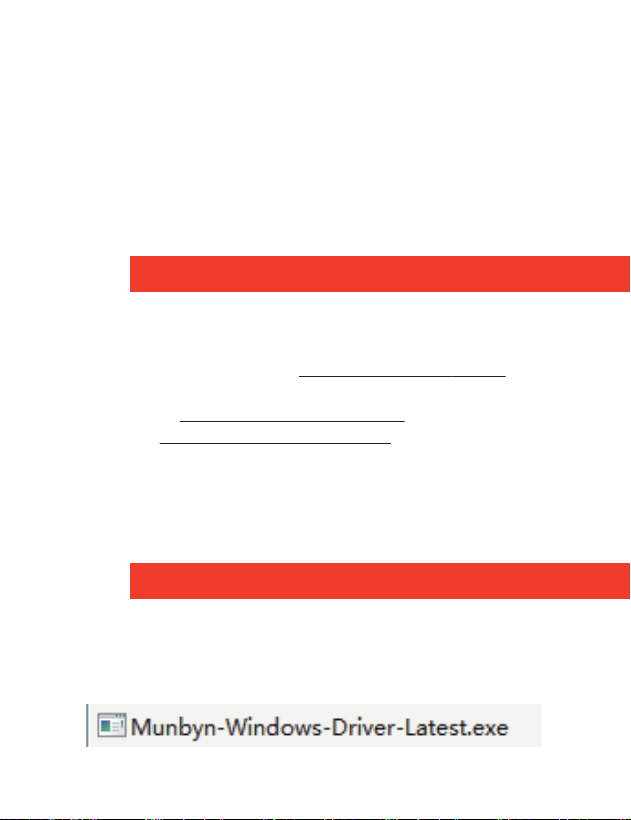
DRIVER INSTALLATION
WINDOWS DRIVER INSTALLATION
Label size calibration:
Warning
1. Open the driver software you downloaded.
Power
off
Power
on
1
2
3
4
2 3
QUICK PRINTER INSTALLATION
LABEL SETUP
Facing the front of the
printer, press the cover open
button to open the top cover.
Install the label paper with
the holders on both sides.
Finish the label paper
installation, and then close
the cover.
For new label paper, do the
label size calibration again.
1. Turn on the printer.
2. Press FEED button and hold on.
3. Release the button when you hear one ‘Di’ sound.
4. Then, the printer will calibrate the label size.
Support downloading driver files via USB flash drive or down-
load link.
Printer driver download link: https://munbyn.biz/941d
Tutorial video:
For Windows : https://munbyn.biz/941win
For Mac OS: https://munbyn.biz/941mac
Printer head (TPH) will be very hot after printing,
Please do not touch the printer head or parts around it .
Note: Please connect to the computer first and then turn on
the printer.
Note: Before using the printer to print labels, please calibrate
the paper size.
1
6
2
4
5
3
Note:Please use the power adapter provided by MUNBYN.
DRIVER INSTALLATION
WINDOWS DRIVER INSTALLATION
Label size calibration:
Warning
1. Open the driver software you downloaded.
Power
off
Power
on
1
2
3
4
4 5
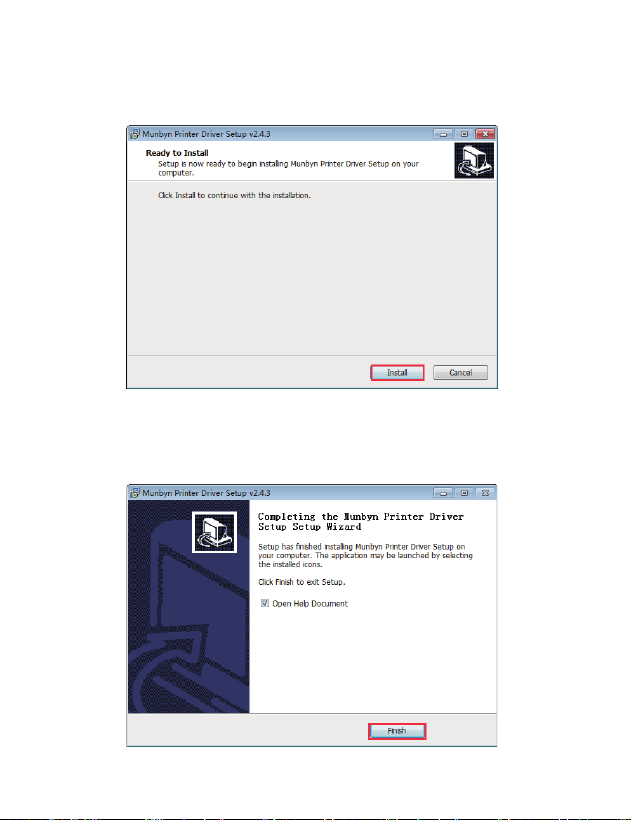
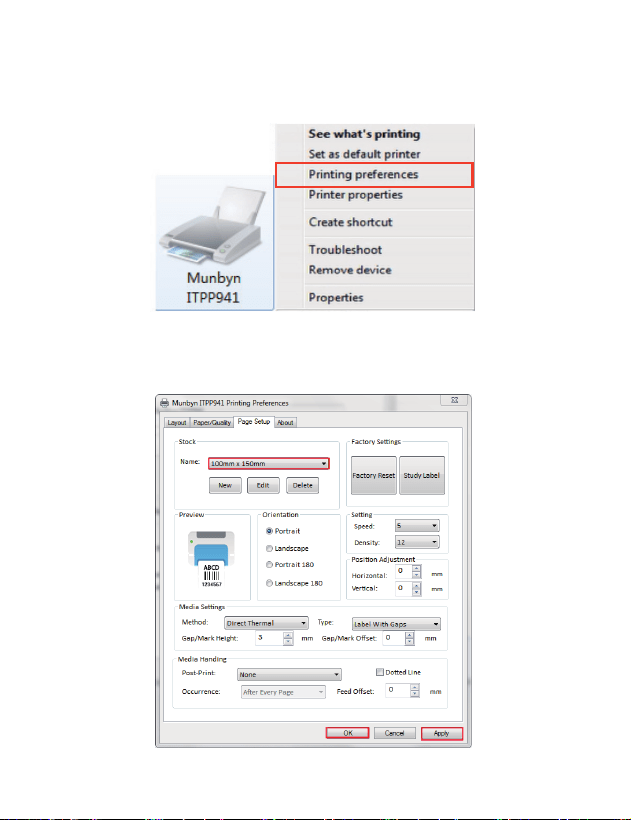
2. Click on "Install" to start installing the driver. 4. Set the printer paper size.
5. Choose 100×150mm(4x6“) label size and apply, then we can use
our printer to print shipping labels.
3. Follow the guideline to install until "Finish" appears, then we
can use our printer to print shipping labels.
4 5
2. Click on "Install" to start installing the driver. 4. Set the printer paper size.
5. Choose 100×150mm(4x6“) label size and apply, then we can use
our printer to print shipping labels.
3. Follow the guideline to install until "Finish" appears, then we
can use our printer to print shipping labels.
6 7
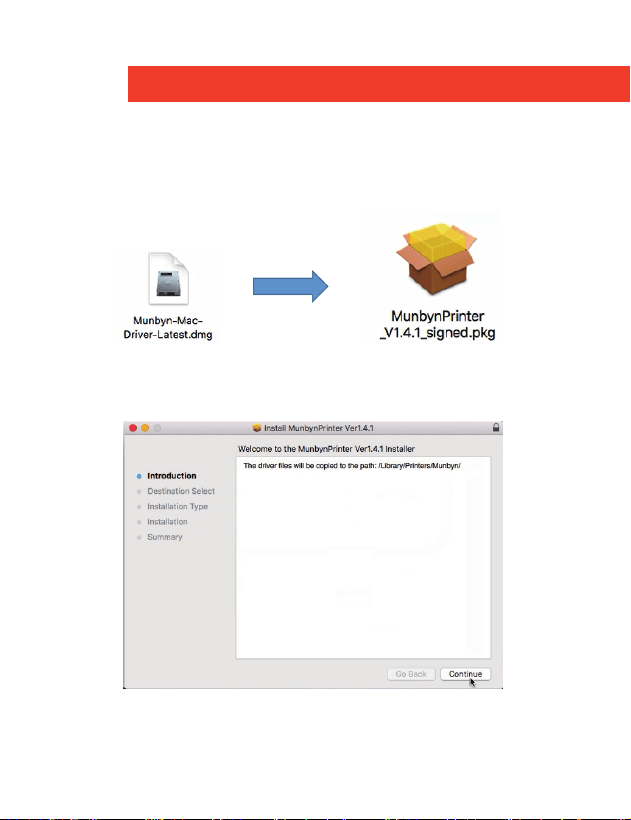
MAC DRIVER INSTALLATION
Note: Please connect to the computer first and then turn on
the printer.
1. Open the driver software you downloaded.
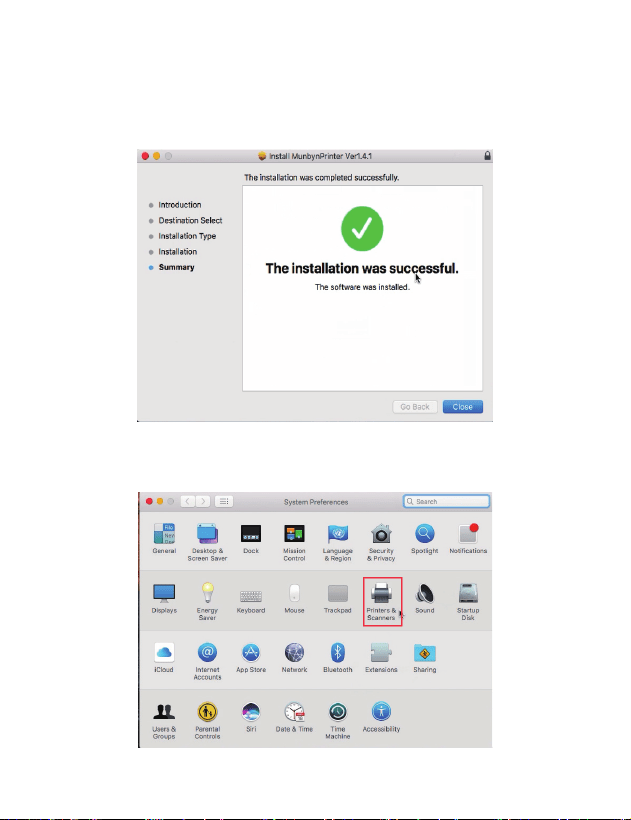
3. Follow the guideline to install until "The installation was
successful appears".
4. Add printer in printer list.
2. Start installation.
6 7
MAC DRIVER INSTALLATION
Note: Please connect to the computer first and then turn on
the printer.
1. Open the driver software you downloaded.
3. Follow the guideline to install until "The installation was
successful appears".
4. Add printer in printer list.
2. Start installation.
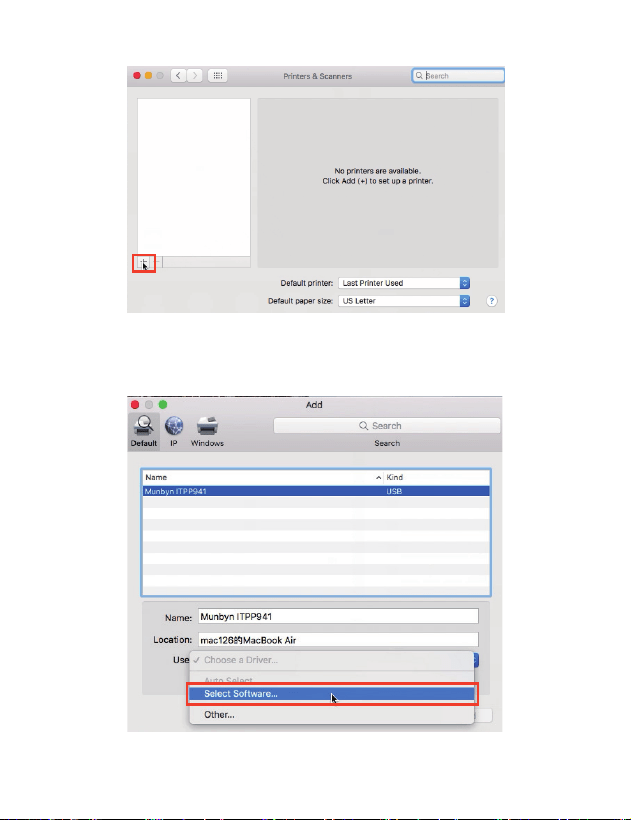
MAC SETUP STEPS
8 9
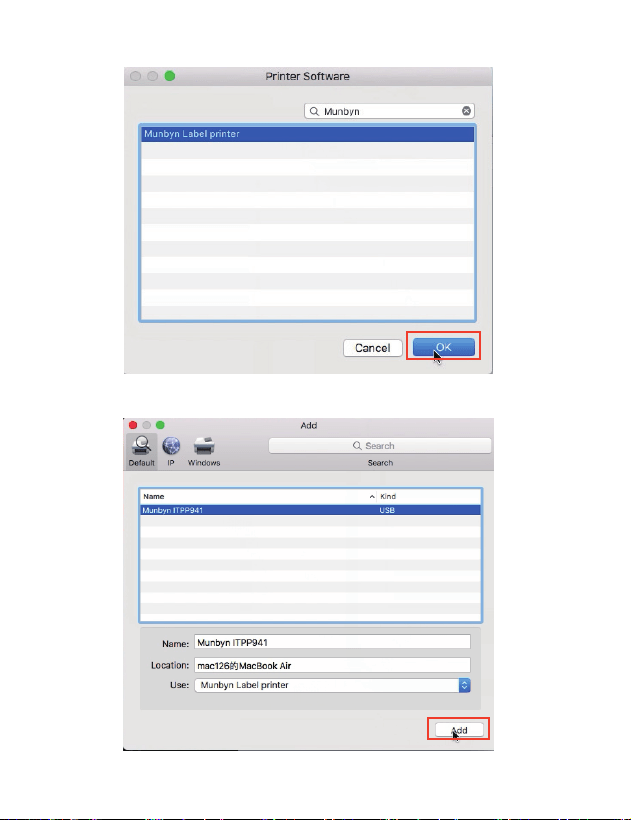
5. Choose printer and "Select Software".
MAC SETUP STEPS
8 9
5. Choose printer and "Select Software".
“FEED” BUTTON INSTRUCTION
LED STATUS
FAQ
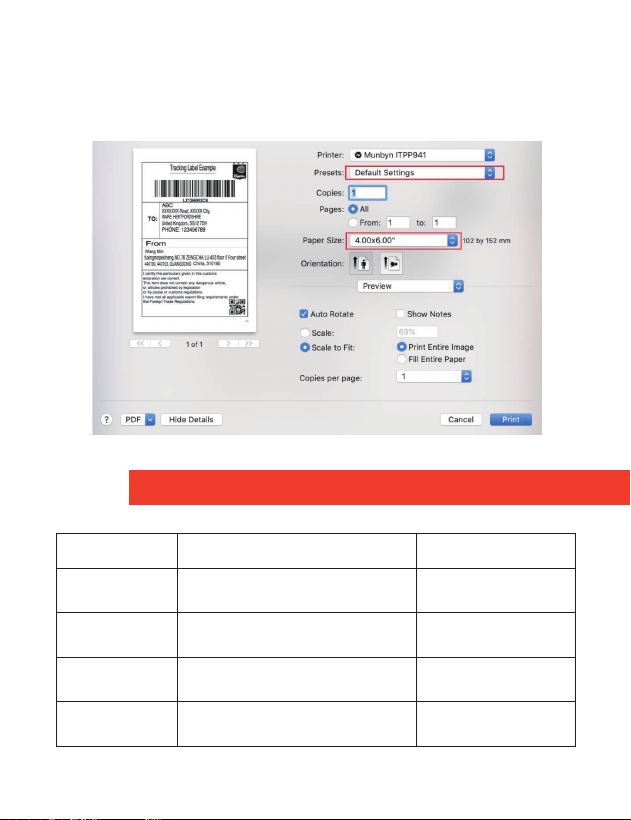
6. Page Setup, choose 4x6” (100x150 mm), then we can open the
document and select the printer to print shipping labels.
Printer status Operation of FEED Function
Description
Normal status
No
OFF
OFFOFF
OFF
OFF
OFF
Flashing
(every 1 second)
Flashing
(every 1 second)
Flashing
(every 1 second)
Flashing
(every 1 second)
Flashing Red
Printer head is overheated
Paper shortage
Cover is not closed
Paper recognition error
Wrong cable connected
or power off
Green light Red light
Standby
Long press the
button(light) beep once
Long press the
button(light) beep twice
Long press the
button(light) beep five times
Short press the button(light)
Feed in a blank
paper
Automatically
calibrate paper size
Print out
Self-test page
Reset printer
Standby
Standby
Standby
Q1: When the printing is too faint, how to adjust the density
and printing speed?
A1: For Windows : Printer Preferences → Page Setup → Seting
For Mac OS: Can be set in drop-down menu under ‘Printer
Features’
Tutorial vedio: https://munbyn.biz/941dsv
Q2: What can I do if paper is jammed or there are white spots
in my print?
A2: Turn off the printer, and allow the printer head to cool down.
Use the pad with alcohol to wipe the printer head clean.
Tutorial vedio: https://munbyn.biz/941pjv
10 11
“FEED” BUTTON INSTRUCTION
LED STATUS
FAQ
6. Page Setup, choose 4x6” (100x150 mm), then we can open the
document and select the printer to print shipping labels.
Printer status Operation of FEED Function
Description
Normal status
No
OFF
OFFOFF
OFF
OFF
OFF
Flashing
(every 1 second)
Flashing
(every 1 second)
Flashing
(every 1 second)
Flashing
(every 1 second)
Flashing Red
Printer head is overheated
Paper shortage
Cover is not closed
Paper recognition error
Wrong cable connected
or power off
Green light Red light
Standby
Long press the
button(light) beep once
Long press the
button(light) beep twice
Long press the
button(light) beep five times
Short press the button(light)
Feed in a blank
paper
Automatically
calibrate paper size
Print out
Self-test page
Reset printer
Standby
Standby
Standby
Q1: When the printing is too faint, how to adjust the density
and printing speed?
A1: For Windows : Printer Preferences → Page Setup → Seting
For Mac OS: Can be set in drop-down menu under ‘Printer
Features’
Tutorial vedio: https://munbyn.biz/941dsv
Q2: What can I do if paper is jammed or there are white spots
in my print?
A2: Turn off the printer, and allow the printer head to cool down.
Use the pad with alcohol to wipe the printer head clean.
Tutorial vedio: https://munbyn.biz/941pjv
10 11

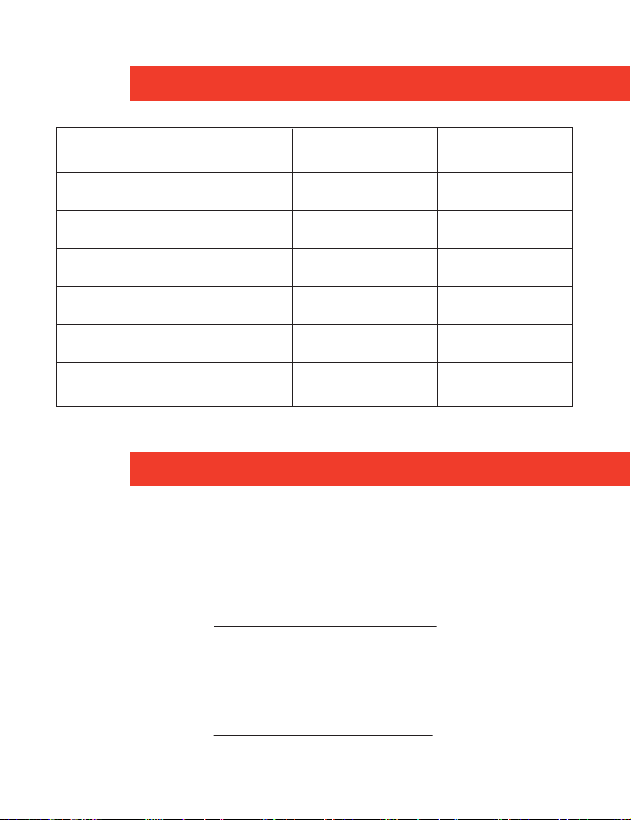
SPECIFICATIONS
Q3: Why the printer is skipping labels or continuously
feeding?
A3: Make sure your computer does not send a print command
to ITPP941, disconnect the USB cable, and then run the
automatic label identification function.
Tutorial video: https://munbyn.biz/941cfv
Q4: Why the printer print extra blank labels after the one
successful print?
A4: Please check if the paper size setting of the printer is correct
and adjust the scale and margins in preview page or page
setup when you are printing from browser.
Tutorial video: https://munbyn.biz/941obv
Q5: Why I am printing blank labels?
A5: Make sure your labels are ‘Direct Thermal’ labels and the
label that you peel off should be facing the ceiling when it
comes out of the printer.
Tutorial video: https://munbyn.biz/941pbv
Q6: How can we print the label that is not in standard 4*6 inch,
such as the USPS?
A6: You can use the screenshot to print the label in correct size.
Tutorial video: https://munbyn.biz/941arv
Q7: How to print self-test label?
A7: The self-test label can be used to determine whether the
machine is malfunctioning and whether the printing
performance is good. You can print self-test label as follows.
1. Turn on the printer.
2. Press FEED button and hold on.
3. Release the button when you hear two ‘Di’ sound.
FAQ download link: https://munbyn.biz/941faq
Method
Resolution 203 DPI
150mm/s
40-110mm
0.06-0.254mm
24V/2A
TPH 50 Km
USB
Max Printing Speed
Paper Width
Paper Thickness
Power Adapter
Printing Life
Connection
Direct Thermal
12
13
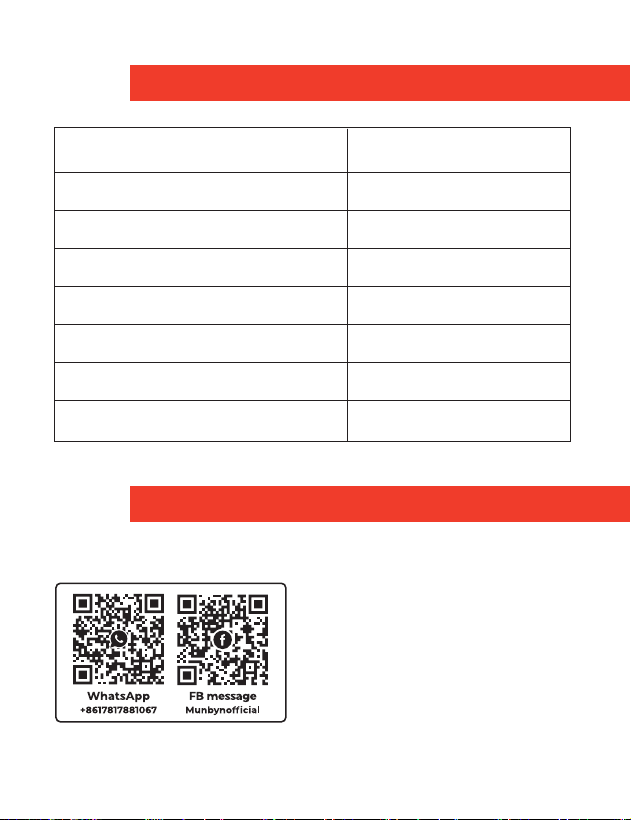
Need Tech Support, contact us by:
E-mail: support@munbyn.com
Whatsapp: +8617817881067
Skype: munbyn
Support time:
Monday to Friday 24 hours.
SUPPORT
SPECIFICATIONS
Q3: Why the printer is skipping labels or continuously
feeding?
A3: Make sure your computer does not send a print command
to ITPP941, disconnect the USB cable, and then run the
automatic label identification function.
Tutorial video: https://munbyn.biz/941cfv
Q4: Why the printer print extra blank labels after the one
successful print?
A4: Please check if the paper size setting of the printer is correct
and adjust the scale and margins in preview page or page
setup when you are printing from browser.
Tutorial video: https://munbyn.biz/941obv
Q5: Why I am printing blank labels?
A5: Make sure your labels are ‘Direct Thermal’ labels and the
label that you peel off should be facing the ceiling when it
comes out of the printer.
Tutorial video: https://munbyn.biz/941pbv
Q6: How can we print the label that is not in standard 4*6 inch,
such as the USPS?
A6: You can use the screenshot to print the label in correct size.
Tutorial video: https://munbyn.biz/941arv
Q7: How to print self-test label?
A7: The self-test label can be used to determine whether the
machine is malfunctioning and whether the printing
performance is good. You can print self-test label as follows.
1. Turn on the printer.
2. Press FEED button and hold on.
3. Release the button when you hear two ‘Di’ sound.
FAQ download link: https://munbyn.biz/941faq
Method
Resolution 203 DPI
150mm/s
40-110mm
0.06-0.254mm
24V/2A
TPH 50 Km
USB
Max Printing Speed
Paper Width
Paper Thickness
Power Adapter
Printing Life
Connection
Direct Thermal
12
13
Need Tech Support, contact us by:
E-mail: support@munbyn.com
Whatsapp: +8617817881067
Skype: munbyn
Support time:
Monday to Friday 24 hours.
SUPPORT

Logistics Label Printer
Version:2.0.1
USER GUIDE
Focus on
Every Powerful
Moment
White Gray Green