
Loading ...
Loading ...
Loading ...
Installation Instructions
8
PREPARATION (CONT.)
Prior to use, it is good practice to review all safety and
precautionary warnings to ensure safe use of your
appliance. For more information, please refer to pages 2
and 3 for greater detail.
Unpacking
Please install the decorative cover for bottom beam onto
your refrigerator after unpacking and adjust the front
leveling legs to level your refrigerator. The following pages
will provide more detail on installing the decorative cover.
Connecting Your Refrigerator to the Power Supply
Your refrigerator will enter a default factory state after
connecting to the power supply and it will display target
temperatures for the refrigerator compartment and
freezer compartment.
Storing Food in the Refrigerator
Once installation is complete, you may want to wait until
the compartments have reached their required operating
temperatures.
Tips: The interior temperature may require a certain
period of time to reach balance if the setting temperature
is changed or if additional items are added to the
refrigerator. Such a period of time depends on the
change to the setting temperature, the surrounding
temperature, opening frequency, the amount of the
stored food and etc.
4
START TO USE
• Beforeinitialstart,keeptherefrigeratorstillfortwo
hours before connecting it to power supply.
• Beforeputtinganyfreshorfrozenfoods,therefrigerator
shall have run for 2-3 hours, or for above 4 hours in
summer when the ambient temperature is high.
• Keepenoughspaceforconvenientopeningofthe
doors and drawers ensuring there are no obstructions.
595mm
1033mm
545mm
1082mm
135°
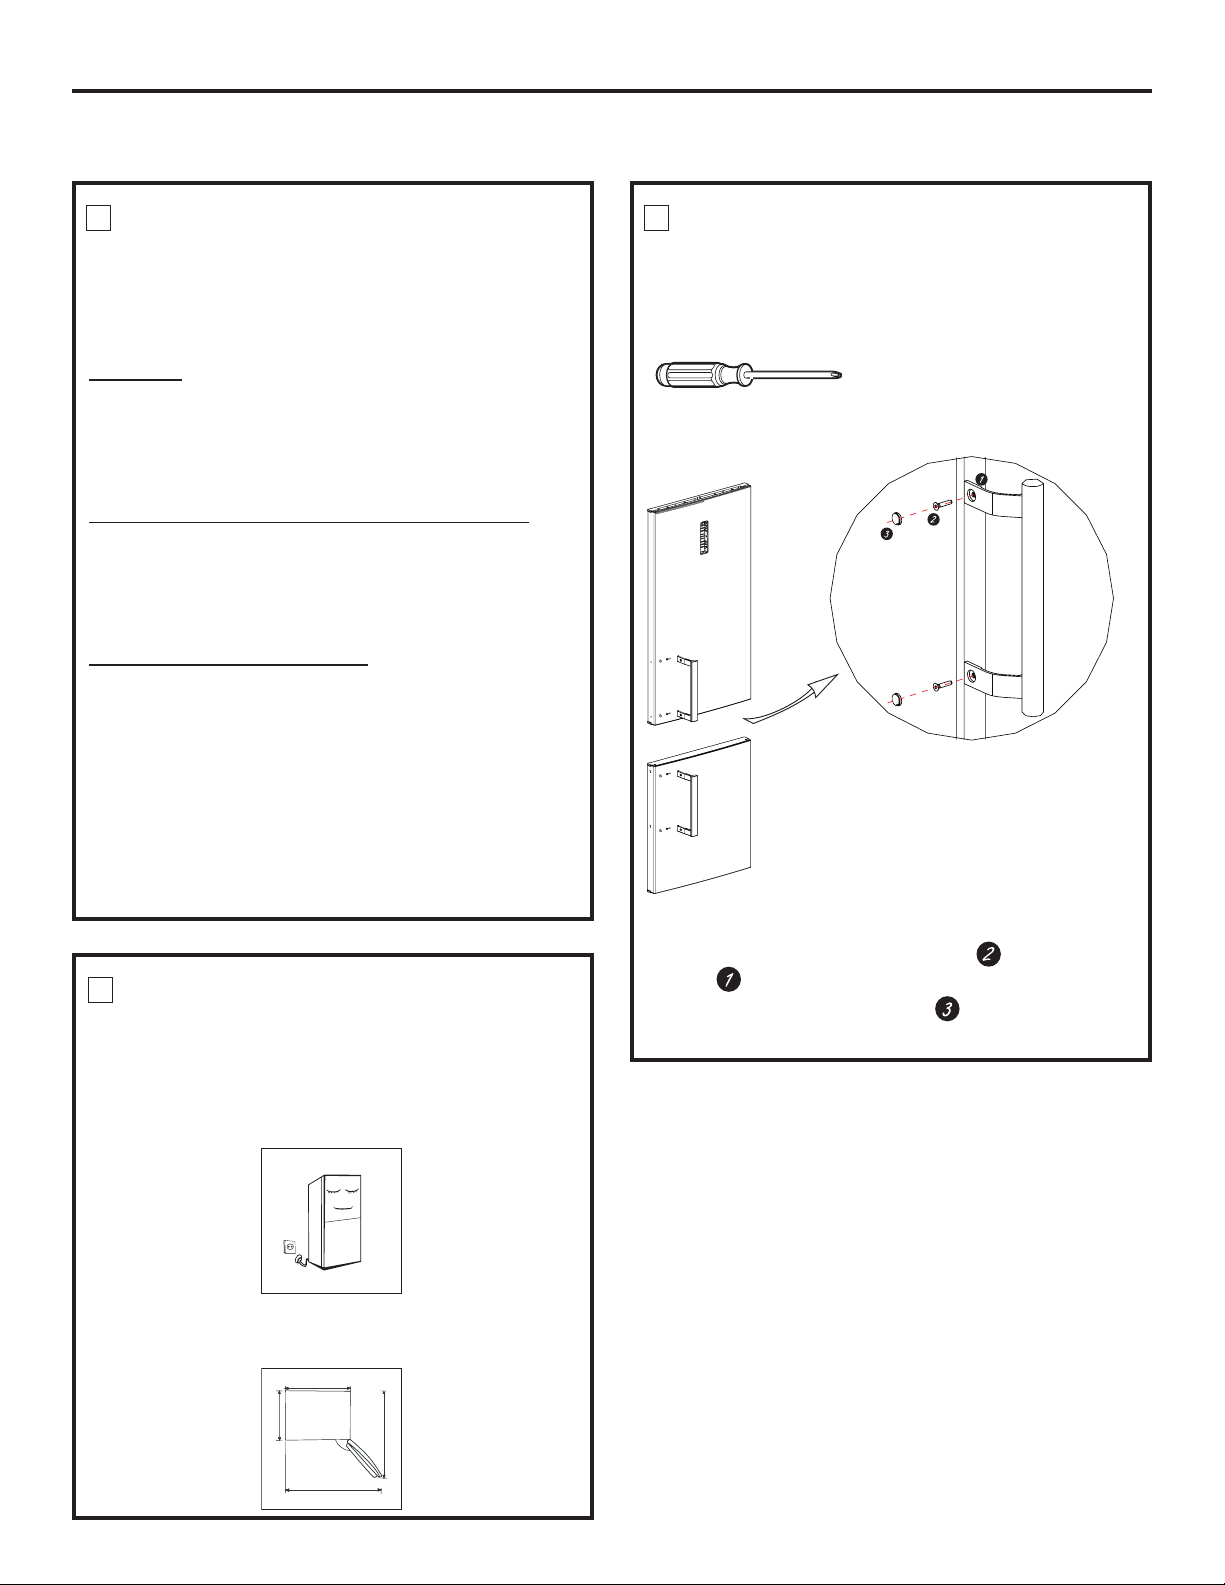
5
STARTING
Precautions shall be taken to prevent fall of the handle
from causing any personal injury.
TOOLS REQUIRED
Phillips screwdriver
Screw hole
Screw
Screw cover
Assembly steps
a. Use cross screwdriver to fix screws into the screw
hole tightly
b. assemble the screw hole caps on the screw hole
of handle
6
DOOR HANDLE INSTALLATION
Loading ...
Loading ...
Loading ...