Loading ...
Loading ...
Loading ...
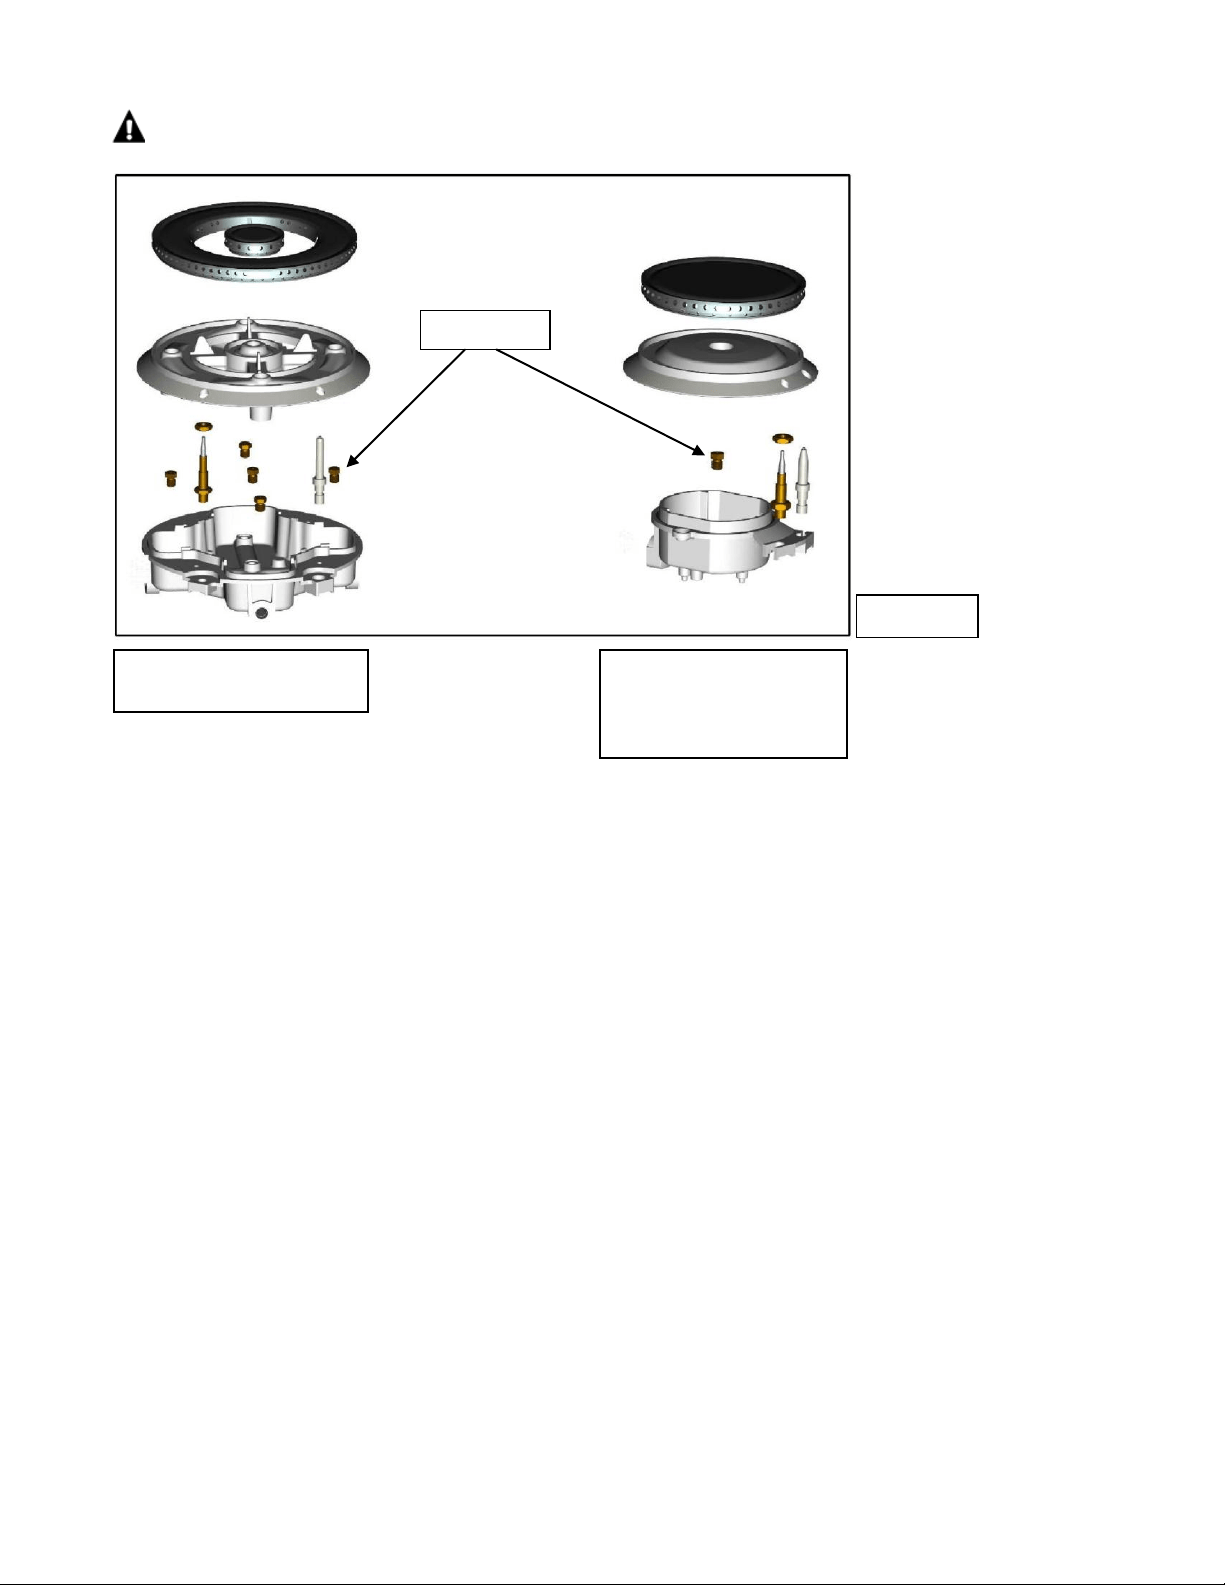
IMPORTANT: Carefully read and observe each nozzle label for correct location (see Figure 18).
3) Install the proper nozzles in the exact locations as noted in the illustrations above (see Figure
24).
4) Replace the burner bases, heads, caps and top grates. Make sure burner caps are properly
seated on the burner head (see Figure 17).
C. ADJUST BURNER FLAMES
1) Turn all burners on highest setting and check the flames. They should be blue in color and may
have some yellow tipping at the ends of the flame when using LP gas. Foreign particles in the
gas line may cause an orange flame at first, but this will soon disappear.
2) Turn the cooktop burner knob to “LO” while observing the flame.
3) Adjustments must be made with two other burners in operation on a medium setting. This
prevents the upper row of flames from being set too low, resulting in the flame being
extinguished when other burners are turned on.
Figure 24
TRIPLE RING BURNER
5 NOZZLES
AUXILARY BURNER
SEMI-RAPID BURNER
RAPID BURNER
1 NOZZLE EACH
NOZZLES
Loading ...
Loading ...