Loading ...
Loading ...
Loading ...
Version 07/11 - Page 6
PREPARE THE WALL FOR ALL INSTALLATIONS
1. Disconnect and move freestanding range from cabinet open-
ing to provide easier access to rear wall. Put a thick, protective
covering over cooktop, set-in range or countertop to protect from
damage or dirt.
2. Determine and clearly mark with a pencil the center line on the
wall where the rangehood will be installed.
3. Draw a Horizontal line at a minimum of 42 5/16" above the
Cooktop, see (FIGURE 4 for reference)
4. Drill 2 holes at 3 15/16" to the right and left of this line. Check
that the two marks are level, before drilling.
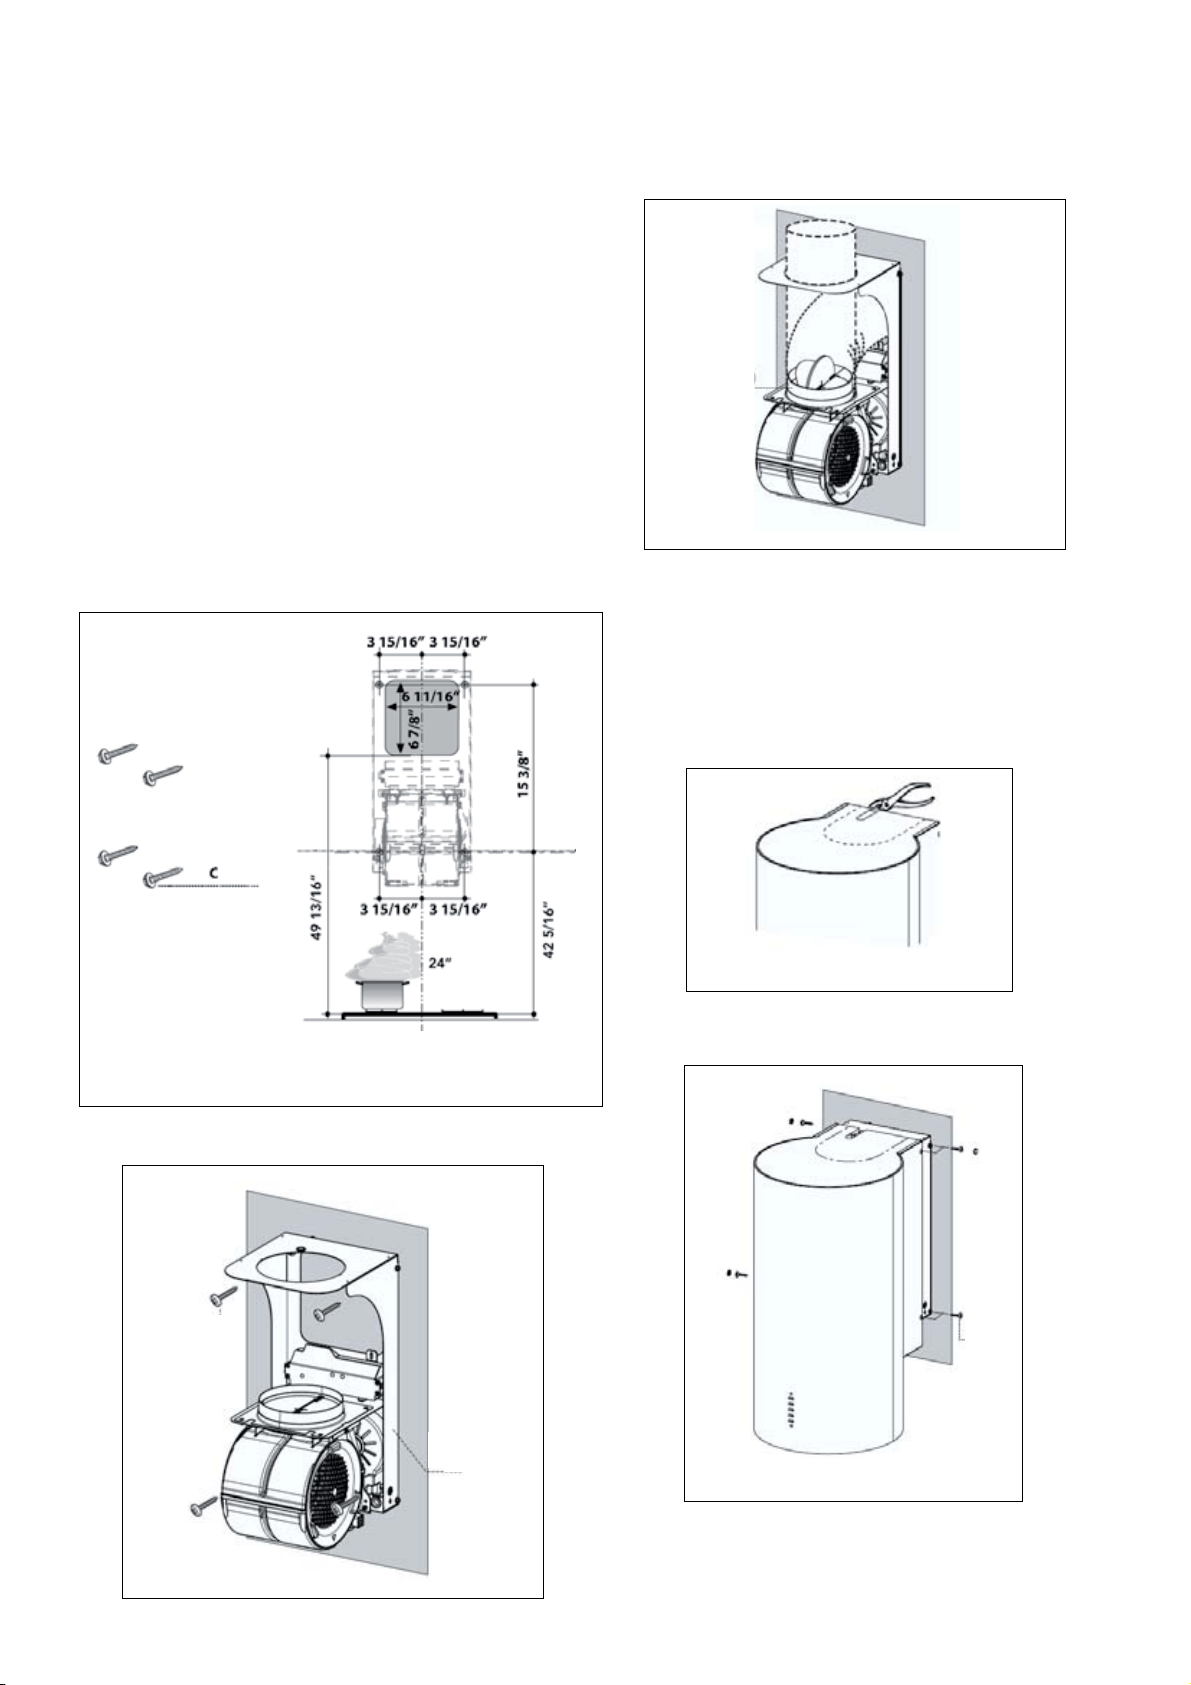
5. Mark a reference point at 15 3/8" above the 42 5/16" line in step
#3 and drill 2 holes 3 15/16" to the right and left of this line. Check
that the two marks are level, before drilling.
6. Attach the motor and wall support (B in FIGURE 5), using the
4 - (C) wall support screws.
FIGURE 4
FIGURE 5
B
C
FIGURE 6
1. The Cylindra hood offers flexibility in ducting. See (FIGURE
6), using 6" rigid metal ducting, the hood can be ducted straight
up or with an elbow to the back of the hood at the 6 7/8" tall x
6 11/16" wide opening next to the wall.
DUCTED INSTALLATIONS
1. If ducting out of the top of the hood, carefully remove the pre
cut metal piece at the top of the hood body (FIGURE 7).
2. Attach the Damper (G in FIGURE 1), connect rigid metal 6
inch round ducting to the damper and seal the duct with tape
3. For all ducting directions, using 4 screws (D in FIGURE 8),
to attach the hood body to the support frame on the wall, cover
screws with (E screw covers in FIGURE 8).
FIGURE 7
FIGURE 8
D
NOTE: When installing the hood in the ductless version,
leave at least 4" between the top of the hood and the
ceiling for proper air circulation.
E
Loading ...
Loading ...
Loading ...