
3-867-659-02 (1)
© 1999 Sony Corporation
Trinitron Color
Computer Display
Operating Instructions
Mode d’emploi
Manual de instrucciones
US
FR
ES
CS
JP
CPD-E100

2
C:\WIN95-E\DESKTOP\CPD E100\386765901CPDE100UC\386765901CPDE100UC\01US02GET-
UC.fm
masterpage:Left
CPD-E100
3-867-659-
01
(1)
Owner’s Record
The model and serial numbers are located at the rear of the unit.
Record these numbers in the spaces provided below. Refer to them
whenever you call upon your dealer regarding this product.
Model No.
Serial No.
To prevent fire or shock hazard, do not expose the
unit to rain or moisture.
Dangerously high voltages are present inside the
unit. Do not open the cabinet. Refer servicing to
qualified personnel only.
FCC Notice
This equipment has been tested and found to comply with the limits
for a Class B digital device, pursuant to Part 15 of the FCC Rules.
These limits are designed to provide reasonable protection against
harmful interference in a residential installation. This equipment
generates, uses, and can radiate radio frequency energy and, if not
installed and used in accordance with the instructions, may cause
harmful interference to radio communications. However, there is no
guarantee that interference will not occur in a particular installation.
If this equipment does cause harmful interference to radio or
television reception, which can be determined by turning the
equipment off and on, the user is encouraged to try to correct the
interference by one or more of the following measures:
– Reorient or relocate the receiving antenna.
– Increase the separation between the equipment and receiver.
– Connect the equipment into an outlet on a circuit different from
that to which the receiver is connected.
– Consult the dealer or an experienced radio/TV technician for
help.
You are cautioned that any changes or modifications not expressly
approved in this manual could void your authority to operate this
equipment.
INFORMATION
This product complies with Swedish National Council for Metrology
(MPR) standards issued in December 1990 (MPR II) for very low
frequency (VLF) and extremely low frequency (ELF).
INFORMATION
Ce produit est conforme aux normes du Swedish National Council
for Metrology de décembre 1990 (MPR II) en ce qui concerne les
fréquences très basses (VLF) et extrêmement basses (ELF).
Hinweis
Dieses Gerät erfüllt bezüglich tieffrequenter (very low frequency)
und tiefstfrequenter (extremely low frequency) Strahlung die
Vorschriften des „Swedish National Council for Metrology (MPR)“
vom Dezember 1990 (MPR II).
INFORMACIÓN
Este producto cumple las normas del Consejo Nacional Sueco
para Metrología (MPR) emitidas en diciembre de 1990 (MPR II)
para frecuencias muy bajas (VLF) y frecuencias extremadamente
bajas (ELF).
Dieses Garät entspricht den folgenden europäischen EMV-
Vorschriften für Betrieb in Wohngebieten, gewerblicher Gebleten
und Leichtindustriegebieten.
EN55022/1994 Klasse B
EN50082-1/1997
EN61000-3-2/1995
WARNING
Hinweise
• Aus ergonomischen Gründen wird empfohlen, die
Grundfarbe Blau nicht auf dunklem Untergrund zu verwenden
(schlechte Erkennbarkeit, Augenbelastung bei zu geringem
Zeichenkontrast).
• Aus ergonomischen Gründen (flimmern) sollten nur
Darstellungen bei Vertikalfrequenzen ab 70 Hz (ohne
Zeilensprung) verwendet werden.
• Die Konvergenz des Bildes kann sich auf Grund des
Magnetfeldes am Ort der Aufstellung aus der korrekten
Grundeinstellung verändern. Zur Korrektur empfiehlt es sich
deshalb, die Regler an der Frontseite für Konvergenz so
einzustellen, daß die getrennt sichtbaren Farblinien für Rot,
Grün und Blau bei z.B. der Darstellung eines Buchstabens
zur Deckung (Konvergenz) gelangen.
Siehe hierzu auch die Erklärungen zu Konvergenz.
NOTICE
This notice is applicable for USA/Canada only.
If shipped to USA/Canada, install only a UL LISTED/CSA
LABELLED power supply cord meeting the following
specifications:
SPECIFICATIONS
Plug Type Nema-Plug 5-15p
Cord Type SVT or SJT, minimum 3
×
18 AWG
Length Maximum 15 feet
Rating Minimum 7 A, 125 V
NOTICE
Cette notice s’applique aux Etats-Unis et au Canada
uniquement.
Si cet appareil est export* aux Etats-Unis ou au Canada, utiliser
le cordon d’alimentation portant la mention UL LISTED/CSA
LABELLED et remplissant les conditions suivantes:
SPECIFICATIONS
Type de fiche Fiche Nema 5-15 broches
Cordon Type SVT ou SJT, minimum 3
×
18 AWG
Longueur Maximum 15 pieds
Tension Minimum 7 A, 125 V
As an
E
NERGY
S
TAR Partner, Sony
Corporation has determined that this
product meets the
E
NERGY
S
TAR
guidelines for energy efficiency.
Declaration of Conformity
Trade Name: Sony
Model No.: CPD-E100
Responsible Party: Sony Electronics Inc.
Address: 1 Sony Drive, Park Ridge, NJ. 07656 USA
Telephone No.: 201-930-6970
This device complies with Part 15 of the FCC Rules. Operation is
subject to the following two conditions: (1) This device may not
cause harmful interference, and (2) this device must accept any
interference received, including interference that may cause
undesired operation.
01US01COV-UC.book Page 2 Thursday, July 1, 1999 5:01 PM

3
Table of Contents
• Trinitron
is a registered trademark of
Sony Corporation.
• Macintosh is a trademark licensed to
Apple Computer, Inc., registered in the
U.S.A. and other countries.
• Windows
and MS-DOS are registered
trademarks of Microsoft Corporation in
the United States and other countries.
• IBM PC/AT and VGA are registered
trademarks of IBM Corporation of the
U.S.A.
• VESA and DDC
are trademarks of the
Video Electronics Standard
Association.
•
E
NERGY
S
TAR is a U.S. registered
mark.
• All other product names mentioned
herein may be the trademarks or
registered trademarks of their respective
companies.
• Furthermore, “
” and “
” are not
mentioned in each case in this manual.
US
C:\WIN95-E\DESKTOP\CPD E100\386765901CPDE100UC\386765901CPDE100UC\01US01COV-
UCTOC.fm
masterpage:Toc.master
CPD-E100
3-867-659-
01
(1)
Precautions. . . . . . . . . . . . . . . . . . . . . . . . . . . . . . . . . . . . . . . . . . . . 4
Identifying parts and controls . . . . . . . . . . . . . . . . . . . . . . . . . . . . . . 5
Setup. . . . . . . . . . . . . . . . . . . . . . . . . . . . . . . . . . . . . . . . . .6
Step 1:
Connect your monitor to your computer . . . . . . . . . . . . . . . 6
Step 2:
Connect the power cord. . . . . . . . . . . . . . . . . . . . . . . . . . . . 6
Step 3:
Turn on the monitor and computer . . . . . . . . . . . . . . . . . . . 7
Selecting the on-screen menu language
(LANGUAGE/INFORMATION) . . . . . . . . . . . . . . . . . . . . . . . . . . . . . 7
Customizing Your Monitor . . . . . . . . . . . . . . . . . . . . . . . .8
Navigating the menu. . . . . . . . . . . . . . . . . . . . . . . . . . . . . . . . . . . . . 8
Adjusting the brightness and contrast. . . . . . . . . . . . . . . . . . . . . . . . 9
Adjusting the horizontal size or centering of the picture
(H-SIZE/CENTER) . . . . . . . . . . . . . . . . . . . . . . . . . . . . . . . . . . . . . 10
Adjusting the vertical size or centering of the picture
(V-SIZE/CENTER) . . . . . . . . . . . . . . . . . . . . . . . . . . . . . . . . . . . . . 10
Adjusting the curvature of the picture’s sides
(PIN/PIN BALANCE). . . . . . . . . . . . . . . . . . . . . . . . . . . . . . . . . . . . 10
Adjusting the angle of the picture’s sides
(KEY/KEY BALANCE) . . . . . . . . . . . . . . . . . . . . . . . . . . . . . . . . . . 10
Adjusting the picture’s rotation (ROTATION) . . . . . . . . . . . . . . . . . 11
Enlarging or reducing the picture (ZOOM) . . . . . . . . . . . . . . . . . . . 11
Adjusting the color of the picture (COLOR) . . . . . . . . . . . . . . . . . . 11
Additional settings (DEGAUSS/CANCEL MOIRE). . . . . . . . . . . . . 12
Resetting the adjustments . . . . . . . . . . . . . . . . . . . . . . . . . . . . . . . 12
Technical Features . . . . . . . . . . . . . . . . . . . . . . . . . . . . .13
Preset and user modes. . . . . . . . . . . . . . . . . . . . . . . . . . . . . . . . . . 13
Power saving function. . . . . . . . . . . . . . . . . . . . . . . . . . . . . . . . . . . 13
Troubleshooting. . . . . . . . . . . . . . . . . . . . . . . . . . . . . . . .13
If thin line appears on your screen (damper wire) . . . . . . . . . . . . . 13
On-screen messages . . . . . . . . . . . . . . . . . . . . . . . . . . . . . . . . . . . 13
Trouble symptoms and remedies . . . . . . . . . . . . . . . . . . . . . . . . . . 14
Self-diagnosis function . . . . . . . . . . . . . . . . . . . . . . . . . . . . . . . . . . 16
Specifications. . . . . . . . . . . . . . . . . . . . . . . . . . . . . . . . . .16
Appendix. . . . . . . . . . . . . . . . . . . . . . . . . . . . . . . . . . . . . . . i
Preset mode timing table . . . . . . . . . . . . . . . . . . . . . . . . . . . . . . . . . .i
01US01COV-UC.book Page 3 Thursday, July 1, 1999 5:01 PM
4
C:\WIN95-E\DESKTOP\CPD E100\386765901CPDE100UC\386765901CPDE100UC\01US03BAS-
UC.fm
masterpage:Left
CPD-E100
3-867-659-
01
(1)
Precautions
Warning on power connections
• Use the supplied power cord. If you use a different power cord,
be sure that it is compatible with your local power supply.
For the customers in the U.S.A.
If you do not use the appropriate cord, this monitor will not
conform to mandatory FCC standards.
• Before disconnecting the power cord, wait at least 30 seconds
after turning off the power to allow the static electricity on the
screen’s surface to discharge.
• After the power is turned on, the screen is demagnetized
(degaussed) for about 5 seconds. This generates a strong
magnetic field around the screen which may affect data stored
on magnetic tapes and disks placed near the monitor. Be sure to
keep magnetic recording equipment, tapes, and disks away
from the monitor.
Installation
Do not install the monitor in the following places:
• on surfaces (rugs, blankets, etc.) or near materials (curtains,
draperies, etc.) that may block the ventilation holes
• near heat sources such as radiators or air ducts, or in a place
subject to direct sunlight
• in a place subject to severe temperature changes
• in a place subject to mechanical vibration or shock
• on an unstable surface
• near equipment which generates magnetism, such as a
transformer or high voltage power lines
• near or on an electrically charged metal surface
Maintenance
• Clean the screen with a soft cloth. If you use a glass cleaning
liquid, do not use any type of cleaner containing an anti-static
solution or similar additive as this may scratch the screen’s
coating.
• Do not rub, touch, or tap the surface of the screen with sharp or
abrasive items such as a ballpoint pen or screwdriver. This type
of contact may result in a scratched picture tube.
• Clean the cabinet, panel and controls with a soft cloth lightly
moistened with a mild detergent solution. Do not use any type
of abrasive pad, scouring powder or solvent, such as alcohol or
benzene.
Transportation
When you transport this monitor for repair or shipment, use the
original carton and packing materials.
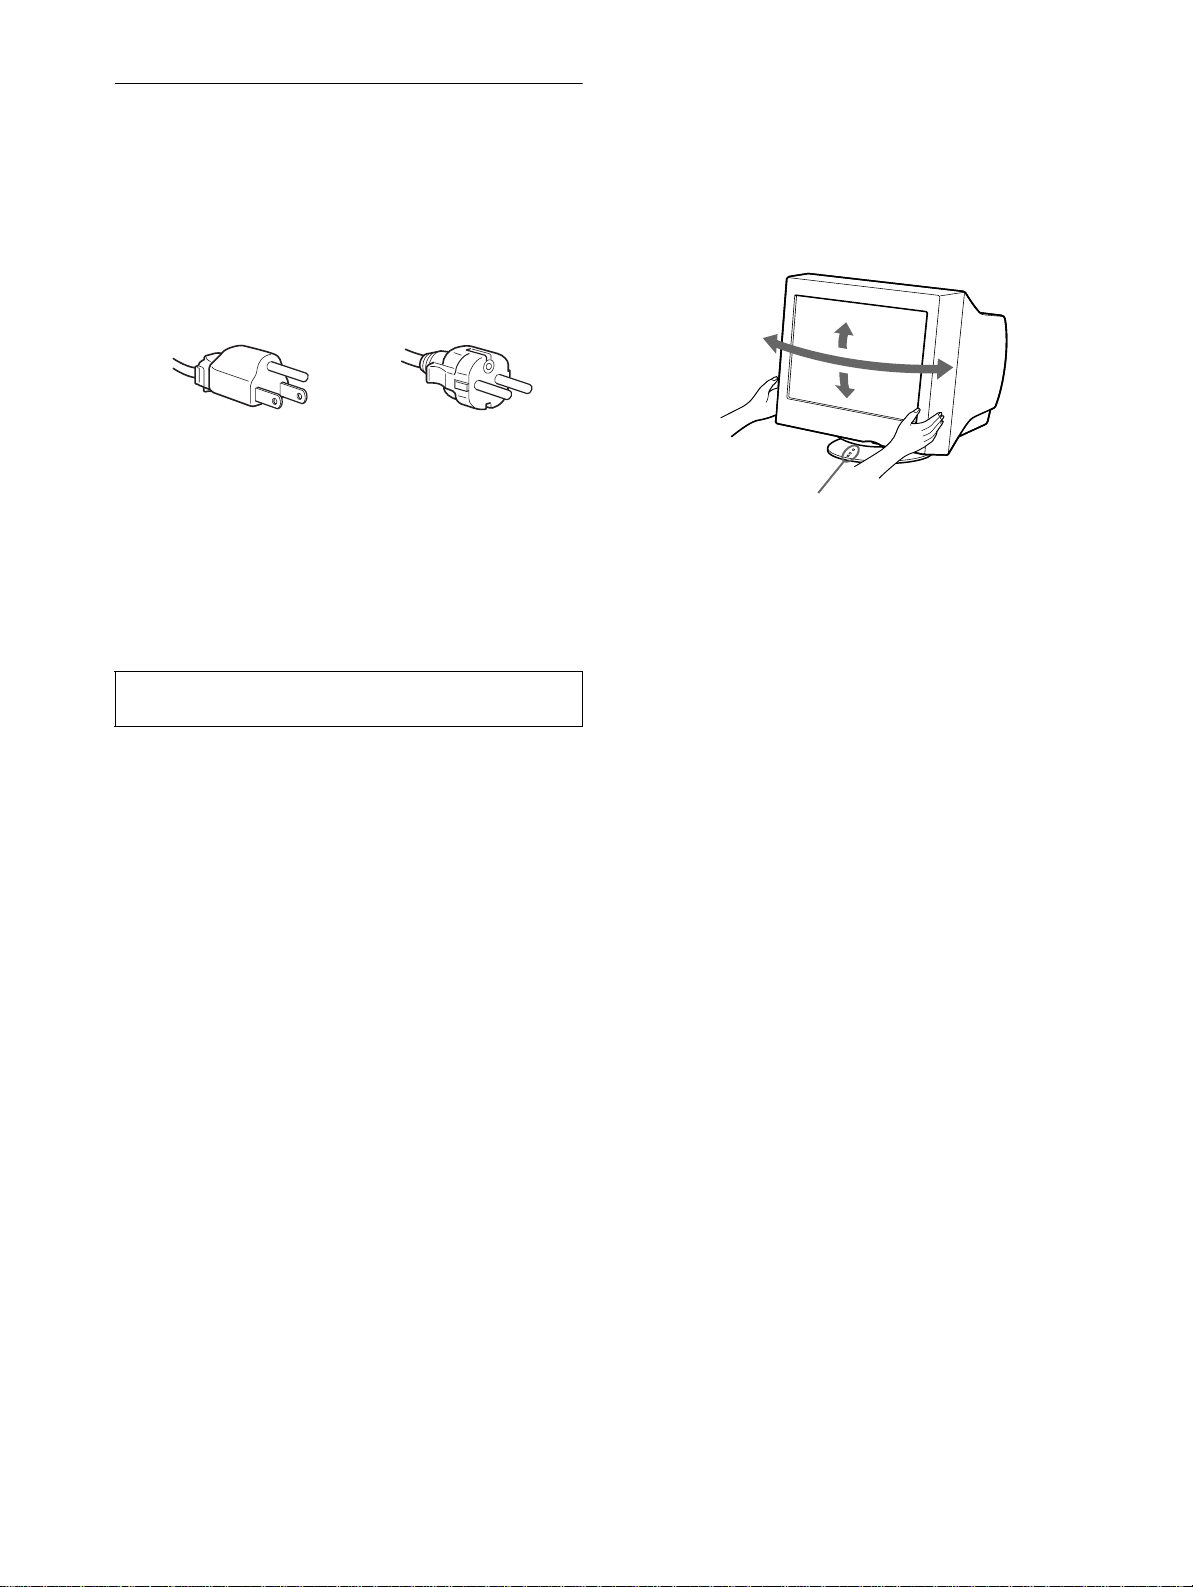
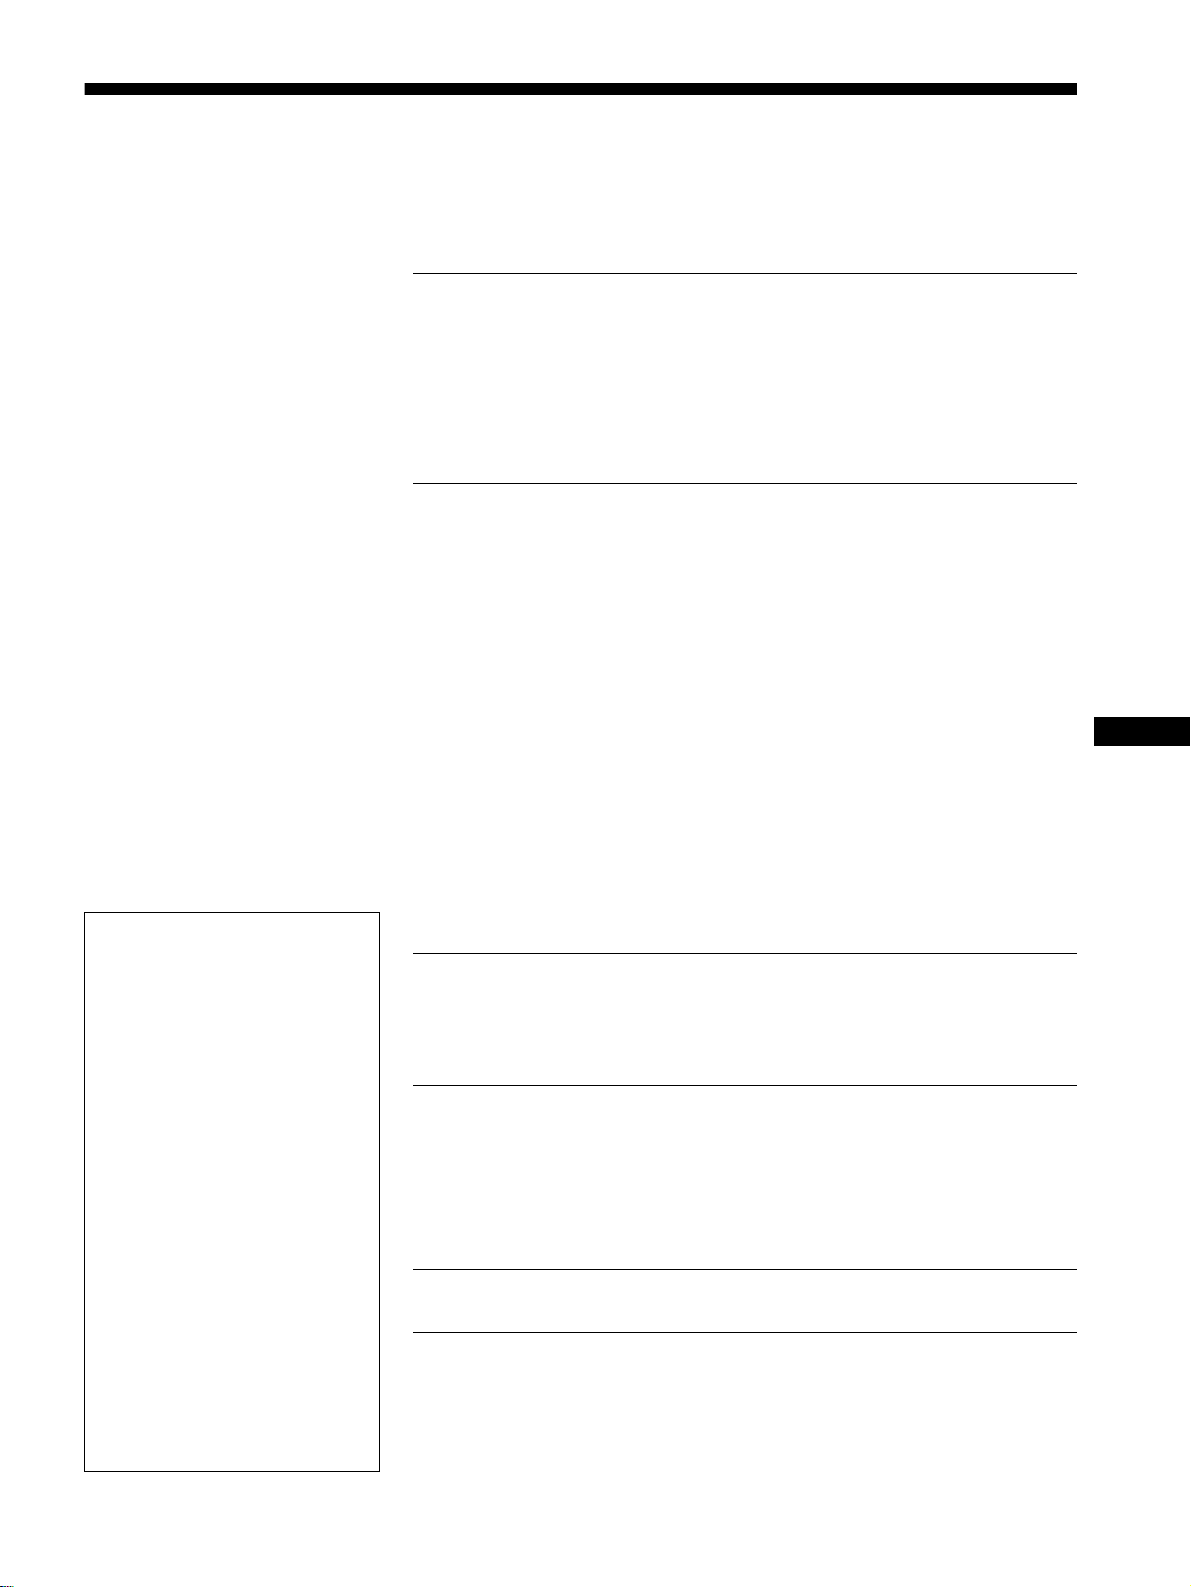
Use of the tilt-swivel
This monitor can be adjusted within the angles shown below. To
find the center of the monitor’s turning radius, align the center of
the monitor’s screen with the centering dots on the stand.
Hold the monitor at the bottom with both hands when you turn it
horizontally or vertically. Be careful not to pinch your fingers at
the back of the monitor when you tilt the monitor up vertically.
The equipment should be installed near an easily accessible
outlet.
Example of plug types
for 100 to 120 V AC
for 200 to 240 V AC
90°
5°
90°
15°
Centering dots
01US01COV-UC.book Page 4 Thursday, July 1, 1999 5:01 PM
5
US
C:\WIN95-E\DESKTOP\CPD E100\386765901CPDE100UC\386765901CPDE100UC\01US03BAS-
UC.fm
masterpage:Right
CPD-E100
3-867-659-
01
(1)
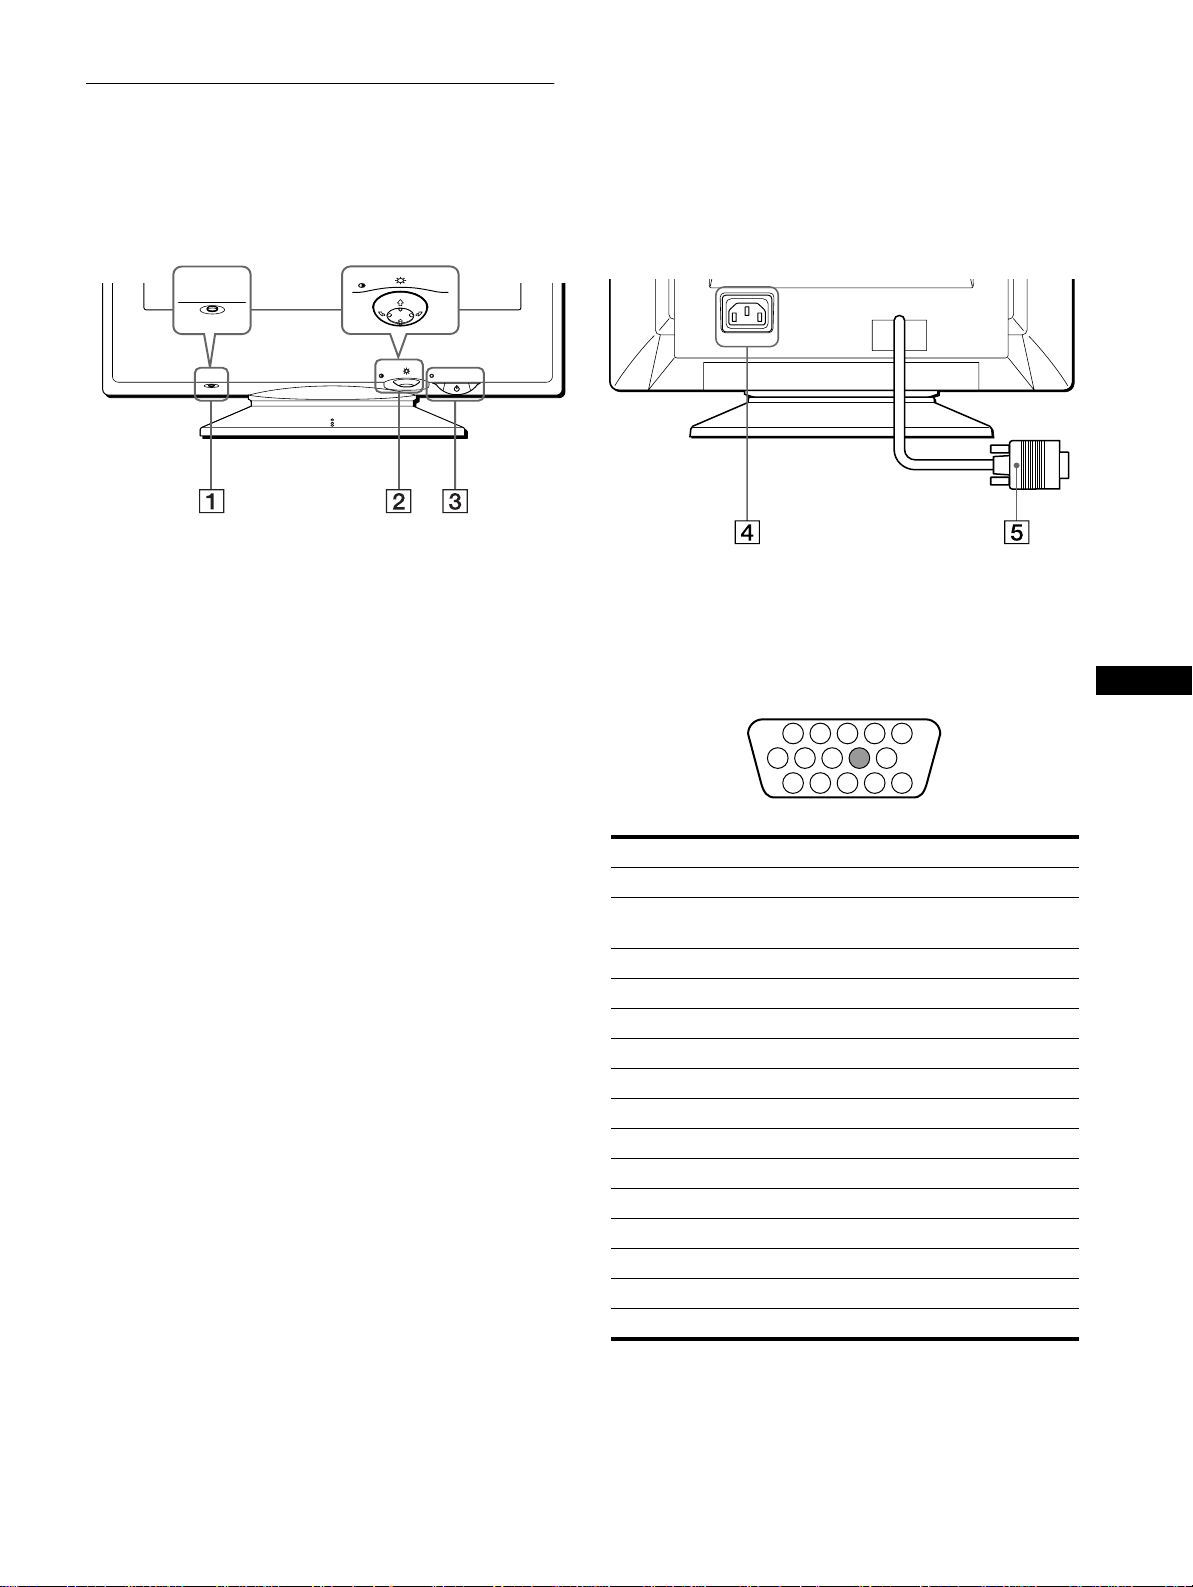
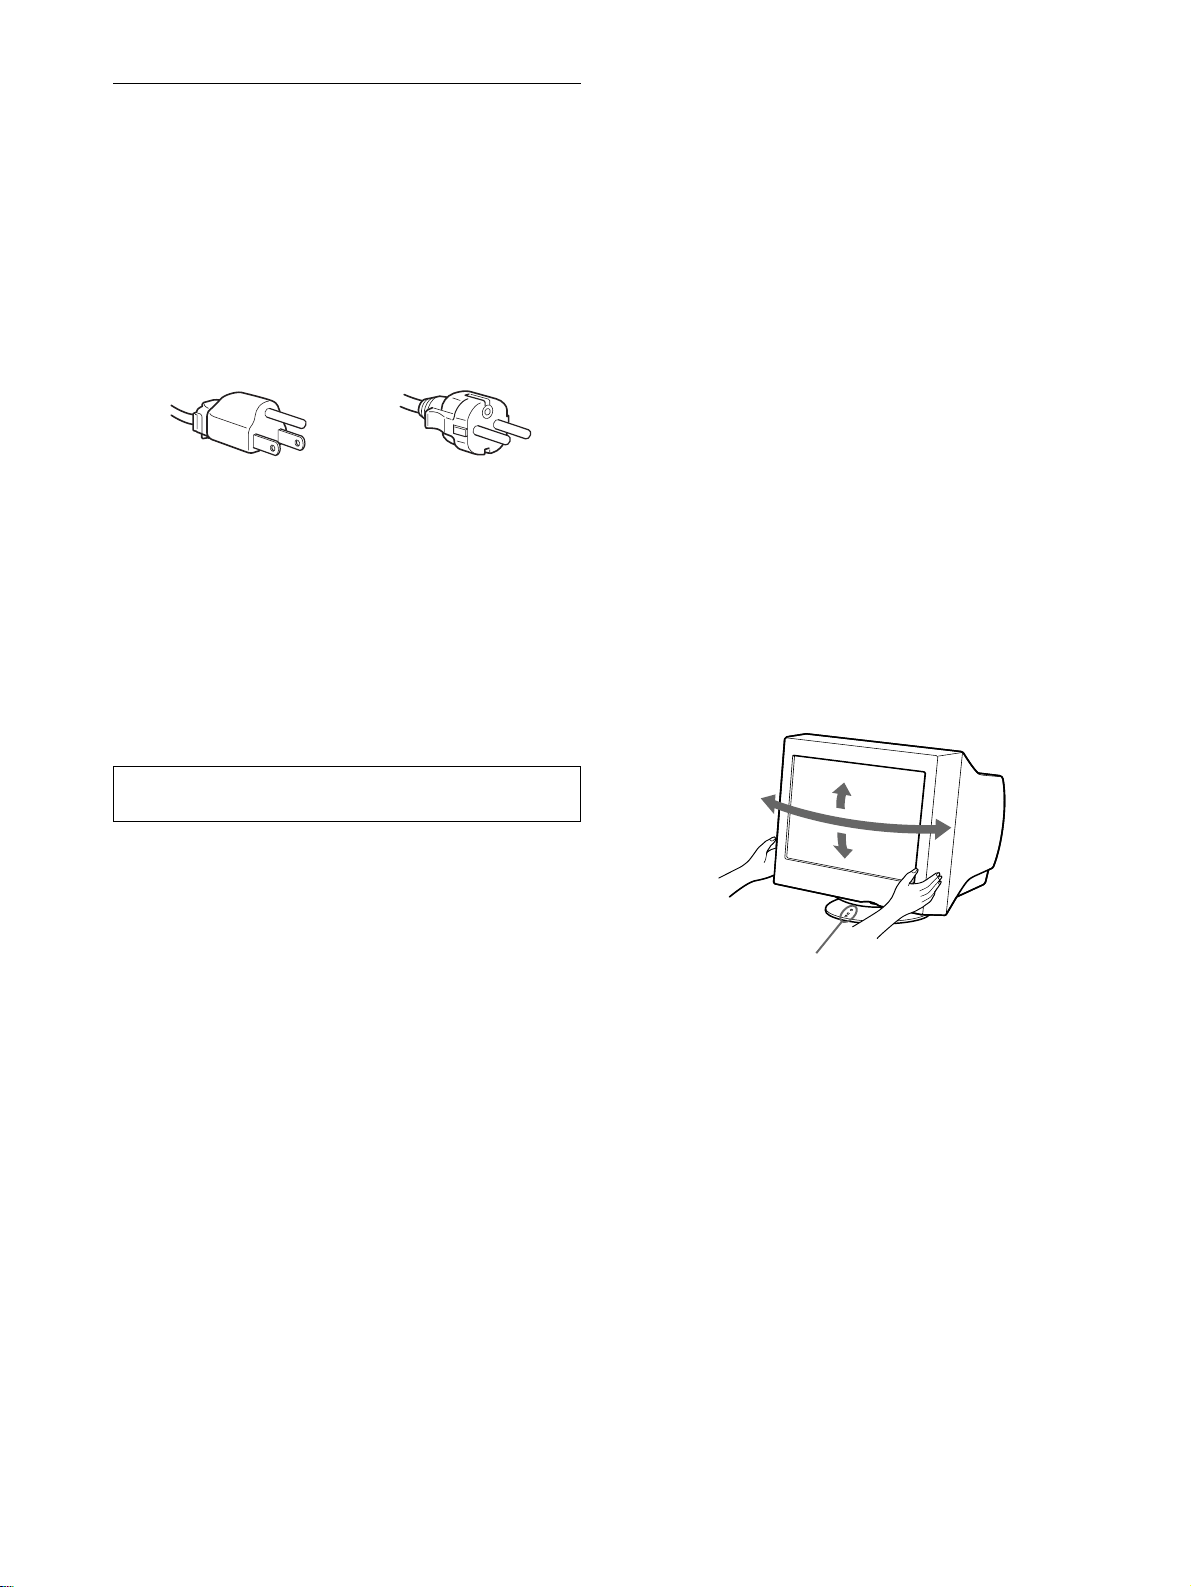
Identifying parts and controls
See the pages in parentheses for further details.
1 RESET button (page 12)
This button resets the adjustments to the factory settings.
2 Control button (page 9)
The control button is used to display the menu and make
adjustments to the monitor, including brightness and contrast
adjustments.
3 1 (power) switch and indicator (pages 7, 13, 16)
This button turns the monitor on and off. The power indicator
lights up in green when the monitor is turned on, and either
flashes in green and orange, or lights up in orange when the
monitor is in power saving mode.
4 AC IN connector (page 6)
This connector provides AC power to the monitor.
5 Video input connector (HD15) (page 6)
This connector inputs RGB video signals (0.700 Vp-p,
positive) and sync signals.
* DDC (Display Data Channel) is a standard of VESA.
AC IN
MENU
RESET
MENU
RESET
RearFront
Pin No. Signal
1Red
2 Green
(Sync on Green)
3Blue
4 ID (Ground)
5 DDC Ground*
6 Red Ground
7 Green Ground
8 Blue Ground
9–
10 Ground
11 ID (Ground)
12 Bi-Directional Data (SDA)*
13 H. Sync
14 V. Sync
15 Data Clock (SCL)*
1 2 3 4
5
876
11 12 13 14 15
10
9
01US01COV-UC.book Page 5 Thursday, July 1, 1999 5:01 PM
6
C:\WIN95-E\DESKTOP\CPD E100\386765901CPDE100UC\386765901CPDE100UC\01US03BAS-
UC.fm
masterpage:Left
CPD-E100
3-867-659-
01
(1)
Setup
Before using your monitor, check that the following accessories
are included in your carton:
• Power cord (1)
• Windows Monitor Information Disk (1)
• Warranty card (1)
• Notes on cleaning the screen’s surface (1)
• This instruction manual (1)
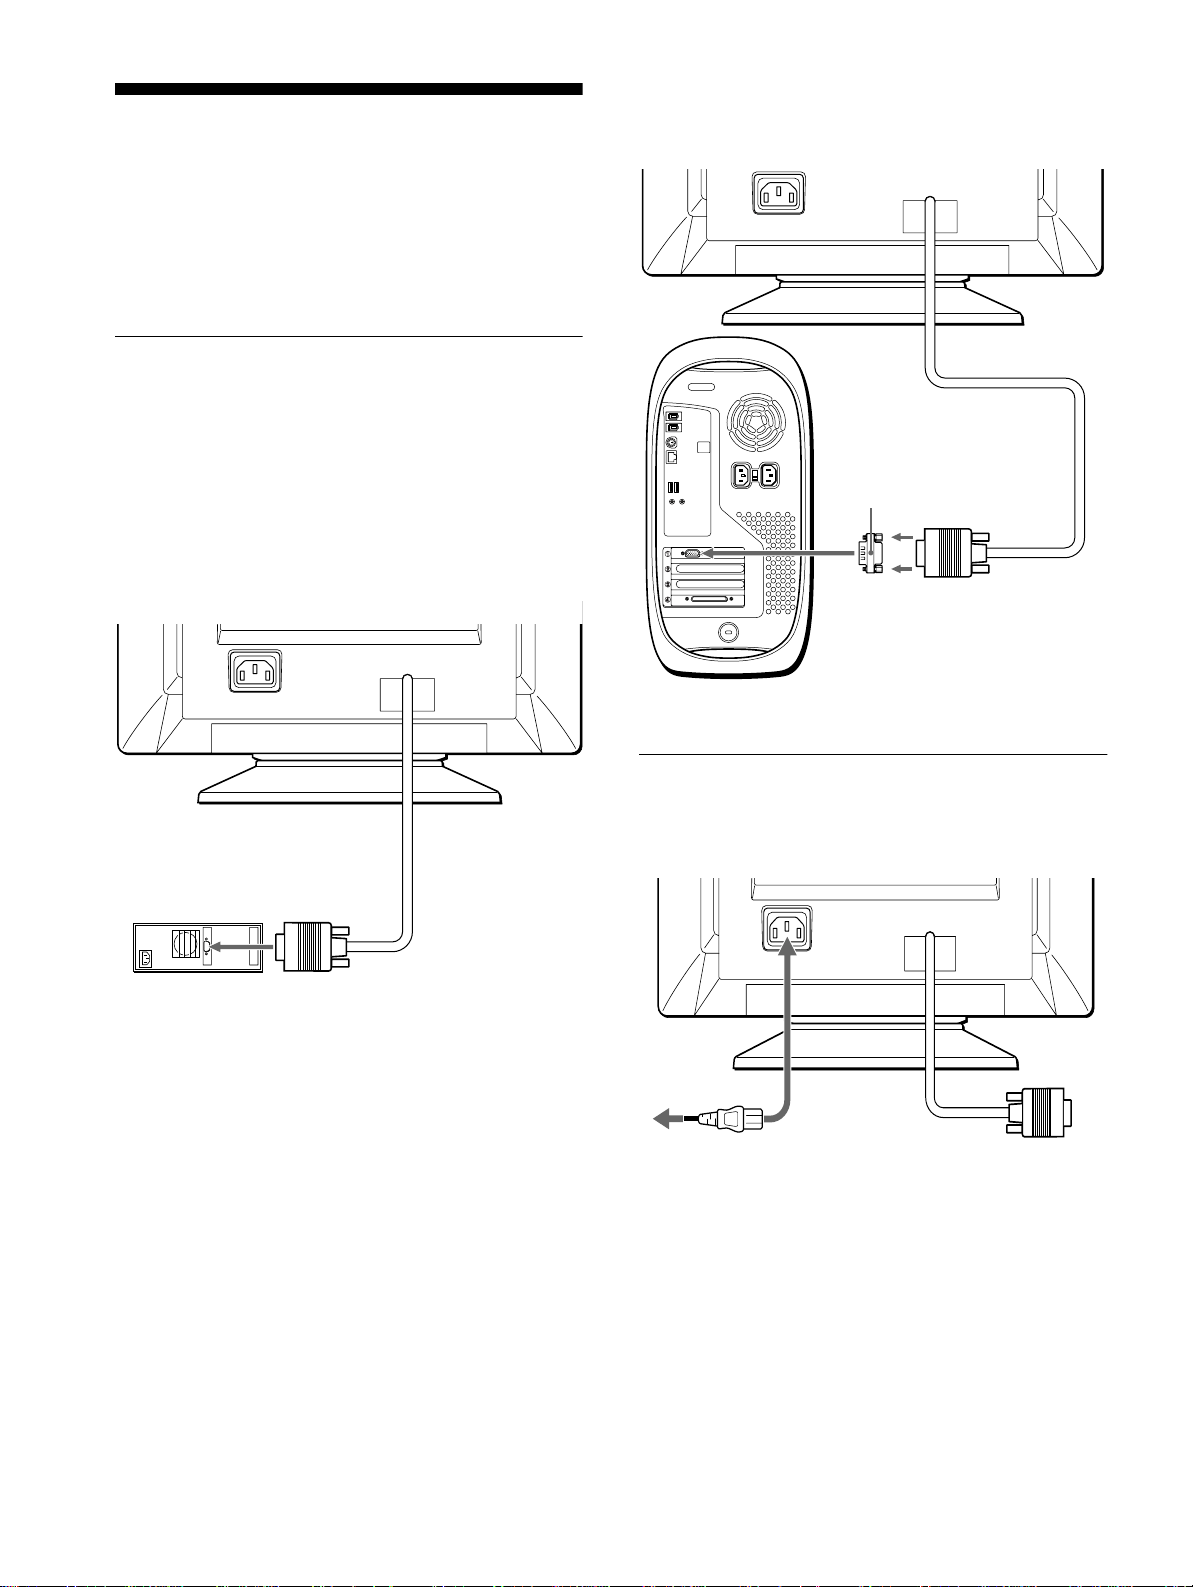
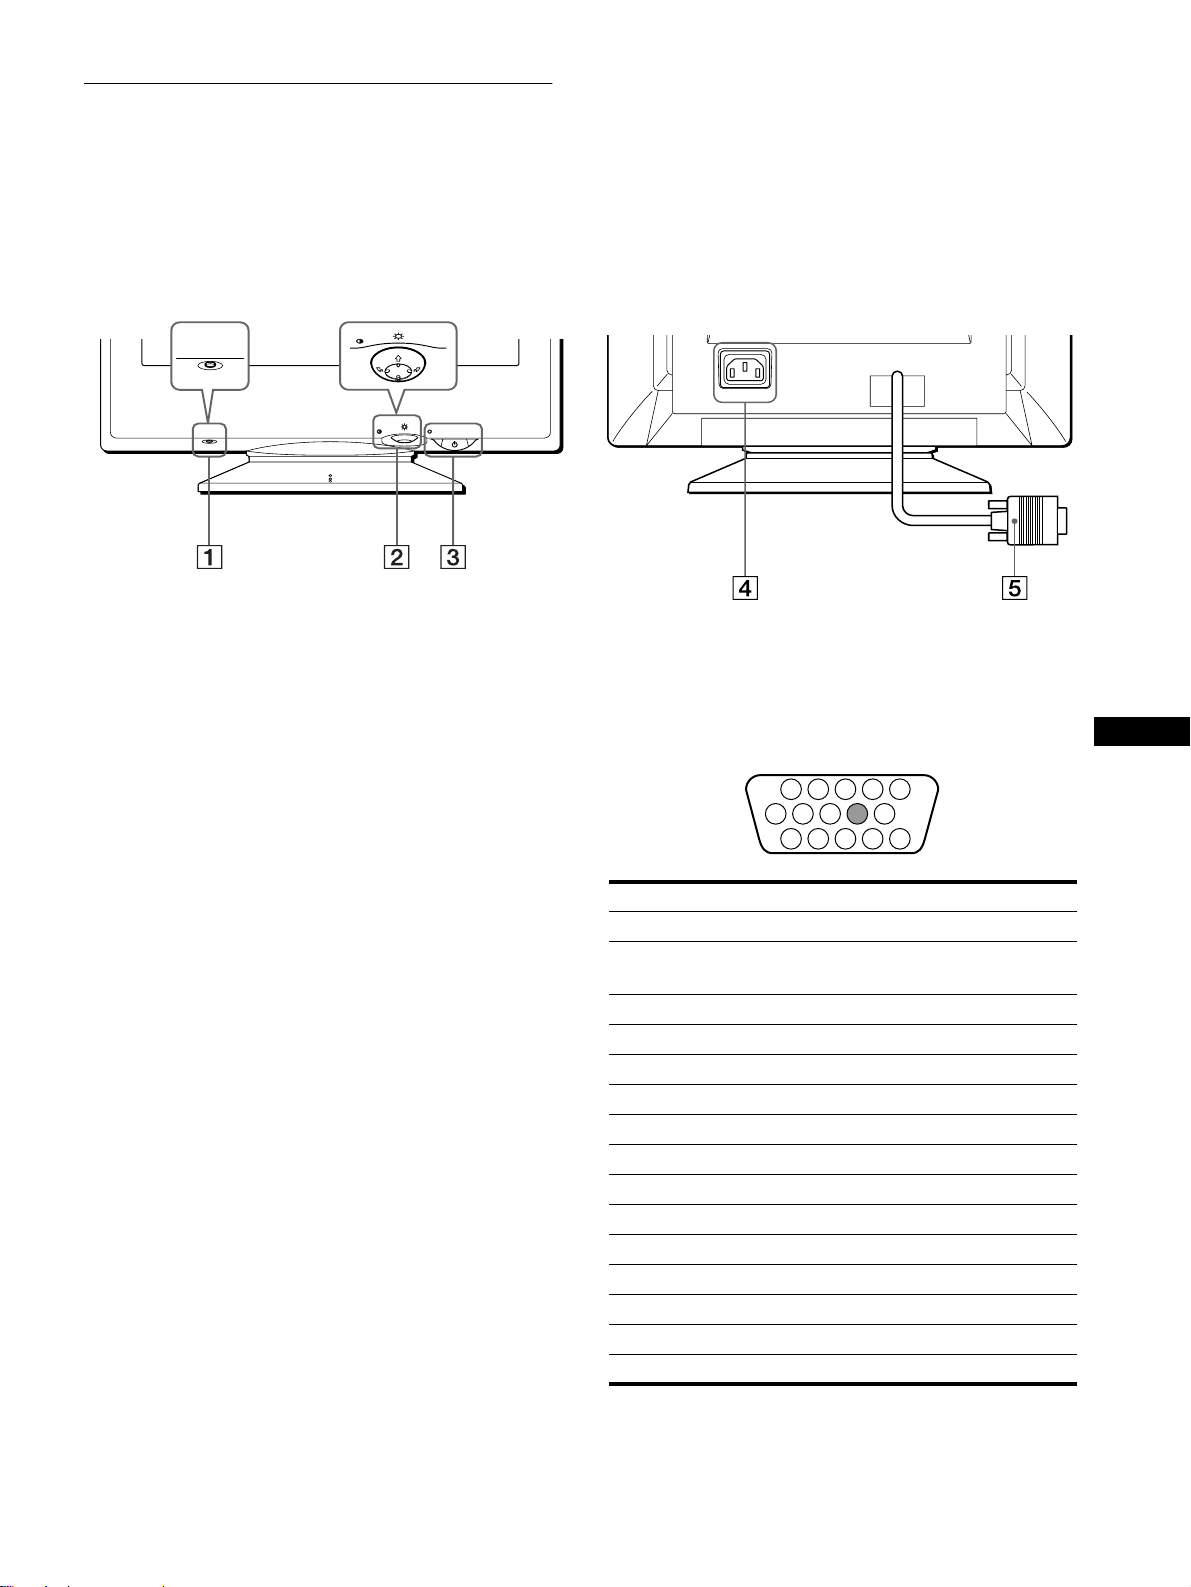
Step 1:Connect your monitor to
your computer
Turn off the monitor and computer before connecting.
Note
Do not touch the pins of the video cable connector as this might bend the
pins.
x
Connecting to an IBM PC/AT or compatible
computer
x
Connecting to a Macintosh or compatible
computer
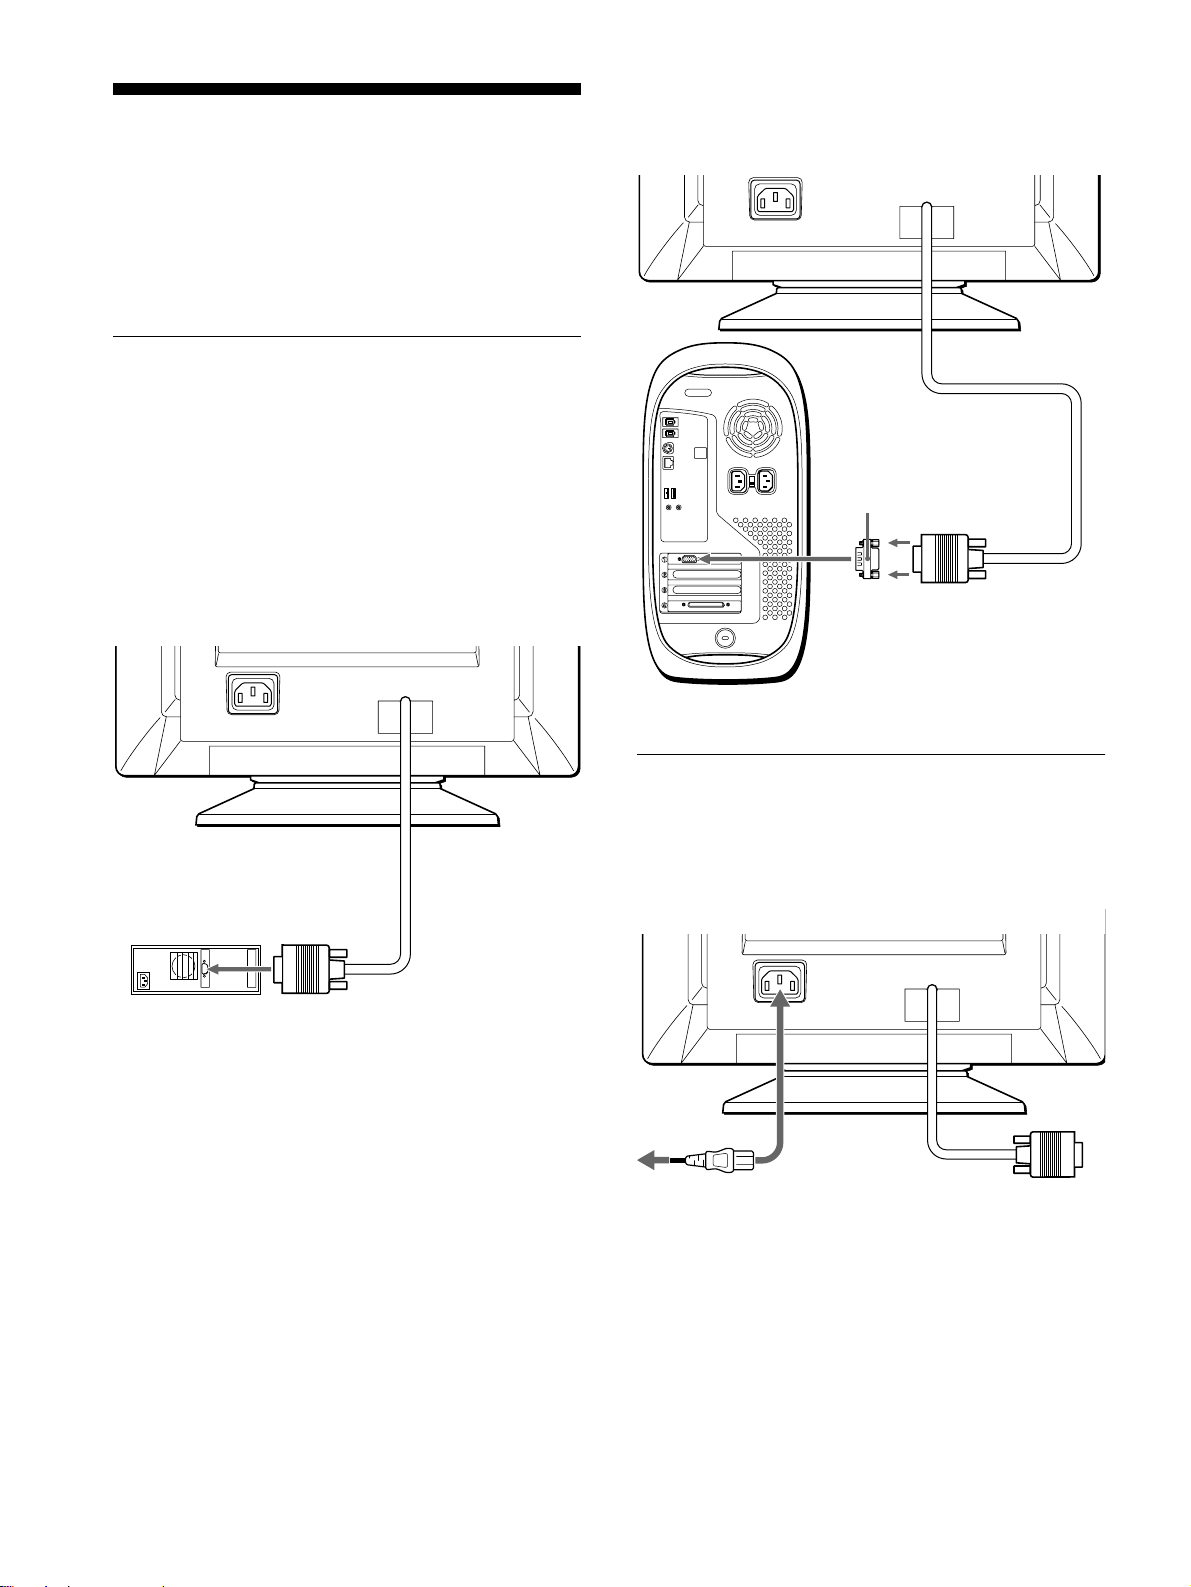
Step 2:Connect the power cord
With the monitor and computer switched off, first connect the
power cord to the monitor, then connect it to a power outlet.
AC IN
IBM PC/AT or
compatible computer
to video output
AC IN
You will need a Macintosh adapter (not supplied).
Macintosh adapter (not supplied)
to video output
Macintosh or
compatible computer
AC IN
to AC IN
to a power outlet
power cord (supplied)
01US01COV-UC.book Page 6 Thursday, July 1, 1999 5:01 PM
7
US
C:\WIN95-E\DESKTOP\CPD E100\386765901CPDE100UC\386765901CPDE100UC\01US03BAS-
UC.fm
masterpage:Right
CPD-E100
3-867-659-
01
(1)
Step 3:Turn on the monitor and
computer
First turn on the monitor, then turn on the computer.
The installation of your monitor is complete.
If necessary, use the monitor’s controls to adjust the picture.
If no picture appears on your screen
• Check that the monitor is correctly connected to the computer.
• If NO INPUT SIGNAL appears on the screen, confirm that
your computer’s graphic board is completely seated in the
correct bus slot.
• If you are replacing an old monitor with this model and OUT
OF SCAN RANGE appears on the screen, reconnect the old
monitor. Then adjust the computer’s graphic board so that the
horizontal frequency is between 30 – 70 kHz, and the vertical
frequency is between 48 – 120 Hz.
For more information about the on-screen messages, see “Trouble
symptoms and remedies” on page 14.
For customers using Windows 95/98
To maximize the potential of your monitor, install the new model
information file from the supplied Windows Monitor Information Disk
onto your PC.
This monitor complies with the “VESA DDC” Plug & Play standard. If
your PC/graphics board complies with DDC, select “Plug & Play Monitor
(VESA DDC)” or this monitor’s model name as the monitor type in the
“Control Panel” of Windows 95/98. If your PC/graphics board has
difficulty communicating with this monitor, load the Windows Monitor
Information Disk and select this monitor’s model name as the monitor
type.
For customers using Windows NT4.0
Monitor setup in Windows NT4.0 is different from Windows 95/98 and
does not involve the selection of monitor type. Refer to the Windows
NT4.0 instruction manual for further details on adjusting the resolution,
refresh rate, and number of colors.
Adjusting the monitor’s resolution and color number
Adjust the monitor’s resolution and color number by referring to your
computer’s instruction manual. The color number may vary according to
your computer or video board. The color palette setting and the actual
number of colors are as follows:
• High Color (16 bit) t 65,536 colors
• True Color (24 bit) t about 16.77 million colors
In true color mode (24 bit), speed may be slower.
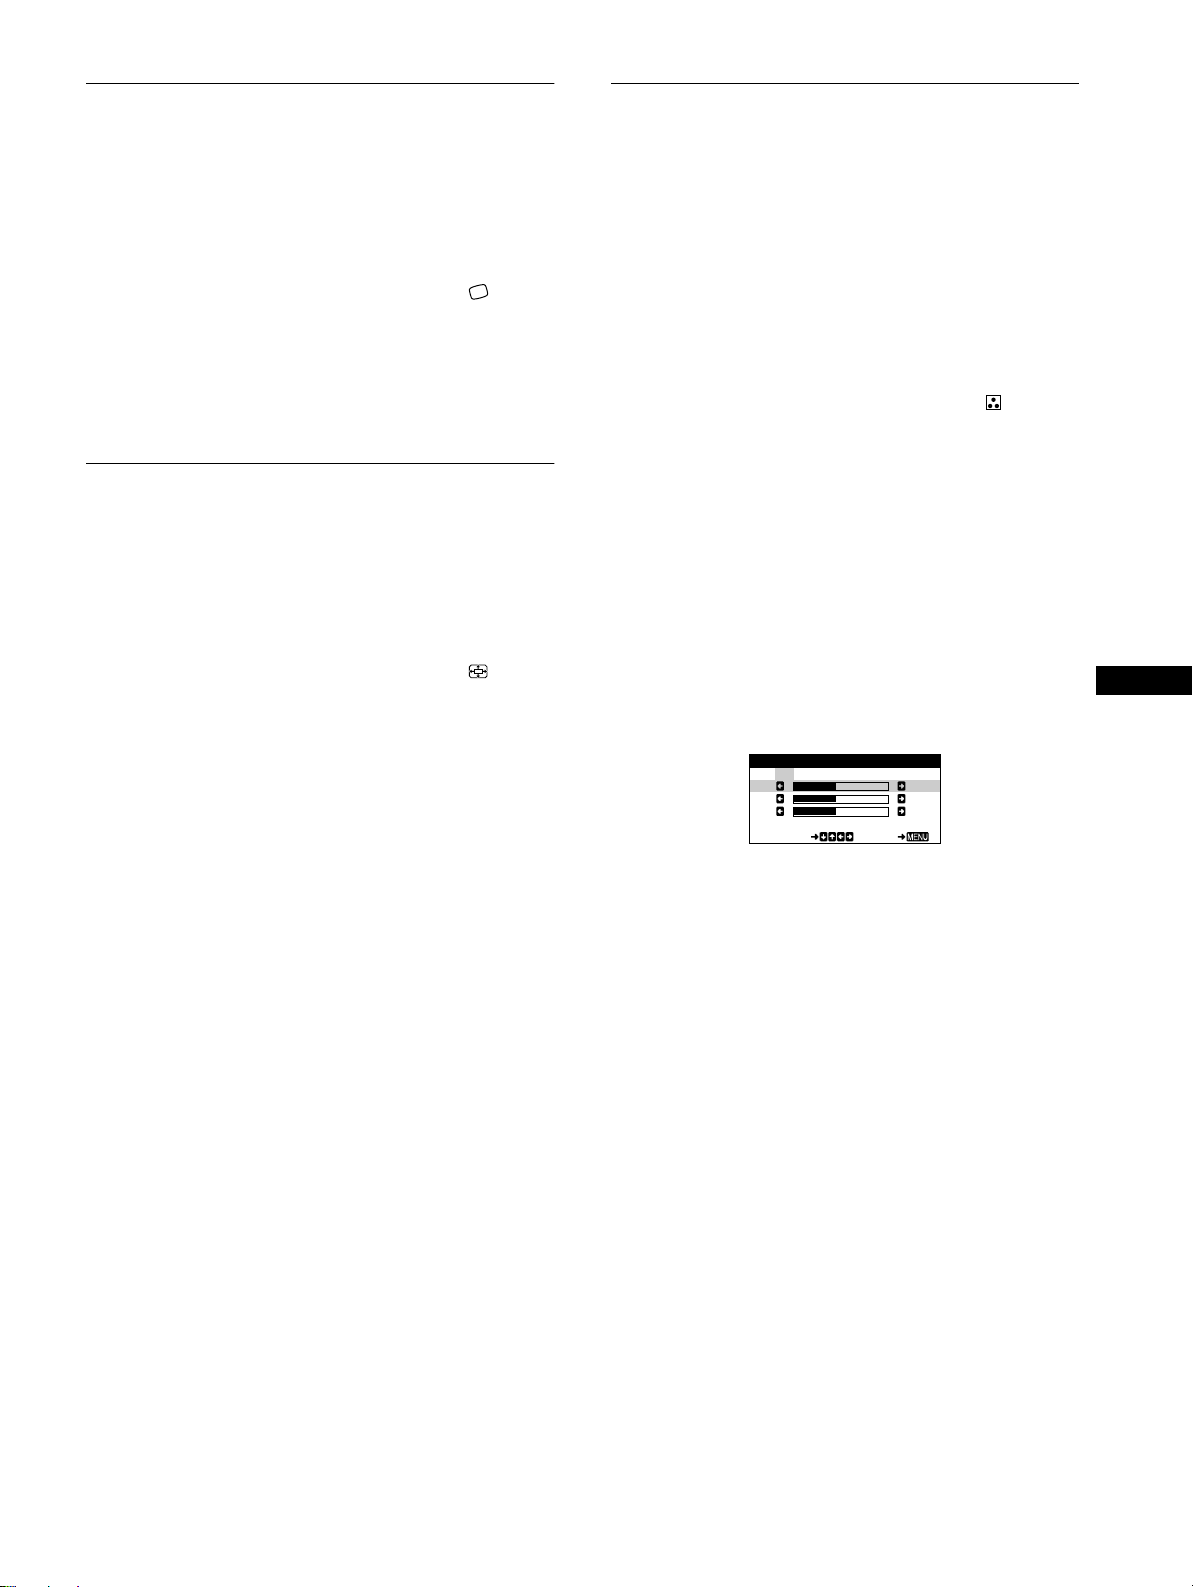
Selecting the on-screen menu
language (LANGUAGE/
INFORMATION)
English, French, German, Italian, Spanish, Russian and Japanese
versions of the on-screen menus are available. The default setting
is English.
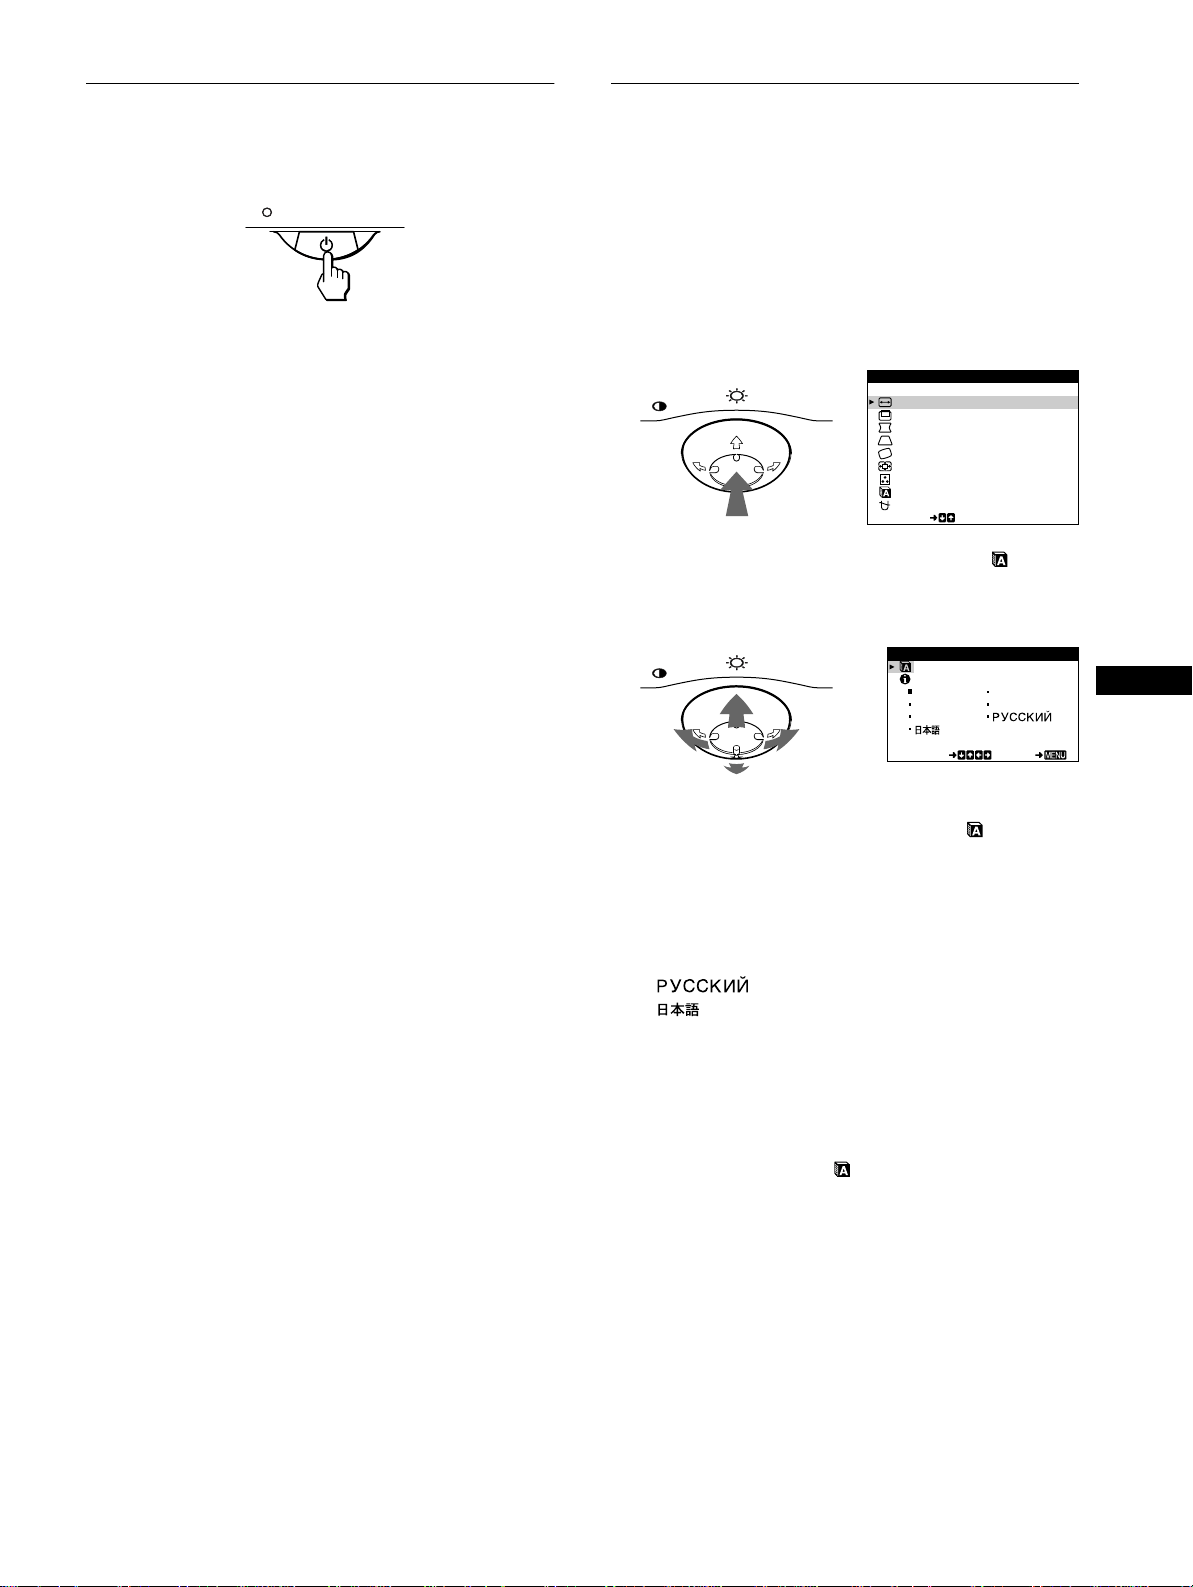
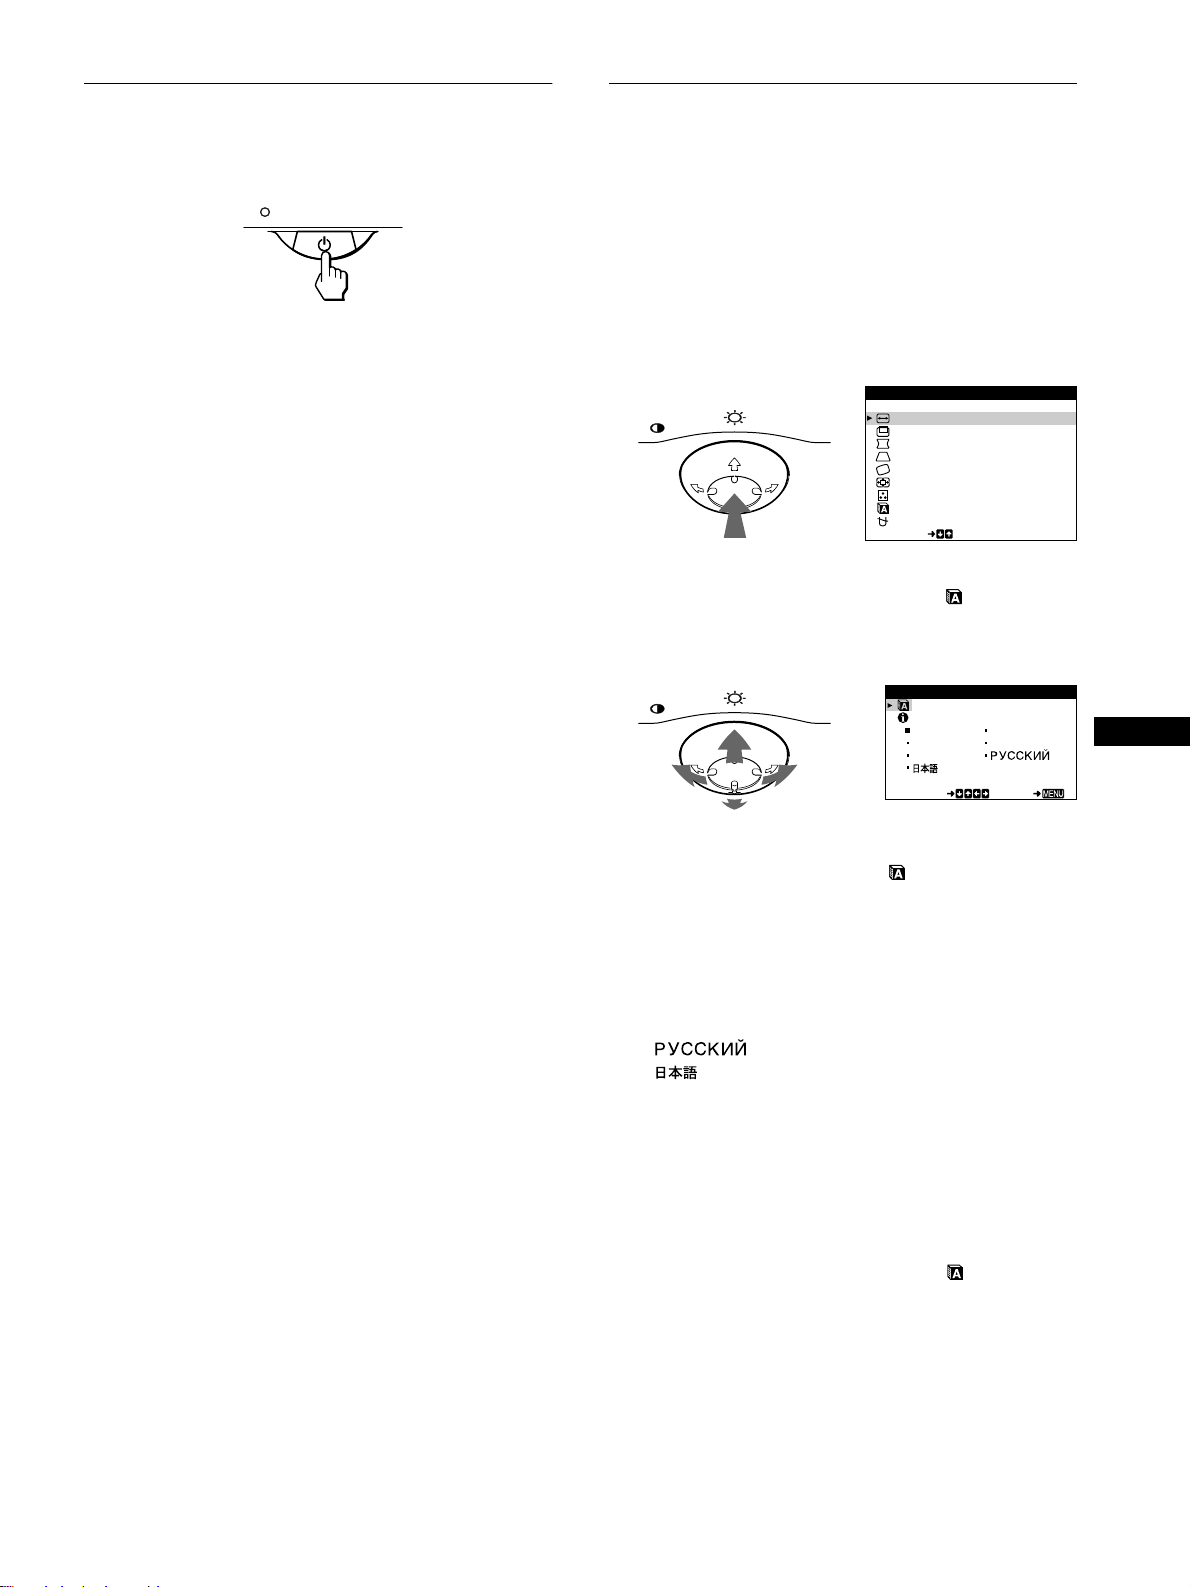
1
Press the center of the control button.
See page 9 for more information on using the control button.
2
Move the control button
m
/
M
to highlight
LANGUAGE/INFORMATION and press the center of
the control button again.
3
Move the control button
m
/
M
to select
(LANGUAGE) and move
<
/
,
to select a language.
• ENGLISH
• FRANÇAIS: French
• DEUTSCH: German
• ITALIANO: Italian
• ESPAÑOL: Spanish
• : Russian
• : Japanese
To close the menu
Press the center of the control button once to return to the main MENU,
and press again selecting EXIT to return to normal viewing. If no buttons
are pressed, the menu closes automatically after about 30 seconds.
To reset to English
Press the RESET button while the (LANGUAGE) menu is displayed
on the screen.
MENU
EXI T
H-SIZE/CENTER
V-SIZE/CENTER
PIN/PIN BALANCE
KEY/KEY BALANCE
ROTATION
ZOOM
COLOR
SELECT
LANGUAGE / I NFORMAT NOI
DEGAUSS /CANCEL MO ERI
MENU
MENU
ENGL ISH FRANÇAI S
DEUTSCH I TAL IANO
ESPAÑOL
SELECT EXI T
LANGUAGE / INFORMAT ION
01US01COV-UC.book Page 7 Thursday, July 1, 1999 5:01 PM
8
C:\WIN95-E\DESKTOP\CPD E100\386765901CPDE100UC\386765901CPDE100UC\01US03BAS-
UC.fm
masterpage:Left
CPD-E100
3-867-659-
01
(1)
Customizing Your Monitor
You can make numerous adjustments to your monitor using the
on-screen menu.
Navigating the menu
Press the center of the control button to display the main MENU
on your screen. See page 9 for more information on using the
control button.
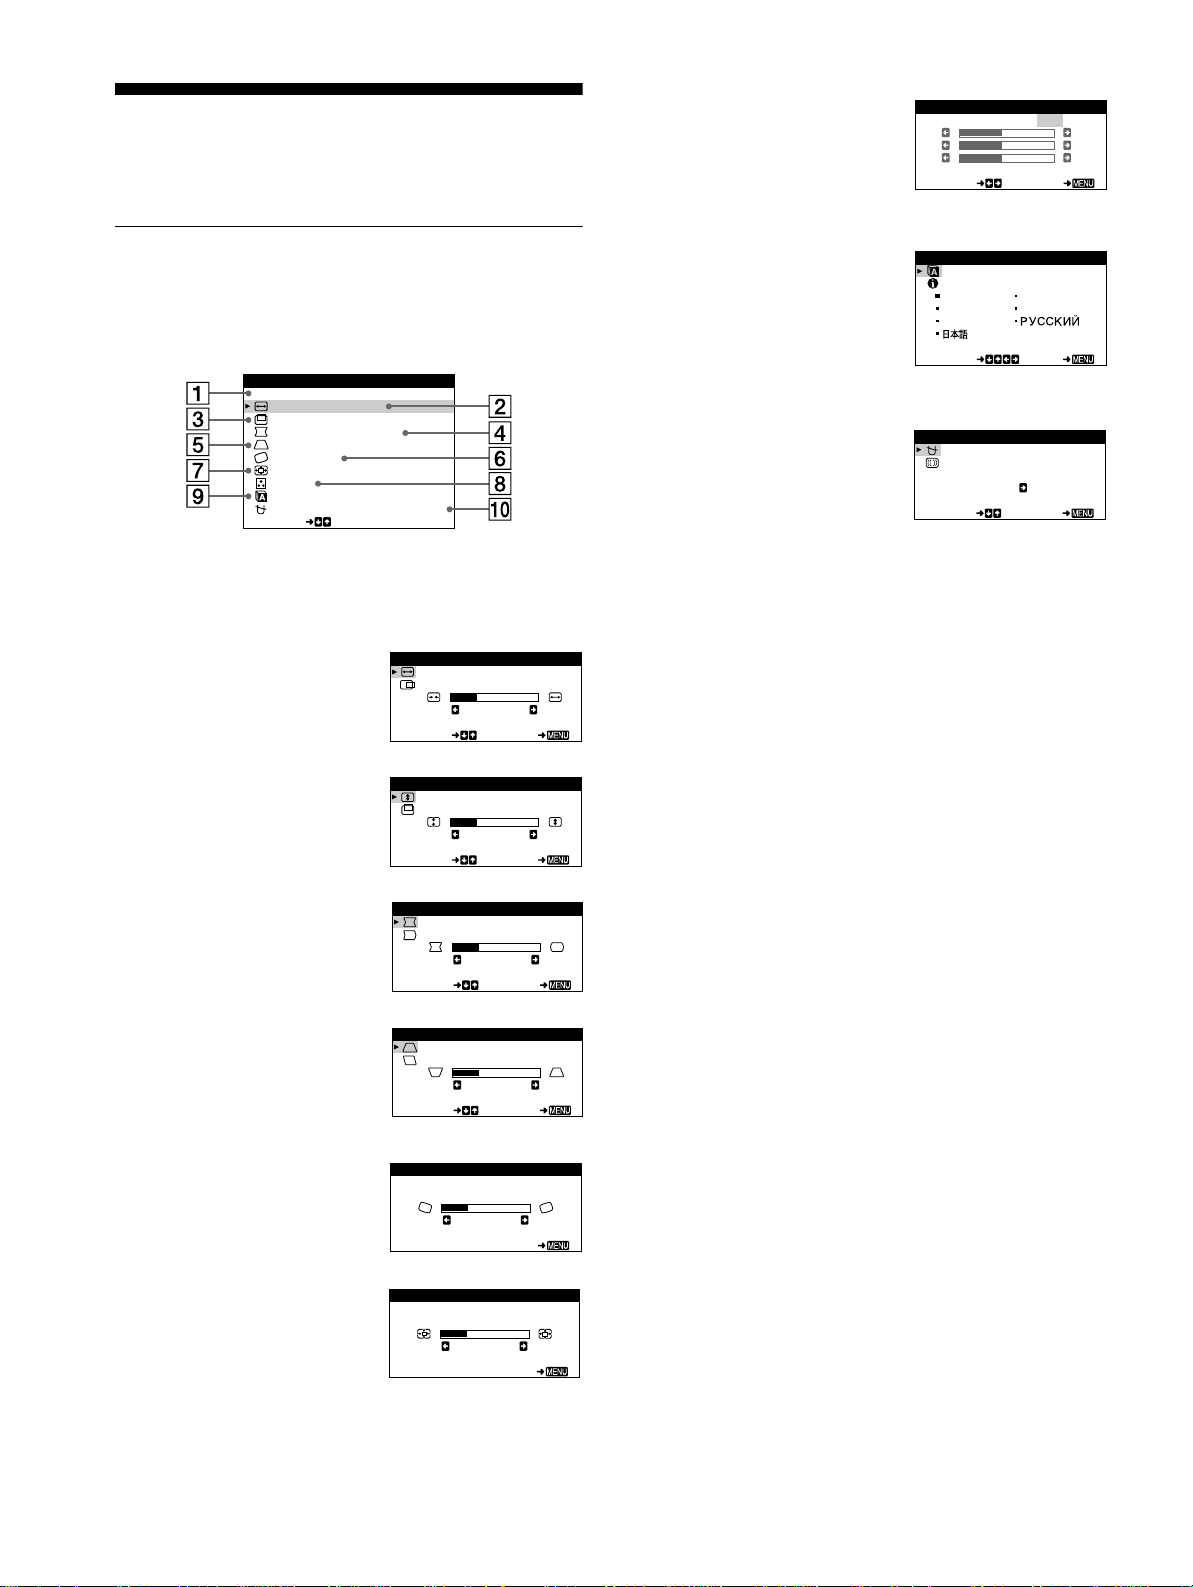
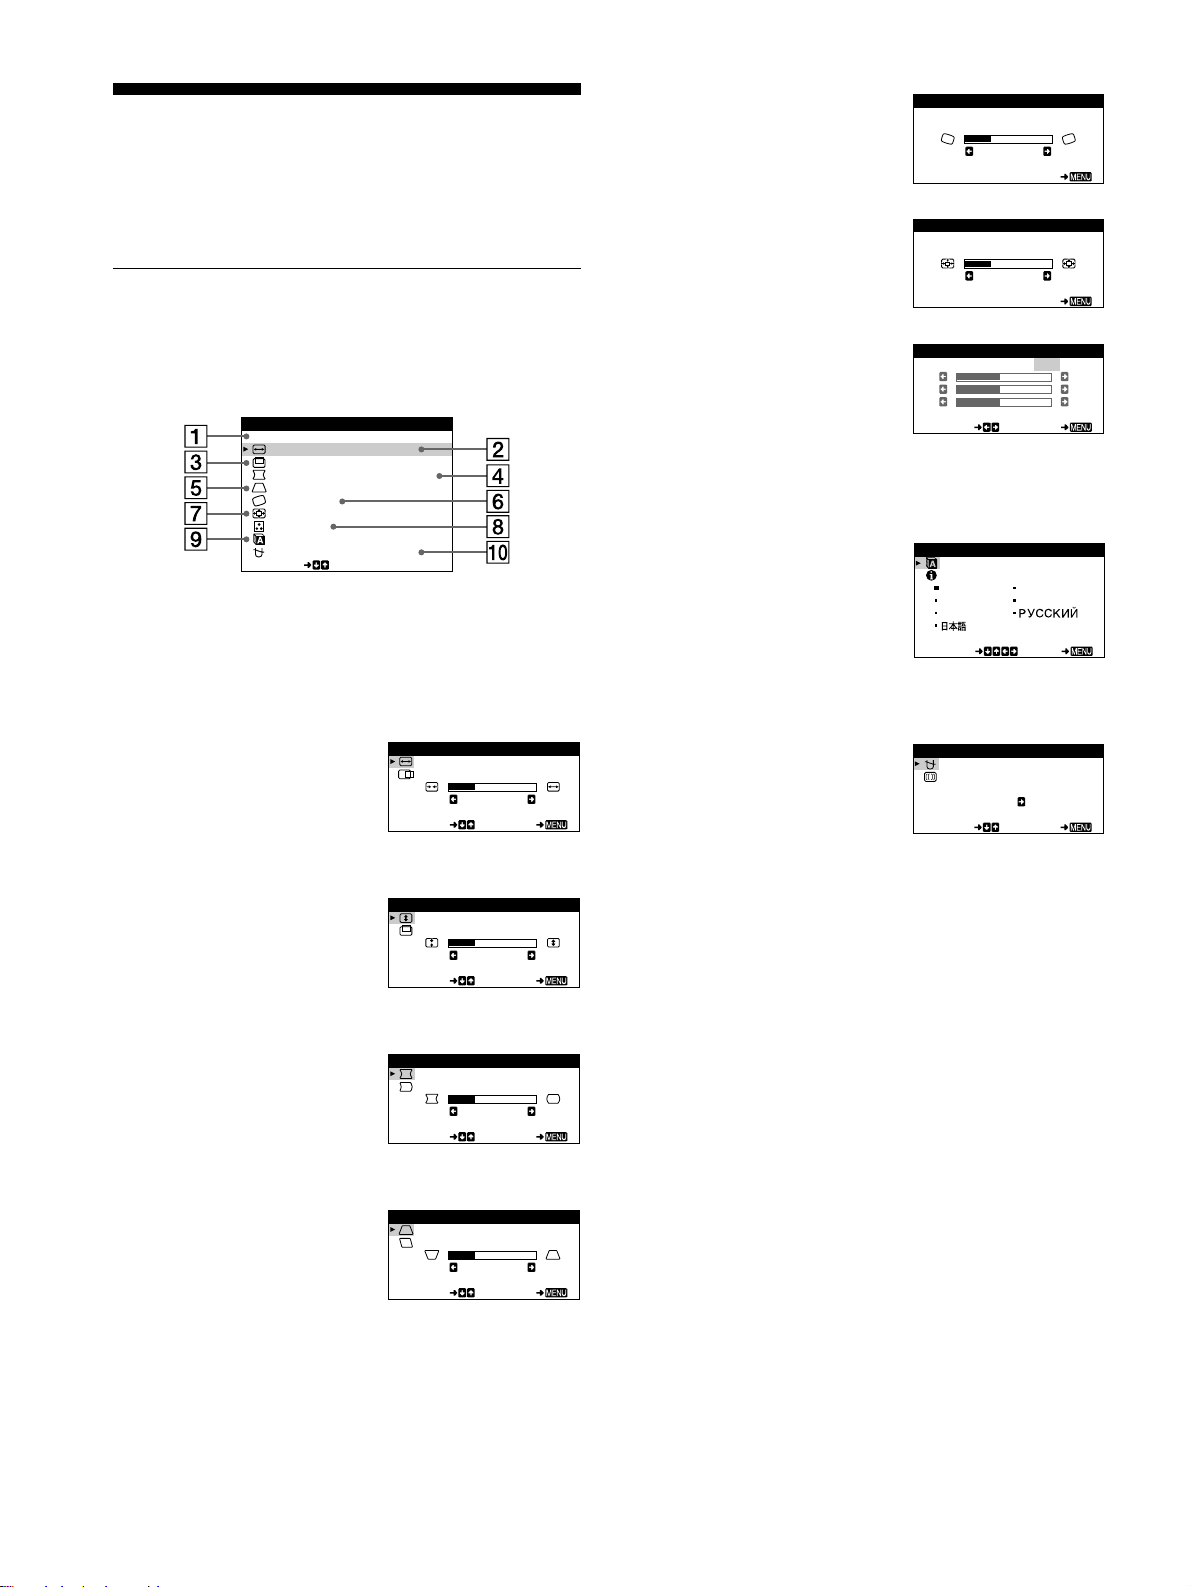
Use the control button to select one of the following menus.
1
EXIT
Select EXIT to close the menu.
2
H-SIZE/CENTER (page 10)
Select the H-SIZE/CENTER
menu to adjust the picture’s
horizontal size and centering.
3
V-SIZE/CENTER (page 10)
Select the V-SIZE/CENTER
menu to adjust the picture’s
vertical size and centering.
4
PIN/PIN BALANCE (page 10)
Select the PIN/PIN BALANCE
menu to adjust the curvature
picture’s sides.
5
KEY/KEY BALANCE
(page 10)
Select the KEY/KEY BALANCE
menu to adjust the angle of the
picture’s sides.
6
ROTATION (page 11)
Select the ROTATION menu to
adjust the picture’s rotation.
7
ZOOM (page 11)
Select the ZOOM menu to enlarge
or reduce the picture.
EXI T
H-SIZE/CENTER
V-SIZE/CENTER
PIN/PIN BALANCE
KEY/KEY BALANCE
ROTATION
ZOOM
COLOR
SELECT
LANGUAGE / I NFORMAT NOI
DEGAUSS /CANCEL MO ERI
MENU
H-SIZE
26
SELECT EXI T
H-SI ZE/CENTER
V-SIZE
26
SELECT EXI T
V-SIZE/CENTER
PIN
26
SELECT EXI T
PIN/PIN BALANCE
KEY
26
SELECT EXI T
KEY/ KEY BALANCE
ROTAT ION
26
EXI T
ROTAT ION
ZOOM
26
EXI T
ZOOM
8
COLOR (page 11)
Select the COLOR menu to adjust
the picture’s color temperature.
You can use this to match the
monitor’s colors to a printed
picture’s colors.
9
LANGUAGE/INFORMATION
(page 7, 15)
Select the LANGUAGE/
INFORMATION menu to choose
the on-screen menu’s language
and display this monitor’s
information box.
q;
DEGAUSS/CANCEL MOIRE
(page 12)
Select the DEGAUSS/CANCEL
MOIRE menu to degauss the
screen and adjust the moire
cancellation level.
KKK
R50
G50
B50
SELECT EXI T
COLOR
5000 6500 9300
USER
ENGL ISH FRANÇAI S
DEUTSCH I TAL IANO
ESPAÑOL
SELECT EXI T
LANGUAGE / INFORMAT ION
DEGAUSS
ON
SELECT EXI T
DEGAUSS /CANCEL MOI RE
01US01COV-UC.book Page 8 Thursday, July 1, 1999 5:01 PM
9
US
C:\WIN95-E\DESKTOP\CPD E100\386765901CPDE100UC\386765901CPDE100UC\01US03BAS-
UC.fm
masterpage:Right
CPD-E100
3-867-659-
01
(1)
x
Using the control button
1
Display the main MENU.
Press the center of the control button to display the main
MENU on your screen.
2
Select the menu you want to adjust.
Highlight the desired menu by moving the control button
towards the rear to go up (M), towards the front to go down
(m), and left (<) or right (,) to move sideways.
3
Adjust the menu.
Move the control button left (<) or right (,) to make the
adjustment.
4
Close the menu.
Press the center of the control button once to return to the
main MENU, and press again selecting EXIT to return to
normal viewing. If no buttons are pressed, the menu closes
automatically after about 30 seconds.
x
Resetting the adjustments
Press the RESET button. See page 12 for more information on
resetting the adjustments.
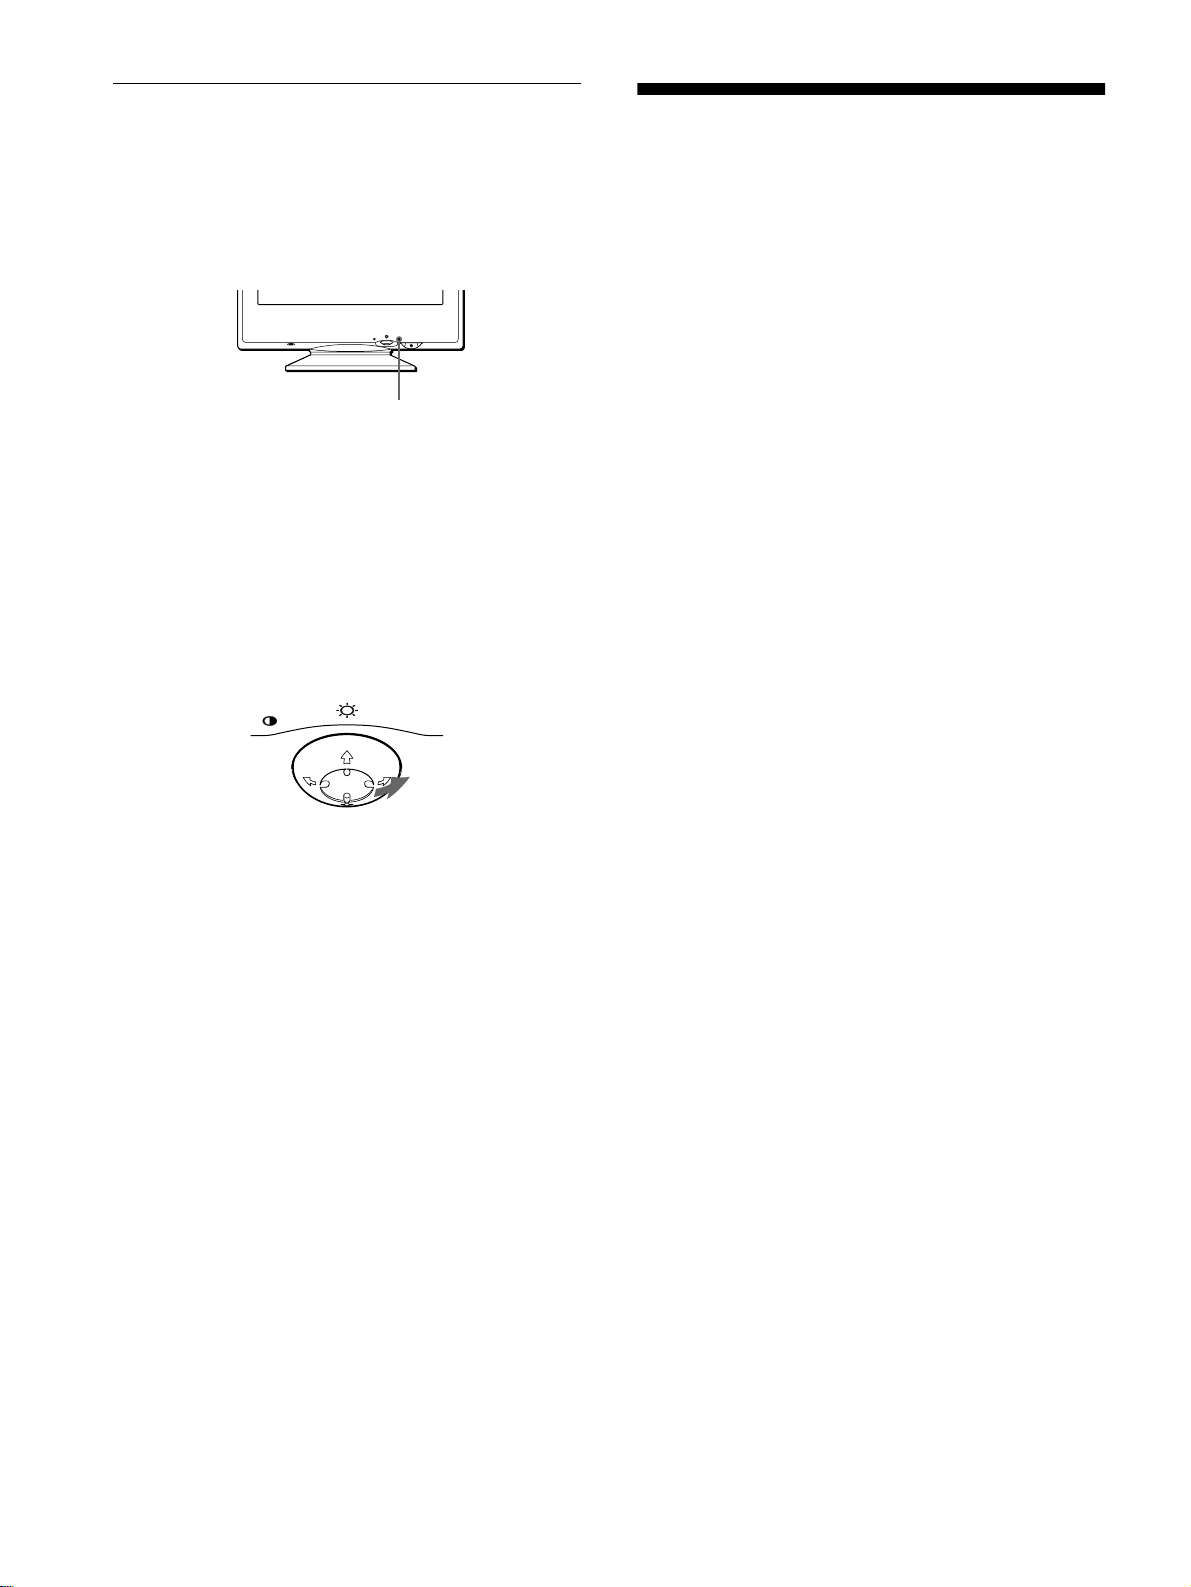
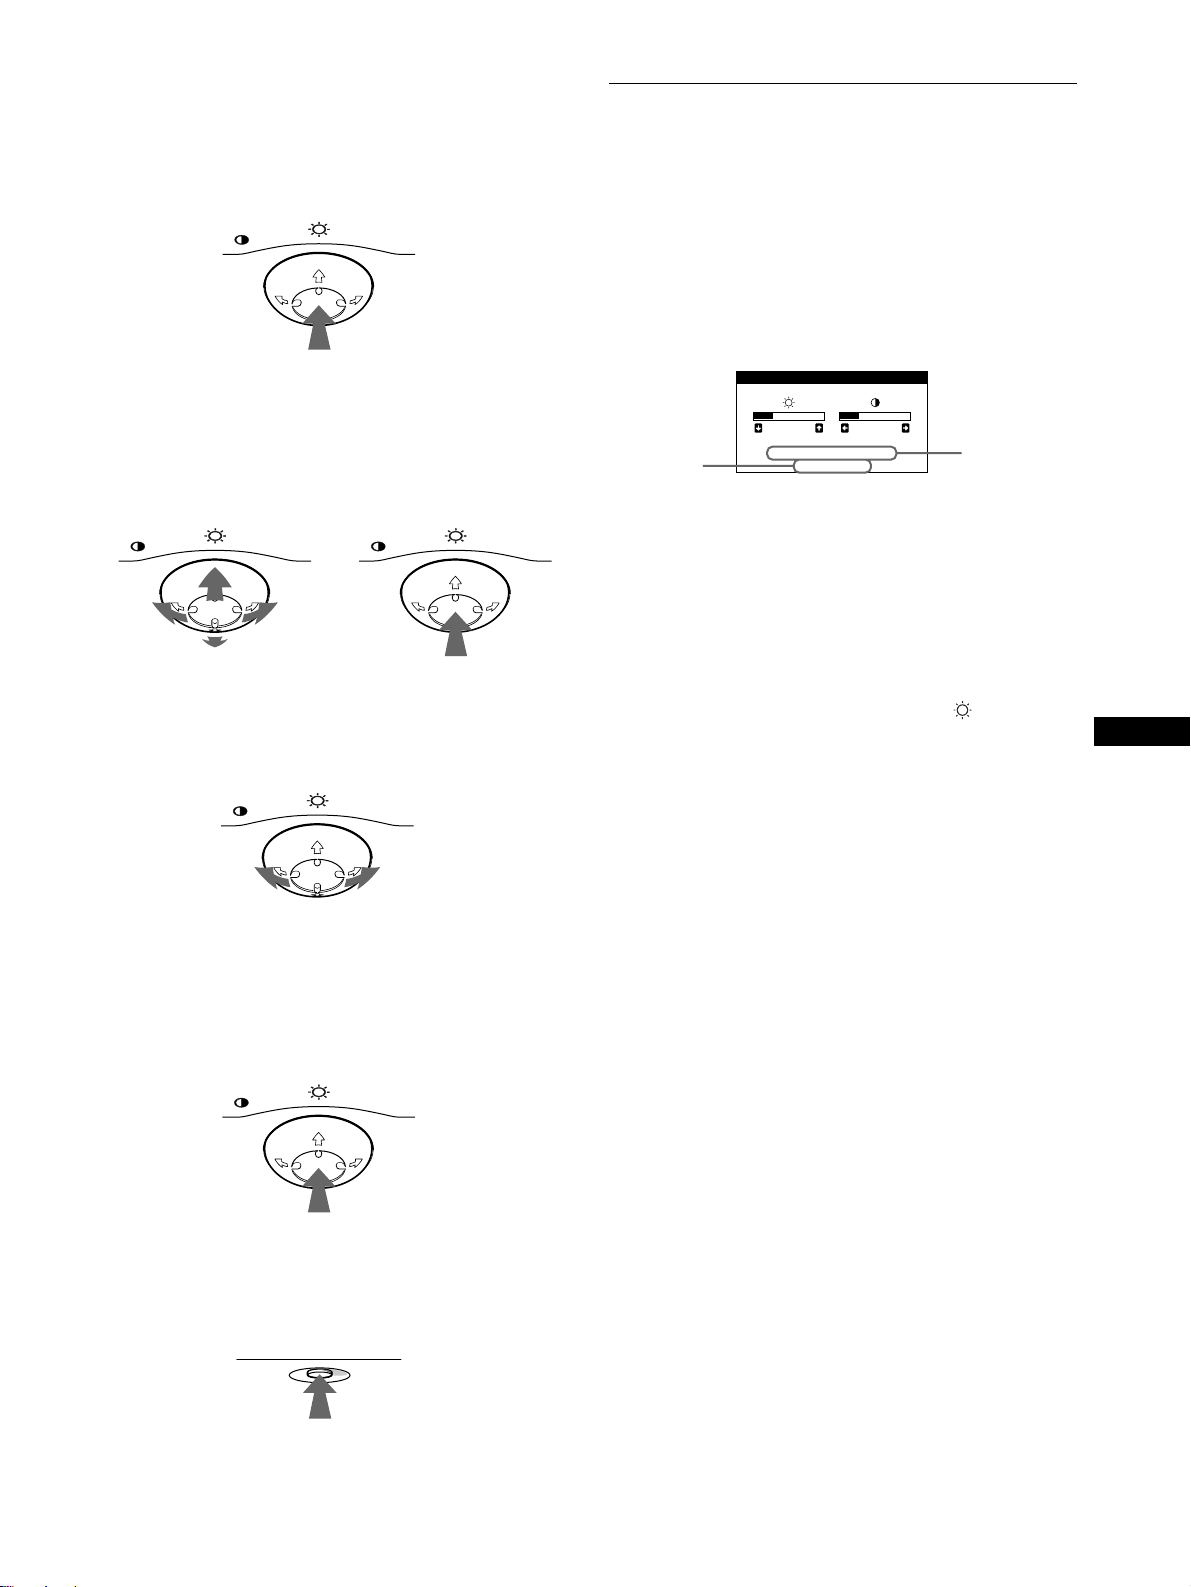
Adjusting the brightness and
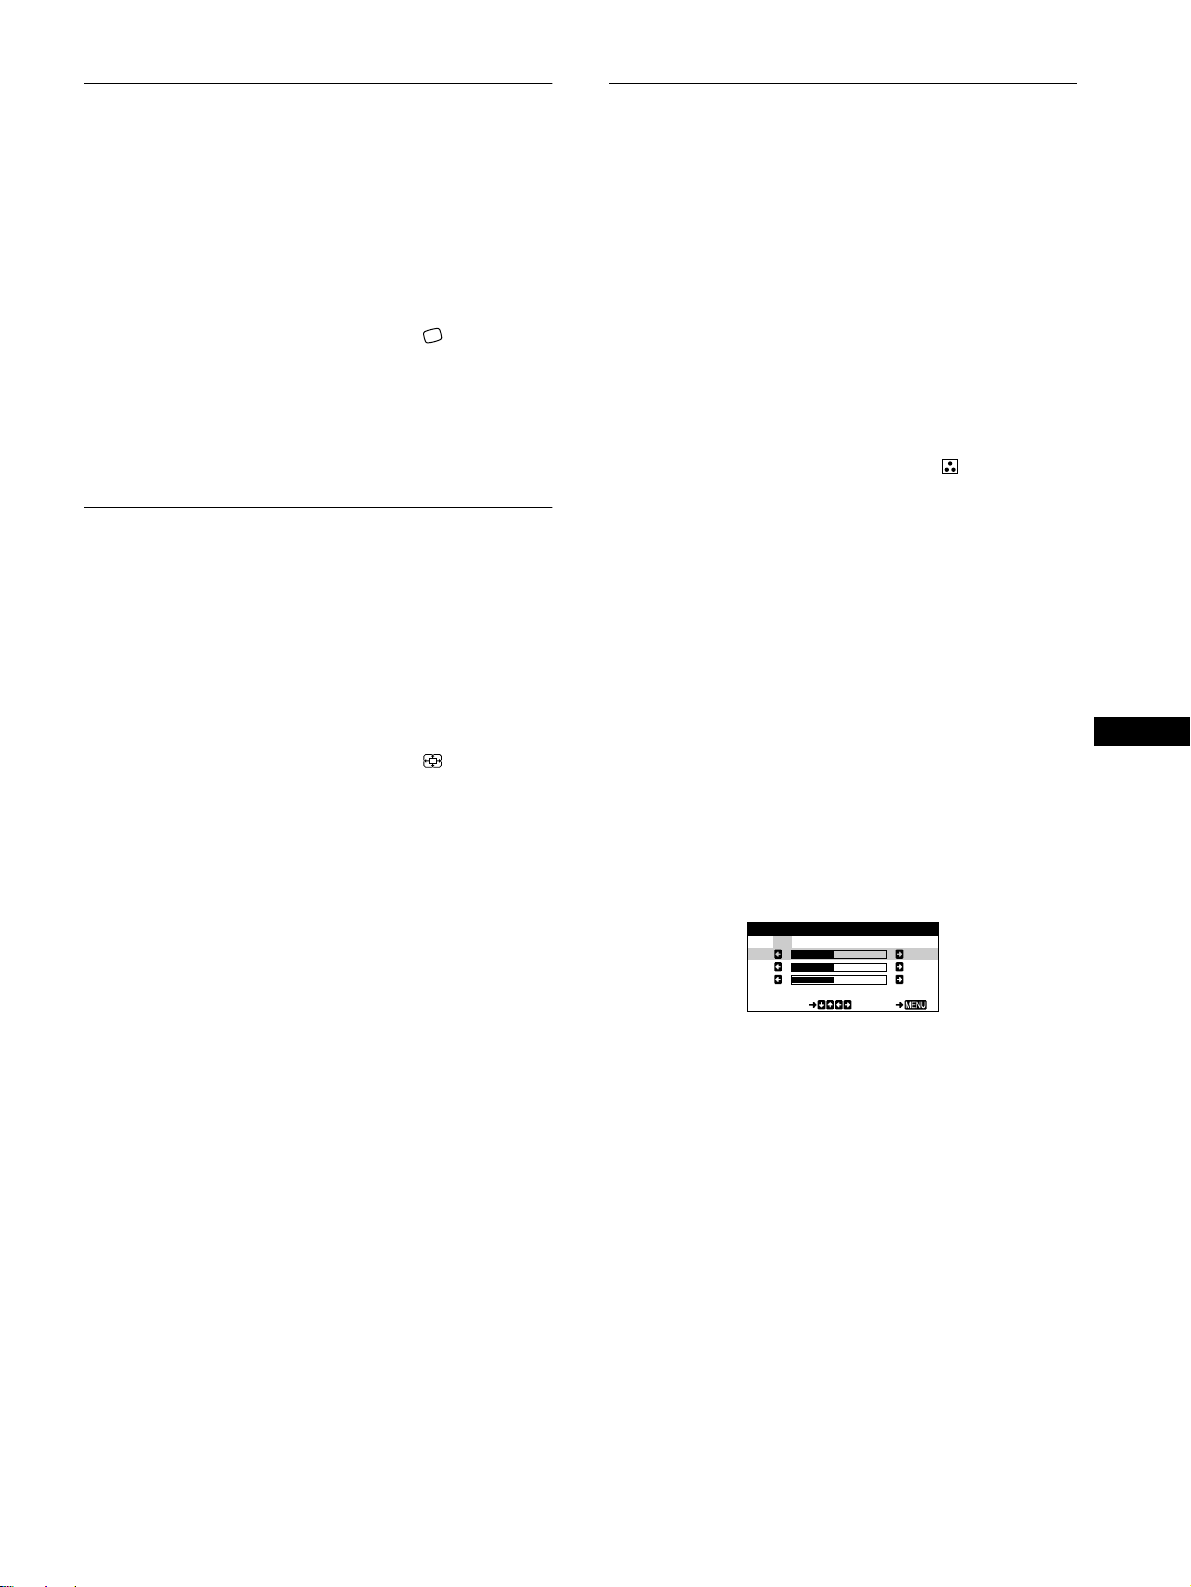
contrast
Brightness and contrast adjustments are made using a separate
BRIGHTNESS/CONTRAST menu.
These settings are stored in memory for all input signals.
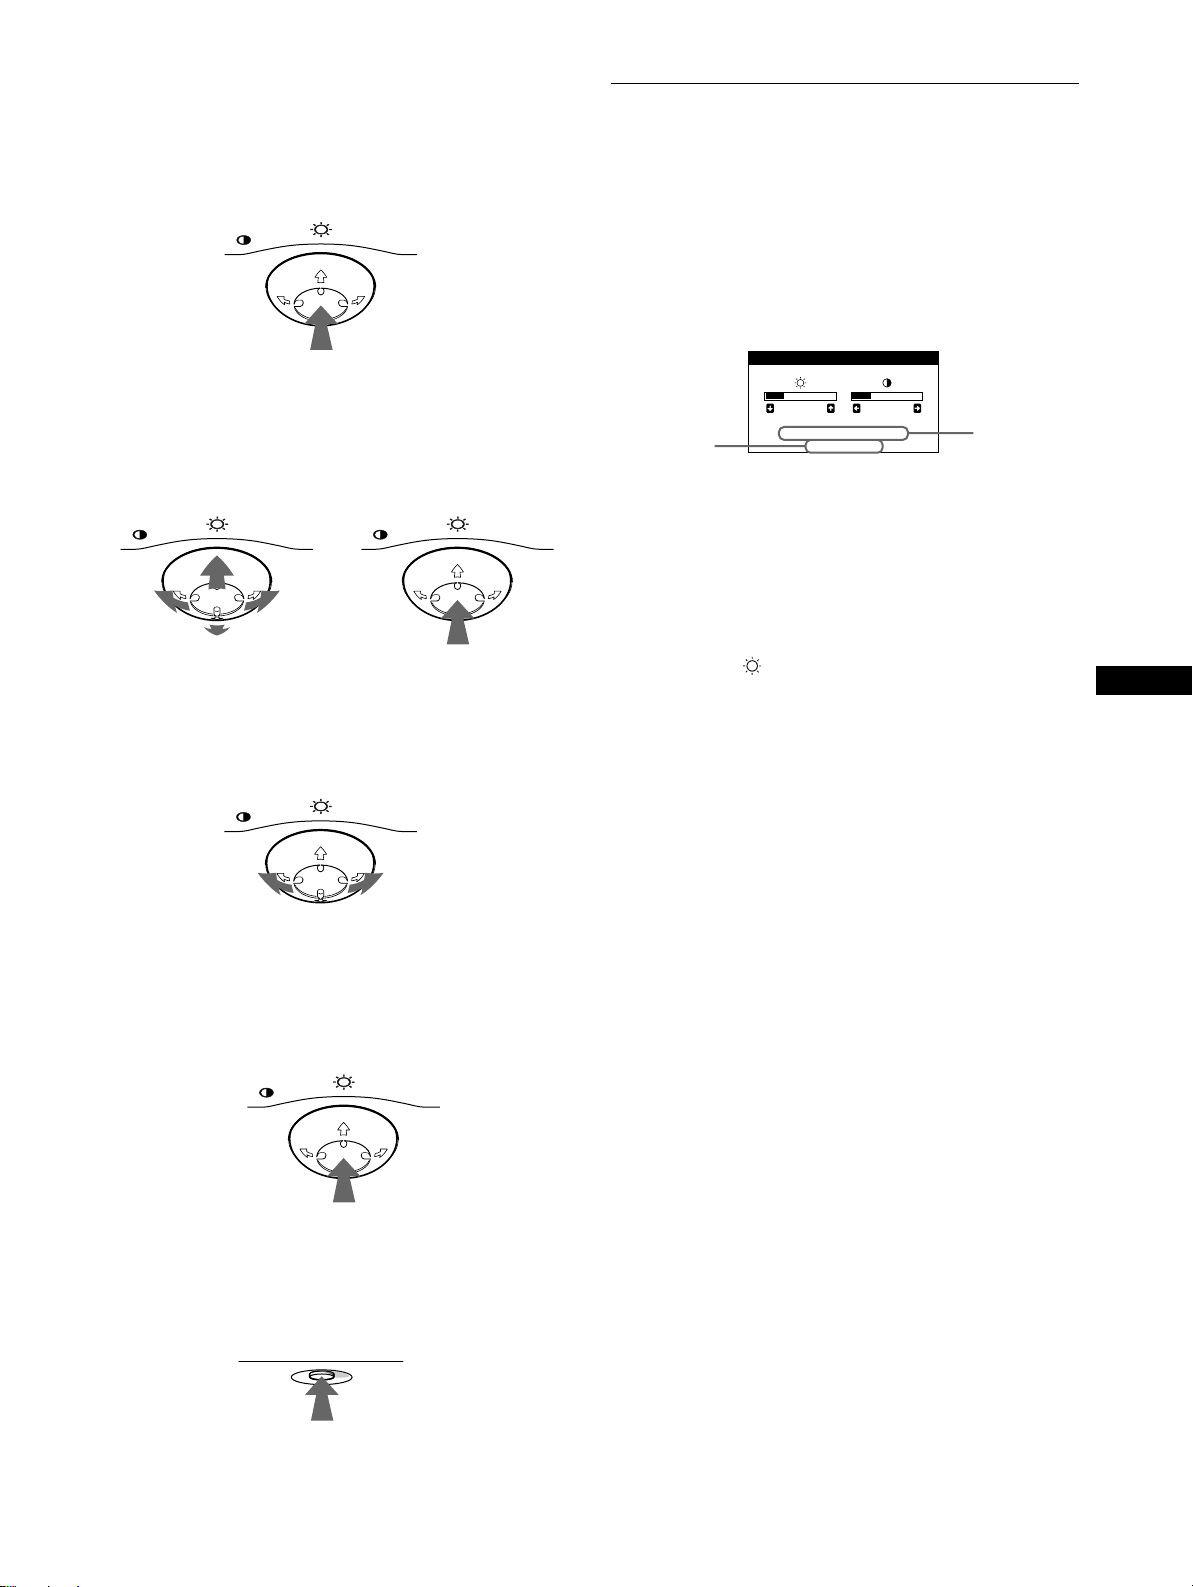
1
Move the control button in any direction.
The BRIGHTNESS/CONTRAST menu appears on the
screen.
The horizontal and vertical frequencies of the current input
signal are displayed in the BRIGHTNESS/CONTRAST
menu. If the signal matches one of this monitor’s factory
preset modes, the resolution is also displayed.
2
Move the control button m/M to adjust the
brightness ( ), and </, to adjust the contrast
(6).
The menu automatically disappears after about 3 seconds.
MENU
MENU MENU
REAR
FRONT
MENU
MENU
RESET
26 26
68.7kHz/85.0Hz
1024X768
BRIGHTNESS/CONTRAST
the resolution
of the current
input signal
the horizontal
and vertical
frequencies
of the current
input signal
01US01COV-UC.book Page 9 Thursday, July 1, 1999 5:01 PM
10
C:\WIN95-E\DESKTOP\CPD E100\386765901CPDE100UC\386765901CPDE100UC\01US03BAS-
UC.fm
masterpage:Left
CPD-E100
3-867-659-
01
(1)
Adjusting the horizontal size or
centering of the picture (H-SIZE/
CENTER)
These settings are stored in memory for the current input signal.
1
Press the center of the control button.
The main MENU appears on the screen.
2
Move the control button
m
/
M
to highlight H-SIZE/
CENTER and press the center of the control button
again.
The H-SIZE/CENTER menu appears on the screen.
3
First move the control button
m
/
M
to select the
desired adjustment item. Then move the control
button
<
/
,
to make the adjustment.
Adjusting the vertical size or
centering of the picture (V-SIZE/
CENTER)
These settings are stored in memory for the current input signal.
1
Press the center of the control button.
The main MENU appears on the screen.
2
Move the control button
m
/
M
to highlight V-SIZE/
CENTER and press the center of the control button
again.
The V-SIZE/CENTER menu appears on the screen.
3
First move the control button
m
/
M
to select the
desired adjustment item. Then move the control
button
<
/
,
to make the adjustment.
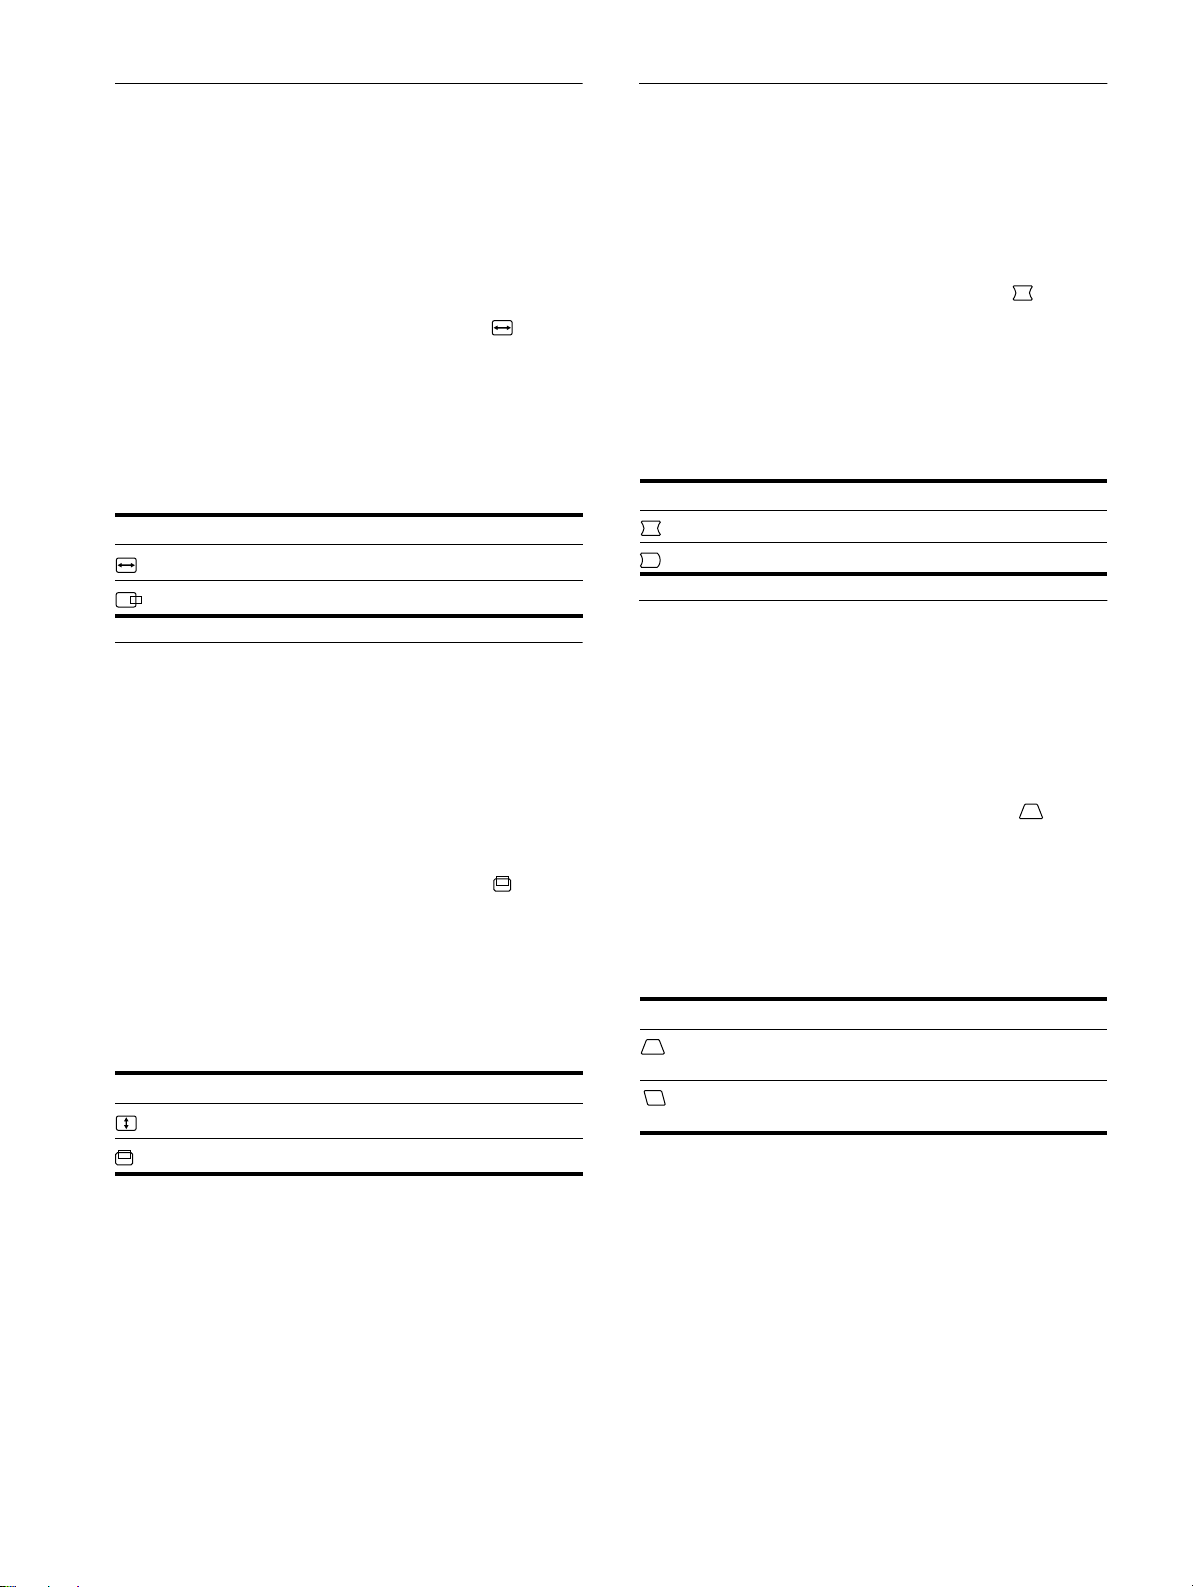
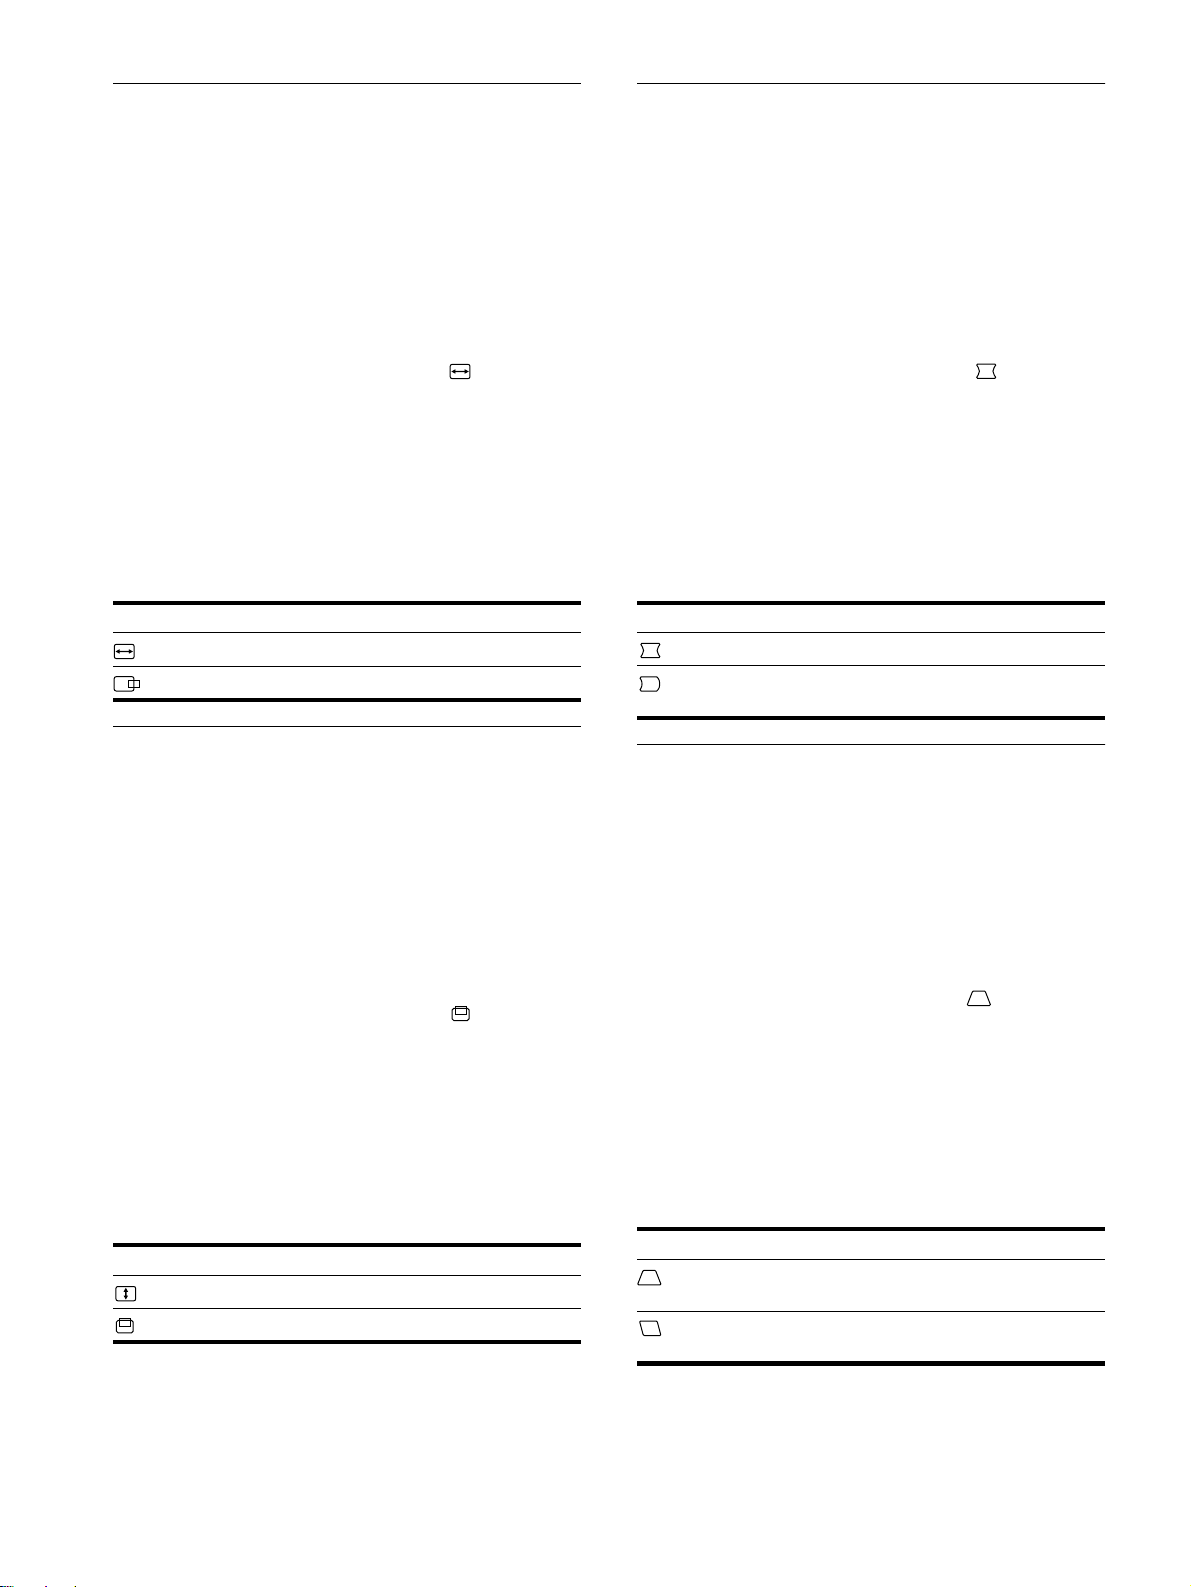
Adjusting the curvature of the
picture’s sides (PIN/PIN BALANCE)
These settings are stored in memory for the current input signal.
1
Press the center of the control button.
The main MENU appears on the screen.
2
Move the control button
m
/
M
to highlight PIN/PIN
BALANCE and press the center of the control
button again.
The PIN/PIN BALANCE menu appears on the screen.
3
First move the control button
m
/
M
to select the
desired adjustment item. Then move the control
button
<
/
,
to make the adjustment.
Adjusting the angle of the picture’s
sides (KEY/KEY BALANCE)
These settings are stored in memory for the current input signal.
1
Press the center of the control button.
The main MENU appears on the screen.
2
Move the control button
m
/
M
to highlight KEY/
KEY BALANCE and press the center of the control
button again.
The KEY/KEY BALANCE menu appears on the screen.
3
First move the control button
m
/
M
to select the
desired adjustment item. Then move the control
button
<
/
,
to make the adjustment.
Select To
H-SIZE
adjust the horizontal size
H-CENTER
adjust the horizontal centering
Select To
V-SIZE
adjust the vertical size
V-CENTER
adjust the vertical centering
Select To
PIN
expand or contract the picture sides
PIN BALANCE
shift the picture sides to the left or right
Select To
KEY
adjust the picture width at the top of
the screen
KEY BALANCE
shift the picture to the left or right at
the top of the screen
01US01COV-UC.book Page 10 Thursday, July 1, 1999 5:01 PM
11
US
C:\WIN95-E\DESKTOP\CPD E100\386765901CPDE100UC\386765901CPDE100UC\01US03BAS-
UC.fm
masterpage:Right
CPD-E100
3-867-659-
01
(1)
Adjusting the picture’s rotation
(ROTATION)
This setting is stored in memory for all input signals.
1
Press the center of the control button.
The main MENU appears on the screen.
2
Move the control button m/M to highlight
ROTATION and press the center of the control
button again.
The ROTATION menu appears on the screen.
3
Move the control button </, to rotate the picture.
Enlarging or reducing the picture
(ZOOM)
This setting is stored in memory for the current input signal.
1
Press the center of the control button.
The main MENU appears on the screen.
2
Move the control m/M button to highlight ZOOM
and press the center of the control button again.
The ZOOM menu appears on the screen.
3
Move the control button </, to enlarge or reduce
the picture.
Note
Adjustment stops when either the horizontal or vertical size reaches its
maximum or minimum value.
Adjusting the color of the picture
(COLOR)
The COLOR settings allow you to adjust the picture’s color
temperature by changing the color level of the white color field.
Colors appear reddish if the temperature is low, and bluish if the
temperature is high. This adjustment is useful for matching the
monitor’s colors to a printed picture’s colors.
This setting is stored in memory for all input signals.
1
Press the center of the control button.
The main MENU appears on the screen.
2
Move the control button m/M to highlight COLOR
and press the center of the control button again.
The COLOR menu appears on the screen.
3
Move the control button </, to select a color
temperature.
The preset color temperatures are 5000K, 6500K, and 9300K.
Since the default setting is 9300K, the whites will change
from a bluish hue to a reddish hue as the temperature is
lowered to 6500K and 5000K.
4
If necessary, fine tune the color temperature.
First move the control button </, to select USER. Then
move the control button m/M to select R (red), G (green), or
B (blue) and move </, to make the adjustment.
If you fine tune the color temperature, the new color settings
are stored in memory and recalled whenever you select
USER.
KKK
R50
G50
B50
SELECT EXI T
COLOR
5000 6500 9300
USER
01US01COV-UC.book Page 11 Thursday, July 1, 1999 5:01 PM
12
C:\WIN95-E\DESKTOP\CPD E100\386765901CPDE100UC\386765901CPDE100UC\01US03BAS-
UC.fm
masterpage:Left
CPD-E100
3-867-659-
01
(1)
Additional settings (DEGAUSS/
CANCEL MOIRE)
You can manually degauss (demagnetize) the monitor, and adjust
the moire cancellation level.
1
Press the center of the control button.
The main MENU appears on the screen.
2
Move the control button
m
/
M
to highlight
DEGAUSS/CANCEL MOIRE and press the center of
the control button again.
The DEGAUSS/CANCEL MOIRE menu appears on the
screen.
3
Move the control button
m
/
M
to select the desired
adjustment item.
Adjust the selected item according to the following
instructions.
Degaussing the screen
The monitor is automatically demagnetized (degaussed) when the
power is turned on.
To manually degauss the monitor, first move the
control button
m
/
M
to select (DEGAUSS). Then move
the control button
,
.
The screen is degaussed for about 5 seconds. If a second degauss
cycle is needed, allow a minimum interval of 20 minutes for the
best result.
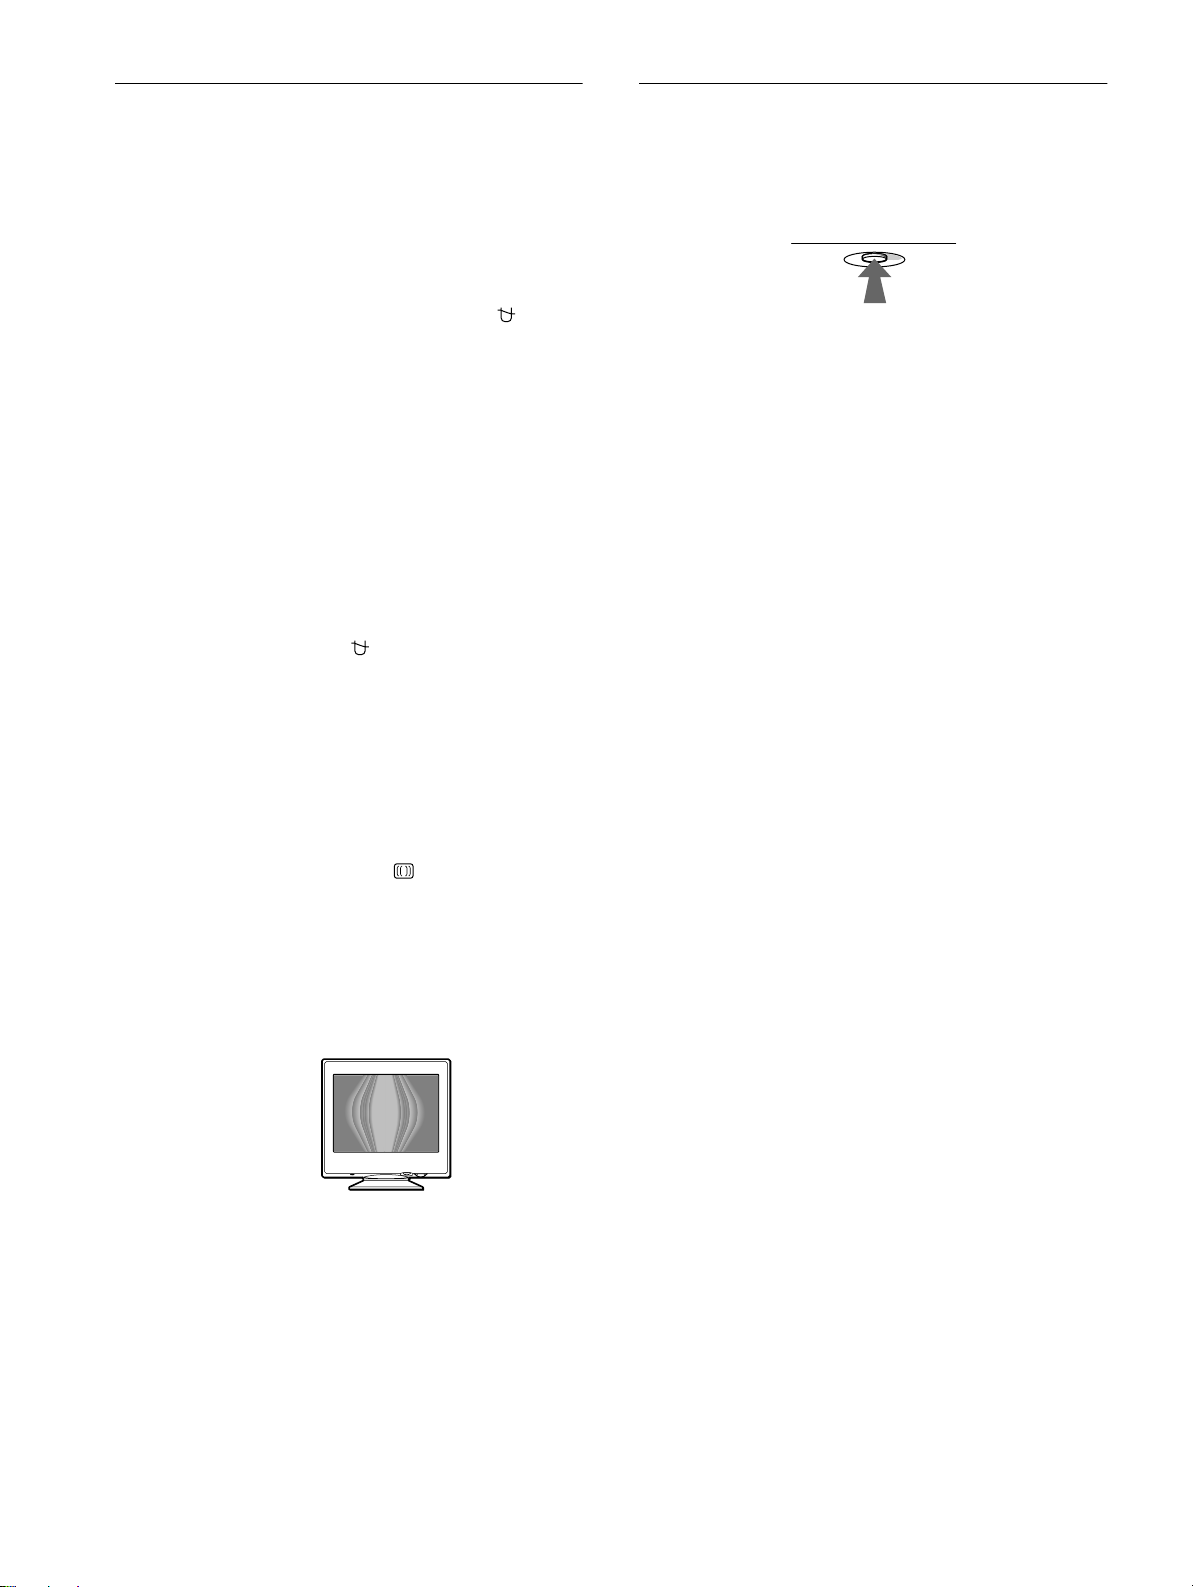
Adjusting the moire*
If elliptical or wavy patterns appear on the screen, adjust the
moire cancellation level.
To adjust the amount of moire cancellation, first move
the control button
m
/
M
to select (CANCEL MOIRE).
Then move the control button
<
/
,
until the moire
effect is at a minimum.
* Moire is a type of natural interference which produces soft, wavy lines
on your screen. It may appear due to interference between the pattern
of the picture on the screen and the phosphor pitch pattern of the
monitor.
Resetting the adjustments
This monitor has the following three reset methods. Use the
RESET button to reset the adjustments.
Resetting a single adjustment item
Use the control button to select the adjustment item you want to
reset, and press the RESET button.
Resetting all of the adjustment data for the
current input signal
Press the RESET button when no menu is displayed on the screen.
Note that the following items are not reset by this method:
• on-screen menu language (page 7)
• picture’s rotation (page 11)
Resetting all of the adjustment data for all input
signals
Press and hold the RESET button for more than two seconds.
Note that the following item is not reset by this method:
• color menu user settings (page 11)
Example of moire
RESET
01US01COV-UC.book Page 12 Thursday, July 1, 1999 5:01 PM

13
US
C:\WIN95-E\DESKTOP\CPD E100\386765901CPDE100UC\386765901CPDE100UC\01US03BAS-
UC.fm
masterpage:Right
CPD-E100
3-867-659-
01
(1)
Technical Features
Preset and user modes
When the monitor receives an input signal, it automatically
matches the signal to one of the factory preset modes stored in the
monitor’s memory to provide a high quality picture at the center of
the screen.
(See Appendix for a list of the factory preset modes.)
For input signals that do not match one of the factory preset modes,
the digital Multiscan technology of this monitor ensures that a
clear picture appears on the screen for any timing in the monitor’s
frequency range (horizontal: 30 – 70 kHz, vertical: 48 – 120 Hz).
If the picture is adjusted, the adjustment data is stored as a user
mode and automatically recalled whenever the same input signal
is received.
Note for Windows users
For Windows users, check your video board manual or the utility
program which comes with your graphic board and select the
highest available refresh rate to maximize monitor performance.
Power saving function
This monitor meets the power-saving guidelines set by VESA,
E
NERGY
S
TAR, and NUTEK. If the monitor is connected to a
computer or video graphics board that is DPMS (Display Power
Management Signaling) compliant, the monitor will automatically
reduce power consumption in three stages as shown below
.
* “Sleep” and “deep sleep” are power saving modes defined by the
Environmental Protection Agency.
** When your computer enters the “active off” mode, the input signal is
cut and NO INPUT SIGNAL appears on the screen. After 20 seconds,
the monitor enters the power saving mode.
Troubleshooting
Before contacting technical support, refer to this section.
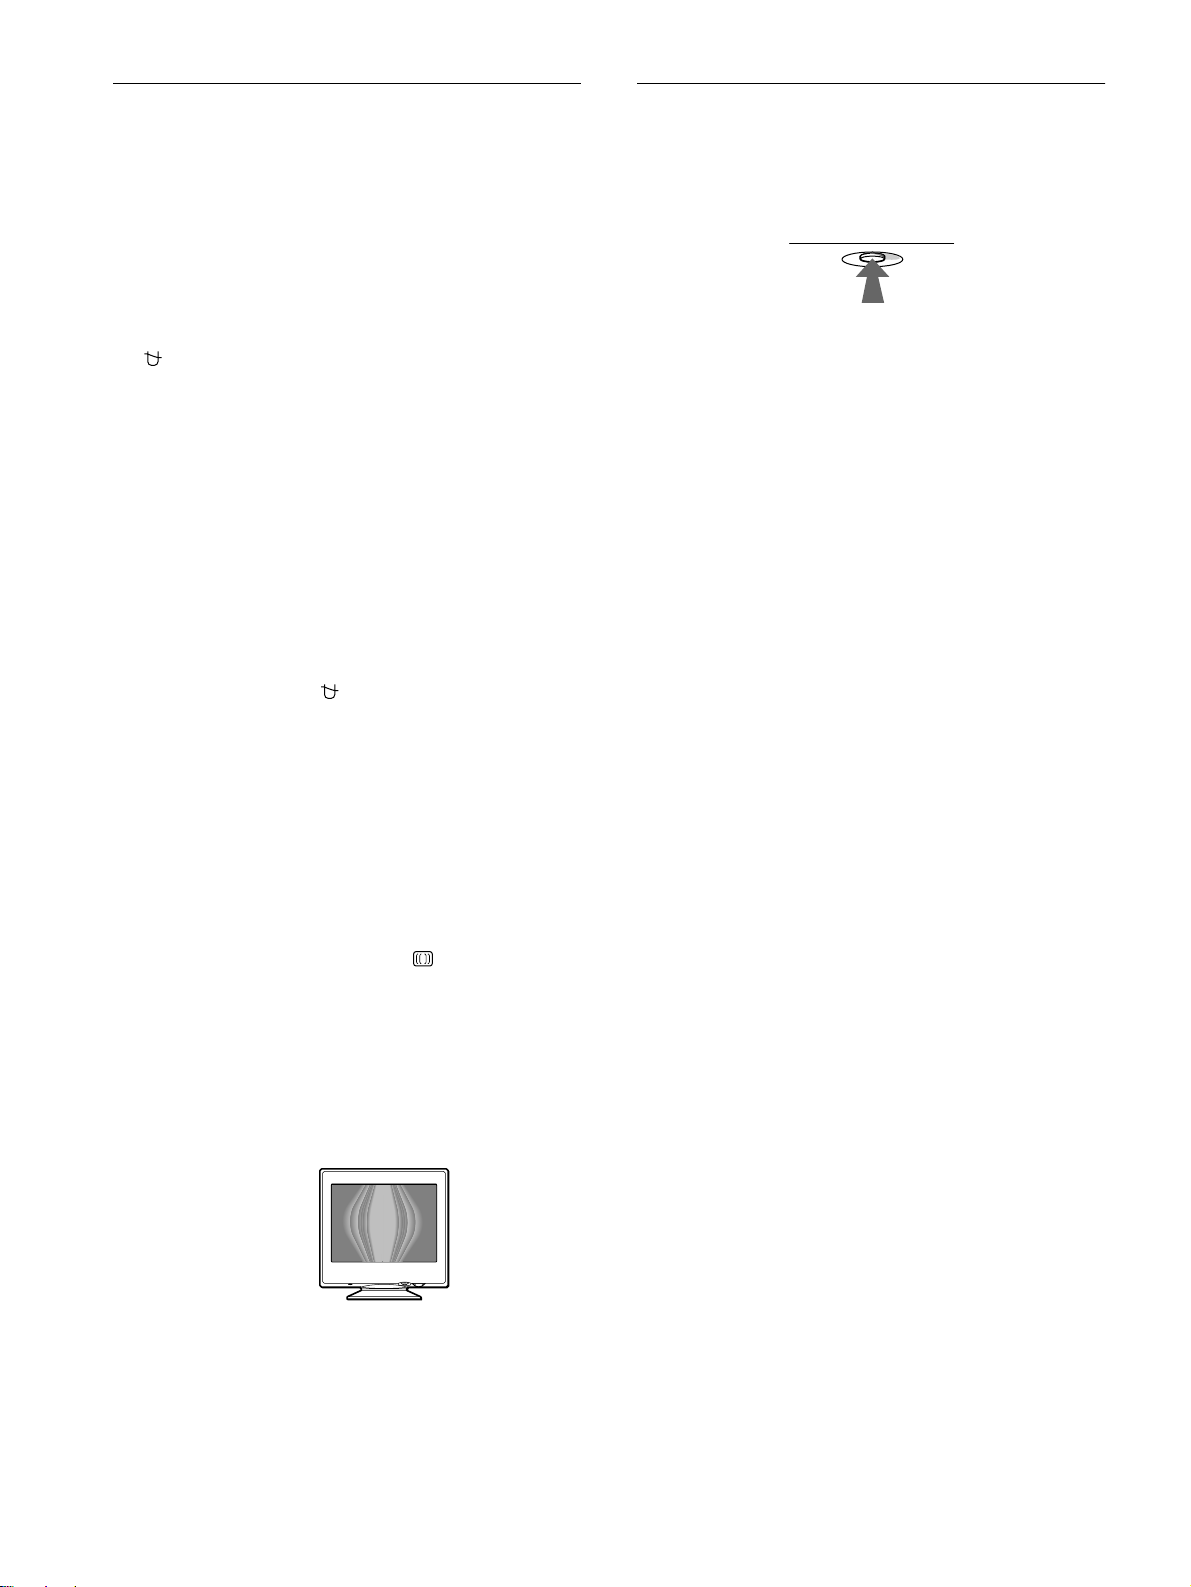
If thin line appears on your screen
(damper wire)
The line you are experiencing on your screen is normal for the
Trinitron monitor and is not a malfunction. This is shadow from
the damper wire used to stabilize the aperture grill and is most
noticeable when the screen’s background is lightly (usually
white). The aperture grille is the essential element that makes a
Trinitron picture tube unique by allowing more light to reach the
screen, resulting in a brighter, more detailed picture.
On-screen messages
If there is something wrong with the input signal, one of the
following messages appears on the screen. To solve the problem,
see “Trouble symptoms and remedies” on page 14.
The input signal condition
OUT OF SCAN RANGE
indicates that the input signal is not supported by the monitor’s
specifications.
NO INPUT SIGNAL
indicates that no signal is being input to the monitor.
Power mode Power consumption 1 (power)
indicator
normal
operation
≤ 95 W green
1 standby ≤ 15 W green and orange
alternate
2 suspend
(sleep)*
≤ 15 W green and orange
alternate
3 active off**
(deep sleep)*
≤ 5 W orange
power off 0 W off
Damper wire
INFORMATION
OUT OF SCAN RANGE
Input signal
condition
01US01COV-UC.book Page 13 Thursday, July 1, 1999 5:01 PM

14
C:\WIN95-E\DESKTOP\CPD E100\386765901CPDE100UC\386765901CPDE100UC\01US03BAS-
UC.fm
masterpage:Left
CPD-E100
3-867-659-
01
(1)
Trouble symptoms and remedies
If the problem is caused by the connected computer or other equipment, please refer to the connected equipment’s instruction manual.
Use the self-diagnosis function (page 16) if the following recommendations do not resolve the problem.
Symptom Check these items
No picture
If the 1 (power) indicator is not lit • Check that the power cord is properly connected.
• Check that the 1 (power) switch is in the “on” position.
If the NO INPUT SIGNAL message
appears on the screen, or if the 1
(power) indicator is either orange or
alternating between green and
orange
• Check that the video signal cable is properly connected and all plugs are firmly seated in
their sockets (page 6).
• Check that the HD15 video input connector’s pins are not bent or pushed in.
x
Problems caused by the connected computer or other equipment
• The computer is in power saving mode. Try pressing any key on the computer keyboard.
• Check that the computer’s power is “on.”
• Check that the graphic board is completely seated in the proper bus slot.
If the OUT OF SCAN RANGE
message appears on the screen
x
Problems caused by the connected computer or other equipment
• Check that the video frequency range is within that specified for the monitor. If you
replaced an old monitor with this monitor, reconnect the old monitor and adjust the
frequency range to the following.
Horizontal: 30 – 70 kHz
Vertical: 48 – 120 Hz
If no message is displayed and the 1
(power) indicator is green or flashing
orange
• Use the Self-diagnosis function (page 16).
If using Windows 95/98 • If you replaced an old monitor with this monitor, reconnect the old monitor and do the
following. Install the Windows Monitor Information Disk (page 7) and select this monitor
(“CPD-E100”) from among the Sony monitors in the Windows 95/98 monitor selection
screen.
If using a Macintosh system • Check that the Macintosh adapter (not supplied) and the video signal cable are properly
connected (page 6).
Picture flickers, bounces,
oscillates, or is scrambled
• Isolate and eliminate any potential sources of electric or magnetic fields such as other
monitors, laser printers, electric fans, fluorescent lighting, or televisions.
• Move the monitor away from power lines or place a magnetic shield near the monitor.
• Try plugging the monitor into a different AC outlet, preferably on a different circuit.
• Try turning the monitor 90° to the left or right.
x
Problems caused by the connected computer or other equipment
• Check your graphics board manual for the proper monitor setting.
• Confirm that the graphics mode (VESA, Macintosh 16" Color, etc.) and the frequency of
the input signal are supported by this monitor (Appendix). Even if the frequency is within
the proper range, some video boards may have a sync pulse that is too narrow for the
monitor to sync correctly.
• Adjust the computer’s refresh rate (vertical frequency) to obtain the best possible picture.
Picture is fuzzy
• Adjust the brightness and contrast (page 9).
• Degauss the monitor* (page 12).
• Select CANCEL MOIRE and adjust the moire cancellation effect (page 12).
01US01COV-UC.book Page 14 Thursday, July 1, 1999 5:01 PM
15
US
C:\WIN95-E\DESKTOP\CPD E100\386765901CPDE100UC\386765901CPDE100UC\01US03BAS-
UC.fm
masterpage:Right
CPD-E100
3-867-659-
01
(1)
* If a second degauss cycle is needed, allow a minimum interval of 20 minutes for the best result. A humming noise may be heard, but this is not a
malfunction.
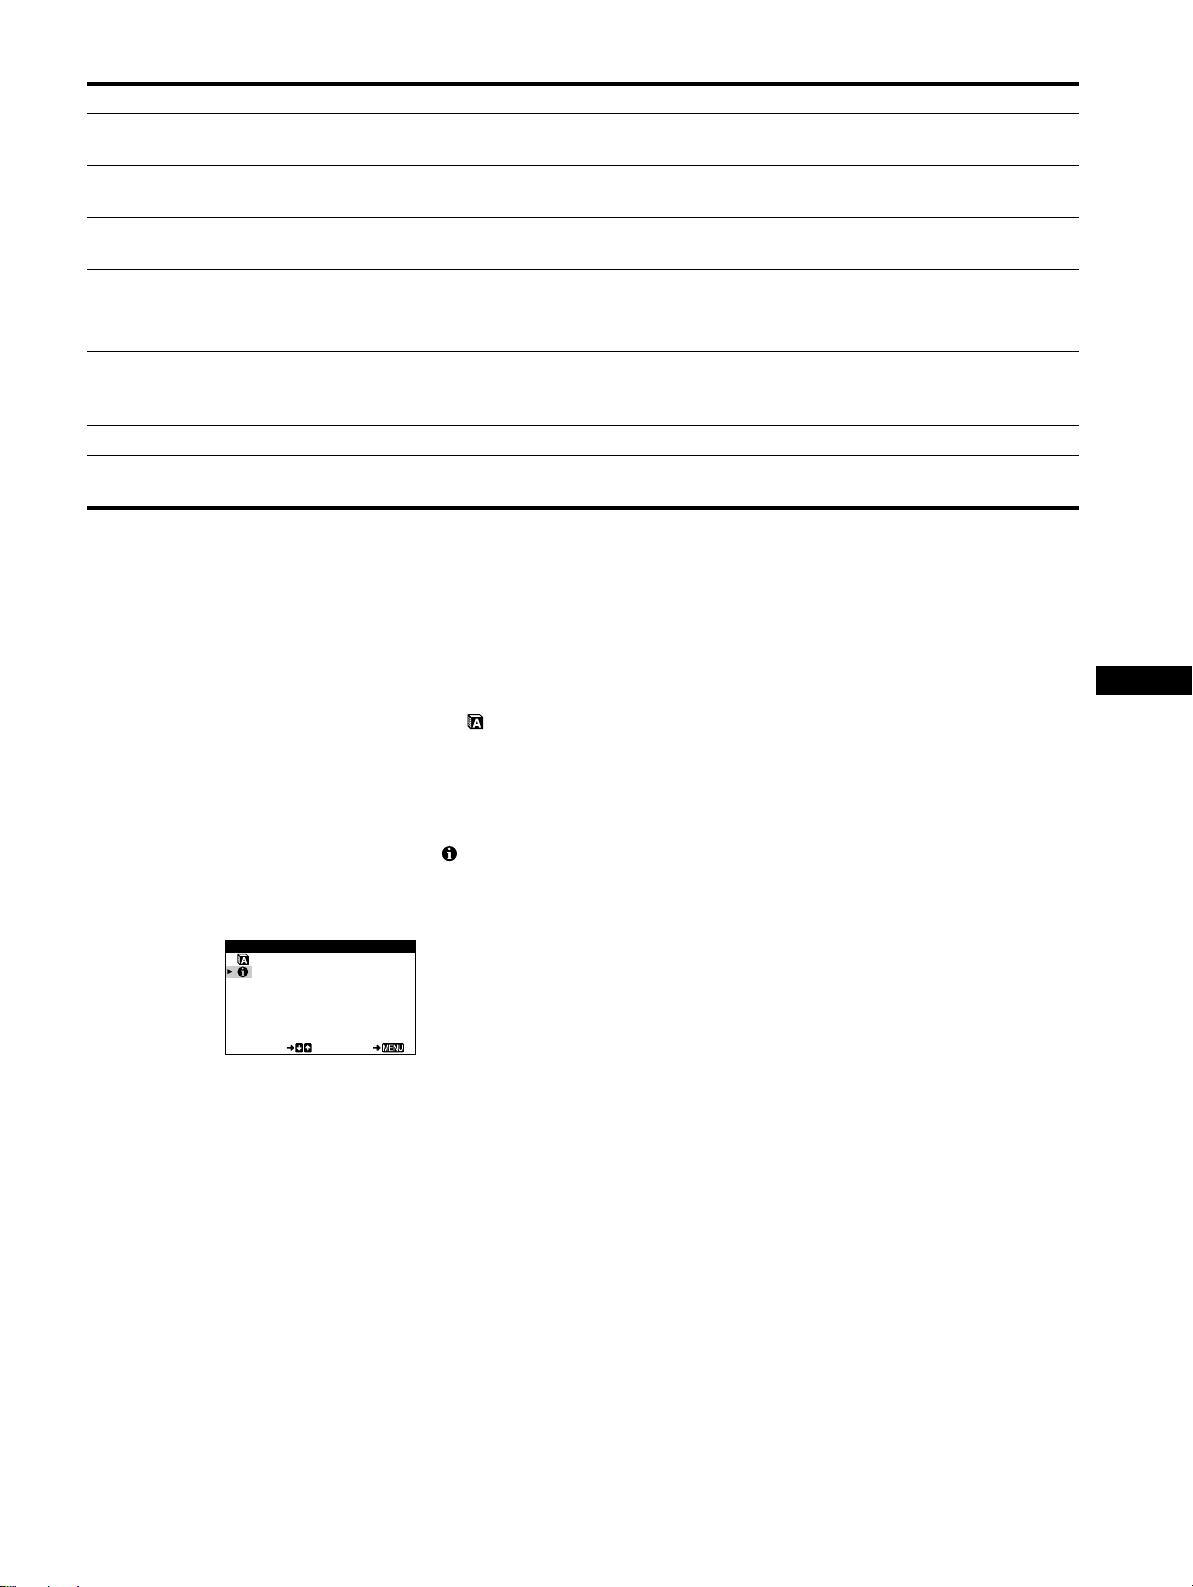
Displaying this monitor’s name, serial number,
and date of manufacture (INFORMATION)
1
Press the center of the control button.
The main MENU appears on the screen.
2
Move the control button m/M to highlight
LANGUAGE/INFORMATION and press the center of
the control button again.
The LANGUAGE/INFORMATION menu appears on the
screen.
3
Move the control button m/M to select
(INFORMATION).
This monitor’s information box appears on the screen.
If the problem persists, call your authorized Sony dealer and give
the following information.
• Model name: CPD-E100
• Serial number
• Name and specifications of your computer and graphics board.
Picture is ghosting • Eliminate the use of video cable extensions and/or video switch boxes.
• Check that all plugs are firmly seated in their sockets.
Picture is not centered or sized
properly
• Adjust the size or centering (page 10). Note that some video modes do not fill the screen
to the edges.
Edges of the image are curved • Select PIN/PIN BALANCE, KEY/KEYBALANCE, or ROTATION, and adjust the
picture’s shape and rotation (page 10, 11).
Wavy or elliptical pattern (moire)
is visible
• Select CANCEL MOIRE and adjust the moire cancellation effect (page 12).
xProblems caused by the connected computer or other equipment
• Change your desktop pattern.
Color is not uniform • Degauss the monitor* (page 12). If you place equipment that generates a magnetic field,
such as a speaker, near the monitor, or if you change the direction the monitor faces, color
may lose uniformity.
White does not look white • Adjust the color temperature (page 11).
A hum is heard right after the
power is turned on
• This is the sound of the auto-degauss cycle. When the power is turned on, the monitor is
automatically degaussed for five seconds.
Symptom Check these items
MODEL :CPD- E100
SERIAL:12345678
MANUFACTURED: 1999 - 52
SELECT EXI T
LANGUAGE / INFORMAT ION
Example
01US01COV-UC.book Page 15 Thursday, July 1, 1999 5:01 PM
16
Self-diagnosis function
This monitor is equipped with a self-diagnosis function. If there is
a problem with your monitor or computer, the screen will go
blank and the 1 (power) indicator will either light up green or
flash orange. If the 1 (power) indicator is lit in orange, the
computer is in power saving mode. Try pressing any key on the
keyboard.
If the
1
(power) indicator is green
1
Disconnect the video input cable or turn off the
connected computer.
2
Press the
1
(power) button twice to turn the monitor
off and then on.
3
Move the control button
,
for 2 seconds before the
monitor enters power saving mode.
If all four color bars appear (white, red, green, blue), the monitor
is working properly. Reconnect the video input cable and check
the condition of your computer.
If the color bars do not appear, there is a potential monitor failure.
Inform your authorized Sony dealer of the monitor’s condition.
If the
1
(power) indicator is flashing orange
Press the
1
(power) button twice to turn the monitor off
and then on.
If the 1 (power) indicator lights up green, the monitor is working
properly.
If the 1 (power) indicator is still flashing, there is a potential
monitor failure. Count the number of seconds between orange
flashes of the 1 (power) indicator and inform your authorized
Sony dealer of the monitor’s condition. Be sure to note the model
name and serial number of your monitor. Also note the make and
model of your computer and video board.
Specifications
CRT 0.24 mm aperture grille pitch (center)
15 inches measured diagonally
90-degree deflection
Viewable image size Approx. 285
×
214 mm (w/h)
(11
1
/
4
×
8
1
/
2
inches)
14.0" viewing image
Resolution
Maximum Horizontal: 1280 dots
Vertical: 1024 lines
Recommended Horizontal: 800 dots
Vertical: 600 lines
Standard image area Approx. 270
×
202 mm (w/h)
(10
3
/
4
×
8 inches)
Deflection frequency* Horizontal: 30 to 70 kHz
Vertical: 48 to 120 Hz
AC input voltage/current 100 to 240 V, 50 – 60 Hz, 1.6 – 0.8 A
Power consumption Max. 95 W
Dimensions
Approx. 356
×
378
×
388 mm (w/h/d)
(14
1
/
8
×
15
×
15
3
/
8
inches)
Mass Approx. 15 kg (33 lb 1 oz)
Plug and Play DDC1/DDC2B
Supplied accessories See page 6
* Recommended horizontal and vertical timing condition
• Horizontal sync width should be more than 1.0 µsec.
• Horizontal blanking width should be more than 3.6 µsec.
• Vertical blanking width should be more than 500 µsec.
Design and specifications are subject to change without notice.
MENU
RESET
1
(power) indicator
MENU
• Trinitron
est une marque commerciale
déposée de Sony Corporation.
• Macintosh est une marque commerciale
sous licence d’Apple Computer, Inc.,
déposée aux Etats-Unis et dans d’autres
pays.
• Windows
et MS-DOS sont des
marques déposées de Microsoft
Corporation aux Etats-Unis et dans
d’autres pays.
• IBM PC/AT et VGA sont des marques
commerciales déposées d’IBM
Corporation aux Etats-Unis.
• VESA et DDC
sont des marques
commerciales de Video Electronics
Standard Association.
•
E
NERGY
S
TAR est une marque
déposée aux Etats-Unis.
• Tous les autres noms de produits
mentionnés dans le présent mode
d’emploi peuvent être des marques
commerciales ou des marques
commerciales déposées de leurs
sociétés respectives.
• Les symboles “
” et “
” ne sont pas
mentionnés systématiquement dans le
présent mode d’emploi.
3
Table des Matières
FR
Précautions. . . . . . . . . . . . . . . . . . . . . . . . . . . . . . . . . . . . . . . . . . . . 4
Identification des composants et des commandes. . . . . . . . . . . . . . 5
Installation . . . . . . . . . . . . . . . . . . . . . . . . . . . . . . . . . . . . .6
1re étape:
Raccordez le moniteur à votre ordinateur. . . . . . . . . . . . 6
2e étape:
Branchez le cordon d’alimentation. . . . . . . . . . . . . . . . . . 6
3e étape:
Mettez le moniteur et l’ordinateur sous tension . . . . . . . . 7
Sélection de la langue d’affichage des menus (LANGUE/
INFORMATION) . . . . . . . . . . . . . . . . . . . . . . . . . . . . . . . . . . . . . . . . 7
Personnalisation de votre moniteur. . . . . . . . . . . . . . . . .8
Pilotage par menus. . . . . . . . . . . . . . . . . . . . . . . . . . . . . . . . . . . . . . 8
Réglage de la luminosité et du contraste . . . . . . . . . . . . . . . . . . . . . 9
Réglage de la taille horizontale ou du centrage de l’image
(TAILLE H/POSITION) . . . . . . . . . . . . . . . . . . . . . . . . . . . . . . . . . . 10
Réglage de la taille verticale ou du centrage de l’image
(TAILLE V/POSITION) . . . . . . . . . . . . . . . . . . . . . . . . . . . . . . . . . . 10
Réglage de l’incurvation des côtés de l’image
(COUSSIN/PIN BALANCE) . . . . . . . . . . . . . . . . . . . . . . . . . . . . . . 10
Réglage de l’angle des côtés de l’image
(TRAPÉZOÏD/PARALLÉL) . . . . . . . . . . . . . . . . . . . . . . . . . . . . . . . 10
Réglage de la rotation de l’image (ROTATION) . . . . . . . . . . . . . . . 11
Agrandir ou réduire l’image (ZOOM) . . . . . . . . . . . . . . . . . . . . . . . 11
Réglage de la couleur de l’image (COULEUR) . . . . . . . . . . . . . . . 11
Réglages supplémentaires (DÉMAGNÉTISÉ/MOIRÉ). . . . . . . . . . 12
Réinitialisation des réglages. . . . . . . . . . . . . . . . . . . . . . . . . . . . . . 12
Caractéristiques techniques. . . . . . . . . . . . . . . . . . . . . .13
Modes présélectionné et utilisateur . . . . . . . . . . . . . . . . . . . . . . . . 13
Fonction d’économie d’énergie. . . . . . . . . . . . . . . . . . . . . . . . . . . . 13
Dépannage . . . . . . . . . . . . . . . . . . . . . . . . . . . . . . . . . . . .13
Si une fine ligne apparaît à l’écran (fil d’amortissement) . . . . . . . . 13
Messages affichés à l’écran . . . . . . . . . . . . . . . . . . . . . . . . . . . . . . 13
Symptômes et remèdes . . . . . . . . . . . . . . . . . . . . . . . . . . . . . . . . . 14
Fonction d’autodiagnostic. . . . . . . . . . . . . . . . . . . . . . . . . . . . . . . . 16
Spécifications. . . . . . . . . . . . . . . . . . . . . . . . . . . . . . . . . .16
Appendix. . . . . . . . . . . . . . . . . . . . . . . . . . . . . . . . . . . . . . . i
Preset mode timing table . . . . . . . . . . . . . . . . . . . . . . . . . . . . . . . . . .i
4
Précautions
Avertissement sur le raccordement à la source
d’alimentation
• Utilisez le cordon d’alimentation fourni. Si vous utilisez un
cordon d’alimentation différent, assurez-vous qu’il est
compatible avec votre tension d’alimentation secteur locale.
Pour les clients aux Etats-Unis
Si vous n’utilisez pas le cordon d’alimentation approprié, ce
moniteur ne sera pas conforme aux normes FCC en vigueur.
• Avant de débrancher le cordon d’alimentation, attendez au
moins 30 secondes après avoir actionné le commutateur
d’alimentation de manière à permettre la décharge de
l’électricité statique à la surface de l’écran.
• Après que le courant a été branché, l’écran est démagnétisé
pendant environ 5 secondes. Cela génère un puissant champ
magnétique autour de l’encadrement métallique qui peut
affecter les données mémorisées sur une bande magnétique ou
des disquettes situées à proximité. Placez ces systèmes
d’enregistrement magnétique, bandes et disquettes à l’écart du
moniteur.
Installation
N’installez pas le moniteur dans les endroits suivants:
• sur des surfaces molles (moquette, nappe, etc.) ou à proximité
de tissus (rideaux, tentures, etc.) qui risquent d’obstruer les
orifices de ventilation
• à proximité de sources de chaleur comme des radiateurs ou des
conduits d’air, ni dans un endroit directement exposé au
rayonnement solaire
• sujet à de fortes variations de température
• soumis à des vibrations ou à des chocs mécaniques
• sur une surface instable
• à proximité d’appareils générant un champ magnétique comme
un transformateur ou des lignes à haute tension
• à proximité de ou sur une surface métallique chargée
électriquement
Entretien
• Nettoyez l’écran à l’aide d’un chiffon doux. Si vous utilisez un
produit nettoyant pour vitres, n’utilisez aucun type de produit
contenant une solution antistatique ou des additifs similaires
parce que vous risquez de rayer le revêtement de l’écran.
• Ne frottez pas, ne touchez pas et ne tapotez pas la surface de
l’écran avec des objets abrasifs ou aux arêtes vives comme un
stylo à bille ou un tournevis. Ce type de contact risque en effet
de rayer le tube image.
• Nettoyez le châssis, le panneau et les commandes à l’aide d’un
chiffon doux légèrement imprégné d’une solution détergente
neutre. N’utilisez jamais de tampons abrasifs, de poudre à
récurer ou de solvants tels que de l’alcool ou du benzène.
Transport
Pour transporter ce moniteur en vue de réparations ou de son
expédition, utilisez le carton d’emballage et les matériaux de
conditionnement d’origine.
Utilisation du support pivotant
Ce moniteur peut être réglé suivant les angles précisés ci-dessous.
Pour localiser le centre du rayon de pivotement du moniteur,
alignez le centre de l’écran du moniteur sur les points de centrage
du support.
Pour faire pivoter le moniteur horizontalement ou verticalement,
saisissez-le des deux mains par la base. Veillez à ne pas vous
coincer les doigts à l’arrière du moniteur lorsque vous le faites
pivoter verticalement.
L’appareil doit être installé à proximité d’une prise murale
aisément accessible.
Exemple de types de fiches
pour 100 à 120 V CA
pour 200 à 240 V CA
90°
5°
90°
15°
Points de centrage
5
FR
Identification des composants et
des commandes
Pour plus de détails, reportez-vous au pages indiquées entre
parenthèses.
1 Touche RESET (réinitialisation) (page 12)
Cette touche réinitialise les réglages aux valeurs par défaut.
2 Manette de commande (page 9)
La manette de commande sert à afficher le menu et à ajuster
les paramètres de réglage du moniteur, y compris la
luminosité et le contraste.
3 Commutateur et indicateur 1 (alimentation)
(pages 7, 13, 16)
Cette touche met le moniteur sous et hors tension.
L’indicateur d’alimentation s’allume en vert lorsque le
moniteur est sous tension et clignote en vert et en orange ou
s’allume en orange lorsque le moniteur se trouve en mode
d’économie d’énergie.
4 Connecteur AC IN (page 6)
Ce connecteur assure l’alimentation du moniteur.
5 Connecteur d’entrée vidéo (HD15) (page 6)
Ce connecteur assure l’entrée des signaux vidéo RVB
(0,700 Vp-p, positifs) et des signaux de synchronisation.
* DDC (Display Data Channel) est une norme de VESA.
AC IN
MENU
RESET
MENU
RESET
ArrièreAvant
Broche n° Signal
1 Rouge
2Vert
(Synchronisation sur le vert)
3Bleu
4 ID (masse)
5 Masse DDC*
6 Masse rouge
7 Masse vert
8 Masse bleu
9–
10 Masse
11 ID (masse)
12 Données bidirectionnelles (SDA)*
13 Synchro H
14 Synchro V
15 Données d’horloge (SCL)*
1 2 3 4
5
876
11 12 13 14 15
10
9
6
Installation
Avant de mettre ce moniteur en service, vérifiez si tous les
accessoires suivants se trouvent bien dans le carton:
• Cordon d’alimentation (1)
• Windows Monitor Information Disk (1)
• Carte de garantie (1)
• Remarques sur l’entretien de la surface de l’écran (1)
• Ce mode d’emploi (1)
1re étape:Raccordez le moniteur à
votre ordinateur
Mettez le moniteur et l’ordinateur hors tension avant de procéder
au raccordement.
Remarque
Ne touchez pas les broches du connecteur de câble vidéo, car vous
risqueriez de les plier.
x
Raccordement à un PC/AT IBM ou à un ordi-
nateur compatible
x
Raccordement à un ordinateur Macintosh
ou compatible
2e étape:Branchez le cordon
d’alimentation
Le moniteur et l’ordinateur étant hors tension, branchez d’abord
le cordon d’alimentation sur le moniteur et ensuite sur une prise
murale.
AC IN
PC/AT IBM ou
ordinateur compatible
vers la
sortie vidéo
AC IN
Vous avez besoin d’un adaptateur Macintosh (non fourni).
Adaptateur Macintosh (non fourni)
Macintosh ou ordinateur
compatible
vers la sortie vidéo
AC IN
vers AC IN
vers une prise
murale
cordon d’alimentation
(fourni)
7
FR
3e étape:Mettez le moniteur et
l’ordinateur sous tension
Mettez d’abord le moniteur sous tension et puis l’ordinateur.
L’installation de votre moniteur est à présent terminée.
Si nécessaire, utilisez les commandes du moniteur pour régler
l’image.
Si aucune image n’apparaît à l’écran
• Vérifiez si le moniteur est correctement raccordé à l’ordinateur.
• Si l’indication PAS ENTREE VIDEO apparaît à l’écran,
vérifiez si la carte graphique de votre ordinateur est
complètement introduite dans la fente de bus correcte.
• Si vous remplacez un ancien moniteur par ce modèle et si
l’indication HORS PLAGE DE BALAYAGE apparaît à
l’écran, rebranchez l’ancien moniteur. Ajustez ensuite la carte
graphique de l’ordinateur de façon à ce que la fréquence
horizontale soit comprise entre 30 et 70 kHz et la fréquence
verticale entre 48 et 120 Hz.
Pour plus d’informations sur les messages affichés à l’écran,
reportez-vous à la section “Symptômes et remèdes” à la page 14.
Pour les clients utilisant Windows 95/98
Pour maximaliser le potentiel de votre moniteur, installez sur votre
ordinateur le nouveau fichier d’informations modèle depuis la disquette
Windows Monitor Information Disk.
Ce moniteur est conforme à la norme Plug & Play “VESA DDC”. Si votre
PC/carte graphique est conforme à la norme DDC, sélectionnez “Plug &
Play Monitor (VESA DDC)” ou la désignation de ce moniteur comme
type de moniteur dans le “Control Panel” de Windows 95/98. Si votre PC/
carte graphique a des difficultés à communiquer avec ce moniteur,
chargez la disquette Windows Monitor Information Disk et sélectionnez
la désignation de ce moniteur comme type de moniteur.
Pour les clients utilisant Windows NT4.0
L’installation du moniteur sous Windows NT4.0 est différente de
Windows 95/98 et n’implique pas la sélection du type de moniteur.
Reportez-vous au mode d’emploi de Windows NT4.0 pour plus de détails
sur le réglage de la résolution, le taux de régénération et le nombre de
couleurs.
Réglage de la résolution du moniteur et du nombre de
couleurs
Ajustez la résolution du moniteur et le nombre de couleurs en vous
référant au mode d’emploi de votre ordinateur. Le nombre de couleurs
peut varier selon votre ordinateur ou votre carte vidéo. Le réglage de la
palette de couleurs et le nombre réel de couleurs se présentent comme suit:
• High Color (16 bit) t 65.536 couleurs
• True Color (24 bit) t environ 16,77 millions de couleurs
En mode True Color (24 bits), la vitesse peut être inférieure.
Sélection de la langue d’affichage
des menus (LANGUE/
INFORMATION)
Les écrans de menu peuvent être affichés en français, anglais,
allemand, italien, espagnol, russe et japonais. La sélection par
défaut est l’anglais.
1
Appuyez au centre de la manette de commande.
Voir page 9 pour plus d’informations sur l’utilisation de la
manette de commande.
2
Déplacez la manette de commande vers le haut ou
le bas
m
/
M
pour mettre en évidence LANGUE/
INFORMATION et appuyez de nouveau au centre de
la manette de commande.
3
Déplacez la manette de commande vers le haut ou
le bas
m
/
M
pour sélectionner (LANGUE) et
déplacez vers la gauche ou la droite
<
/
,
pour
sélectionner une langue.
• ENGLISH: Anglais
• FRANÇAIS
• DEUTSCH: Allemand
• ITALIANO: Italien
• ESPAÑOL: Espagnol
• : Russe
• : Japonais
Pour quitter le menu
Appuyez une fois au centre de la manette de commande pour revenir au
MENU principal et appuyez ensuite de nouveau en sélectionnant
QUITTER pour revenir à la visualisation normale. Si vous n’actionnez
aucune touche, le menu se referme automatiquement au bout de 30
secondes environ.
Pour restaurer l’anglais
Appuyez sur la touche RESET pendant que le menu
(LANGUE) est
affiché à l’écran.
MENU
QU I TTER
TA I LLE H / POSI T ION
TA I LLE V / POSI T ION
COUSSIN/PINBALANEC
TRAPEZOÏD/PARALLÉL
ROTATION
ZOOM
COULEUR
SELECT
LANGUE / I NFORMAT I ON
DÉMAGNÉT I SÉ /MOI RÉ
MENU
MENU
ENGL ISH FRANÇAI S
DEUTSCH I TAL IANO
ESPAÑOL
SELECT EXI T
LANGUE / I NFORMAT ION
8
Personnalisation de votre
moniteur
Vous pouvez effectuer de multiples réglages sur votre moniteur à
l’aide des écrans de menu.
Pilotage par menus
Appuyez au centre de la manette de commande pour afficher le
MENU principal à l’écran. Voir page 9 pour plus d’informations
sur l’utilisation de la manette de commande.
Utilisez la manette de commande pour sélectionner l’un des
menus suivants.
1 QUITTER
Sélectionnez QUITTER pour
quitter le menu.
2 TAILLE H/POSITION
(page 10)
Sélectionnez le menu TAILLE
H/POSITION pour régler la
taille horizontale et le centrage
de l’image.
3 TAILLE V/POSITION
(page 10)
Sélectionnez le menu TAILLE
V/POSITION pour régler la
taille verticale et le centrage de
l’image.
4 COUSSIN/PIN BALANCE
(page 10)
Sélectionnez le menu
COUSSIN/PIN BALANCE pour
régler l’incurvation des côtés de
l’image.
5 TRAPÉZOÏD/PARALLÉL
(page 10)
Sélectionnez le menu
TRAPÉZOÏD/PARALLÉL pour
régler l’angle des côtés de
l’image.
QU I TTER
TA I LLE H / POS I T ION
TA I LLE V / POS I T ION
COUSSIN/PINBALANEC
TRAPÉZOÏD/PARALLÉL
ROTATION
ZOOM
COULEUR
SELECT
LANGUE / I NFORMAT I ON
DÉMAGNÉT I SÉ /MOI RÉ
MENU
TAI LLE H
26
SELECT EXI T
TA I LLE H / POS I T I ON
TAI LLE V
26
SELECT EXI T
TA I LLE V / POS I T ION
COUSS I N
26
SELECT EXI T
COUSS I N / P I N BALANCE
TRAPÉZOÏD
26
SELECT EXI T
TRAPÉZOÏD/PARALLÉL
6 ROTATION (page 11)
Sélectionnez le menu
ROTATION pour régler la
rotation de l’image.
7 ZOOM (page 11)
Sélectionnez le menu ZOOM
pour agrandir ou pour réduire
l’image.
8 COULEUR (page 11)
Sélectionnez le menu
COULEUR pour régler la
température des couleurs de
l’image. Vous pouvez utiliser ce
menu pour faire correspondre les
couleurs du moniteur aux
couleurs d’une image imprimée.
9 LANGUE/INFORMATION
(pages 7, 15)
Sélectionnez le menu LANGUE/
INFORMATION pour
sélectionner la langue
d’affichage des menus et afficher
la fenêtre d’information de ce
moniteur.
0 DÉMAGNÉTISÉ/MOIRÉ
(page 12)
Sélectionnez le menu
DÉMAGNÉTISÉ/MOIRÉ pour
démagnétiser l’écran et ajustez le
niveau de suppression du moiré.
ROTAT ION
26
EXI T
ROTAT ION
ZOOM
26
EXI T
ZOOM
KKK
R50
G50
B50
SELECT EXI T
COULEUR
5000 6500 9300
USER
ENGL ISH FRANÇA I S
DEUTSCH I TAL IANO
ESPAÑOL
SELECT EXI T
LANGUE / I NFORMATI ON
DÉMAGNÉT I SÉ
OU I
SELECT EXI T
DÉMAGNÉT I SÉ / MOI RÉ
9
FR
x
Utilisation de la manette de commande
1
Affichez le MENU principal.
Appuyez au centre de la manette de commande pour afficher
le MENU principal sur l’écran.
2
Sélectionnez le menu que vous voulez régler.
Mettez en évidence le menu de votre choix en déplaçant la
manette de commande vers l’arrière pour monter (
M
), vers
l’avant pour descendre (
m
) et vers la gauche (
<
) ou vers la
droite (
,
) pour vous déplacer latéralement.
3
Réglez le menu.
Déplacez la manette de commande vers la gauche (
<
) ou la
droite (
,
) pour effectuer le réglage.
4
Quittez le menu.
Appuyez une fois au centre de la manette de commande pour
revenir au MENU principal et appuyez ensuite de nouveau en
sélectionnant QUITTER pour revenir à la visualisation
normale. Si vous n’actionnez aucune touche, le menu se
referme automatiquement au bout de 30 secondes environ.
x
Réinitialisation des réglages
Appuyez sur la touche RESET. Voir page 12 pour plus
d’informations sur la réinitialisation des réglages.
Réglage de la luminosité et du
contraste
Les réglages de la luminosité et du contraste sont effectués au
moyen d’un menu LUMINOSITÉ/CONTRASTE séparé.
Ces réglages sont enregistrés dans la mémoire pour tous les
signaux entrants.
1
Déplacez la manette de commande dans n’importe
quel sens.
Le menu LUMINOSITÉ/CONTRASTE apparaît à l’écran.
Les fréquences horizontales et verticales du signal d’entrée en
cours sont affichées dans le menu LUMINOSITÉ/
CONTRASTE. Si le signal correspond à l’un des modes
présélectionnés par défaut de ce moniteur, la résolution
s’affiche également.
2
Déplacez la manette de commande vers le haut ou
le bas
m
/
M
pour régler la luminosité ( ), et vers la
gauche ou la droite
<
/
,
pour régler le contraste
(6).
Le menu disparaît automatiquement au bout d’environ
3 secondes.
MENU
MENU MENU
ARRIERE
AVANT
MENU
MENU
RESET
26 26
68.7kHz/85.0Hz
1024X768
LUMINOSI TÉ/CONTRASTE
les fréquences
horizontales et
verticales du
signal d’entrée
en cours
la résolution
du
signal d’en
trée
en cours
10
Réglage de la taille horizontale ou
du centrage de l’image (TAILLE H/
POSITION)
Ces réglages sont enregistrés dans la mémoire pour le signal
d’entrée en cours.
1
Appuyez au centre de la manette de commande.
Le MENU principal apparaît à l’écran.
2
Déplacez la manette de commande vers le haut ou
le bas
m
/
M
pour mettre en évidence TAILLE H/
POSITION et appuyez de nouveau au centre de la
manette de commande.
Le menu TAILLE H/POSITION apparaît à l’écran.
3
Déplacez d’abord la manette de commande vers le
haut ou le bas
m
/
M
pour sélectionner le paramètre
de réglage voulu. Déplacez ensuite la manette de
commande vers la gauche ou la droite
<
/
,
pour
exécuter le réglage.
Réglage de la taille verticale ou du
centrage de l’image (TAILLE V/
POSITION)
Ces réglages sont enregistrés dans la mémoire pour le signal
d’entrée en cours.
1
Appuyez au centre de la manette de commande.
Le MENU principal apparaît à l’écran.
2
Déplacez la manette de commande vers le haut ou
le bas
m
/
M
pour mettre en évidence TAILLE V/
POSITION et appuyez de nouveau au centre de la
manette de commande.
Le menu TAILLE V/POSITION apparaît à l’écran.
3
Déplacez d’abord la manette de commande vers le
haut ou le bas
m
/
M
pour sélectionner le paramètre
de réglage voulu. Déplacez ensuite la manette de
commande vers la gauche ou la droite
<
/
,
pour
exécuter le réglage.
Réglage de l’incurvation des côtés
de l’image (COUSSIN/PIN
BALANCE)
Ces réglages sont enregistrés dans la mémoire pour le signal
d’entrée en cours.
1
Appuyez au centre de la manette de commande.
Le MENU principal apparaît à l’écran.
2
Déplacez la manette de commande vers le haut ou
le bas
m
/
M
pour mettre en évidence COUSSIN/
PIN BALANCE et appuyez de nouveau au centre de
la manette de commande.
Le menu COUSSIN/PIN BALANCE apparaît à l’écran.
3
Déplacez d’abord la manette de commande vers le
haut ou le bas
m
/
M
pour sélectionner le paramètre
de réglage voulu. Déplacez ensuite la manette de
commande vers la gauche ou la droite
<
/
,
pour
exécuter le réglage.
Réglage de l’angle des côtés de
l’image (TRAPÉZOÏD/PARALLÉL)
Ces réglages sont enregistrés dans la mémoire pour le signal
d’entrée en cours.
1
Appuyez au centre de la manette de commande.
Le MENU principal apparaît à l’écran.
2
Déplacez la manette de commande vers le haut ou
le bas
m
/
M
pour mettre en évidence TRAPÉZOÏD/
PARALLÉL et appuyez de nouveau au centre de la
manette de commande.
Le menu TRAPÉZOÏD/PARALLÉL apparaît à l’écran.
3
Déplacez d’abord la manette de commande vers le
haut ou le bas
m
/
M
pour sélectionner le paramètre
de réglage voulu. Déplacez ensuite la manette de
commande vers la gauche ou la droite
<
/
,
pour
exécuter le réglage.
Sélectionnez Pour
TAILLE H
régler la taille horizontale
POSITION H
régler le centrage horizontal
Sélectionnez Pour
TAILLE V
régler la taille verticale
POSITION V
régler le centrage vertical
Sélectionnez Pour
COUSSIN
élargir ou rétrécir les côtés de l’image
PIN BALANCE
décaler les côtés de l’image vers la
gauche ou la droite
Sélectionnez Pour
TRAPÉZOÏD
régler la largeur de l’image dans le
haut de l’écran
PARALLÉL
décaler l’image vers la gauche ou la
droite dans le haut de l’écran
11
FR
Réglage de la rotation de l’image
(ROTATION)
Ce réglage est enregistré dans la mémoire pour tous les signaux
d’entrée.
1
Appuyez au centre de la manette de commande.
Le MENU principal apparaît à l’écran.
2
Déplacez la manette de commande vers le haut ou
le bas
m
/
M
pour mettre en évidence ROTATION
et appuyez de nouveau au centre de la manette de
commande.
Le menu ROTATION apparaît à l’écran.
3
Déplacez la manette de commande vers la gauche
ou la droite
<
/
,
pour faire pivoter l’image.
Agrandir ou réduire l’image
(ZOOM)
Ce réglage est enregistré dans la mémoire pour le signal d’entrée
en cours.
1
Appuyez au centre de la manette de commande.
Le MENU principal apparaît à l’écran.
2
Déplacez la manette de commande vers le haut ou
le bas
m
/
M
pour mettre en évidence ZOOM et
appuyez de nouveau au centre de la manette de
commande.
Le menu ZOOM apparaît à l’écran.
3
Déplacez la manette de commande vers la gauche
ou la droite
<
/
,
pour agrandir ou réduire l’image.
Remarque
Le réglage s’arrête lorsque la plage de réglage horizontal ou vertical
atteint sa valeur limite maximum ou minimum.
Réglage de la couleur de l’image
(COULEUR)
Les réglages COULEUR permettent de régler la température de
couleur de l’image en changeant le niveau de couleur du champ
de couleur blanc. Les couleurs apparaissent rougeâtres lorsque la
température est basse et bleuâtres lorsqu’elle est élevée. Ce
réglage est pratique pour faire correspondre les couleurs du
moniteur aux couleurs d’une image imprimée.
Ce réglage est enregistré dans la mémoire pour tous les signaux
d’entrée.
1
Appuyez au centre de la manette de commande.
Le MENU principal apparaît à l’écran.
2
Déplacez la manette de commande vers le haut ou
le bas
m
/
M
pour mettre en évidence COULEUR et
appuyez de nouveau au centre de la manette de
commande.
Le menu COULEUR apparaît à l’écran.
3
Déplacez la manette de commande vers la gauche
ou la droite
<
/
,
pour sélectionner une
température de couleur.
Les températures de couleur présélectionnées sont 5000K,
6500K, et 9300K. Comme le réglage par défaut est 9300K, les
blancs passent d’une nuance bleuâtre à une nuance rougeâtre
lorsque la température est abaissée de 6500K à 5000K.
4
Si nécessaire, accordez finement la température de
couleur.
Déplacez d’abord la manette de commande vers la gauche ou
la droite
<
/
,
pour sélectionner USER. Déplacez ensuite la
manette de commande vers le haut ou le bas
m
/
M
pour
sélectionner R (rouge), G (vert) ou B (bleu) et déplacez vers
la gauche ou la droite
<
/
,
pour effectuer le réglage.
Si vous procédez au réglage précis de la température des
couleurs, le nouveau réglage des couleurs est mémorisé et
rappelé chaque fois que vous sélectionnez USER.
KKK
R50
G50
B50
SELECT EXI T
COULEUR
5000 6500 9300
USER
12
Réglages supplémentaires
(DÉMAGNÉTISÉ/MOIRÉ)
Vous pouvez dégausser (démagnétiser) manuellement le
moniteur et ajuster le niveau de suppression du moiré.
1
Appuyez au centre de la manette de commande.
Le MENU principal apparaît à l’écran.
2
Déplacez la manette de commande vers le haut ou
le bas
m
/
M
pour mettre en évidence
DÉMAGNÉTISÉ/MOIRÉ et appuyez de nouveau
au centre de la manette de commande.
Le menu DÉMAGNÉTISÉ/MOIRÉ apparaît à l’écran.
3
Déplacez la manette de commande vers le haut ou
le bas
m
/
M
pour sélectionner le paramètre de
réglage voulu.
Procédez au réglage du paramètre sélectionné en suivant les
instructions ci-dessous.
Démagnétisation de l’écran
L’écran du moniteur est automatiquement démagnétisé à la mise
sous tension.
Pour démagnétiser manuellement l’écran, déplacez
d’abord la manette de commande vers le haut ou le bas
m
/
M
afin de sélectionner (DÉMAGNÉTISÉ). Déplacez
ensuite la manette de commande vers la droite
,
.
L’écran est démagnétisé pendant environ 5 secondes. Si un
second cycle de démagnétisation s’avère nécessaire, laissez
s’écouler un intervalle de 20 minutes pour obtenir de meilleurs
résultats.
Réglage du moiré*
Si des motifs elliptiques ou ondulés apparaissent sur l’écran,
réglez le niveau de suppression du moiré.
Pour régler le niveau de suppression du moiré,
déplacez d’abord la manette de commande vers le haut
ou le bas
m
/
M
afin de sélectionner (ADAPTE
MOIRÉ). Déplacez ensuite la manette de commande
vers la gauche ou la droite
<
/
,
jusqu’à ce que l’effet
de moiré soit minimal.
* L’effet de moiré est un type d’interférence naturelle qui produit de
légères lignes ondulées sur l’écran. Il peut résulter d’une interférence
entre le motif de l’image à l’écran et la disposition des points du
moniteur.
Réinitialisation des réglages
Ce moniteur offre trois méthodes de réinitialisation. Utilisez la
touche RESET pour réinitialiser les réglages.
Réinitialisation d’un seul paramètre de réglage
Utilisez la manette de commande pour sélectionner le paramètre
de réglage que vous voulez réinitialiser et appuyez sur la touche
RESET.
Réinitialisation de toutes les données de réglage
pour le signal d’entrée en cours
Appuyez sur la touche RESET lorsqu’aucun menu n’est affiché
sur l’écran.
Attention que les paramètres suivants ne sont pas réinitialisés par
cette méthode:
• langue d’affichage des menus (page 7)
• rotation de l’image (page 11)
Réinitialisation de toutes les données de réglage
pour tous les signaux d’entrée
Maintenez la touche RESET enfoncée pendant au moins deux
secondes.
Attention que le paramètre suivant ne peut être réinitialisé suivant
cette méthode:
• réglages utilisateur du menu couleur (page 11)
Exemple de moiré
RESET
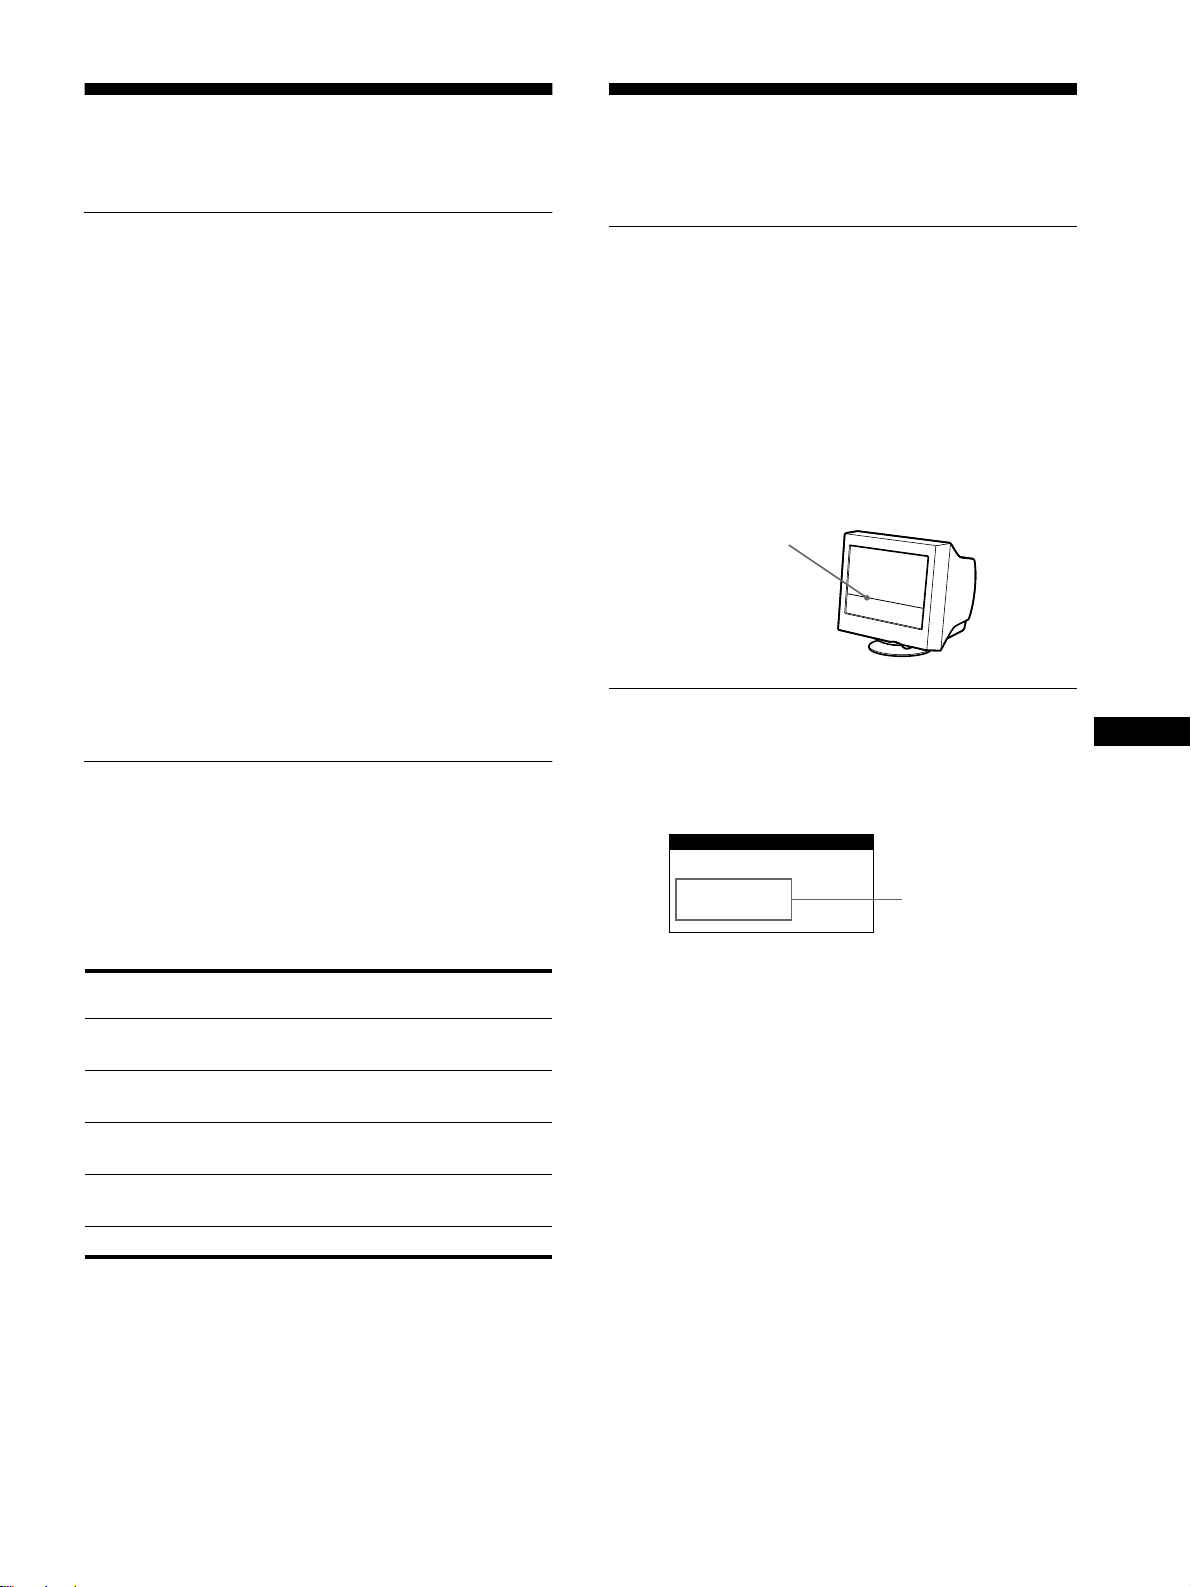
13
FR
Caractéristiques
techniques
Modes présélectionné et utilisateur
Lorsque le moniteur reçoit un signal d’entrée, il fait
automatiquement correspondre le signal à l’un des modes
présélectionnés qui sont enregistrés dans la mémoire du moniteur
de manière à offrir une image de haute qualité au centre de
l’écran. (Voir Appendix pour une liste des modes
présélectionnés.) Pour les signaux d’entrée qui ne correspondent
pas à l’un des modes présélectionnés, la technologie Multiscan
numérique intégrée dans ce moniteur fait en sorte qu’une image
claire apparaisse à l’écran pour toutes les synchronisations dans la
plage de fréquences du moniteur (horizontale: 30 à 70 kHz;
verticale: 48 à 120 Hz). Lorsque l’image est réglée, les données
de réglage sont mémorisées comme un mode utilisateur et sont
rappelées automatiquement chaque fois que le même signal
d’entrée est reçu.
Remarque à l’intention des utilisateurs de
Windows
Vérifiez le mode d’emploi de votre carte vidéo ou le programme
utilitaire fourni avec la carte graphique et sélectionnez le taux de
régénération le plus élevé de manière à maximiser les
performances du moniteur.
Fonction d’économie d’énergie
Ce moniteur satisfait aux critères d’économie d’énergie VESA,
E
NERGY
S
TAR et NUTEK. Lorsque le moniteur est raccordé à
un ordinateur ou une carte graphique vidéo compatible DPMS
(Display Power Management Signaling), le moniteur réduit
automatiquement sa consommation d’énergie en trois étapes
comme indiqué ci-dessous.
* “Sommeil” et “sommeil profond” sont des modes d’économie
d’énergie définis par l’Environmental Protection Agency.
** Lorsque votre ordinateur passe en mode “inactif”, le signal d’entrée
est coupé et l’indication PAS ENTREE VIDEO apparaît à l’écran. Au
bout de 20 secondes, le moniteur passe en mode d’économie
d’énergie.
Dépannage
Consultez cette section avant de faire appel au service
d’assistance technique.
Si une fine ligne apparaît à l’écran
(fil d’amortissement)
La ligne que vous apercevez sur votre écran est une
caractéristique normale du moniteur Trinitron et ne constitue
donc pas un dysfonctionnement. Il s’agit de l’ombre du fil
d’amortissement employé pour stabiliser la grille d’ouverture qui
est le plus facilement visible lorsque l’arrière-plan de l’écran est
clair (généralement blanc). La grille d’ouverture est l’élément
essentiel qui rend les tubes image Trinitron uniques en permettant
le passage d’une plus grande quantité de lumière vers l’écran, ce
qui garantit une image plus lumineuse et plus finement détaillée.
Messages affichés à l’écran
Lorsqu’une anomalie du signal d’entrée est détectée, l’un des
messages suivants apparaît à l’écran. Pour remédier au problème,
voir “Symptômes et remèdes” à la page 14.
Condition du signal d’entrée
HORS PLAGE DE BALAYAGE
indique que le signal d’entrée n’est pas supporté par les
spécifications du moniteur.
PAS ENTREE VIDEO
indique qu’aucun signal n’est entré sur le moniteur.
Mode
d’alimentation
Consommation
d’énergie
L’indicateur 1
(alimentation)
fonctionnement
normal
≤
95 W vert
1 veille
≤
15 W vert et orange en
alternance
2 interruption
(sommeil)*
≤
15 W vert et orange en
alternance
3 inactif**
(sommeil profond)*
≤
5 W orange
hors tension 0 W désactivé
Fil d’amortissement
INFORMATIONS
HORS PLAGE
DE BALAYAGE
Condition du
signal d’entrée

14
Symptômes et remèdes
Si le problème est provoqué par l’ordinateur ou tout autre appareil raccordé, veuillez vous référer au mode d’emploi de l’appareil raccordé.
Utilisez la fonction d’autodiagnostic (page 16) si les recommandations suivantes ne vous permettent pas de résoudre le problème survenu.
Symptôme Vérifiez
Pas d’image
Si l’indicateur 1 (alimentation) ne
s’allume pas
• Vérifiez si le cordon d’alimentation est correctement branché.
• Vérifiez si le commutateur 1 (alimentation) est réglé sur la position “on”.
Si le message PAS ENTREE
VIDEO apparaît à l’écran ou si
l’indicateur 1 (alimentation) est
orange ou clignote alternativement
en vert et en orange
• Vérifiez si le câble de signal vidéo est correctement branché et si les fiches sont
fermement enfoncées dans leurs prises respectives (page 6).
• Vérifiez si les broches du connecteur d’entrée vidéo HD15 ne sont pas faussées ou
enfoncées.
xProblèmes causés par l’ordinateur ou tout autre appareil raccordé
• L’ordinateur est en mode d’économie d’énergie. Essayez d’appuyer sur une touche du
clavier de l’ordinateur.
• Vérifiez si le commutateur d’alimentation de l’ordinateur est sur “on”.
• Vérifiez si la carte graphique est complètement enfoncée dans la fente de bus appropriée.
Si le message HORS PLAGE DE
BALAYAGE apparaît à l’écran
xProblèmes causés par l’ordinateur ou tout autre appareil raccordé
• Vérifiez si la plage de fréquence vidéo correspond aux spécifications du moniteur. Si vous
remplacez un ancien moniteur par ce moniteur, reconnectez l’ancien moniteur et ajustez la
plage de fréquence comme suit.
Horizontale: 30 à 70 kHz
Verticale: 48 à 120 Hz
Si aucun message ne s’affiche et si
l’indicateur 1 (alimentation) est vert
ou clignote en orange
• Activez la fonction d’autodiagnostic (page 16).
Si vous utilisez Windows 95/98 • Si vous remplacez un ancien moniteur par ce moniteur, reconnectez l’ancien moniteur et
procédez comme suit. Installez la disquette Windows Monitor Information Disk (page 7)
et sélectionnez ce moniteur (“CPD-E100”) parmi les moniteurs Sony dans l’écran de
sélection de moniteur de Windows 95/98.
Si vous utilisez un système
Macintosh
• Vérifiez si l’adaptateur Macintosh (non fourni) et le câble de signal vidéo sont
correctement raccordés (page 6).
L’image scintille, sautille, oscille
ou est brouillée
• Isolez et éliminez les sources potentielles de champs électriques ou magnétiques tels que
d’autres moniteurs, des imprimantes laser, des ventilateurs électriques, des lampes
fluorescentes ou des téléviseurs.
• Éloignez le moniteur des lignes à haute tension ou placez un blindage magnétique à
proximité du moniteur.
• Branchez le moniteur sur une autre prise secteur, de préférence raccordée à un autre
circuit.
• Faites pivoter le moniteur de 90° vers la gauche ou la droite.
xProblèmes causés par l’ordinateur ou tout autre appareil raccordé
• Vérifiez le réglage adéquat pour le moniteur dans le mode d’emploi de votre carte
graphique.
• Assurez-vous que le mode graphique (VESA, Macintosh 16" Color, etc.) et la fréquence
du signal d’entrée sont supportés par ce moniteur (Appendix). Même si la fréquence est
comprise dans la plage adéquate, il arrive que certaines cartes vidéo présentent une
impulsion de synchronisation trop étroite pour que le moniteur puisse se synchroniser
correctement.
• Ajustez le taux de régénération de l’ordinateur (fréquence verticale) de façon à obtenir la
meilleure image possible.
L’image est floue • Ajustez la luminosité et le contraste (page 9).
• Démagnétisez le moniteur* (page 12).
• Sélectionnez ADAPTE MOIRÉ et réglez le niveau de suppression de moiré (page 12).
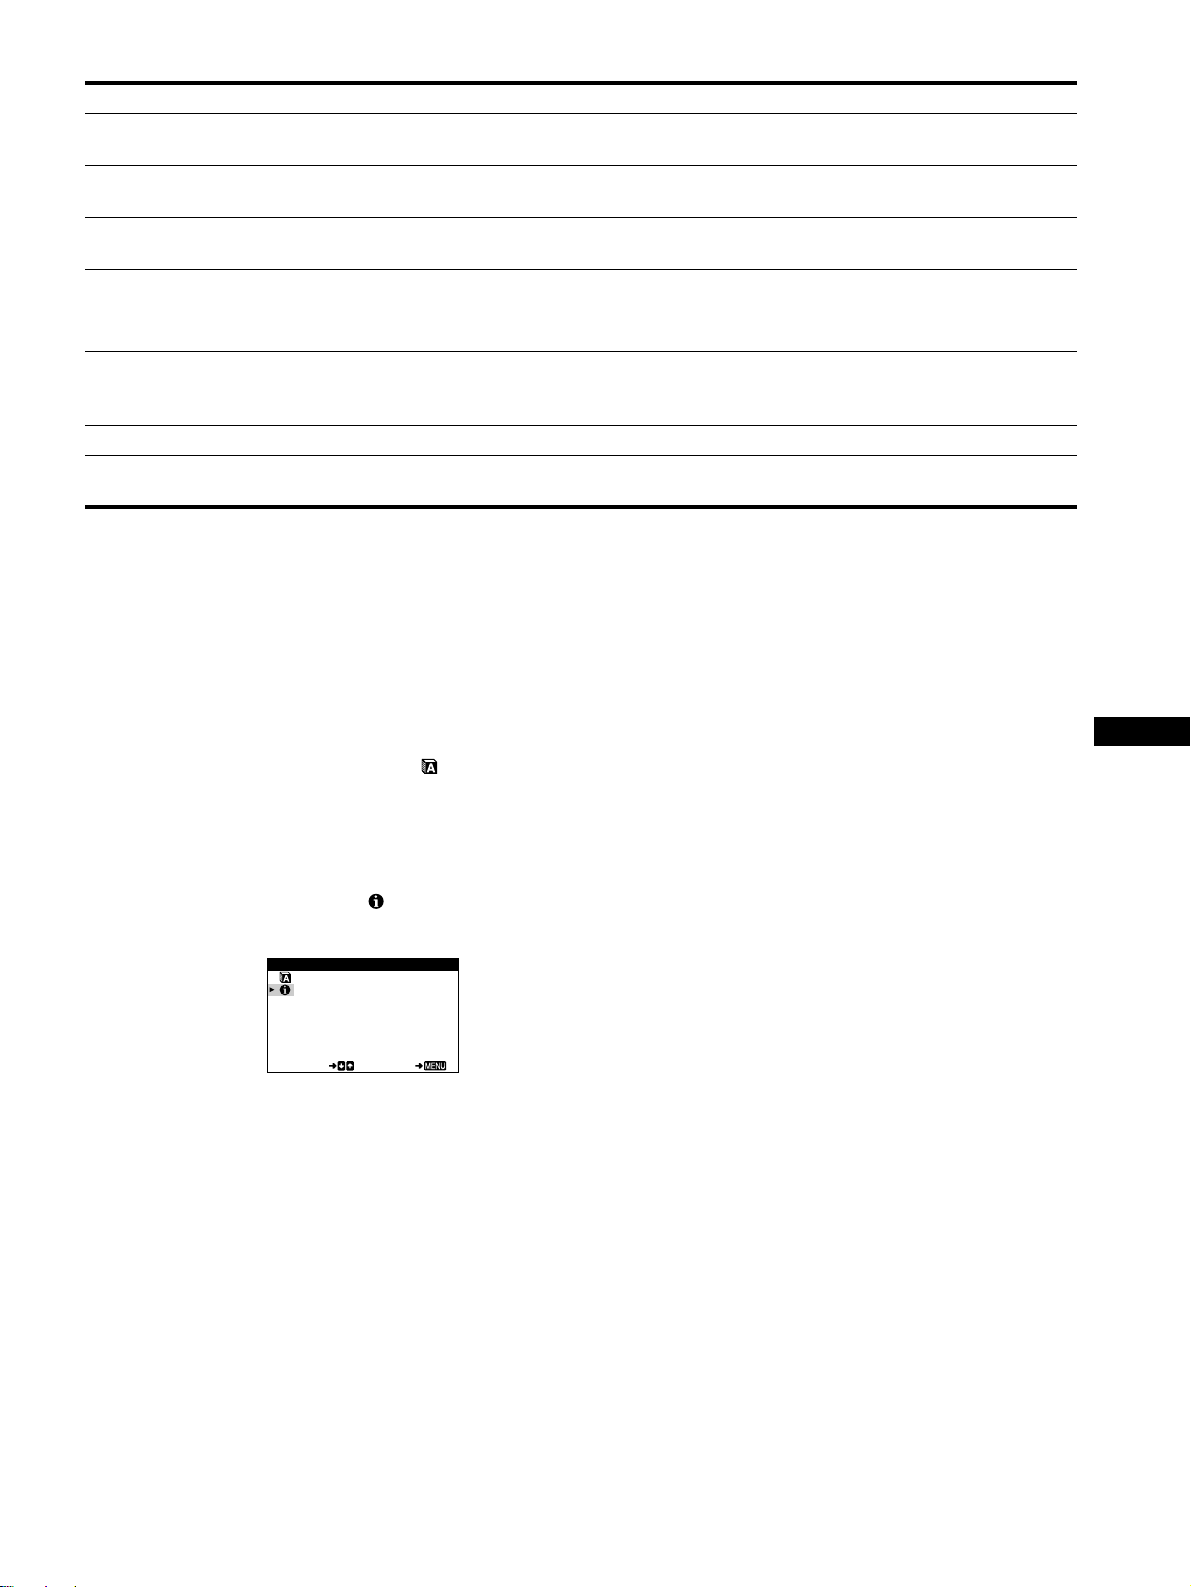
15
FR
* Si un second cycle de démagnétisation s’avère nécessaire, laissez s’écouler un intervalle de 20 minutes pour obtenir de meilleurs résultats. Un bruit de
souffle peut se faire entendre, mais il ne s’agit pas d’un dysfonctionnement.
Affichage de la désignation, du numéro de série et
de la date de fabrication du moniteur
(INFORMATION)
1
Appuyez au centre de la manette de commande.
Le MENU principal apparaît à l’écran.
2
Déplacez la manette de commande vers le haut ou
le bas
m
/
M
pour mettre en évidence LANGUE/
INFORMATION et appuyez de nouveau au centre de
la manette de commande.
Le menu LANGUE/INFORMATION apparaît à l’écran.
3
Déplacez la manette de commande vers le haut ou
le bas
m
/
M
pour sélectionner (INFORMATION).
Cette fenêtre d’information sur le moniteur apparaît à l’
éc
ran.
Si le problème persiste, appelez votre revendeur Sony agréé et
fournissez-lui les informations suivantes.
• Désignation du modèle: CPD-E100
• Numéro de série
• Marque et spécifications de votre ordinateur et de votre carte
graphique.
Des images fantômes
apparaissent
• N’utilisez pas de prolongateurs de câble vidéo et/ou de boîtiers de commutation vidéo.
• Vérifiez si toutes les fiches sont fermement connectées dans leurs prises respectives.
L’image n’est pas centrée ou de
taille incorrecte
• Ajustez la taille ou le centrage (page 10) de l’image. Attention que certains modes vidéo
ne remplissent pas l’écran jusqu’aux bords.
Les bords de l’image sont
incurvés
• Sélectionnez COUSSIN/PIN BALANCE, TRAPÉZOÏD/PARALLÉL ou ROTATION et
réglez la forme et la rotation de l’image (pages 10, 11).
Un motif ondulatoire ou elliptique
(moiré) est visible
• Sélectionnez ADAPTE MOIRÉ et réglez le niveau de suppression de moiré (page 12).
xProblèmes causés par l’ordinateur ou tout autre appareil raccordé
• Changez le motif de votre bureau.
Les couleurs ne sont pas
uniformes
• Démagnétisez le moniteur* (page 12). Si vous placez à côté du moniteur un appareil qui
génère un champ magnétique, comme un haut-parleur, ou si vous changez l’orientation du
moniteur, il se peut que les couleurs perdent leur uniformité.
Le blanc n’est pas blanc • Ajustez la température de couleur (page 11).
Un souffle est audible juste après
la mise sous tension
• C’est le son provoqué par le cycle de démagnétisation automatique. Lorsque le moniteur
est mis sous tension, il est automatiquement démagnétisé pendant cinq secondes.
Symptôme Vérifiez
MODEL :CPD- E100
SERIAL:12345678
MANUFACTURED: 1999 - 52
SELECT EXI T
LANGUE / I NFORMAT I ON
Exemple
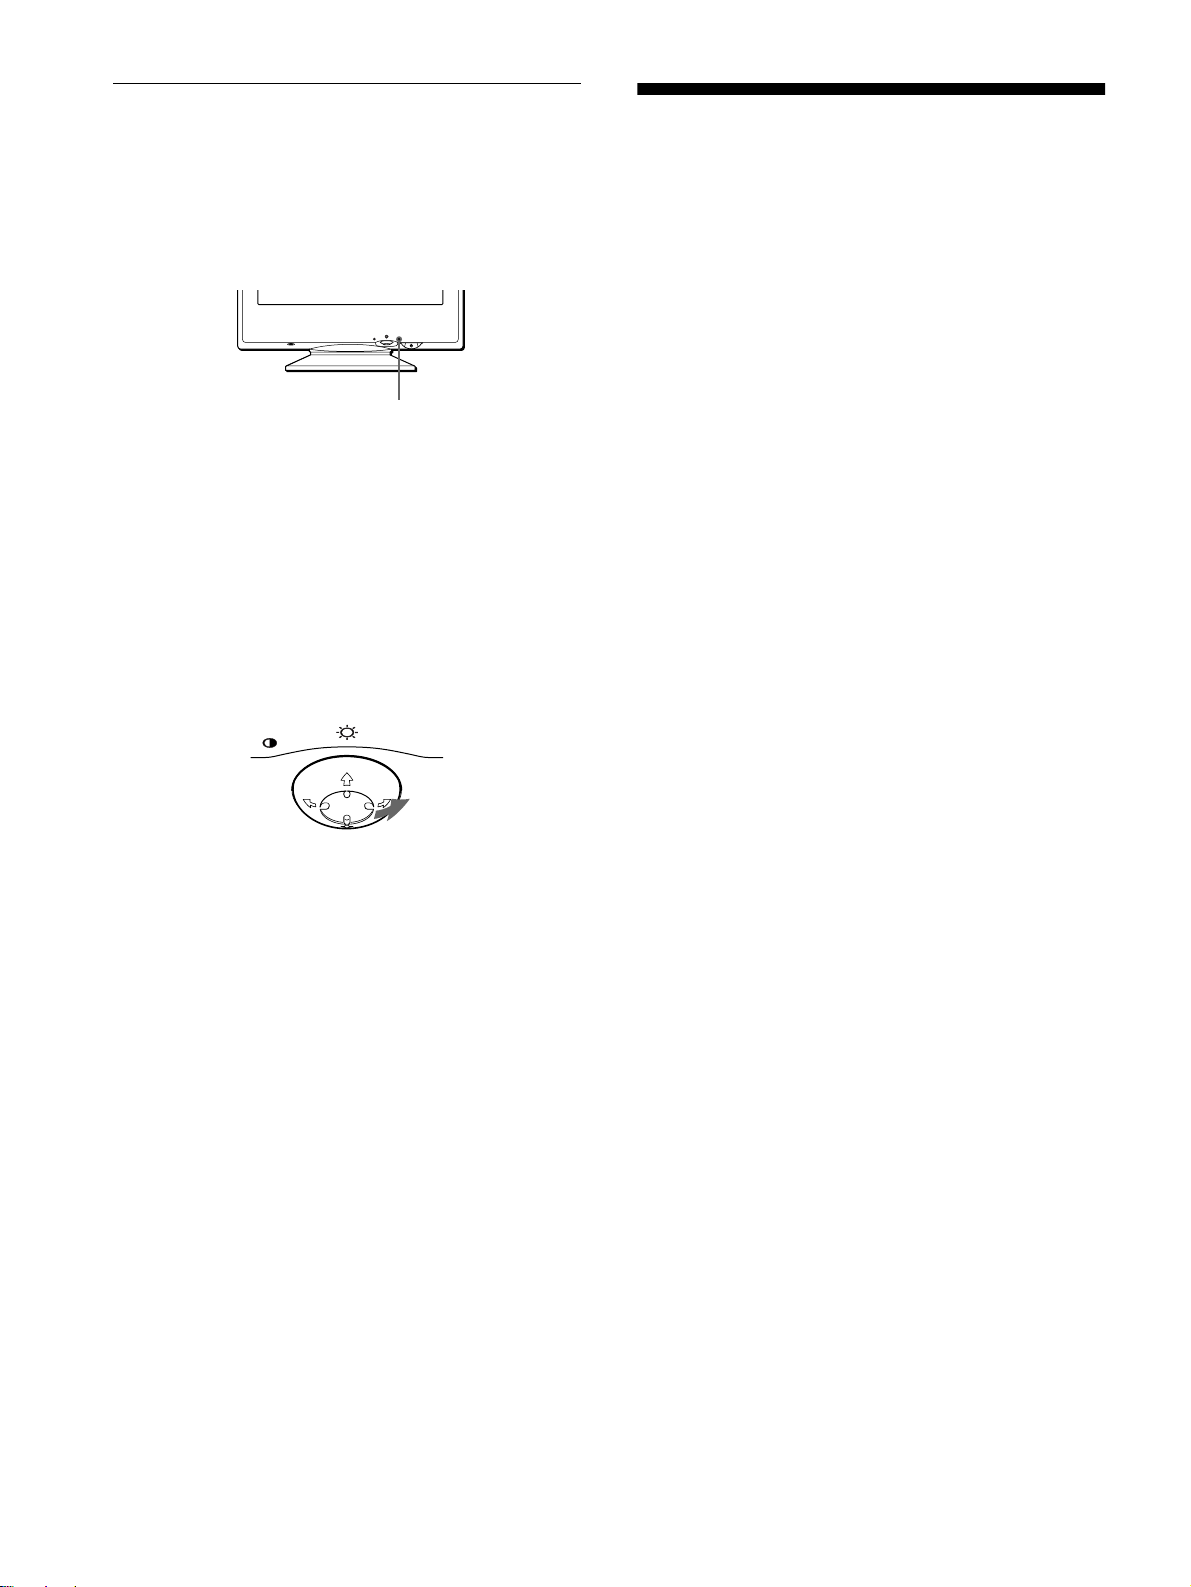
16
Fonction d’autodiagnostic
Ce moniteur est doté d’une fonction d’autodiagnostic. S’il y a un
problème avec votre moniteur ou ordinateur, l’écran devient
blanc et l’indicateur 1 (alimentation) s’allume en vert ou clignote
en orange. Si l’indicateur 1 (alimentation) s’allume en orange,
c’est que l’ordinateur se trouve en mode d’économie d’énergie.
Appuyez sur une touche quelconque du clavier.
Si l’indicateur
1
(alimentation) est allumé en vert
1
Débranchez le câble d’entrée vidéo ou mettez
l’ordinateur raccordé hors tension.
2
Appuyez deux fois sur la touche 1 (alimentation)
pour mettre le moniteur hors et sous tension.
3
Déplacez la manette de commande vers la droite
,
pendant 2 secondes avant que le moniteur passe en
mode d’économie d’énergie.
Si les quatre barres de couleur apparaissent (blanc, rouge, vert,
bleu), c’est que le moniteur fonctionne correctement. Rebranchez
le câble d’entrée vidéo et vérifiez l’état de votre ordinateur.
Si les barres de couleur n’apparaissent pas, c’est probablement
parce qu’une anomalie s’est produite au niveau du moniteur.
Informez votre revendeur Sony agréé de l’état du moniteur.
Si l’indicateur
1
(alimentation) clignote en orange
Appuyez deux fois sur la touche 1 (alimentation) pour
mettre le moniteur hors et puis sous tension.
Si l’indicateur 1 (alimentation) s’allume en vert, c’est que le
moniteur fonctionne correctement.
Si l’indicateur 1 (alimentation) clignote toujours, c’est
probablement parce qu’il y a une anomalie au niveau du moniteur.
Comptez le nombre de secondes entre les clignotements oranges
de l’indicateur 1 (alimentation) et informez votre revendeur
Sony agréé de l’état du moniteur. Notez également la désignation
du modèle et le numéro de série de votre moniteur. Notez
également la marque et le modèle de votre ordinateur et de votre
carte vidéo.
Spécifications
Tube cathodique Pas d’ouverture de grille de 0,24 mm
(central)
15 pouces mesurés en diagonale
Déflexion de 90 degrés
Taille de l’image affichée Approx. 285
×
214 mm (l/h)
(11
1
/
4
×
8
1
/
2
pouces)
Zone de visualisation de 14,0"
Résolution
Maximum Horizontale: 1280 points
Verticale: 1024 lignes
Recommandée Horizontale: 800 points
Verticale: 600 ligne
Zone d’image standard Approx. 270
×
202 mm (l/h)
(10
3
/
4
×
8 pouces)
Fréquence de déflexion* Horizontale: 30 à 70 kHz
Verticale: 48 à 120 Hz
Tension/courant d’entrée CA
100 à 240 V, 50 – 60 Hz,
1,6 – 0,8 A
Consommation électrique Max. 95 W
Dimensions Approx
. 356
×
378
×
388 mm
(
l/h/p
)
(14
1
/
8
×
15
×
15
3
/
8
pouces)
Poids Approx. 15 kg (33 lb 1 oz)
Plug & Play DDC1/DDC2B
Accessoires fournis Voir page 6
* Condition de synchronisation horizontale et verticale
• La largeur de synchronisation horizontale doit être
supérieure à 1,0 µsec.
• La largeur de suppression horizontale doit être supérieure à
3,6 µsec.
• La largeur de suppression verticale doit être supérieure à
500 µsec.
La conception et les spécifications sont sujettes à modifications
sans préavis.
MENU
RESET
L’indicateur
1
(alimentation)
MENU
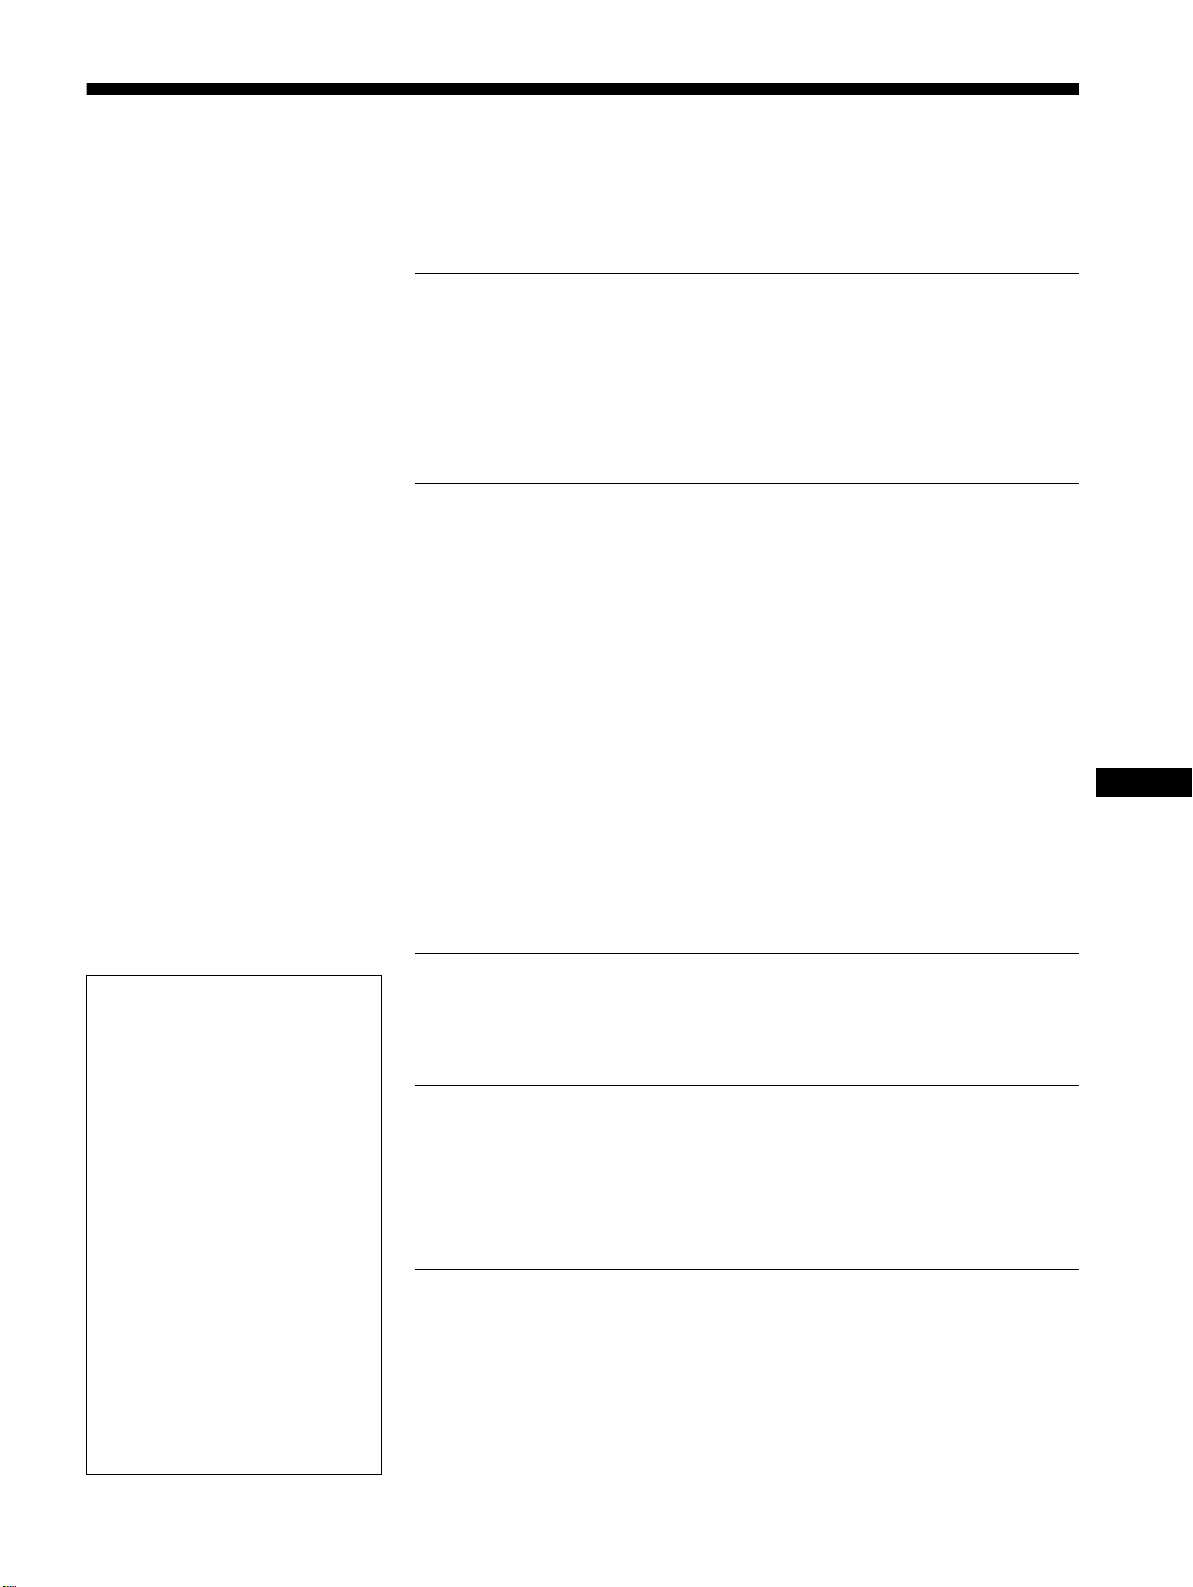
• Trinitron
es una marca comercial
registrada de Sony Corporation.
• Macintosh es una marca comercial de
Apple Computer, Inc., registrada en
EE.UU. y otros países.
• Windows
y MS-DOS son marcas
comerciales registradas de Microsoft
Corporation en Estados Unidos y otros
países.
• IBM PC/AT y VGA son marcas
comerciales registradas de IBM
Corporation de EE.UU.
• VESA y DDC
son marcas comerciales
de Video Electronics Standard
Association.
•
E
NERGY
S
TAR es una marca
registrada de EE.UU.
• El resto de los nombres de productos
mencionados en este manual pueden ser
marcas comerciales o marcas
comerciales registradas de sus
respectivas compañías.
•Además, “
” y “
” no se mencionan en
cada caso en este manual.
3
Índice
C:\WIN95-E\DESKTOP\CPD E100\386765901CPDE100UC\386765901CPDE100UC\03ES01COV-
UCTOC.fm
masterpage:Toc.master
CPD-E100
3-867-659-
01
(1)
ES
Precauciones . . . . . . . . . . . . . . . . . . . . . . . . . . . . . . . . . . . . . . . . . . 4
Identificación de los componentes y los controles . . . . . . . . . . . . . . 5
Instalación . . . . . . . . . . . . . . . . . . . . . . . . . . . . . . . . . . . . .6
Paso 1:
Conexión del monitor al ordenador. . . . . . . . . . . . . . . . . . . 6
Paso 2:
Conexión del cable de alimentación . . . . . . . . . . . . . . . . . . 6
Paso 3:
Encendido del monitor y del ordenador . . . . . . . . . . . . . . . 7
Selección del idioma de los menús en pantalla (LENGUAJE/
INFORMACIÓN). . . . . . . . . . . . . . . . . . . . . . . . . . . . . . . . . . . . . . . . 7
Personalización del monitor. . . . . . . . . . . . . . . . . . . . . . .8
Navegación por el menú. . . . . . . . . . . . . . . . . . . . . . . . . . . . . . . . . . 8
Ajuste del brillo y del contraste. . . . . . . . . . . . . . . . . . . . . . . . . . . . . 9
Ajuste del tamaño o centrado horizontal de la imagen
(TAMAÑO H/POSICIÓN) . . . . . . . . . . . . . . . . . . . . . . . . . . . . . . . . 10
Ajuste del tamaño o centrado vertical de la imagen
(TAMAÑO V/POSICIÓN) . . . . . . . . . . . . . . . . . . . . . . . . . . . . . . . . 10
Ajuste de la curvatura de los lados de la imagen
(COJÍN/BAL COJÍN). . . . . . . . . . . . . . . . . . . . . . . . . . . . . . . . . . . . 10
Ajuste del ángulo de los lados de la imagen
(TRAPECIO/PARALELO). . . . . . . . . . . . . . . . . . . . . . . . . . . . . . . . 10
Ajuste de la rotación de la imagen (ROTACIÓN). . . . . . . . . . . . . . 11
Ampliación o reducción de la imagen (ZOOM). . . . . . . . . . . . . . . . 11
Ajuste del color de la imagen (COLOR) . . . . . . . . . . . . . . . . . . . . . 11
Ajustes complementarios (DESMAGNETIZAR/MUARE) . . . . . . . . 12
Restauración de los ajustes . . . . . . . . . . . . . . . . . . . . . . . . . . . . . . 12
Características técnicas . . . . . . . . . . . . . . . . . . . . . . . . .13
Modos predefinidos y de usuario . . . . . . . . . . . . . . . . . . . . . . . . . . 13
Función de ahorro de energía . . . . . . . . . . . . . . . . . . . . . . . . . . . . 13
Solución de problemas . . . . . . . . . . . . . . . . . . . . . . . . . .13
Si aparece una línea fina en pantalla (hilo de amortiguación) . . . . 13
Mensajes en pantalla . . . . . . . . . . . . . . . . . . . . . . . . . . . . . . . . . . . 13
Problemas y soluciones . . . . . . . . . . . . . . . . . . . . . . . . . . . . . . . . . 14
Función de autodiagnóstico . . . . . . . . . . . . . . . . . . . . . . . . . . . . . . 16
Especificaciones . . . . . . . . . . . . . . . . . . . . . . . . . . . . . . .16
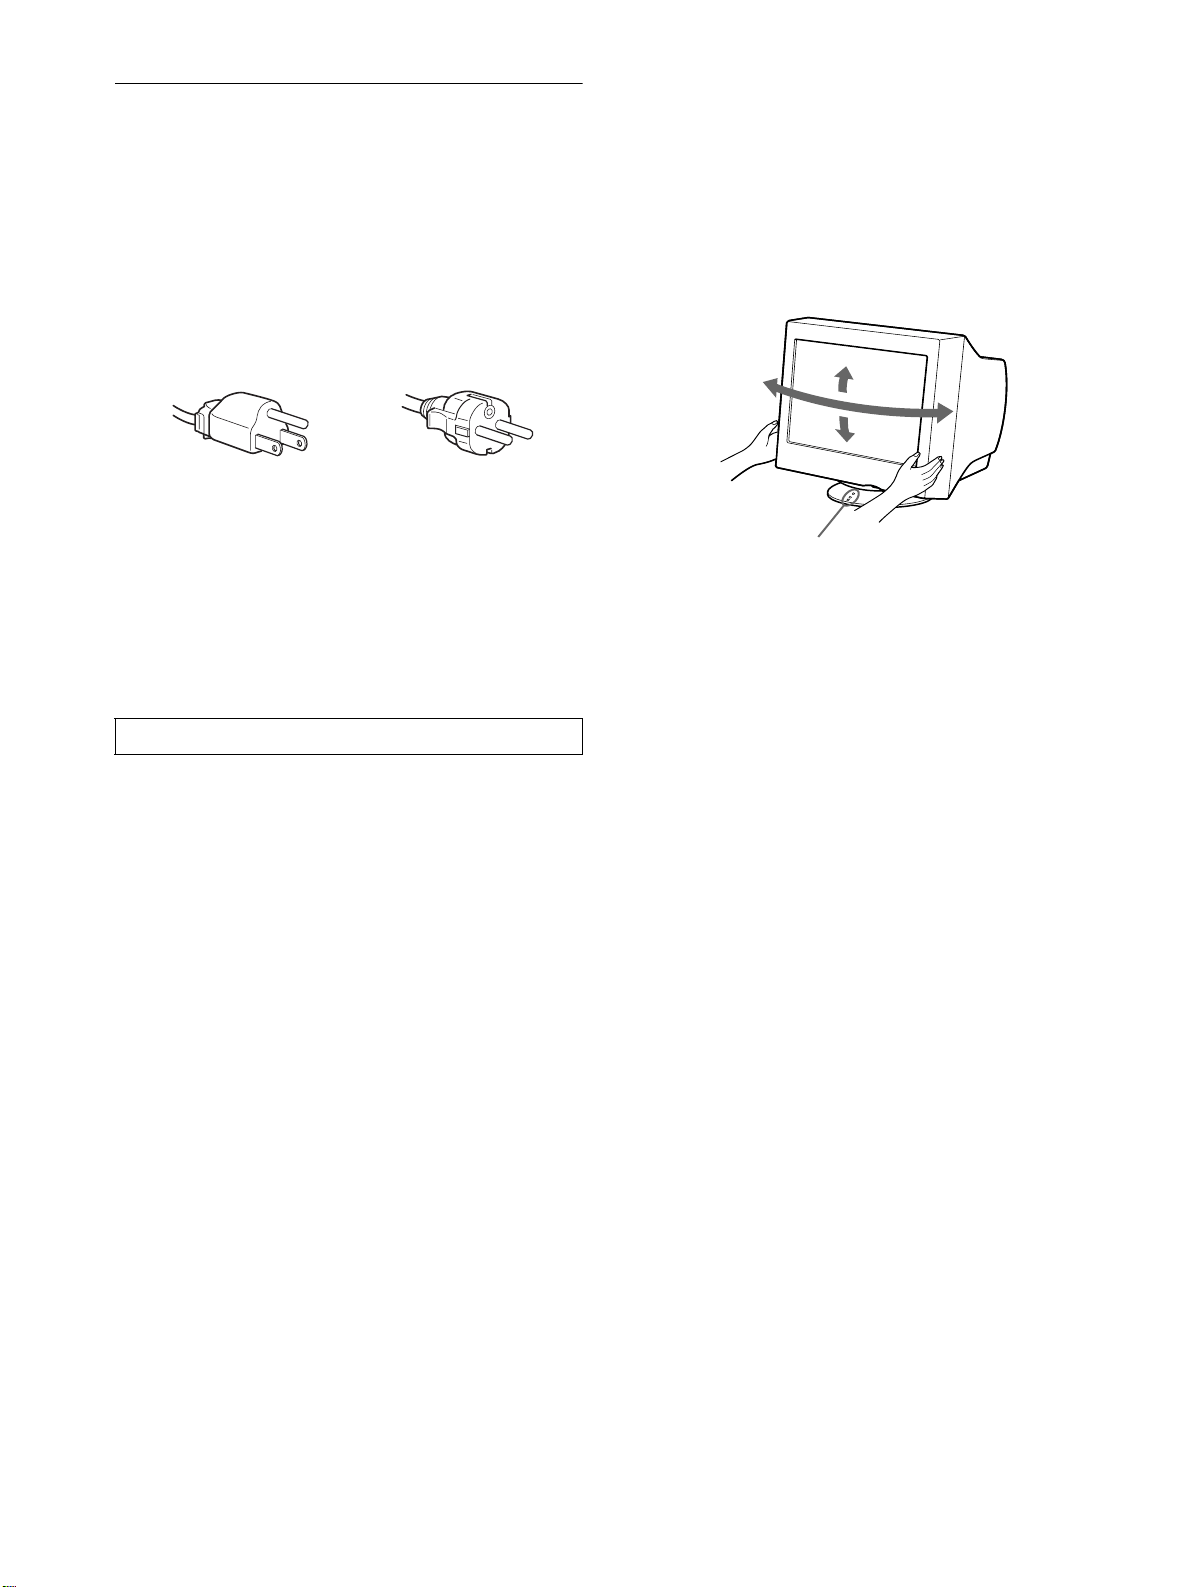
4
C:\WIN95-E\DESKTOP\CPD E100\386765901CPDE100UC\386765901CPDE100UC\03ES02BAS-
UC.fm
masterpage:Left
CPD-E100
3-867-659-
01
(1)
Precauciones
Advertencia sobre las conexiones de
alimentación
• Utilice el cable de alimentación suministrado. Si emplea otro
tipo de cable, asegúrese de que es compatible con el suministro
de alimentación local.
Para los usuarios en EE.UU.
Si no utiliza el cable apropiado, este monitor no cumplirá con
las normas obligatorias de la FCC.
• Antes de desconectar el cable de alimentación, espere al menos
30 segundos después de desactivar la alimentación para que se
descargue la electricidad estática de la superficie de la pantalla.
• Una vez activada la alimentación, la pantalla se desmagnetiza
durante unos 5 segundos. Esto genera un intenso campo
magnético alrededor de la pantalla que puede afectar a los datos
almacenados en discos y cintas magnéticas situados cerca del
monitor. Asegúrese de mantener discos, cintas y equipos de
grabación magnéticos alejados del monitor.
Instalación
No instale el monitor en los siguientes lugares:
• sobre superficies (mantas, colchas, etc.) ni cerca de materiales
(cortinas, tapices, etc.) que puedan bloquear los orificios de
ventilación
• cerca de fuentes de calor, como radiadores o conductos de aire
caliente, ni en lugares sujetos a la luz solar directa
• en lugares sujetos a cambios bruscos de temperatura
• en lugares sujetos a golpes o vibraciones mecánicas
• sobre superficies inestables
• cerca de equipos que generen magnetismo, como
transformadores o líneas eléctricas de alta tensión
• cerca o sobre una superficie metálica con carga eléctrica
Mantenimiento
• Limpie la pantalla con un paño suave. Si utiliza algún líquido
limpiador de cristales, no emplee ningún tipo de producto de
limpieza que contenga soluciones antiestáticas o aditivos
similares, ya que pueden rayar la superficie de la pantalla.
• No frote, toque ni manipule la superficie de la pantalla con
objetos afilados o abrasivos, como un bolígrafo o un
destornillador. Este tipo de contacto puede rayar el tubo de
imagen.
• Limpie el exterior, el panel y los controles con un paño suave
ligeramente humedecido con una solución detergente poco
concentrada. No utilice estropajos abrasivos, detergente en
polvo ni disolventes, como alcohol o bencina.
Transporte
Cuando transporte este monitor para su reparación o traslado,
utilice la caja y materiales de embalaje originales.
Uso del soporte basculante giratorio
Este monitor puede ajustarse en los ángulos mostrados a
continuación. Para encontrar el centro del radio de giro del
monitor, alinee el centro de la pantalla de dicho monitor con los
puntos de centrado del soporte.
Agarre el monitor por su parte inferior con las dos manos cuando
lo gire horizontal o verticalmente. Tenga cuidado de no pillarse
los dedos en la parte trasera del monitor cuando lo incline hacia
arriba verticalmente.
El equipo debe instalarse cerca de una toma de fácil acceso.
Ejemplo de tipos de enchufes
para 100 a 120 V CA
para 200 a 240 V CA
90°
5°
90°
15°
Puntos de centrado
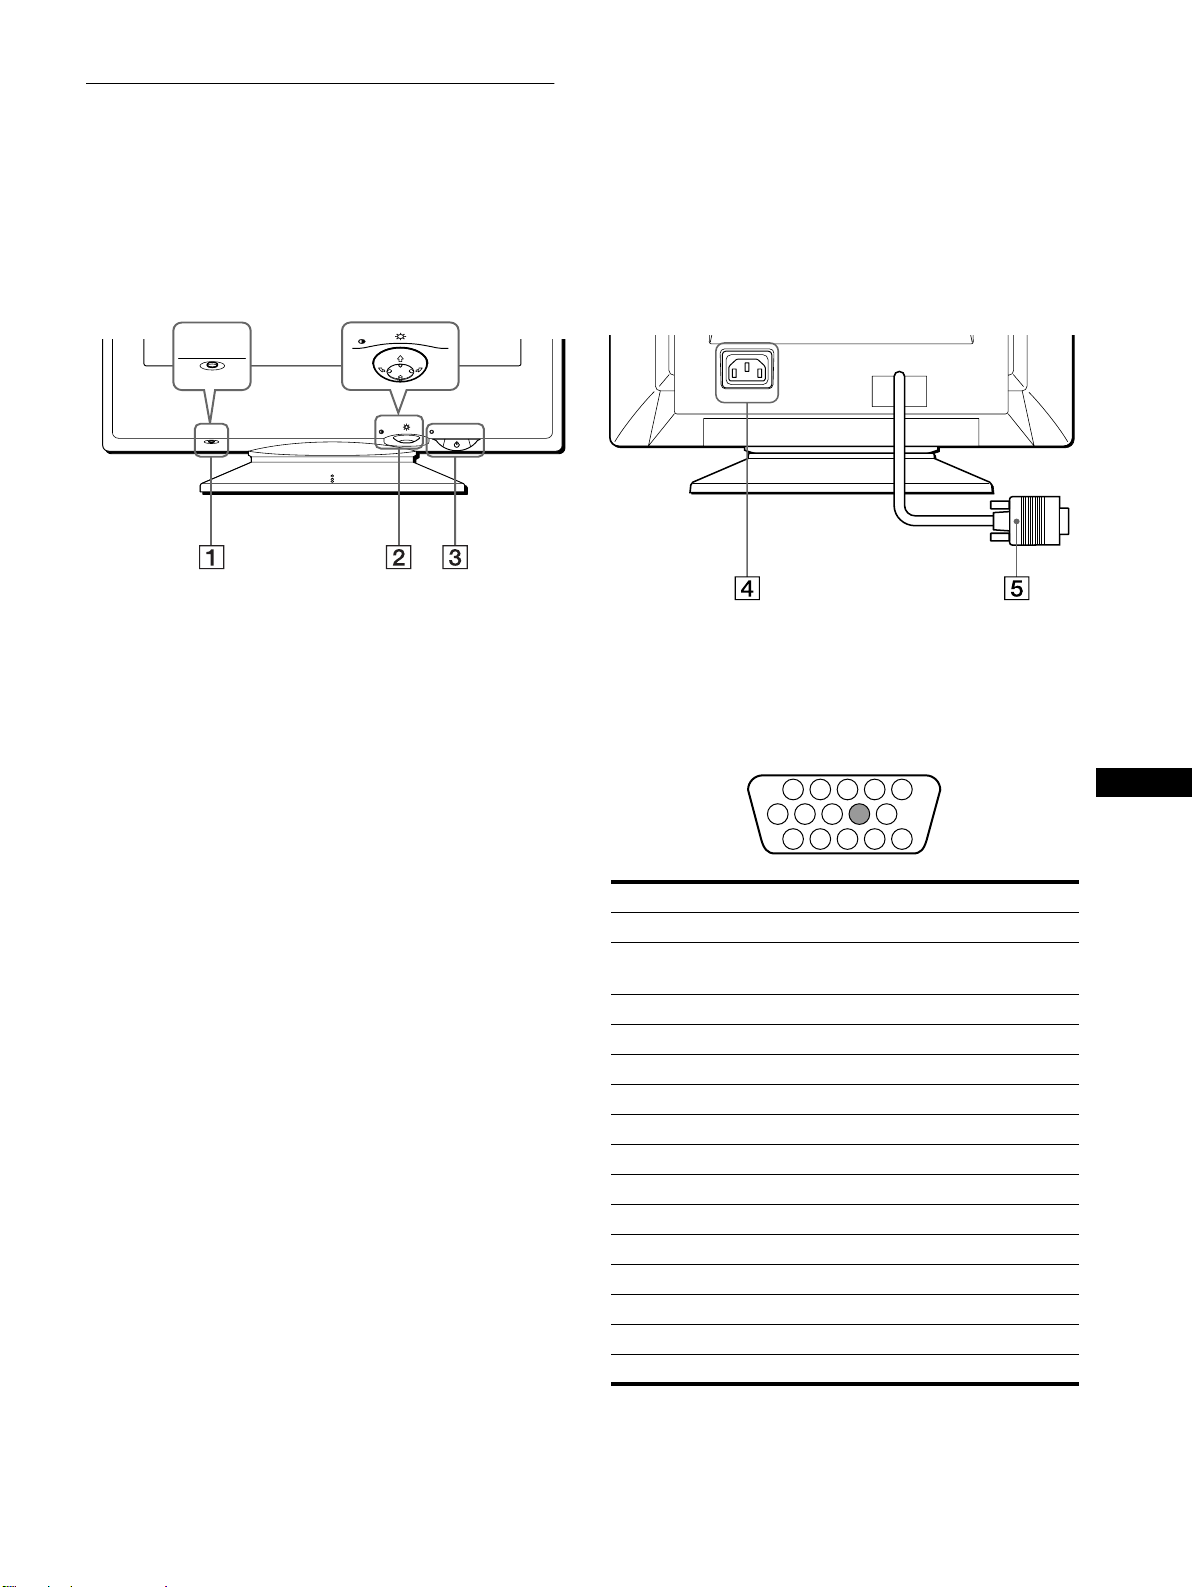
5
C:\WIN95-E\DESKTOP\CPD E100\386765901CPDE100UC\386765901CPDE100UC\03ES02BAS-
UC.fm
masterpage:Right
CPD-E100
3-867-659-
01
(1)
ES
Identificación de los componentes
y los controles
Consulte las páginas indicadas entre paréntesis para obtener más
información.
1
Botón RESET (restauración) (página 12)
Este botón recupera los valores de fábrica.
2
Botón de control (página 9)
El botón de control se utiliza para mostrar el menú y realizar
ajustes del monitor, incluidos los de brillo y contraste.
3
Interruptor e indicador
1
(alimentación)
(páginas 7, 13, 16)
Este botón enciende y apaga el monitor. El indicador de
alimentación se ilumina en verde cuando el monitor está
encendido, y parpadea en verde y en naranja, o se ilumina en
naranja cuando dicho monitor se encuentra en el modo de
ahorro de energía.
4
Conector AC IN (página 6)
Este conector proporciona alimentación de CA al monitor.
5
Conector de entrada de vídeo (HD15) (página 6)
Este conector introduce las señales de vídeo RGB
(0,700 Vp-p, positivas) y de sincronización.
* DDC (Display Data Channel) es un estándar de VESA.
AC IN
MENU
RESET
MENU
RESET
Parte posteriorParte frontal
Terminal nº Señal
1Roja
2Verde
(Sincronización en verde)
3Azul
4 Identificación (Masa)
5 Masa DDC*
6Masa roja
7 Masa verde
8 Masa azul
9–
10 Masa
11 Identificación (Masa)
12 Datos bidireccionales (SDA)*
13 Sincronización H.
14 Sincronización V.
15 Reloj de datos (SCL)*
1 2 3 4
5
876
11 12 13 14 15
10
9
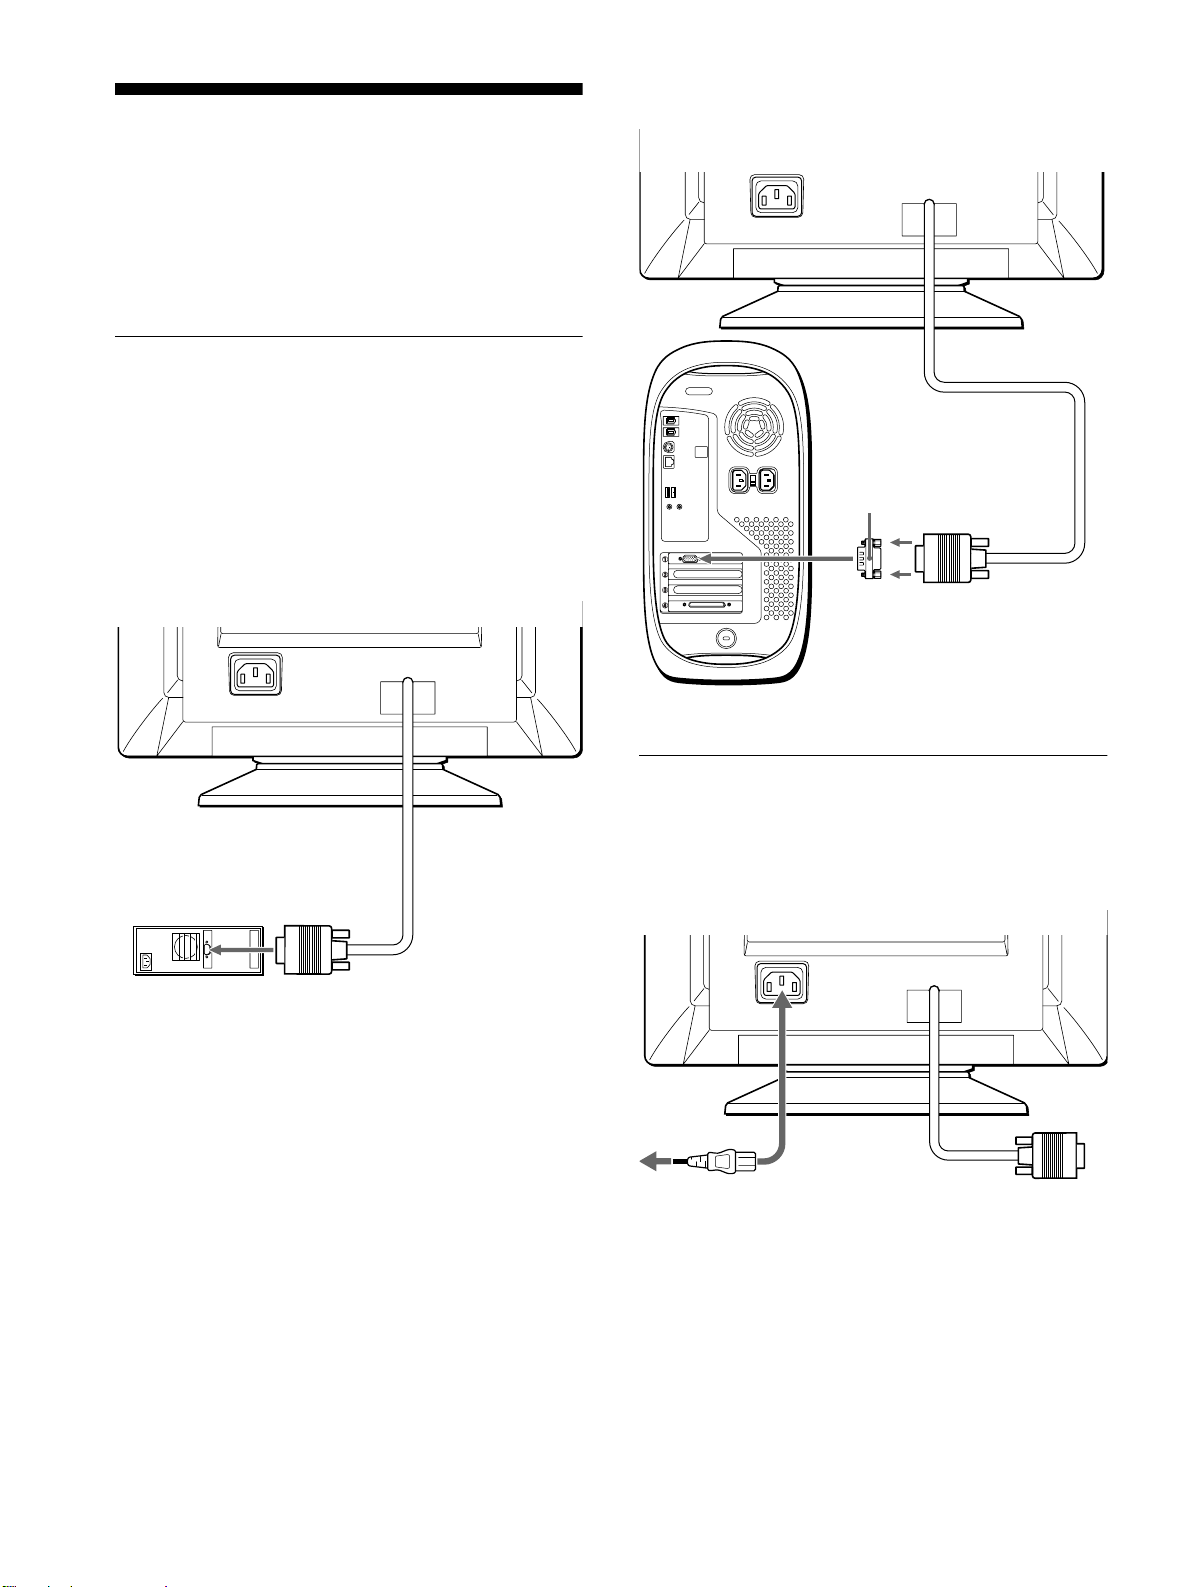
6
C:\WIN95-E\DESKTOP\CPD E100\386765901CPDE100UC\386765901CPDE100UC\03ES02BAS-
UC.fm
masterpage:Left
CPD-E100
3-867-659-
01
(1)
Instalación
Antes de utilizar el monitor, compruebe que los siguientes
accesorios se hayan incluido en la caja:
• Cable de alimentación (1)
• Windows Monitor Information Disk (1)
• Tarjeta de garantía (1)
• Notas sobre la limpieza de la superficie de la pantalla (1)
• Este manual de instrucciones (1)
Paso 1:Conexión del monitor al
ordenador
Apague el monitor y el ordenador antes de realizar la conexión.
Nota
No toque los terminales del conector de cable de vídeo, ya que podría
dañar dichos terminales.
x
Conexión a un ordenador IBM PC/AT o
compatible
x
Conexión a un ordenador Macintosh o
compatible
Paso 2:Conexión del cable de
alimentación
Con el monitor y el ordenador apagados, primero conecte el cable
de alimentación al monitor y, a continuación, a una toma de
corriente.
AC IN
Ordenador IBM PC/AT
o compatible
a salida de vídeo
AC IN
Es necesario un adaptador Macintosh (no suministrado).
Adaptador Macintosh
(no suministrado)
Ordenador Macintosh o
compatible
a salida de vídeo
AC IN
a AC IN
a una toma de
corriente
Cable de alimentación
(suministrado)
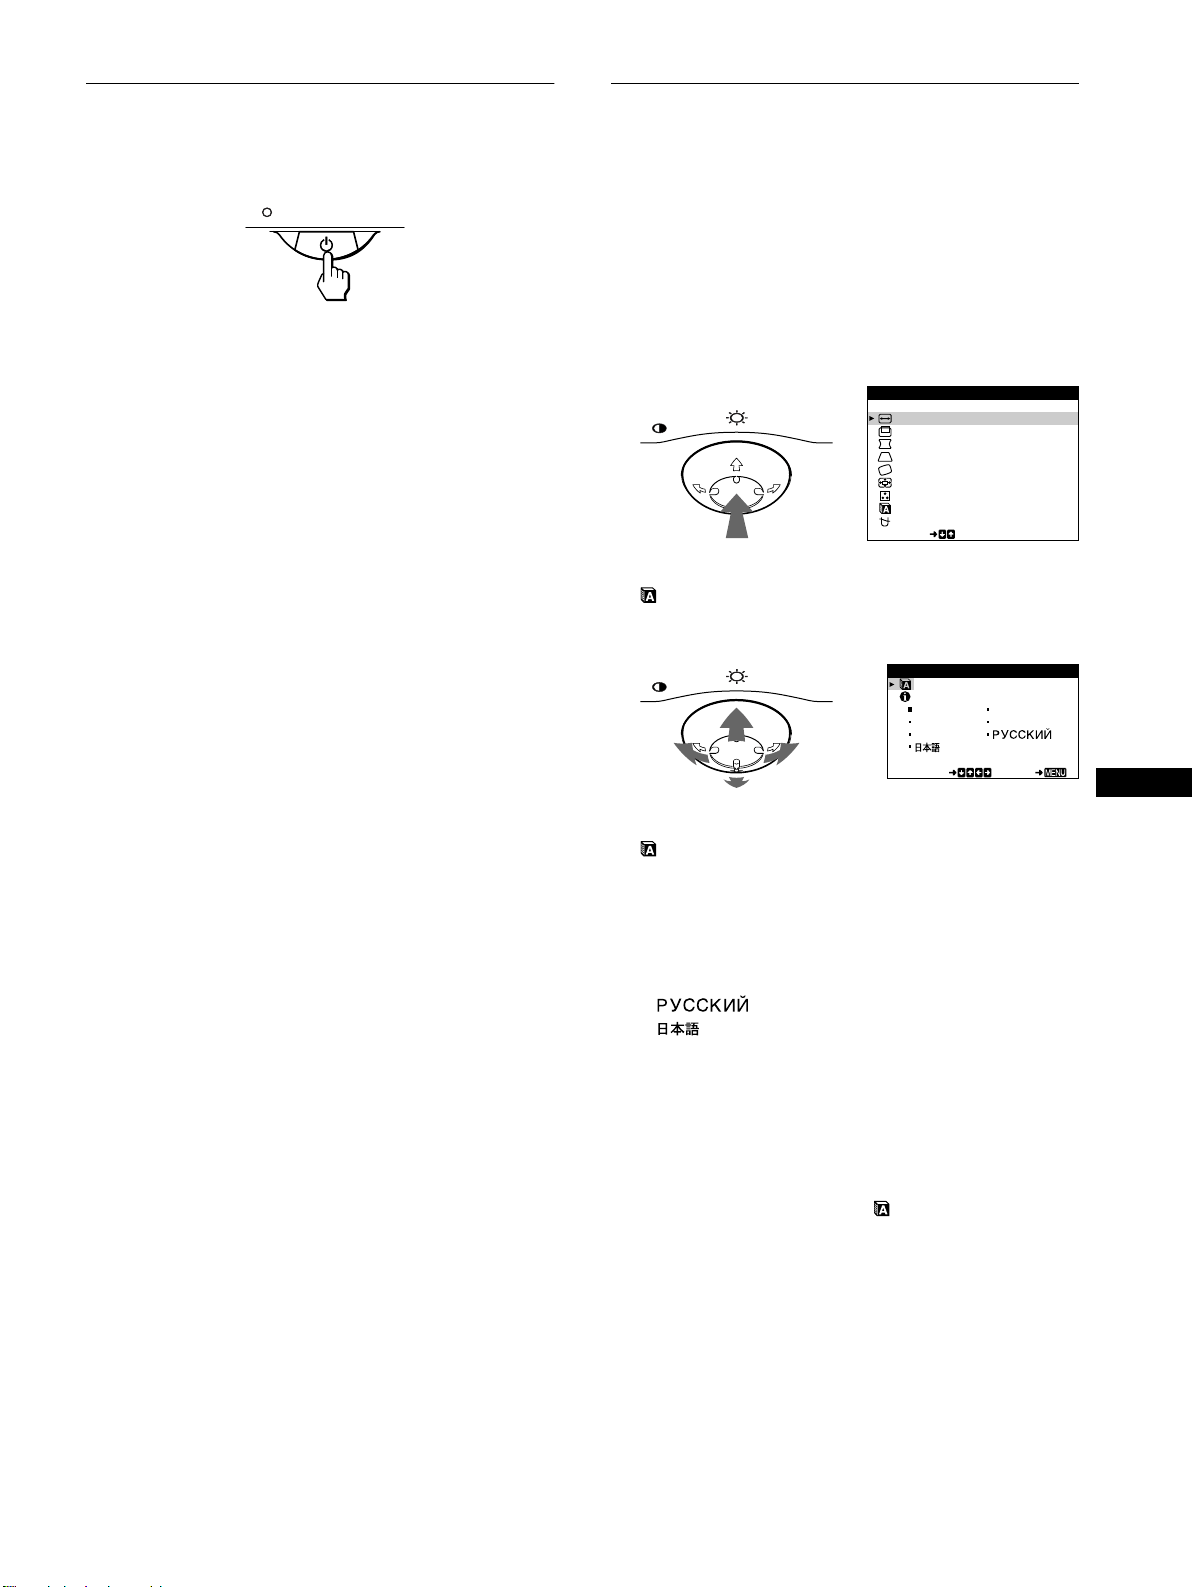
7
C:\WIN95-E\DESKTOP\CPD E100\386765901CPDE100UC\386765901CPDE100UC\03ES02BAS-
UC.fm
masterpage:Right
CPD-E100
3-867-659-
01
(1)
ES
Paso 3:Encendido del monitor y
del ordenador
Primero encienda el monitor y, a continuación, el ordenador.
La instalación del monitor ha finalizado.
Si fuese necesario, utilice los controles del monitor para ajustar la
imagen.
Si las imágenes no aparecen en pantalla
• Compruebe que el monitor esté correctamente conectado al
ordenador.
• Si NO SEÑAL DE ENTRADA aparece en pantalla, compruebe
que la tarjeta gráfica del ordenador esté completamente
insertada en la ranura de bus correcta.
• Si sustituye un monitor antiguo por este modelo y el mensaje
FUERA DEL RANGO DE AJUSTE aparece en pantalla,
vuelva a conectar el monitor antiguo. A continuación, ajuste la
tarjeta gráfica del ordenador de forma que la frecuencia
horizontal se encuentre entre 30 – 70 kHz, y la vertical entre
48 – 120 Hz.
Para obtener más información sobre los mensajes en pantalla,
consulte “Problemas y soluciones” en la página 14.
Para los usuarios que utilicen Windows 95/98
Para maximizar el potencial del monitor, instale en el PC el archivo de
información sobre el nuevo modelo del disquete Windows Monitor
Information Disk suministrado.
Este monitor cumple con el estándar Plug & Play “VESA DDC”. Si el PC/
tarjeta gráfica cumple con DDC, seleccione “Plug & Play Monitor (VESA
DDC)” o el nombre de modelo de este monitor como tipo de monitor en
el “Control Panel” de Windows 95/98. Si el PC/tarjeta gráfica presenta
problemas de comunicación con este monitor, cargue el disquete
Windows Monitor Information Disk y seleccione el nombre de modelo de
este monitor como tipo de monitor.
Para los usuarios que utilicen Windows NT4.0
La instalación del monitor en Windows NT4.0 difiere de la utilizada en
Windows 95/98 y no implica selección de tipo de monitor. Consulte el
manual de instrucciones de Windows NT4.0 para obtener más
información sobre el ajuste de la resolución, frecuencia de barrido y
número de colores.
Ajuste de la resolución y el número de colores del monitor
Ajuste la resolución y el número de colores del monitor. Para ello,
consulte el manual de instrucciones del ordenador. El número de colores
puede variar de acuerdo con el ordenador o la tarjeta de vídeo. El ajuste
de la paleta de colores y el número real de colores son de la siguiente
forma:
• High Color (16 bit) t 65.536 colores
• True Color (24 bit) t aproximadamente 16,77 millones de colores
En el modo True color (24 bits), la velocidad puede ser más lenta.
Selección del idioma de los menús
en pantalla (LENGUAJE/
INFORMACIÓN)
Los idiomas disponibles para los menús en pantalla son inglés,
francés, alemán, italiano, español, ruso y japonés. El ajuste por
omisión es el idioma inglés.
1
Pulse el centro del botón de control.
Consulte la página 9 para obtener más información sobre el
uso del botón de control.
2
Desplace el botón de control
m
/
M
para resaltar
LENGUAJE/INFORMACIÓN y pulse de nuevo el
centro del botón de control.
3
Desplace el botón de control
m
/
M
para seleccionar
(LENGUAJE), y desplace
<
/
,
para seleccionar
un idioma.
• ENGLISH: Inglés
• FRANÇAIS: Francés
• DEUTSCH: Alemán
• ITALIANO: Italiano
• ESPAÑOL
•: Ruso
• : Japonés
Para cerrar el menú
Pulse el centro del botón de control una vez para volver al MENÚ
principal, y púlselo de nuevo seleccionando SALIDA para volver a la
visualización normal. Si no pulsa ningún botón, el menú se cerrará
automáticamente transcurridos unos 30 segundos.
Para restaurar el idioma inglés
Pulse el botón RESET mientras el menú (LENGUAJE) se encuentra
en pantalla.
MENU
SAL IDA
TAMAÑO H / POS I C I ÓN
TAMAÑO V / POS I C IÓN
COJÍN/BAL COJÍN
TRAPECIO/PARALELO
ROTAC IÓN
ZOOM
COLOR
SELECT
LENGUAJE / I NFORMAC NÓI
DESMAGNET I ZAR/MUA ER
MENÚ
MENU
ENGL ISH FRANÇAI S
DEUTSCH I TAL IANO
ESPAÑOL
SELECT EXI T
LENGUAJE / INFORMACIÓN
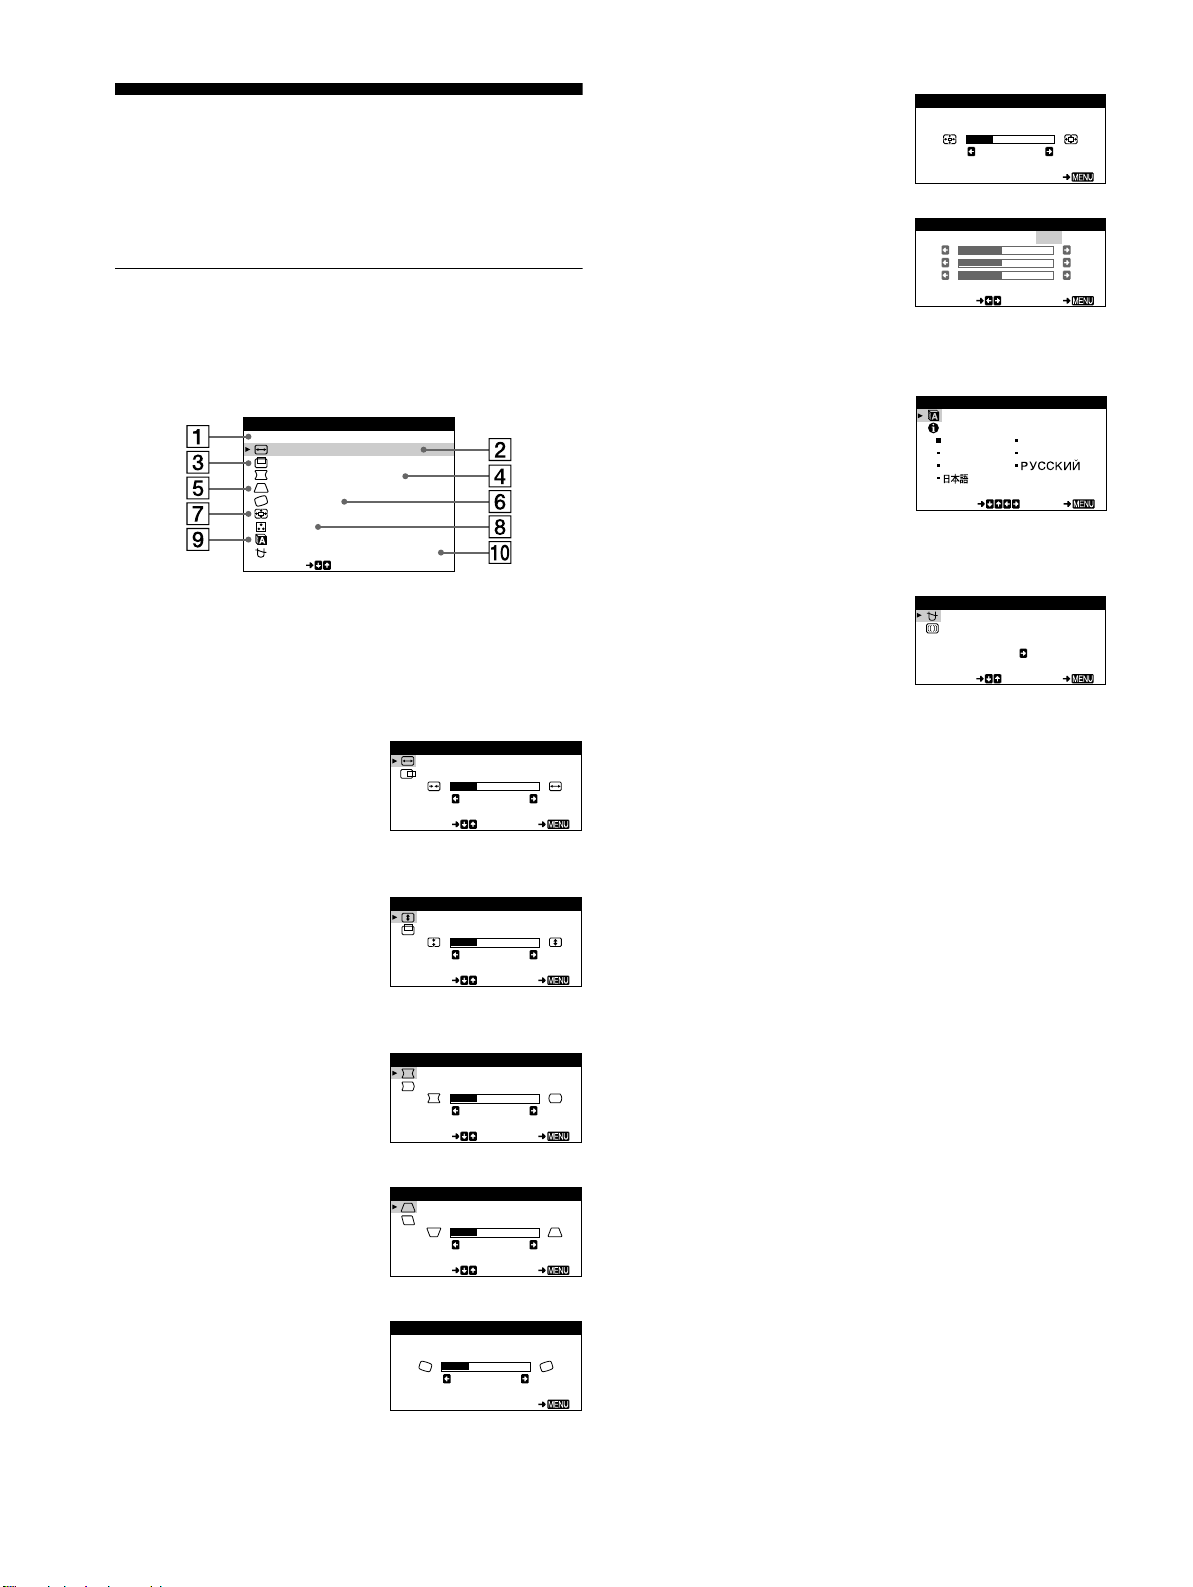
8
C:\WIN95-E\DESKTOP\CPD E100\386765901CPDE100UC\386765901CPDE100UC\03ES02BAS-
UC.fm
masterpage:Left
CPD-E100
3-867-659-
01
(1)
Personalización del
monitor
Es posible realizar diversos ajustes del monitor mediante el menú
en pantalla.
Navegación por el menú
Pulse el centro del botón de control para que aparezca el MENÚ
principal en pantalla. Consulte la página 9 para obtener más
información sobre el empleo del botón de control.
Utilice el botón de control para seleccionar uno de los siguientes
menús.
1
SALIDA
Seleccione SALIDA para cerrar
el menú.
2
TAMAÑO H/POSICIÓN
(página 10)
Seleccione el menú TAMAÑO
H/POSICIÓN para ajustar el
tamaño y centrado horizontal de
la imagen.
3
TAMAÑO V/POSICIÓN
(página 10)
Seleccione el menú TAMAÑO
V/POSICIÓN para ajustar el
tamaño y centrado vertical de la
imagen.
4
COJÍN/BAL COJÍN
(página 10)
Seleccione el menú COJÍN/BAL
COJÍN para ajustar la curvatura
de los lados de la imagen.
5
TRAPECIO/PARALELO
(página 10)
Seleccione el menú TRAPECIO/
PARALELO para ajustar el
ángulo de los lados de la imagen.
6
ROTACIÓN (página 11)
Seleccione el menú ROTACIÓN
para ajustar la rotación de la
imagen.
SAL IDA
TAMAÑO H / POS I C I ÓN
TAMAÑO V / POS I C IÓN
COJÍN/BAL COJÍN
TRAPECIO/PARALELO
ROTAC IÓN
ZOOM
COLOR
SELECT
LENGUAJE / I NFORMAC NÓI
DESMAGNET I ZAR/MUA ER
MENÚ
TAMAÑO H
26
SELECT EXI T
TAMAÑO H / POS I C I ÓN
TAMAÑO V
26
SELECT EXI T
TAMAÑO V / POS I C I ÓN
COJ Í N
26
SELECT EXI T
COJÍN/BAL COJÍN
TRAPECIO
26
SELECT EXI T
TRAPECIO/PARALELO
ROTAC I ÓN
26
EXI T
ROTAC I ÓN
7
ZOOM (página 11)
Seleccione el menú ZOOM para
aumentar o reducir la imagen.
8
COLOR (página 11)
Seleccione el menú COLOR para
ajustar la temperatura del color
de la imagen. Puede utilizar esta
función para hacer que los
colores del monitor coincidan
con los de una imagen impresa.
9
LENGUAJE/INFORMACIÓN
(páginas 7, 15)
Seleccione el menú
LENGUAJE/INFORMACIÓN
para seleccionar el idioma de los
menús en pantalla y visualizar el
cuadro de información sobre este
monitor.
0
DESMAGNETIZAR/MUARE
(página 12)
Seleccione el menú
DESMAGNETIZAR/MUARE
para desmagnetizar la pantalla y
ajustar el nivel de cancelación de
muaré.
ZOOM
26
EXI T
ZOOM
KKK
R50
G50
B50
SELECT EXI T
COLOR
5000 6500 9300
USER
ENGL I SH FRANÇAI S
DEUTSCH I TAL I ANO
ESPAÑOL
SELECT EXI T
LENGUA JE / I NFORMACI ÓN
DESMAGNET I ZAR
SI
SELECT EXI T
DESMAGNET I ZAR /MUARE
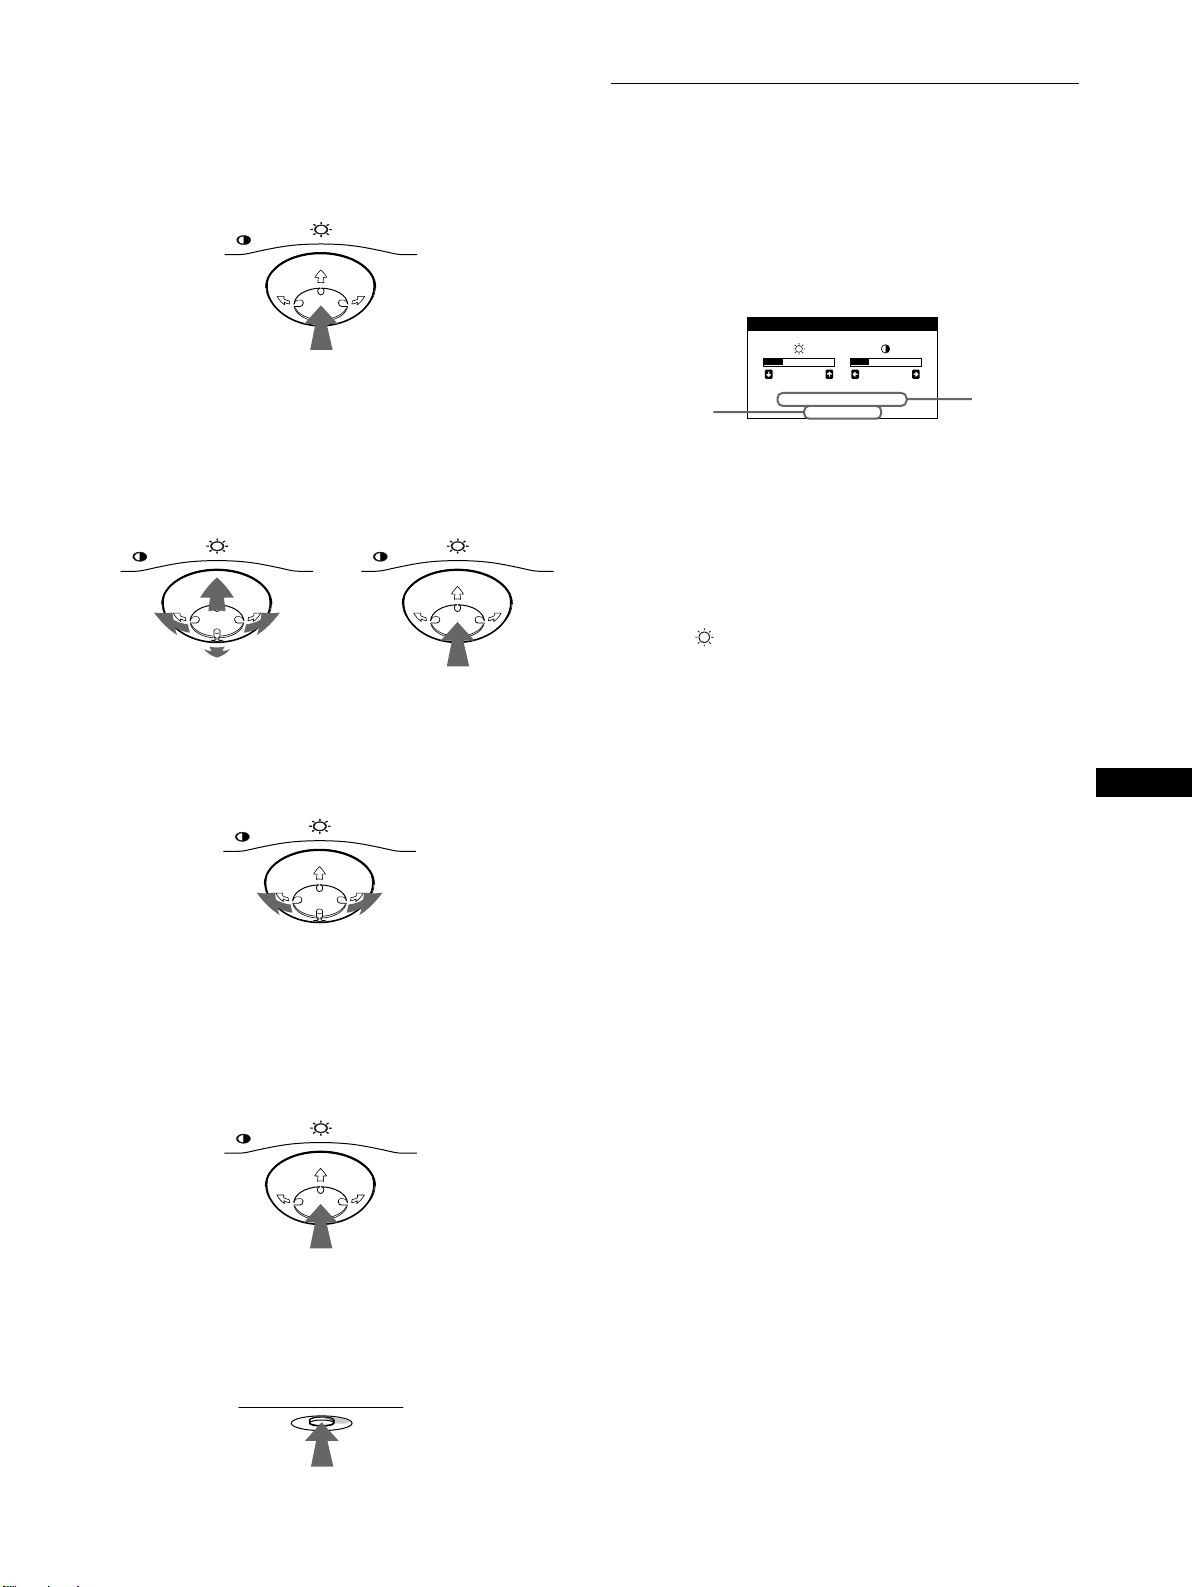
9
C:\WIN95-E\DESKTOP\CPD E100\386765901CPDE100UC\386765901CPDE100UC\03ES02BAS-
UC.fm
masterpage:Right
CPD-E100
3-867-659-
01
(1)
ES
x
Uso del botón de control
1
Muestre el MENÚ principal.
Pulse el centro del botón de control para que aparezca en
pantalla el MENÚ principal.
2
Seleccione el menú que desee ajustar.
Resalte el menú deseado desplazando el botón de control
hacia atrás para subir (M), hacia delante para bajar (m), y
hacia la izquierda (<) o la derecha (,) para desplazarse
hacia los lados.
3
Ajuste el menú.
Desplace el botón de control hacia la izquierda (<) o la
derecha (,) para realizar el ajuste.
4
Cierre el menú.
Pulse el centro del botón de control una vez para volver al
MENÚ principal, y púlselo de nuevo seleccionando SALIDA
para volver a la visualización normal. Si no pulsa ningún
botón, el menú se cerrará automáticamente transcurridos unos
30 segundos.
x
Restauración de los ajustes
Pulse el botón RESET. Consulte la página 12 para obtener más
información sobre la restauración de los ajustes.
Ajuste del brillo y del contraste
Los ajustes de brillo y contraste se realizan mediante un menú de
BRILLO/CONTRASTE independiente.
Estos ajustes se almacenan en la memoria para todas las señales
de entrada.
1
Desplace el botón de control en cualquier dirección.
El menú de BRILLO/CONTRASTE aparece en pantalla.
Las frecuencias horizontal y vertical de la señal de entrada
actual aparecen en el menú BRILLO/CONTRASTE. Si la
señal se corresponde con alguno de los modos predefinidos de
fábrica de este monitor, también aparecerá la resolución.
2
Desplace el botón de control
m
/
M
para ajustar el
brillo ( ), y
<
/
,
para ajustar el contraste (
6
).
El menú desaparece automáticamente transcurridos unos
3 segundos.
MENU
MENU MENU
POSTERIOR
FRONTAL
MENU
MENU
RESET
26 26
68.7kHz/85.0Hz
1024X768
BRI LLO/CONTRASTE
resolución
de la señal
de entrada
actual
frecuencias
horizontal y
vertical de la
señal de
entrada actual
10
C:\WIN95-E\DESKTOP\CPD E100\386765901CPDE100UC\386765901CPDE100UC\03ES02BAS-
UC.fm
masterpage:Left
CPD-E100
3-867-659-
01
(1)
Ajuste del tamaño o centrado
horizontal de la imagen (TAMAÑO
H/POSICIÓN)
Estos valores se almacenan en memoria para la señal de entrada
actual.
1
Pulse el centro del botón de control.
El MENÚ principal aparece en pantalla.
2
Desplace el botón de control
m
/
M
para resaltar
TAMAÑO H/POSICIÓN y pulse de nuevo el
centro del botón de control.
El menú TAMAÑO H/POSICIÓN aparece en pantalla.
3
Primero, desplace el botón de control
m
/
M
para
seleccionar la opción de ajuste que desee. A
continuación, desplace el botón
<
/
,
para realizar
el ajuste.
Ajuste del tamaño o centrado
vertical de la imagen (TAMAÑO V/
POSICIÓN)
Estos valores se almacenan en memoria para la señal de entrada
actual.
1
Pulse el centro del botón de control.
El MENÚ principal aparece en pantalla.
2
Desplace el botón de control
m
/
M
para resaltar
TAMAÑO V/POSICIÓN y pulse de nuevo el centro
del botón de control.
El menú TAMAÑO V/POSICIÓN aparece en pantalla.
3
Primero, desplace el botón de control
m
/
M
para
seleccionar la opción de ajuste que desee. A
continuación, desplace el botón
<
/
,
para realizar
el ajuste.
Ajuste de la curvatura de los lados
de la imagen (COJÍN/BAL COJÍN)
Estos valores se almacenan en memoria para la señal de entrada
actual.
1
Pulse el centro del botón de control.
El MENÚ principal aparece en pantalla.
2
Desplace el botón de control
m
/
M
para resaltar
COJÍN/BAL COJÍN y pulse de nuevo el centro del
botón de control.
El menú COJÍN/BAL COJÍN aparece en pantalla.
3
Primero, desplace el botón de control
m
/
M
para
seleccionar la opción de ajuste que desee. A
continuación, desplace el botón
<
/
,
para realizar
el ajuste.
Ajuste del ángulo de los lados de
la imagen (TRAPECIO/PARALELO)
Estos valores se almacenan en memoria para la señal de entrada
actual.
1
Pulse el centro del botón de control.
El MENÚ principal aparece en pantalla.
2
Desplace el botón de control
m
/
M
para resaltar
TRAPECIO/PARALELO y pulse de nuevo el
centro del botón de control.
El menú TRAPECIO/PARALELO aparece en pantalla.
3
Primero, desplace el botón de control
m
/
M
para
seleccionar la opción de ajuste que desee. A
continuación, desplace el botón
<
/
,
para realizar
el ajuste.
Seleccione Para
TAMAÑO H
ajustar el tamaño horizontal
POSICIÓN H
ajustar el centrado horizontal
Seleccione Para
TAMAÑO V
ajustar el tamaño vertical
POSICIÓN V
ajustar el centrado vertical
Seleccione Para
COJÍN
expandir o contraer los lados de la
imagen
BAL COJÍN
desplazar los lados de la imagen hacia
la izquierda o la derecha
Seleccione Para
TRAPECIO
ajustar la anchura de la imagen en la
parte superior de la pantalla
PA RA LE LO
desplazar la imagen hacia la izquierda
o la derecha en la parte superior de la
pantalla
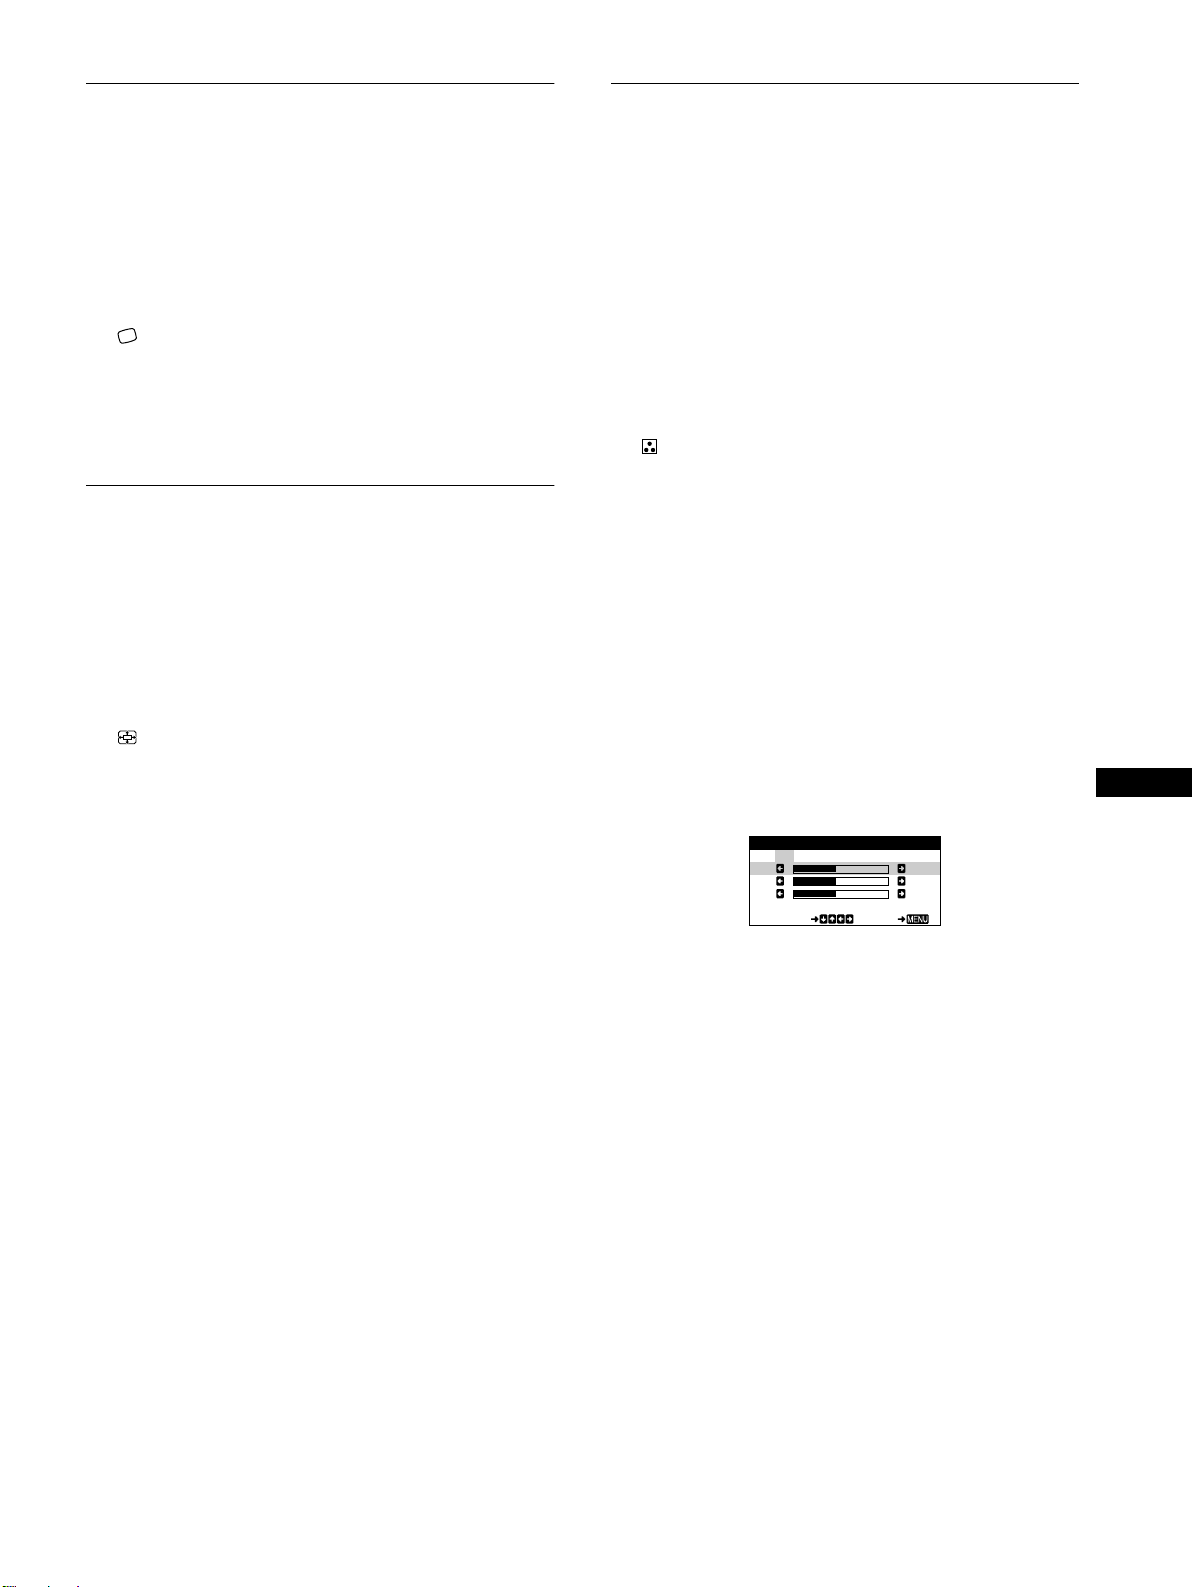
11
C:\WIN95-E\DESKTOP\CPD E100\386765901CPDE100UC\386765901CPDE100UC\03ES02BAS-
UC.fm
masterpage:Right
CPD-E100
3-867-659-
01
(1)
ES
Ajuste de la rotación de la imagen
(ROTACIÓN)
Este ajuste se almacena en memoria para todas las señales de
entrada.
1
Pulse el centro del botón de control.
El MENÚ principal aparece en pantalla.
2
Desplace el botón de control
m
/
M
para resaltar
ROTACIÓN y pulse de nuevo el centro del botón
de control.
El menú ROTACIÓN aparece en pantalla.
3
Desplace el botón de control
<
/
,
para girar la
imagen.
Ampliación o reducción de la
imagen (ZOOM)
Este ajuste se almacena en la memoria para la señal de entrada
actual.
1
Pulse el centro del botón de control.
El MENÚ principal aparece en pantalla.
2
Desplace el botón de control
m
/
M
para resaltar
ZOOM y pulse de nuevo el centro del botón de
control.
El menú ZOOM aparece en pantalla.
3
Desplace el botón de control
<
/
,
para aumentar o
reducir la imagen.
Nota
El ajuste se detiene cuando el tamaño horizontal o el vertical alcanza su
valor máximo o mínimo.
Ajuste del color de la imagen
(COLOR)
Los ajustes de COLOR permiten ajustar la temperatura del color
de la imagen mediante el cambio del nivel de color del campo de
color blanco. Los colores se mostrarán rojizos si la temperatura es
baja, y azulados si ésta es alta. Este ajuste resulta útil para hacer
coincidir los colores del monitor con los de una imagen impresa.
Este ajuste se almacena en la memoria para todas las señales de
entrada.
1
Pulse el centro del botón de control.
El MENÚ principal aparece en pantalla.
2
Desplace el botón de control
m
/
M
para resaltar
COLOR y pulse de nuevo el centro del botón de
control.
El menú COLOR aparece en pantalla.
3
Desplace el botón de control
<
/
,
para
seleccionar una temperatura del color.
Las temperaturas predefinidas son 5000K, 6500K y 9300K.
Puesto que el valor ajustado en fábrica es de 9300K, la
tonalidad del color blanco cambiará de azulada a rojiza al
disminuir la temperatura hasta 6500K y 5000K.
4
Si fuese necesario, ajuste con precisión la
temperatura del color.
Primero desplace el botón de control </, para seleccionar
USER. Después desplace el botón de control m/M para
seleccionar R (rojo), V (verde) o A (azul), y desplace </,
para realizar el ajuste.
Si sintoniza la temperatura con precisión, los valores del color
nuevos se almacenan en memoria y se recuperan siempre que
seleccione USER.
KKK
R50
G50
B50
SELECT EXI T
COLOR
5000 6500 9300
USER
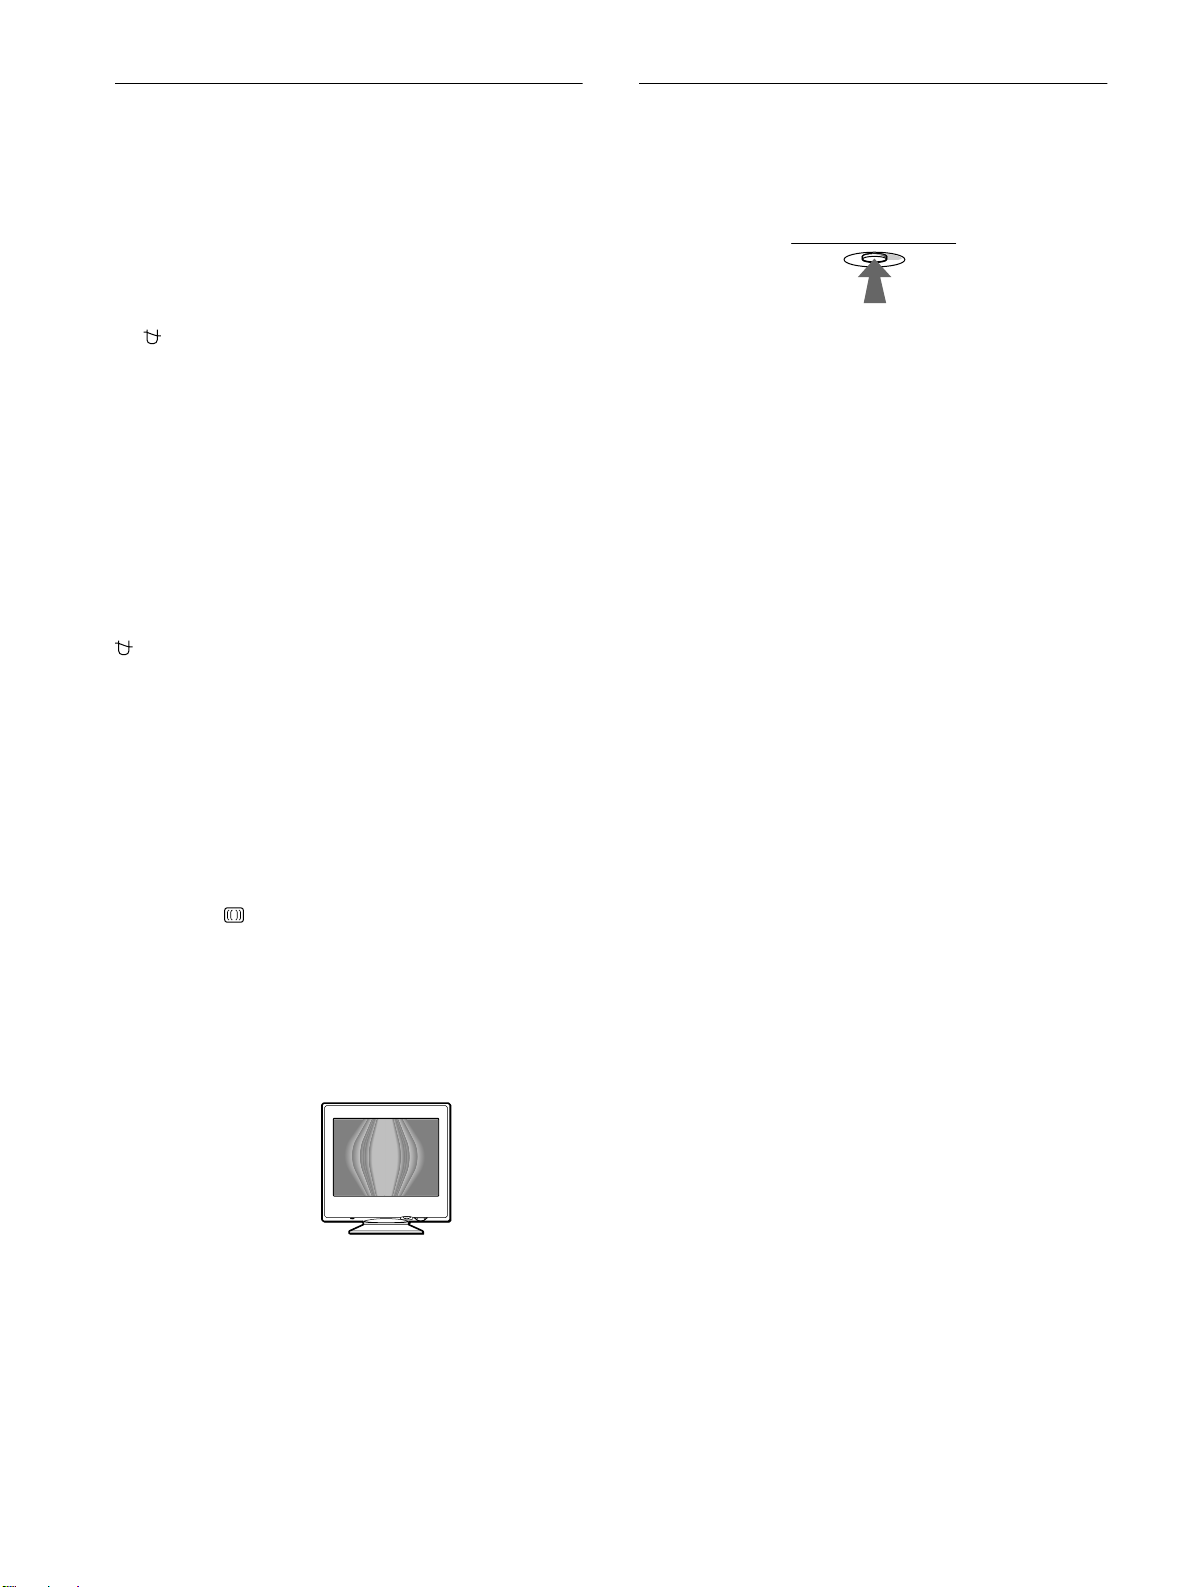
12
C:\WIN95-E\DESKTOP\CPD E100\386765901CPDE100UC\386765901CPDE100UC\03ES02BAS-
UC.fm
masterpage:Left
CPD-E100
3-867-659-
01
(1)
Ajustes complementarios
(DESMAGNETIZAR/MUARE)
Es posible desmagnetizar el monitor manualmente, y ajustar el
nivel de cancelación de muaré.
1
Pulse el centro del botón de control.
El MENÚ principal aparece en pantalla.
2
Desplace el botón de control
m
/
M
para resaltar
DESMAGNETIZAR/MUARE y pulse de nuevo el
centro del botón de control.
El menú DESMAGNETIZAR/MUARE aparece en pantalla.
3
Desplace el botón de control
m
/
M
para seleccionar
la opción de ajuste que desee.
Ajuste la opción seleccionada de acuerdo con las siguientes
instrucciones.
Desmagnetización de la pantalla
El monitor se desmagnetiza automáticamente al activar la
alimentación.
Para desmagnetizarlo manualmente, primero desplace
el botón de control
m
/
M
para seleccionar
(DESMAGNETIZAR). A continuación, desplace el
botón
,
.
La pantalla se desmagnetiza durante unos 5 segundos. Si es
preciso aplicar un segundo ciclo de desmagnetización, espere al
menos 20 minutos antes de aplicarlo para obtener los mejores
resultados posibles.
Ajuste del muaré*
Si aparecen patrones elípticos u ondulados en pantalla, ajuste el
nivel de cancelación de muaré.
Para ajustar la cantidad de cancelación de muaré,
primero desplace el botón de control
m
/
M
para
seleccionar (CANCELAR MUARE). A continuación,
desplace el botón
<
/
,
hasta que el efecto de muaré
sea mínimo.
* El muaré es un tipo de interferencia natural que produce líneas suaves
y onduladas en la pantalla. Puede aparecer debido a la interferencia
entre el patrón de la imagen en pantalla y el de paso de fósforo del
monitor.
Restauración de los ajustes
Este monitor dispone de los siguientes métodos de restauración.
Utilice el botón RESET para restaurar los ajustes.
Restauración de una sola opción de ajuste
Emplee el botón de control para seleccionar la opción de ajuste
que desee restaurar, y pulse el botón RESET.
Restauración de todos los datos de ajuste para la
señal de entrada actual
Pulse el botón RESET cuando la pantalla no muestre ningún
menú.
Tenga en cuenta que las siguientes opciones no se restauran
mediante este método:
• idioma de los menús en pantalla (página 7)
• rotación de la imagen (página 11)
Restauración de todos los datos de ajuste para
todas las señales de entrada
Pulse y mantenga pulsado el botón RESET durante más de dos
segundos.
Tenga en cuenta que la siguiente opción no se restaura mediante
este método:
• ajustes de usuario del menú de color (página 11)
Ejemplo de muaré
RESET
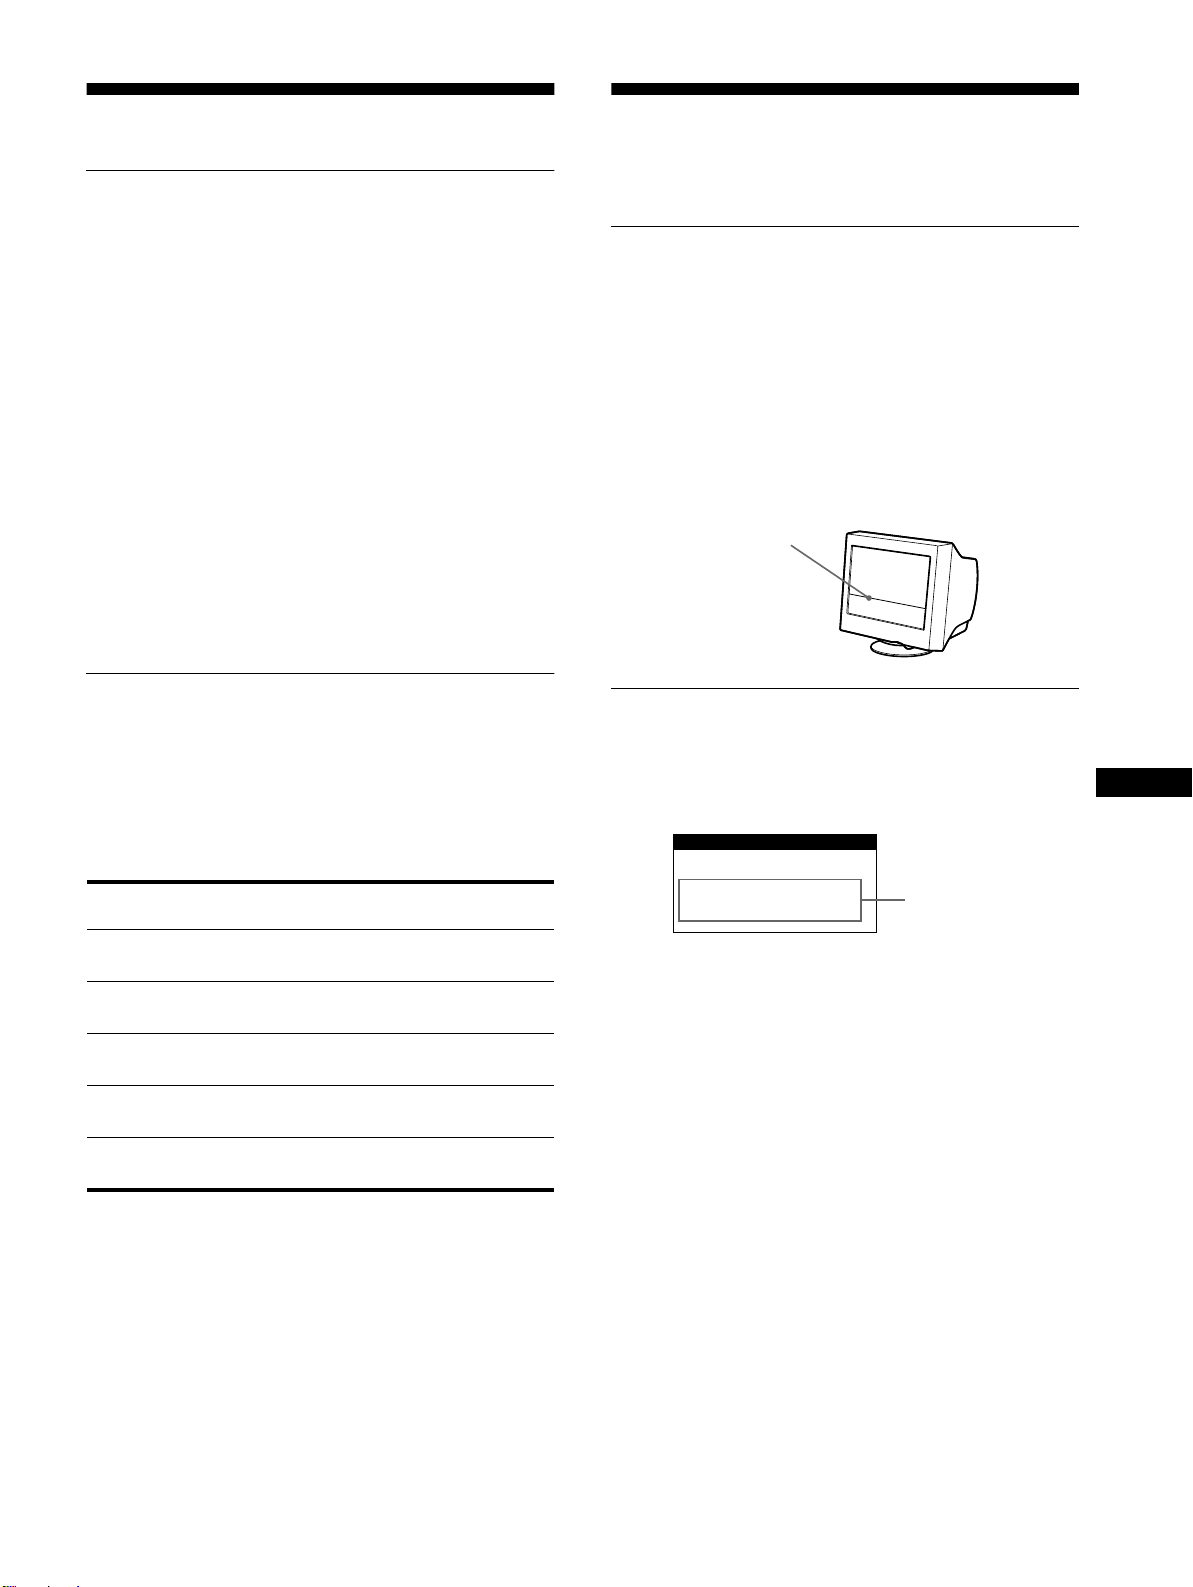
13
C:\WIN95-E\DESKTOP\CPD E100\386765901CPDE100UC\386765901CPDE100UC\03ES02BAS-
UC.fm
masterpage:Right
CPD-E100
3-867-659-
01
(1)
ES
Características técnicas
Modos predefinidos y de usuario
Cuando el monitor recibe una señal de entrada, hace coincidir
automáticamente dicha señal con uno de los modos predefinidos
en fábrica almacenados en la memoria para mostrar imágenes de
alta calidad en el centro de la pantalla. (Consulte Appendix para
comprobar la lista de los modos predefinidos en fábrica.) Con
respecto a las señales de entrada que no se correspondan con
ninguno de los modos predefinidos de fábrica, la tecnología
digital Multiscan de este monitor garantiza la presentación en
pantalla de imágenes nítidas para cualquier sincronización dentro
del margen de frecuencias del monitor (horizontal: 30 – 70 kHz,
vertical: 48 – 120 Hz). Si la imagen se ajusta, los datos de ajuste
se almacenan como modo de usuario y se recuperan
automáticamente al recibirse la misma señal de entrada
.
Nota para los usuarios de Windows
Consulte el manual de la tarjeta de vídeo o el programa de
utilidades suministrado con la tarjeta gráfica, y seleccione la
frecuencia de barrido más alta disponible para maximizar el
rendimiento del monitor.
Función de ahorro de energía
Este monitor cumple las directrices de ahorro de energía
establecidas por VESA,
E
NERGY
S
TAR y NUTEK. Si el
monitor se conecta a un ordenador o tarjeta gráfica de vídeo
conforme con DPMS (Display Power Management Signaling),
dicho monitor reducirá automáticamente el consumo de energía
en tres etapas como se muestra a continuación.
* “Sleep” y “deep sleep” son modos de ahorro de energía definidos por
la Agencia de protección del medio ambiente (Environmental
Protection Agency).
** Cuando el ordenador entra en el modo “activo-inactivo”, la señal de
entrada se interrumpe y la pantalla muestra NO SEÑAL DE
ENTRADA. Transcurridos 20 segundos, el monitor entra en el modo
de ahorro de energía.
Solución de problemas
Antes de ponerse en contacto con personal de servicio técnico,
consulte esta sección.
Si aparece una línea fina en
pantalla (hilo de amortiguación)
La línea que se aprecia en el pantalla es normal en el monitor
Trinitron y no indica que exista un fallo de funcionamiento. Se
trata de la sombra del hilo de amortiguación utilizado para
estabilizar la rejilla de apertura y se aprecia en mayor medida
cuando el fondo de la pantalla es luminoso (normalmente blanco).
La rejilla de apertura es el elemento esencial por el que el tubo de
imagen Trinitron es único, permitiendo que la pantalla reciba más
iluminación, por lo que las imágenes aparecen con más brillo y
más detalle.
Mensajes en pantalla
Si la señal de entrada presenta algún problema, la pantalla
mostrará uno de los siguientes mensajes. Para solucionar el
problema, consulte “Problemas y soluciones” en la página 14.
Condición de la señal de entrada
FUERA DEL RANGO DE AJUSTE
indica que las especificaciones del monitor no admiten la señal de
entrada.
NO SEÑAL DE ENTRADA
indica que el monitor no recibe ninguna señal.
Modo de
alimentación
Consumo de
energía
Indicador
1
(alimentación)
funcionamiento
normal
≤ 95 W verde
1 espera ≤ 15 W alternación entre
verde y naranja
2 reposo
(sleep)*
≤ 15 W alternación entre
verde y naranja
3 activo inactivo**
(deep sleep)*
≤ 5 W naranja
alimentación
desactivada
0 W apagado
Hilo de amortiguación
INFORMACION
FUERA DEL
RANGO DE AJUSTE
Condición de
la señal de
entrada

14
C:\WIN95-E\DESKTOP\CPD E100\386765901CPDE100UC\386765901CPDE100UC\03ES02BAS-
UC.fm
masterpage:Left
CPD-E100
3-867-659-
01
(1)
Problemas y soluciones
Si el problema lo causa el ordenador conectado u otro equipo, consulte el manual de instrucciones del equipo conectado.
Utilice la función de autodiagnóstico (página 16) si las siguientes recomendaciones no ayudan a solucionar el problema.
Problema Compruebe lo siguiente
Ausencia de imagen
Si el indicador 1 (alimentación) no
está iluminado
• Compruebe que el cable de alimentación esté correctamente conectado.
• Compruebe que el interruptor 1 (alimentación) esté en la posición de “activado”.
Si el mensaje NO SEÑAL DE
ENTRADA aparece en pantalla, o si
el indicador 1 (alimentación) se
iluminado en naranja o alterna entre
verde y naranja
• Asegúrese de que el cable de señal de vídeo esté correctamente conectado y de que todos
los enchufes estén firmemente insertados en sus tomas (página 6).
• Compruebe que los terminales del conector de entrada de vídeo HD15 no estén doblados
ni arrancados.
x
Problemas causados por el ordenador u otro equipo conectado
• El ordenador se encuentra en el modo de ahorro de energía. Pulse cualquier tecla del
teclado del ordenador.
• Compruebe que la alimentación del ordenador esté activada.
• Compruebe que la tarjeta gráfica esté completamente insertada en la ranura bus adecuada.
Si el mensaje FUERA DEL RANGO
DE AJUSTE aparece en pantalla
x
Problemas causados por el ordenador u otro equipo conectado
• Compruebe que el margen de frecuencia de vídeo se encuentre dentro del especificado
para el monitor. Si ha sustituido un monitor antiguo por este, vuelva a conectar el antiguo
y ajuste el margen de frecuencia de acuerdo con lo siguiente.
Horizontal: 30 – 70 kHz
Vertical: 48 – 120 Hz
Si no aparece ningún mensaje y el
indicador 1 (alimentación) se
ilumina en verde o parpadea en
naranja
• Utilice la función de autodiagnóstico (página 16).
Si utiliza Windows 95/98 • Si ha sustituido un monitor antiguo por este, vuelva a conectar el antiguo y realice lo
siguiente. Instale el disquete Windows Monitor Information Disk (página 7) y seleccione
este monitor (“CPD-E100”) entre los monitores de Sony en la pantalla de selección de
éstos de Windows 95/98.
Si utiliza un sistema Macintosh • Compruebe que el adaptador Macintosh (no suministrado) y el cable de señales de vídeo
estén correctamente conectados (página 6).
La imagen parpadea, se ondula,
oscila o aparece codificada
• Aísle y elimine las fuentes potenciales de campos eléctricos o magnéticos, como otros
monitores, impresoras láser, ventiladores eléctricos, lámparas fluorescentes o televisores.
• Aleje el monitor de líneas eléctricas o instale una protección magnética cerca del monitor.
• Enchufe el monitor en una toma de CA diferente, preferiblemente de otro circuito.
• Gire el monitor 90° hacia la izquierda o la derecha.
x
Problemas causados por el ordenador u otro equipo conectado
• Consulte el manual de la tarjeta gráfica para obtener información sobre el ajuste adecuado
al monitor.
• Confirme que este monitor admite el modo gráfico (VESA, Macintosh 16" Color, etc.) y
la frecuencia de la señal de entrada (Appendix). Aunque la frecuencia se encuentre dentro
del margen adecuado, ciertas tarjetas de vídeo pueden presentar un impulso de
sincronización demasiado estrecho para que el monitor se sincronice correctamente.
• Ajuste la frecuencia de barrido del ordenador (frecuencia vertical) para que la imagen
presente la mejor calidad posible.
La imagen aparece borrosa
• Ajuste el brillo y el contraste (página 9).
• Desmagnetice el monitor* (página 12).
• Seleccione CANCELAR MUARE y ajuste el efecto de cancelación de muaré (página 12).
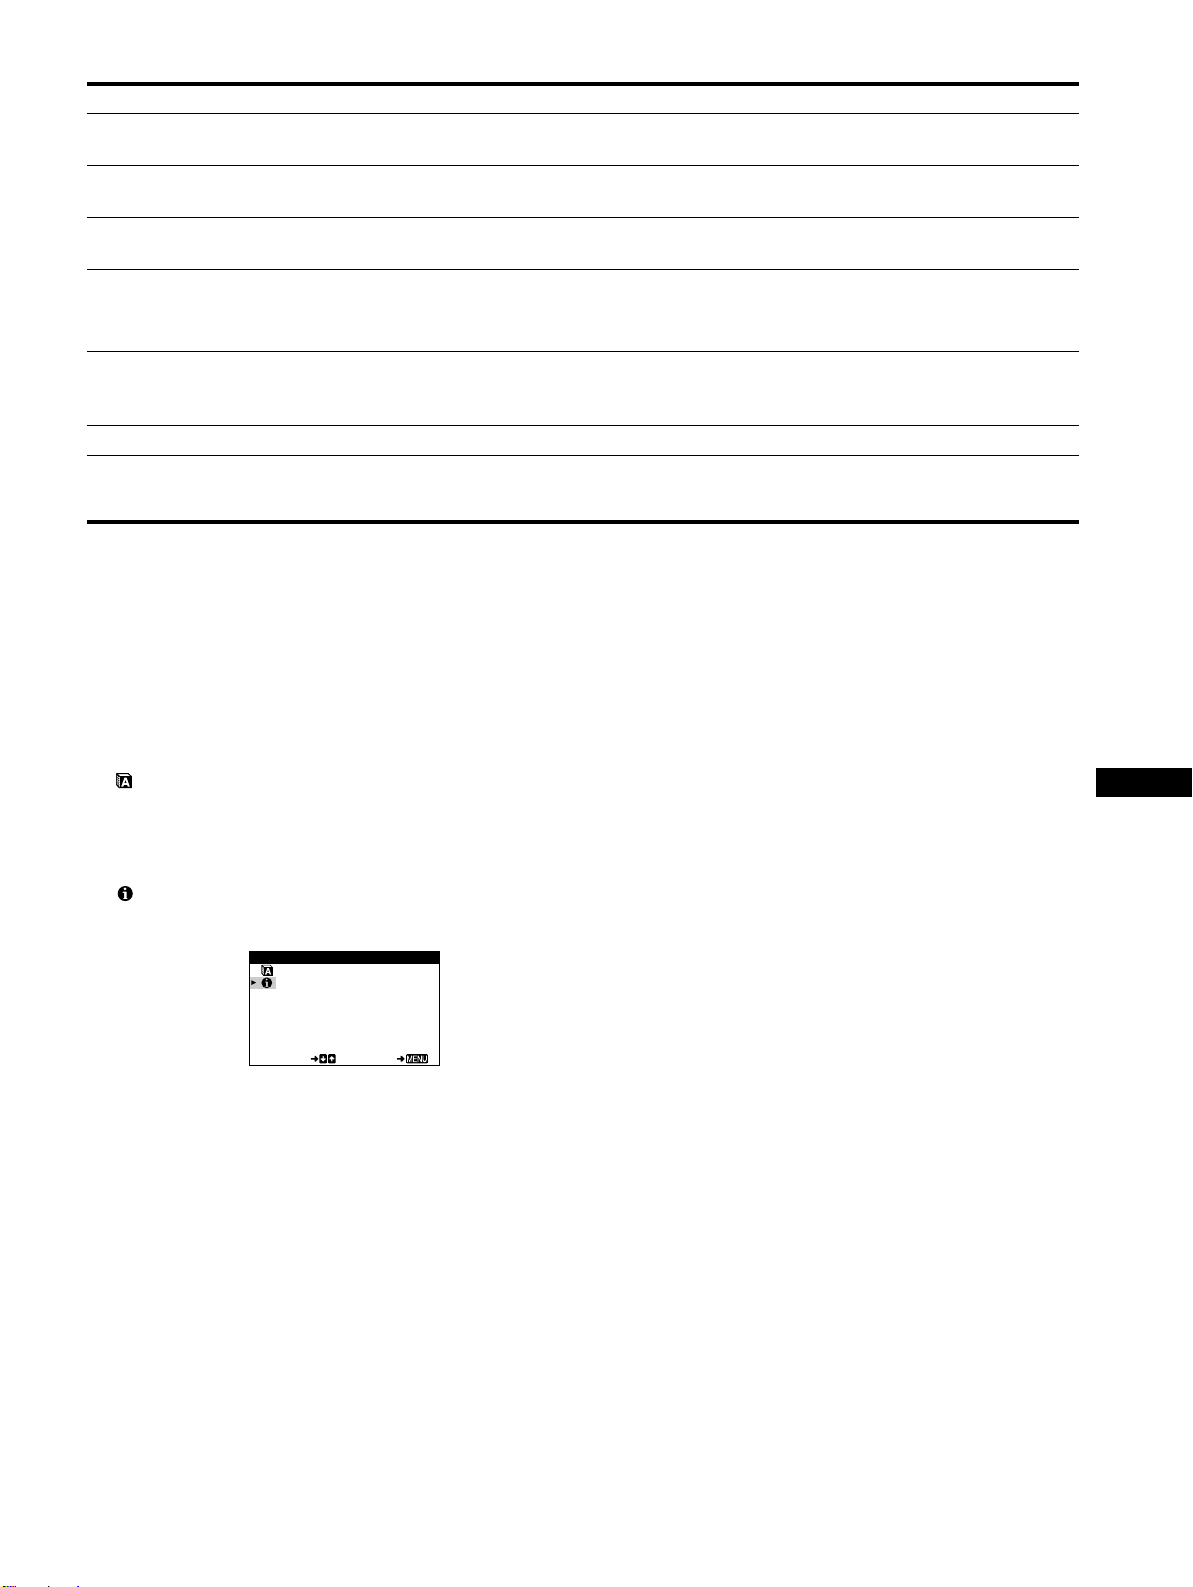
15
C:\WIN95-E\DESKTOP\CPD E100\386765901CPDE100UC\386765901CPDE100UC\03ES02BAS-
UC.fm
masterpage:Right
CPD-E100
3-867-659-
01
(1)
ES
* Si es necesario aplicar un segundo ciclo de desmagnetización, deje que transcurran al menos 20 minutos antes de volver a aplicarlo para obtener el mejor
resultado posible. Es posible que se oiga un zumbido, pero no es un fallo de funcionamiento.
Visualización del nombre, número de serie y
fecha de fabricación de este monitor
(INFORMACIÓN)
1
Pulse el centro del botón de control.
El MENÚ principal aparece en pantalla.
2
Desplace el botón de control
m
/
M
para resaltar
LENGUAJE/INFORMACIÓN y pulse de nuevo el
centro del botón de control.
El menú LENGUAJE/INFORMACIÓN aparece en pantalla.
3
Desplace el botón de control
m
/
M
para seleccionar
(INFORMACIÓN).
Aparece en pantalla el cuadro de información de este monitor.
Si el problema persiste, póngase en contacto con un proveedor
Sony autorizado y proporciónele la siguiente información.
• Nombre del modelo: CPD-E100
• Número de serie
• Nombre y especificaciones del ordenador y de la tarjeta gráfica.
Aparecen imágenes fantasma
• No utilice cables prolongadores de vídeo ni dispositivos de conmutación de vídeo.
• Compruebe que todos los enchufes estén firmemente insertado en sus tomas.
La imagen aparece descentrada o
con un tamaño incorrecto
• Ajuste el tamaño o el centrado (página 10). Tenga en cuenta que ciertos modos de vídeo
no llenan la pantalla hasta los bordes.
Los bordes de la imagen aparecen
curvos
• Seleccione COJÍN/BAL COJÍN, TRAPECIO/PARALELO o ROTACIÓN, y ajuste la
forma y la rotación de la imagen (páginas 10, 11).
Se aprecian patrones ondulados o
elípticos (muaré)
• Seleccione CANCELAR MUARE y ajuste el efecto de cancelación de muaré (página 12).
x
Problemas causados por el ordenador u otro equipo conectado
• Cambie el patrón de escritorio.
El color no es uniforme
• Desmagnetice el monitor* (página 12). Si coloca equipos que generen campos
magnéticos, como altavoces, cerca del monitor, o si cambia la orientación del monitor, el
color puede perder uniformidad.
El blanco no parece blanco
• Ajuste la temperatura del color (página 11).
Se oye un zumbido
inmediatamente después de
activar la alimentación
• Se trata del sonido producido por el ciclo de desmagnetización automática. Al activar la
alimentación, el monitor se desmagnetiza automáticamente durante cinco segundos.
Problema Compruebe lo siguiente
MODEL :CPD- E100
SERIAL:12345678
MANUFACTURED: 1999 - 52
SELECT EXI T
LENGUAJE / I NFORMAC I ÓN
Ejemplo
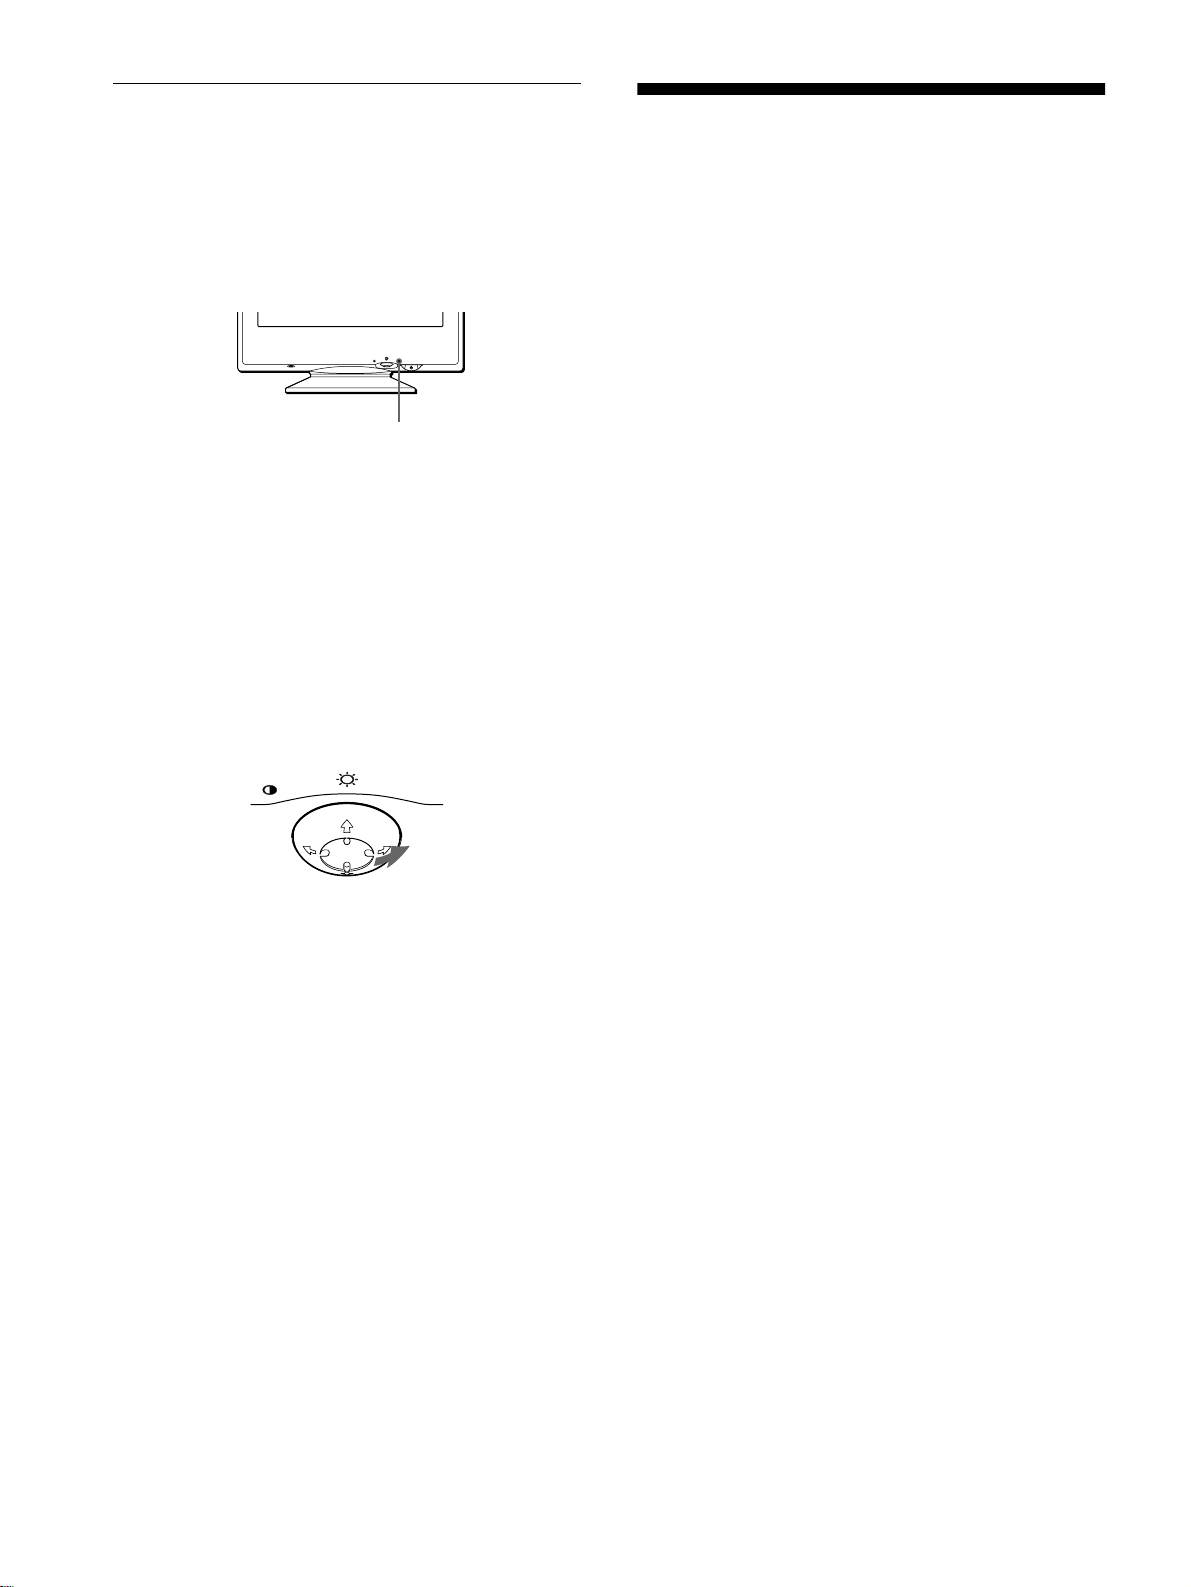
16
Función de autodiagnóstico
Este monitor dispone de una función de autodiagnóstico. Si existe
algún problema con el monitor o con el ordenador, la pantalla se
mostrará en blanco y el indicador 1 (alimentación) se iluminará
en verde o parpadeará en naranja. Si el indicador
1 (alimentación) está iluminado en naranja, significa que el
ordenador se encuentra en el modo de ahorro de energía. Pulse
cualquier tecla del teclado.
Si el indicador
1
(alimentación) está iluminado en
verde
1
Desconecte el cable de entrada de vídeo o apague
el ordenador conectado.
2
Pulse el botón 1 (alimentación) dos veces para
apagar el monitor y, a continuación, encenderlo.
3
Mantenga desplazado el botón de control
,
durante 2 segundos antes de que el monitor entre
en el modo de ahorro de energía.
Si aparecen las cuatro barras de color (blanco, rojo, verde, azul),
significa que el monitor funciona correctamente. Vuelva a
conectar el cable de entrada de vídeo y compruebe el estado del
ordenador.
Si las barras de color no aparecen, significa que hay un fallo
potencial del monitor. Informe al proveedor Sony autorizado del
estado del monitor.
Si el indicador
1
(alimentación) parpadea en
naranja
Pulse el botón 1 (alimentación) dos veces para apagar
el monitor y, a continuación, encenderlo.
Si el indicador 1 (alimentación) se ilumina en verde, significa
que el monitor funciona correctamente.
Si el indicador 1 (alimentación) sigue parpadeando, significa que
hay un fallo potencial del monitor. Cuente el número de segundos
entre los parpadeos en naranja del indicador 1 (alimentación) e
informe al proveedor Sony autorizado sobre el estado del monitor.
Asegúrese de anotar el nombre del modelo y el número de serie
de dicho monitor. Tome nota también del fabricante y del modelo
del ordenador y de la tarjeta de vídeo.
Especificaciones
TRC Paso de la rejilla de apertura de
0,24 mm (central)
15 pulgadas, medida diagonal
90 grados de deflexión
Tamaño de imagen visualizable
Aprox. 285
×
214 mm (an/al)
(11
1
/
4
×
8
1
/
2
pulgadas)
Imagen de visualización de 14,0"
Resolución
Máxima Horizontal: 1280 puntos
Vertical: 1024 líneas
Recomendada Horizontal: 800 puntos
Vertical: 600 líneas
Área de imagen estándar Aprox. 270
×
202 mm (an/al)
(10
3
/
4
×
8 pulgadas)
Frecuencia de deflexión* Horizontal: 30 a 70 kHz
Vertical: 48 a 120 Hz
Corriente/tensión de entrada de CA
100 a 240 V, 50 – 60 Hz,
1,6 – 0,8 A
Consumo de energía Máx. 95 W
Dimensiones Aprox. 356
×
378
×
388 mm
(an/al/prf)
(14
1
/
8
×
15
×
15
3
/
8
pulgadas)
Peso Aprox. 15 kg (33 lb 1 oz)
Plug and Play DDC1/DDC2B
Accesorios suministrados Consulte la página 6
* Condición de sincronización horizontal y vertical recomendada
• La anchura de sincronización horizontal debe ser superior a
1,0 µseg.
• La anchura de supresión horizontal debe ser superior a
3,6 µseg.
• La anchura de supresión vertical debe ser superior a
500 µseg.
Diseño y especificaciones sujetos a cambios sin previo aviso.
MENU
RESET
Indicador
1
(alimentación)
MENU
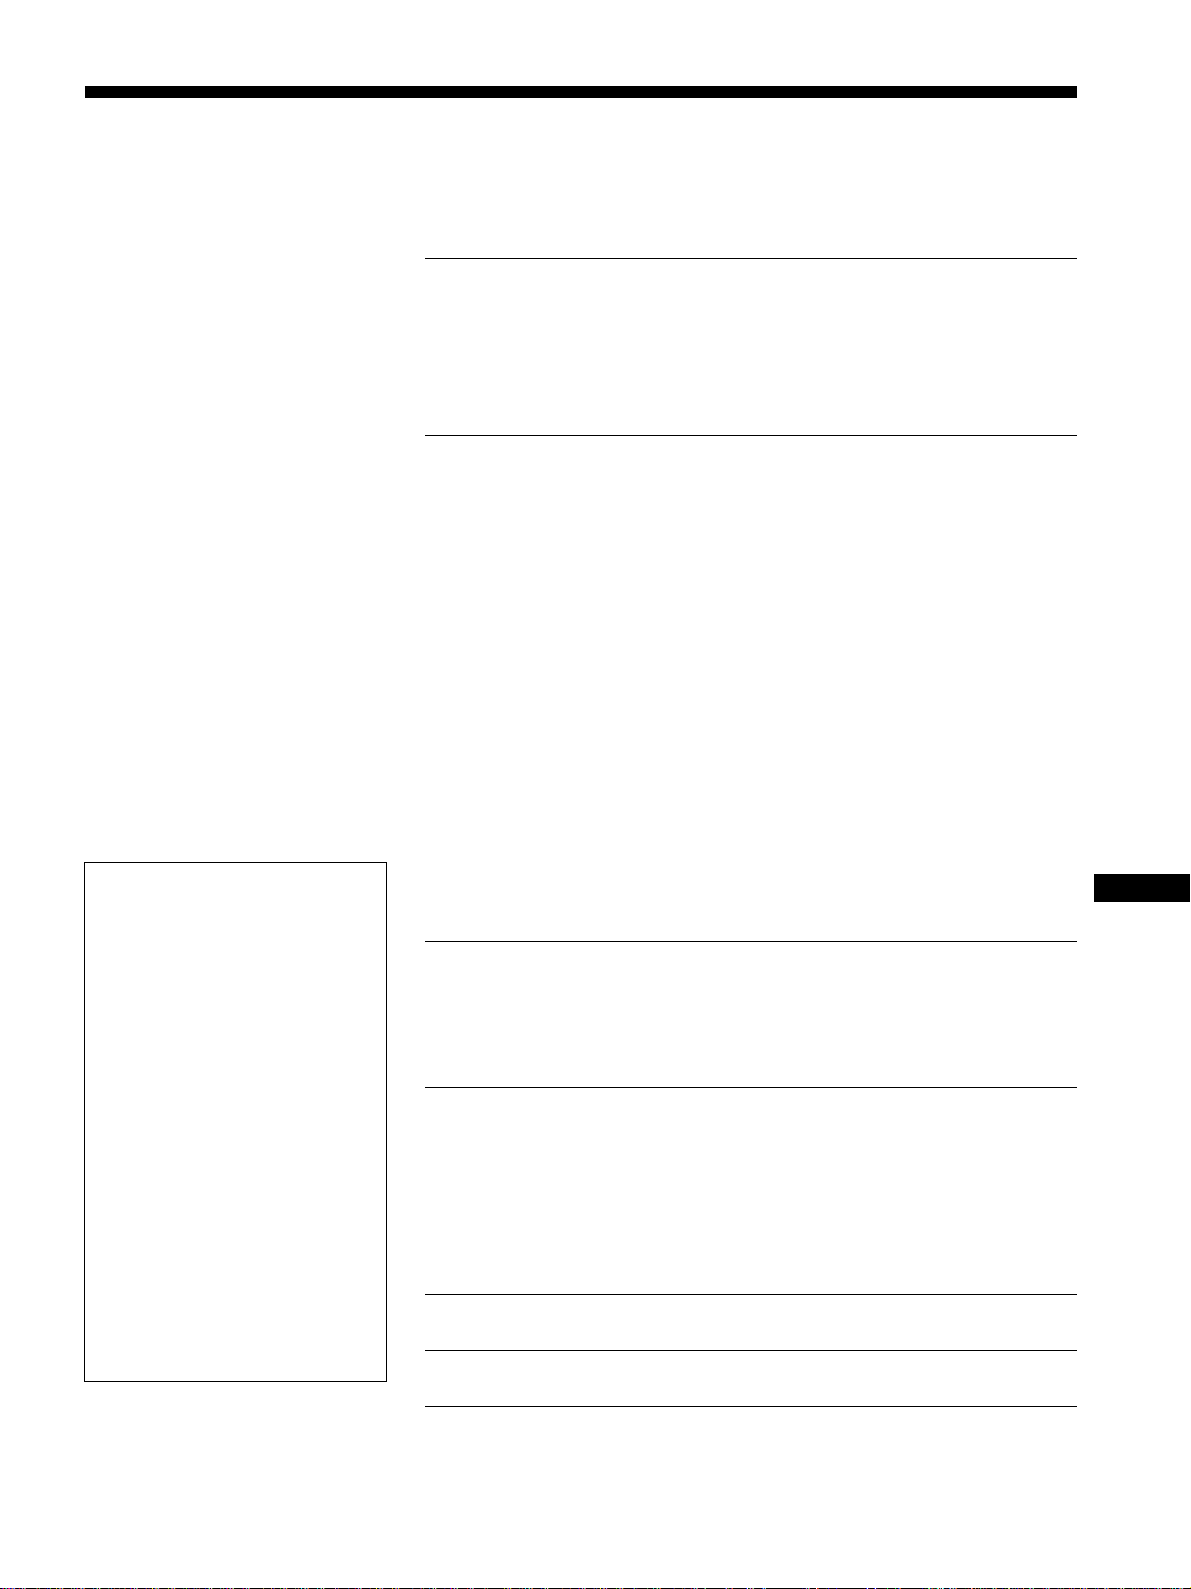
3
JP
•
トリニトロン
はソニー株式会社の登
録商標です。
• Macintosh
は、
Apple Computer
Inc.
の米国およびその他の国におけ
る登録商標です。
• Windows
と
MS-DOS
は、米国
Microsoft Corporation
の米国およ
びその他の国における登録商標で
す。
• IBM PC/AT
と
VGA
は、
IBM
Corporation
の登録商標です。
• NEC PC-98
は、
NEC
の登録商標で
す。
• VESA
と
DDC
は、
Video
Electronics Standard Association
の商標です。
•
この取扱説明書に表記されている上
記以外の製品名は、それぞれの会社
の商標または登録商標です。
•
この取扱説明書では、「」と「」につ
いては一部表記を省略しています。
目次
使用上のご注意 .............................................................................
4
各部の名前とはたらき...................................................................
5
接続と設定.....................................................................................
6
手順
1
:コンピューターにつなぐ....................................................
6
手順
2
:電源コードをつなぐ...........................................................
7
手順
3
:電源を入れる......................................................................
7
調整する ........................................................................................
8
メニュー操作のしかた...................................................................
8
メニュー言語を変える(
LANGUAGE/INFORMATION
)..........
9
明るさとコントラストを調整する ..............................................
10
水平方向での画像の大きさや位置を調整する
(水平サイズ調整
/
位置調整)........................................................
10
垂直方向での画像の大きさや位置を調整する
(垂直サイズ調整
/
位置調整)........................................................
10
画像の歪みを調整する(糸巻歪
/
糸巻歪バランス)........................
10
画像の側面の角度を調整する(台形歪
/
台形歪バランス).............
11
画像の傾きを調整する(傾き)......................................................
11
画像を拡大
/
縮小する(ズーム).....................................................
11
色温度を調整する(色温度調整)..................................................
11
その他の調整をする(デガウス/モアレキャンセル)..................
12
お買い上げ時の設定に戻す .........................................................
12
機能解説 ......................................................................................
13
本機の対応信号 ...........................................................................
13
省電力(パワーセービング)機能 ..................................................
13
故障かな?と思ったら.................................................................
13
画面に細い横線が出たら(ダンパーワイヤー)............................
13
表示メッセージについて .............................................................
13
本機の症状と対処のしかた .........................................................
14
自己診断表示機能........................................................................
16
保証書とアフターサービス .........................................................
16
主な仕様 ......................................................................................
17
Appendix
.......................................................................................
i
Preset mode timing table
..........................................................
i
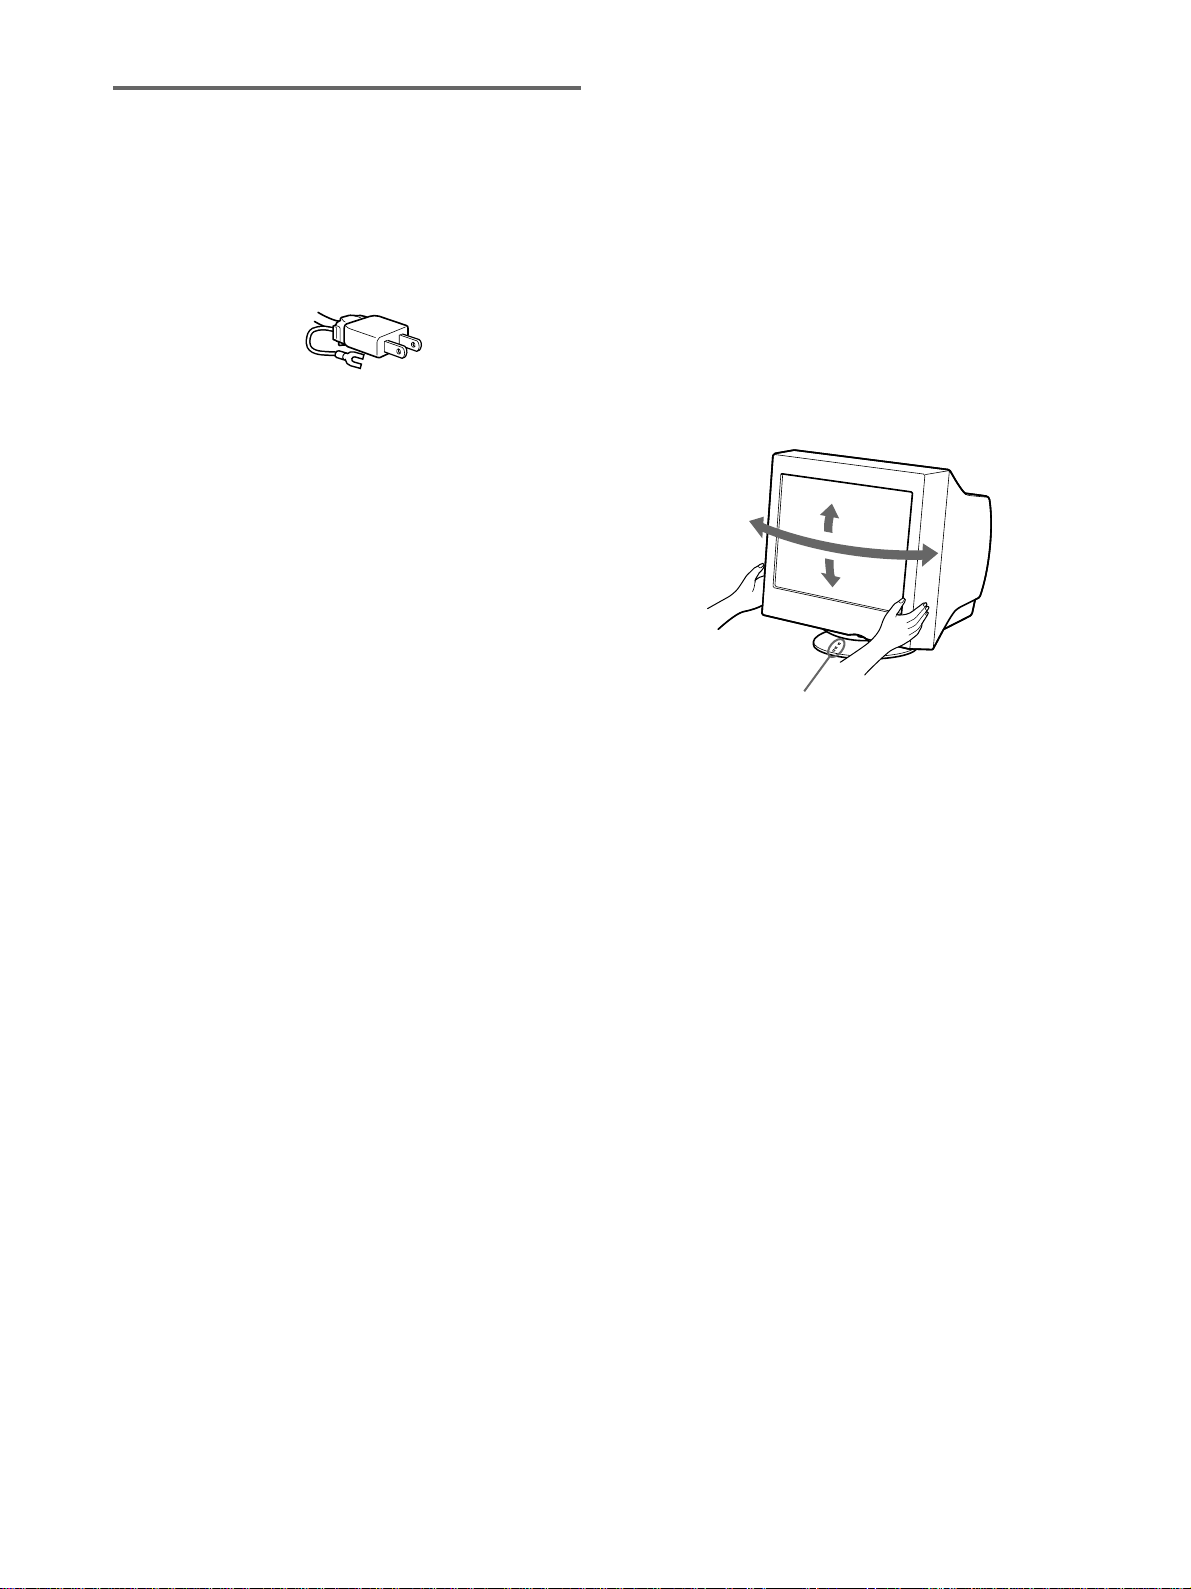
4
使用上のご注意
電源についてのご注意
•
付属の電源コードをお使いください。別売りの電源コー
ドをお使いになる場合は、下図のプラグ形状例を参考に
してください。
•
電源コードを抜く場合は、電源スイッチを切ったあと
30
秒以上たってから抜いてください。管面に帯電した
静電気を放電させるためです。
•
本機は電源を入れると、約
5
秒間自動的に消磁します。
このとき、周辺に強い磁界が発生しますので、磁気テー
プや磁気ディスクなどは本機から離しておいてくださ
い。データが破損するおそれがあります。
設置上のご注意
次のような場所には置かないでください。
•
じゅうたんや毛布などの上やカーテンの近くなど、通風
口をふさぐおそれのある場所
•
直射日光のあたるところや熱器具の近くなど、温度の高
い場所
•
温度変化の激しい場所
•
振動の多い場所
•
不安定な台の上
•
高圧送電線や変圧器など、強い磁界を発生する機器の近く
•
鉄板など帯電しやすい金属の上や近く
お手入れについてのご注意
•
管面は柔らかい布で軽くふきます。ガラスクリーナーを
使うときは、管面を傷める原因となる帯電防止剤などの
薬品が入っていないものをお使いください。
•
ボールペンやドライバーなど、先の尖ったもので管面に
触れたり、こすったりしないでください。
•
キャビネットなどの汚れは、中性洗剤溶液を少し含ませ
た柔らかい布などでふいてください。シンナー、ベンジ
ン、アルコールなどは表面を傷めますので、使わないで
ください。
搬送時のご注意
修理や引っ越しなどで本機を運ぶ場合は、お買い上げ時に
本機が入っていた箱と、クッション材を使ってください。
ディスプレイの向きを変えるときのご注意
本機にはディスプレイスタンドがついているので、下図の
範囲で向きを変えられます。本機の画面の中心をスタンド
の中心点に合わせて、向きが変わる範囲を確認してくださ
い。
向きを変えるときは、下図のようにディスプレイ両側の下
部を持ってください。本機を上向きにするときは、ディス
プレイの後底部に指をはさまないようにご注意ください。
プラグ形状例
AC100V
用
90
゜
90
゜
5
゜
15
゜
中心点
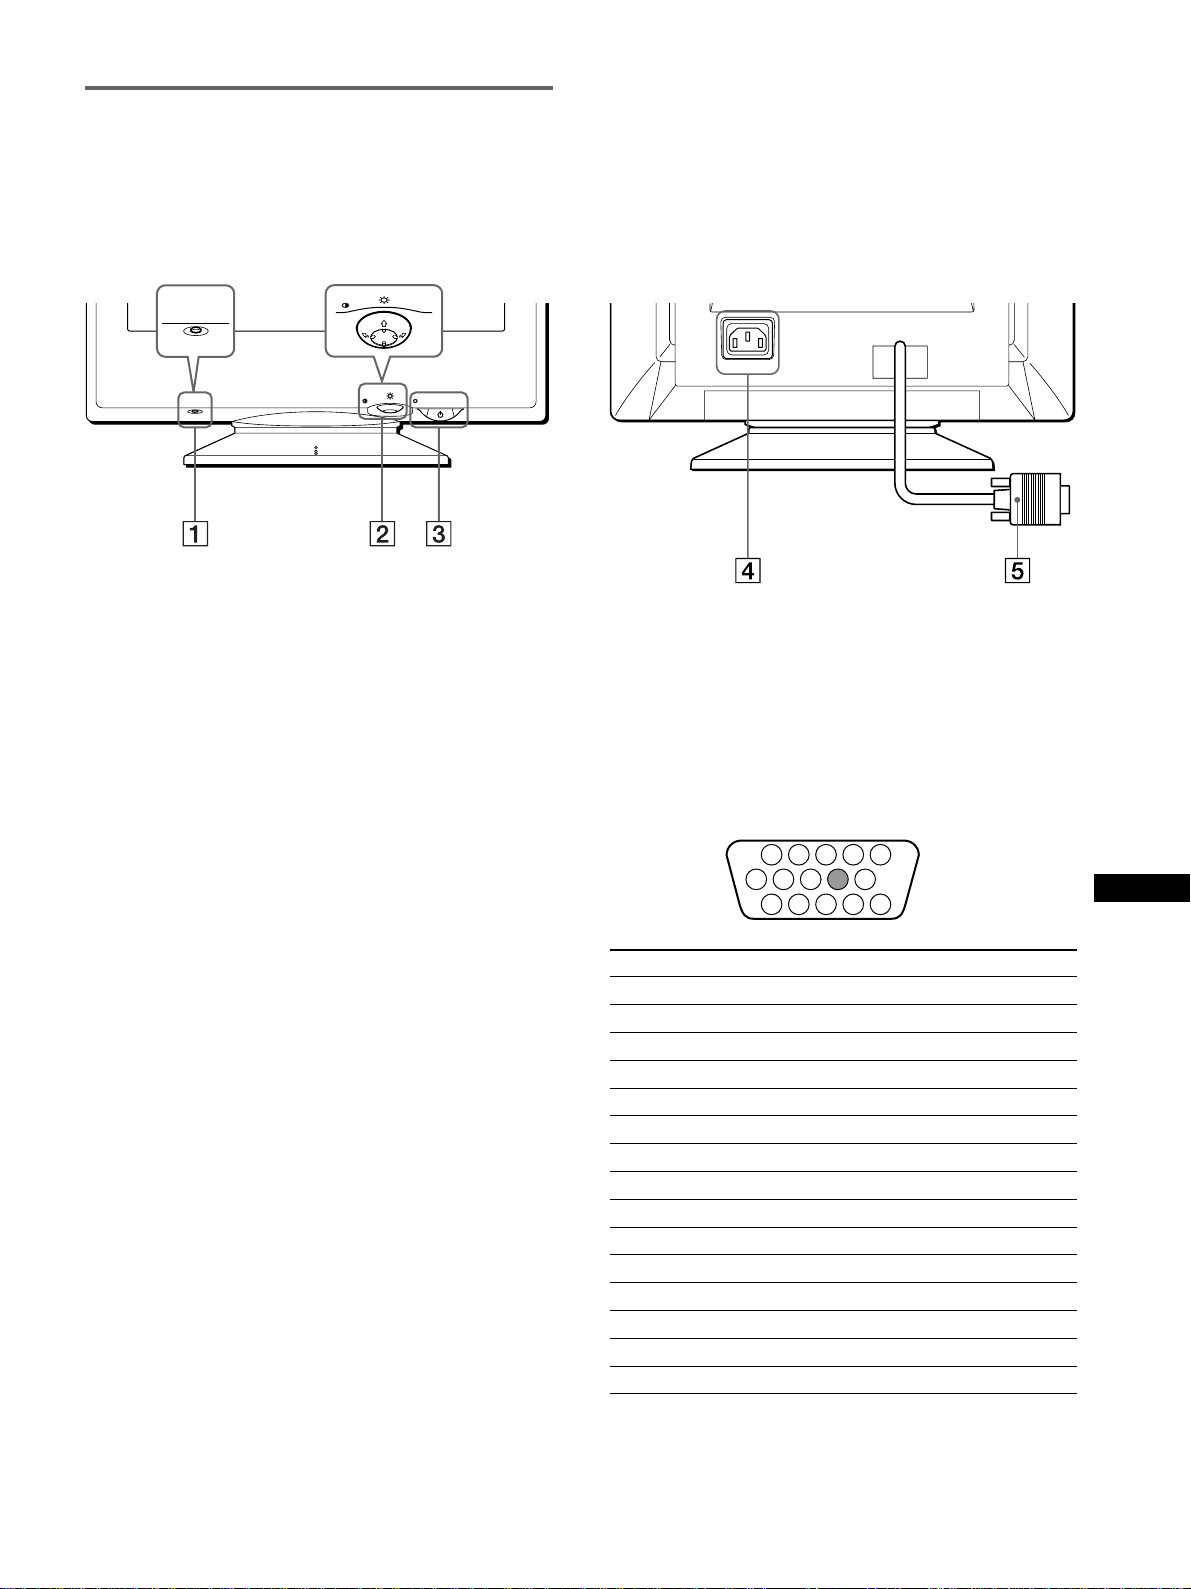
5
JP
AC IN
MENU
RESET
MENU
RESET
各部の名前とはたらき
使いかたについてのくわしい説明は( )内のページをご覧
ください。
前面
1
RESET
(リセット)ボタン(
12
ページ)
調整した設定を、お買い上げ時の設定に戻します。
2 コントロールボタン(
9
ページ)
メニューを出したり、メニューでいろいろな調整をする
ときに使います。明るさやコントラストも、これで調整
します。
3 1
(電源)スイッチとインジケーター(
7
、
13
、
16
ページ)
電源を入
/
切します。
電源が入るとインジケーターが緑色に点灯します。
省電力状態のときは、緑色とオレンジ色が交互に点滅す
るか、オレンジ色に点灯します。
後面
4 電源入力端子(
7
ページ)
電源コードをつなぎます。
5 ビデオ入力端子
(
HD15
)(
6
ページ)
RGB
の映像信号(
0.700 Vp-p
、正極性)と同期信号を
入力します。
ピン番号 信号名
1R
(赤)
2G
(緑)(
Sync on Green)
3B
(青)
4ID
(アース)
5 DDC
アース
*
6R
(赤)アース
7G
(緑)アース
8B
(青)アース
9–
10
アース
11 ID
(アース)
12
データライン(
SDA
)
*
13
水平同期
14
垂直同期
15
クロックライン(
SCL
)
*
* VESA
による
Display Data Channel
(
DDC
)規格
1 2 3 4
5
876
11 12 13 14 15
10
9
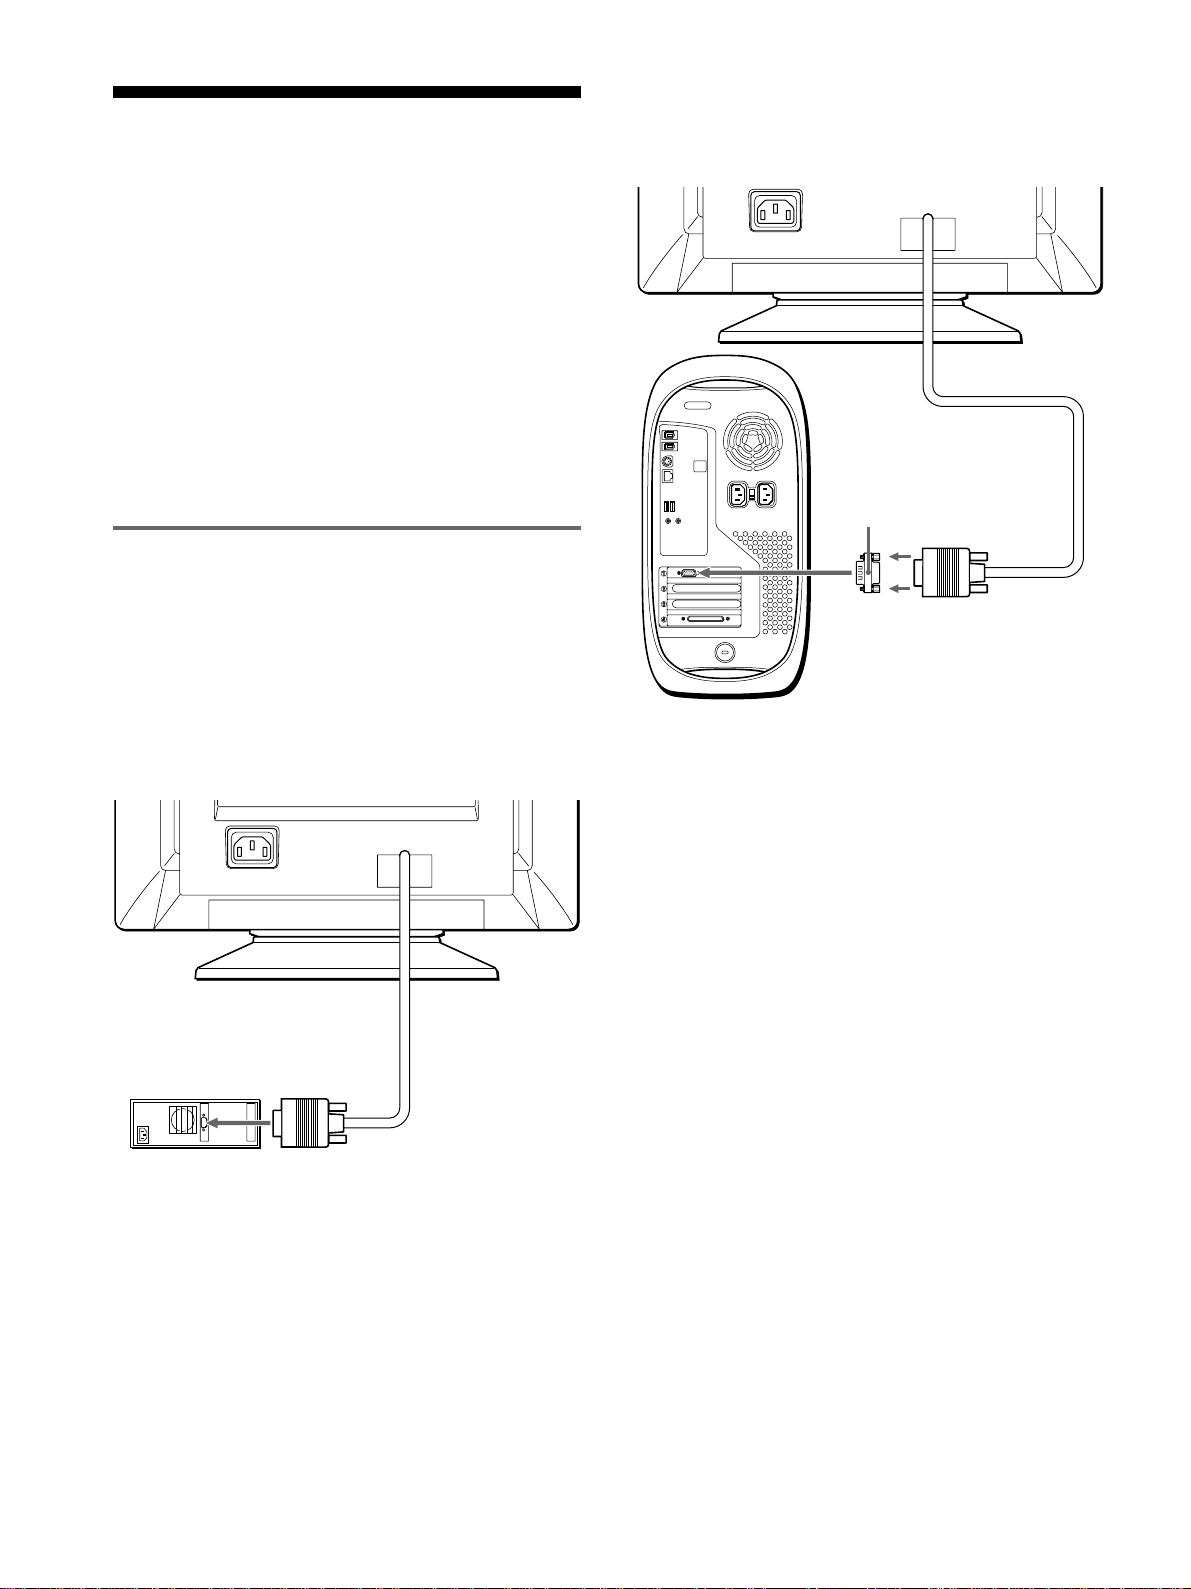
6
AC IN
AC IN
IBM PC/AT
コンピューター
または互換機
ビデオ出力へ
接続と設定
本機をお使いになる前に、下記の付属品がそろっているこ
とをご確認ください。
•
電源コード(
1
)
• Windows Monitor Information Disk
(
1
)
• Power Mac G3
(
1999
年
1
月以降発売)用アダプター(
1
)
•
保証書(
1
)
•
取扱説明書(
1
)
•
安全のために(
1
)
•
管面のお手入れについてのご注意(
1
)
•
ソニーご相談窓口のご案内(
1
)
手順
1
:コンピューターにつなぐ
本機とコンピューターの電源を切った状態でつないでくだ
さい。
ご注意
ビデオ信号ケーブルのピンに、直接手を触れないでください。
■
IBM PC/AT
コンピューターまたは互換機につなぐ
■
Macintosh
コンピューターにつなぐ
*
ビデオ出力コネクターのピン配列が
3
列タイプの
Power Mac G3
(
1999
年
1
月以降発売)シリーズと本機をつなぐときは、必ず付
属のアダプターをお使いください。
ビデオ出力コネクターのピン配列が
2
列タイプの
Macintosh
シ
リーズとつなぐときは、別アダプターが必要となります。お買い
上げ店またはソニーサービス窓口にご相談ください。
付属の
Power Mac G3
(
1999
年
1
月以降発売)用アダプ
ターを使います。
Power Mac G3
(
1999
年
1
月以降発売)
用アダプター(付属)
*
Macintosh
コンピューター
または互換機
ビデオ出力へ
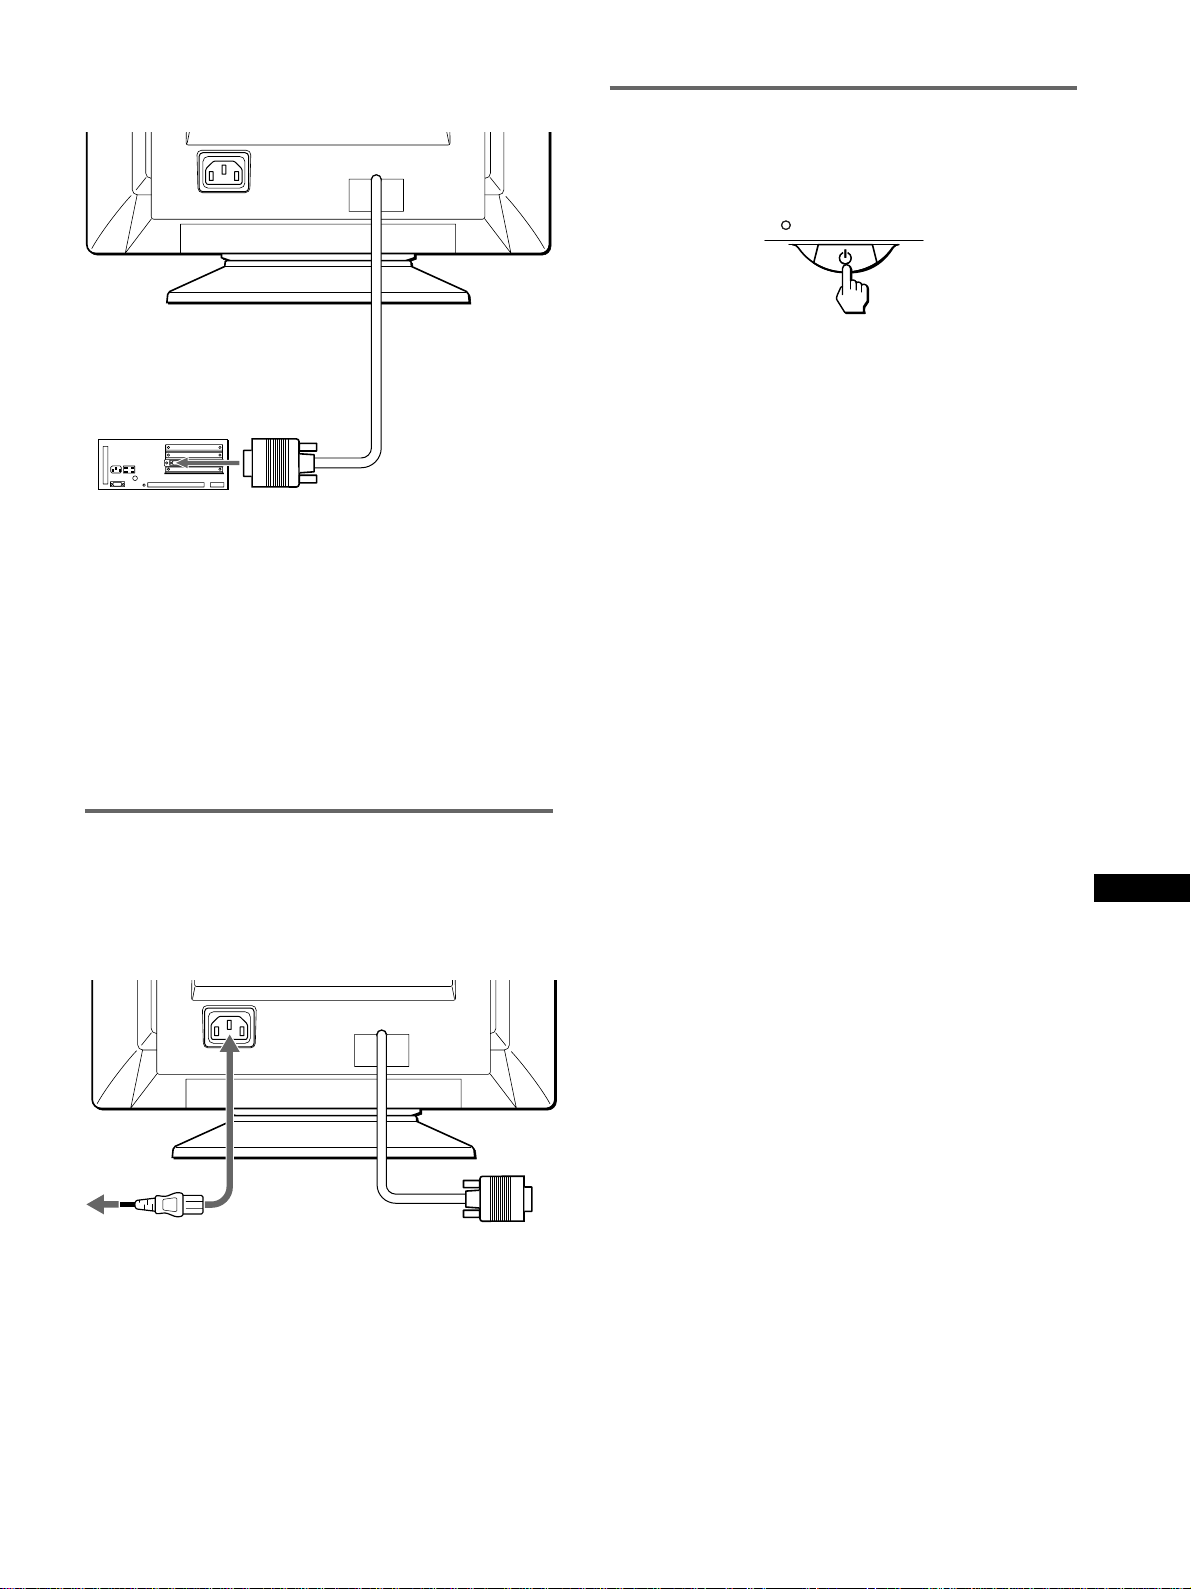
7
JP
AC IN
AC IN
■
NEC PC-98
シリーズのコンピューターにつなぐ
* PC-98
シリーズまたは
PC-H98
シリーズ用変換アダプター(別売
り)が必要な場合があります。
ご注意
本機は、下記の水平周波数
24.8kHz
、解像度
640x400
のモデルに
は対応していません(画像が画面に出ません)。この場合は
「
GRAPH
」キーと「
2
」キーを押しながら、コンピューターの電源ス
イッチを入れ、水平周波数を
31.5kHz
に設定します。
• 98MATE
シリーズ
• 98FELLOW
シリーズ(
PC-9801BA
、
BX
は除く)
• PC-H98
シリーズ(
PC-H98S
は除く)
手順
2
:電源コードをつなぐ
本機とコンピューターの電源を切った状態でつないでくだ
さい。本機に電源コードをつないでから、電源コンセント
へ差し込みます。
電源コード(付属)
電源コンセントへ
電源入力
端子へ
ビデオ出力へ
*
PC-98
シリーズの
コンピューター
手順
3
:電源を入れる
本機の電源を入れてから、コンピューターの電源を入れま
す。
これで、本機を使用できる状態になりました。必要に応じ
て、次ページからの設定や調整などを行ってください。
電源を入れても画面に画像が出ないときは
•
正しく接続されているか確認する。
•
「
NO INPUT SIGNAL
」と表示されている場合、コン
ピューターのグラフィックボードを正しいバススロット
に差し込む。
•
「
OUT OF SCAN RANGE
」と表示されている場合、
本機をつなぐ前につないでいたディスプレイがあるとき
は、それにつなぎ換えてみる。画像が出たら、コン
ピューターで水平周波数:
30
〜
70kHz
、垂直周波数:
48
〜
120Hz
の範囲に設定する。
くわしくは、「本機の症状と対処のしかた」(
14
ページ)を
ご覧ください。
Windows 95/98
をお使いのお客さまは
本機がその性能を最大限に発揮できるよう、付属の「
Windows
Monitor Information Disk
」から新機種情報ファイルを、お使い
のコンピューターにインストールしてください。
本機は、プラグ&プレイ規格である「
VESA DDC
」に対応していま
す。お使いのコンピューターまたはグラフィックボードが
DDC
に
対応している場合は、
Windows 95/98
の「コントロールパネル」
の中から「プラグアンドプレイモニター(
VESA DDC
)」、または本
機の型名を選択してください。
コンピューターやグラフィックボードと本機の通信に不都合がある
場合は、「
Windows Monitor Information Disk
」をインストール
し、本機の型名を選択してください。
Windows NT4.0
でお使いのときは
Windows NT4.0
では、
Windows 95/98
で表示される機種名が
表示されません。
Windows NT4.0
の取扱説明書をご覧になって、
解像度、リフレッシュレート、色数を設定してください。
解像度と色数を設定するには
コンピューターの取扱説明書をご覧ください。
カラーパレットの設定と表示される色数は、以下のとおりです。色
数は、コンピューターやグラフィックボードの性能によって制限さ
れます。
• High Color
(
16
ビット)→
65536
色
• True Color
(
24
ビット)→約
1677
万色
True Color
(
24
ビット)に設定すると、画面の描画速度が少し遅く
なります。
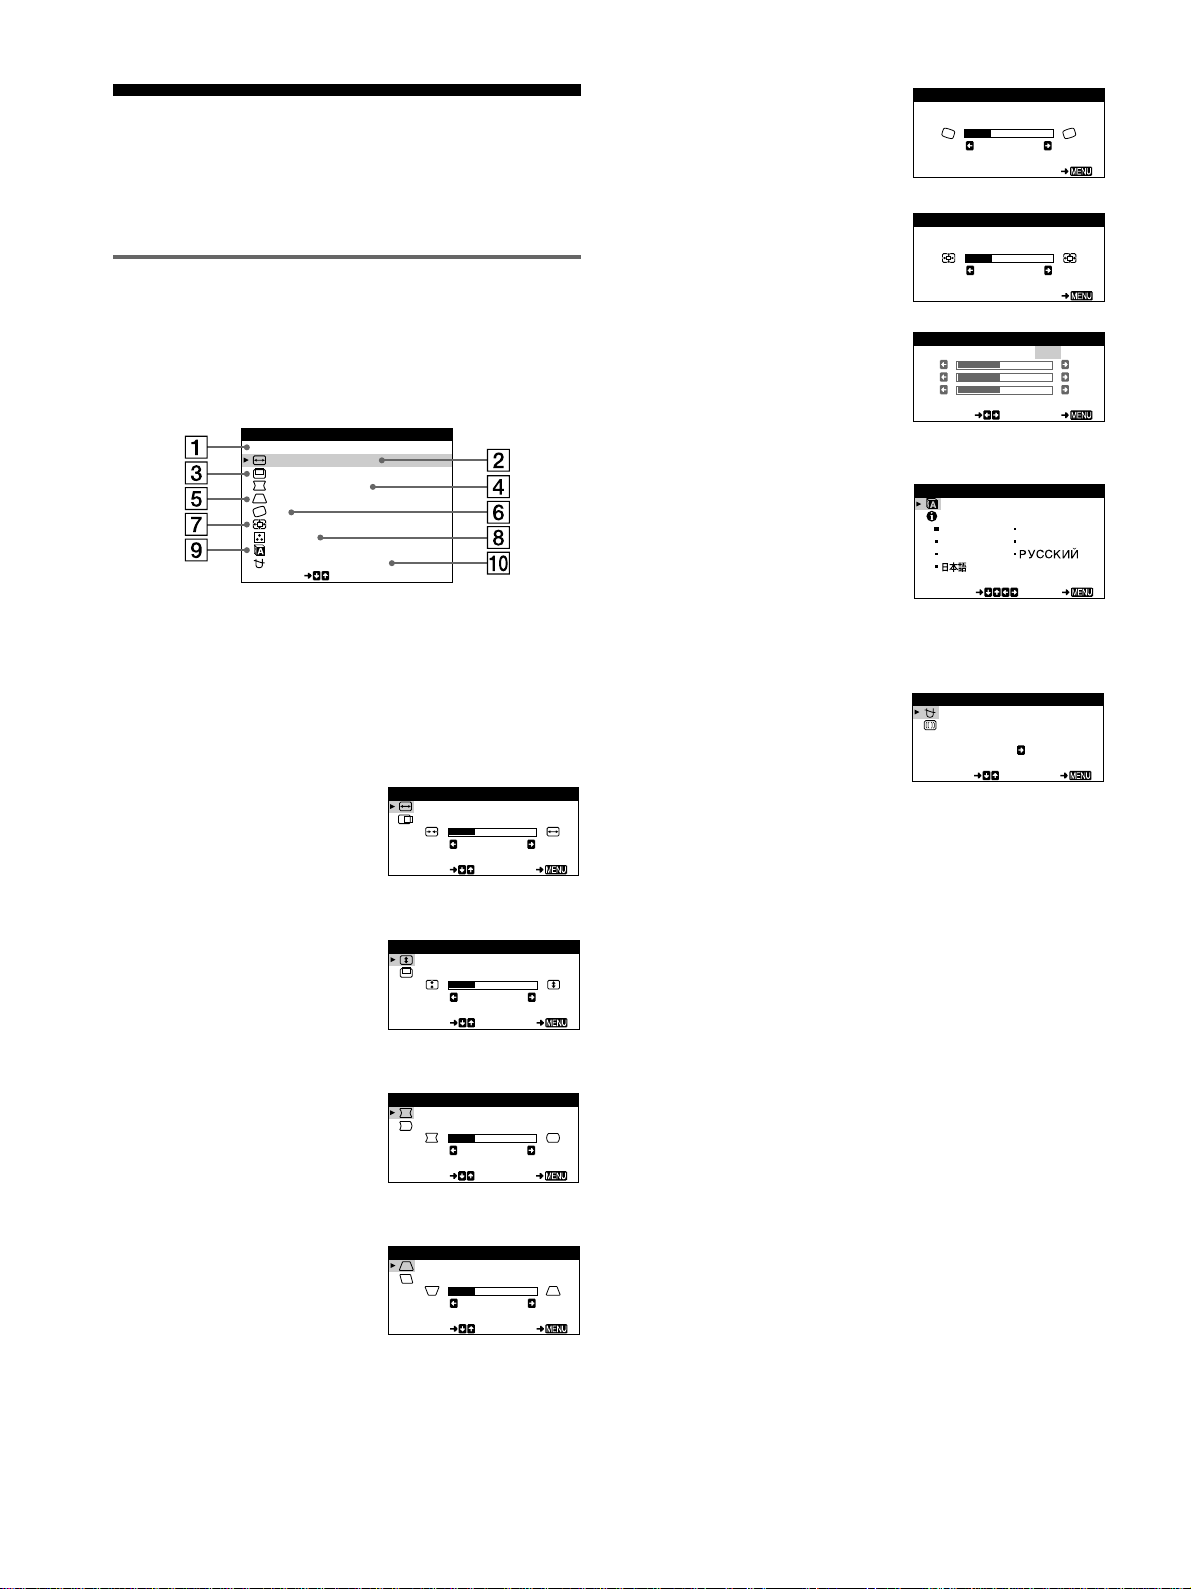
8
調整する
メニューを使って、いろいろな調整や設定ができます。
メニュー操作のしかた
コントロールボタンを押して、
MENU
画面を出します。
コントロールボタンの使いかたは、次のページをご覧くだ
さい。
コントロールボタンで1〜0を選ぶと、次のメニューが出
ます。
1 終了
メニューを消します。
2 水平サイズ調整
/
位置調
整(
10
ページ)
画像の水平方向の大きさ
や、位置の調整をします。
3 垂直サイズ調整
/
位置調
整(
10
ページ)
画像の垂直方向の大きさ
や、位置の調整をします。
4 糸巻歪
/
糸巻歪バランス
(
10
ページ)
画像側面の歪みを調整しま
す。
5 台形歪
/
台形歪バランス
(
11
ページ)
画像上部と下部の幅のバラ
ンスや、位置のずれを調整
します。
6 傾き(
11
ページ)
画像の傾きを調整します。
7 ズーム(
11
ページ)
画像を拡大、縮小します。
8 色温度調整(
11
ページ)
色温度を調整します。画面
の色を、印刷時の色に近づ
けたいときなどに使いま
す。
9
LANGUAGE/
INFORMATION
(
9
ページ)
メニューに表示する
言語を選んだり、
INFORMATION
画面を
表示したりします。
0 デガウス
/
モアレキャン
セル
(
12
ページ)
画面を消磁したり、モアレ
(波模様や点状の模様)を
調整したりします。
SELECT
LANGUAGE / I NFORMAT NOI
MENU
終了
水平サイズ調整/位置調整
垂直サイズ調整/位置調整
糸巻歪/糸巻歪バランス
台形歪/台形歪バランス
傾き
ズーム
色温度調整
デガウス/モアレキャンセル
26
SELECT EXI T
水平サイズ調整/位置調整
水平サイズ調整
26
SELECT EXI T
垂直サイズ調整/位置調整
垂直サイズ調整
26
SELECT EXI T
糸巻歪/糸巻歪バランス
糸巻歪
26
SELECT EXI T
台形歪/台形歪バランス
台形歪
26
EXI T
傾き
傾き
26
EXI T
ズーム
ズーム
ON
SELECT EXI T
デガウス/モアレキャンセル
デガウス
ENGL ISH FRANÇAI S
DEUTSCH I TAL IANO
ESPAÑOL
SELECT EXIT
LANGUAGE / INFORMAT ION
KKK
R50
G50
B50
SELECT EXIT
5000 6500 9300
USER
色温度調整
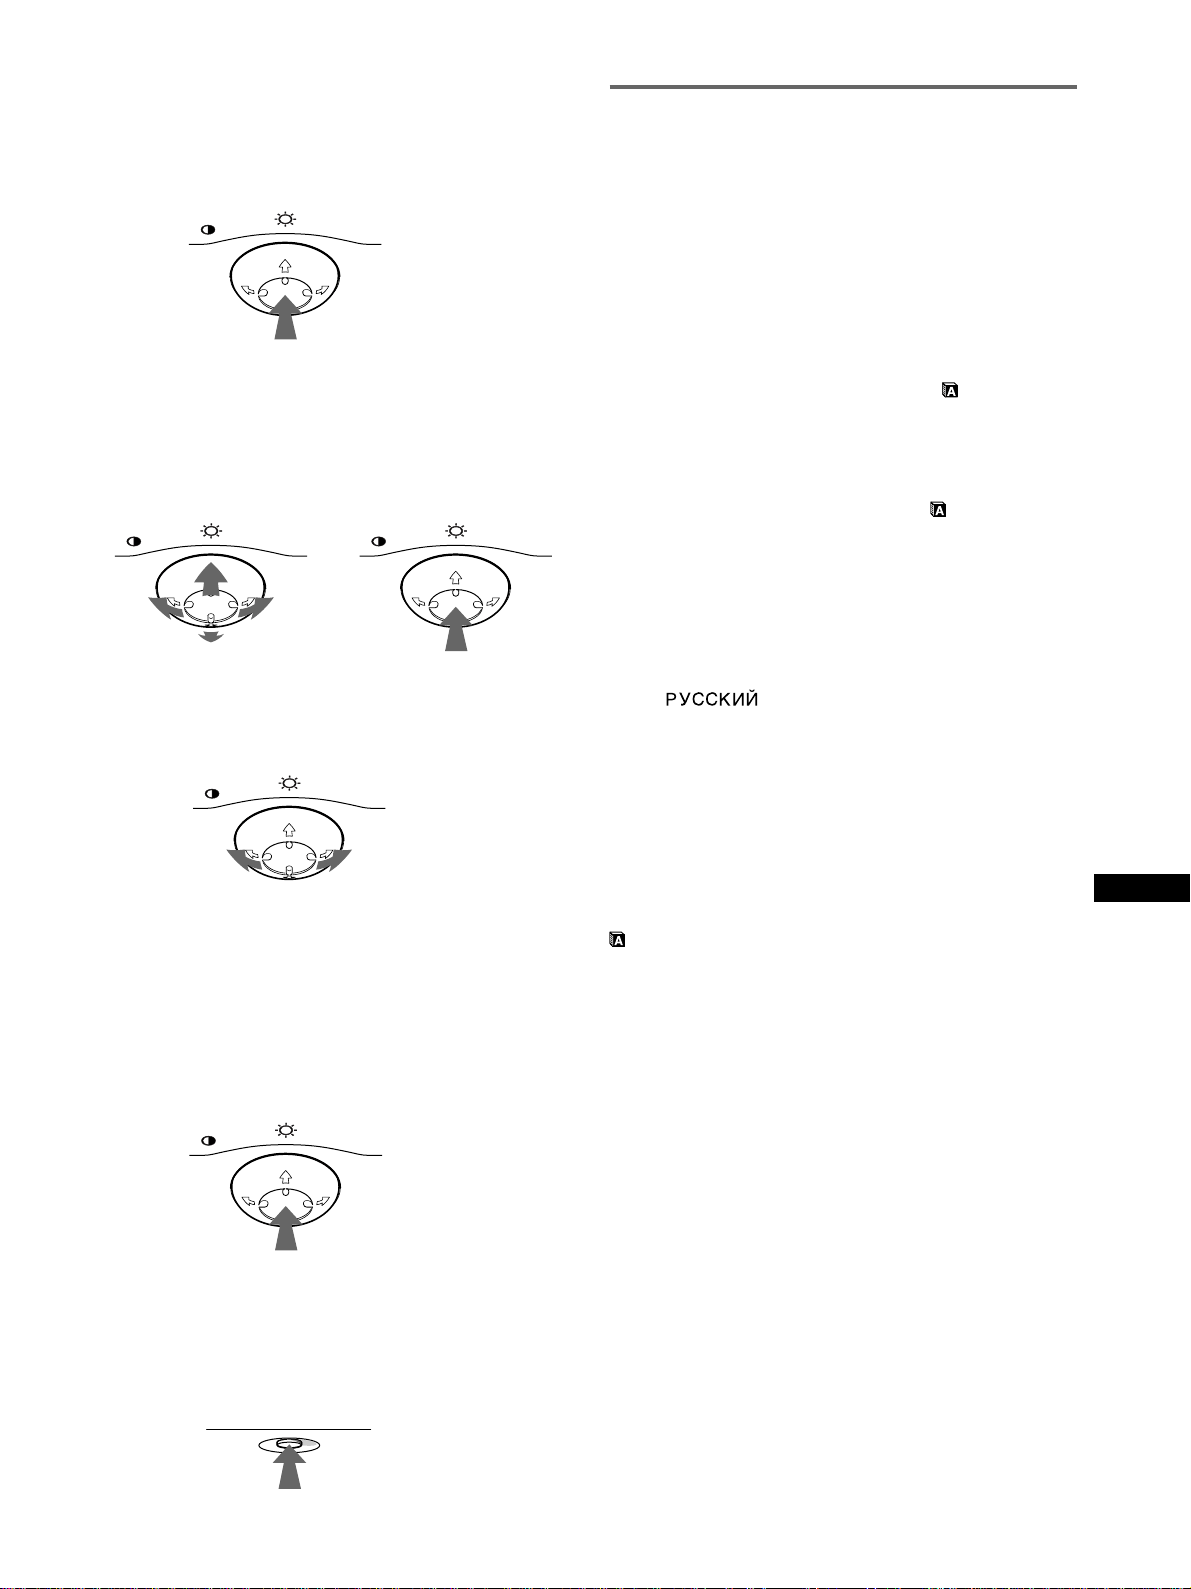
9
JP
■ コントロールボタンの使いかた
1 MENU
画面を出す
コントロールボタンを押して、
MENU
画面を出す。
2
調整したいメニューや項目を選ぶ
コントロールボタンを奥側(M)、手前側(m)、左側
(<)、または右側(,)に動かして選び、コントロー
ルボタンを押して決定する。
3
調整する
コントロールボタンを左右(<
/
,)に動かす。
4
メニューを消す
コントロールボタンを1回押すと、
MENU
画面に戻
る。「終了」を選んでいる状態でもう1回押すと、
MENU
画面が消える。
コントロールボタンを押さなくても、調整後、約
30
秒
たつと自動的に消えます。
■ お買い上げ時の状態に戻す
RESET
ボタンを使います。くわしくは、
12
ページをご覧
ください。
b
メニュー言語を変える
(
LANGUAGE/INFORMATION
)
お買い上げ時は、メニューに表示する言語は日本語になっ
ています。他に、英語、フランス語、ドイツ語、イタリア
語、スペイン語、ロシア語に変えられます。
1
コントロールボタンを押す。
MENU
画面が出ます。
2
コントロールボタンをm
/
Mに動かして「
LANGUAGE/
INFORMATION
」を選び、コントロールボタンを押
す。
LANGUAGE/INFORMATION
画面が出ます。
3
コントロールボタンをm
/
Mに動かして「 (
LANGUAGE
)」
を選び、<
/
,に動かして言語を選ぶ。
•
ENGLISH:英語
•
FRANÇAIS:フランス語
•
DEUTSCH:ドイツ語
•
ITALIANO:イタリア語
•
ESPAÑOL:スペイン語
•
:ロシア語
•
日本語
メニューを消すには
コントロールボタンを1回押すと、
MENU
画面に戻ります。「終
了」を選んでいる状態でもう1回押すと、
MENU
画面が消えます。
コントロールボタンを押さなくても、選択後、約
30
秒たつと自動
的に消えます。
日本語に戻すには
(
LANGUAGE
)画面が出ているときに
RESET
ボタンを押しま
す。
MENU MENU
RESET
MENU
MENU
手前側
奥側
MENU
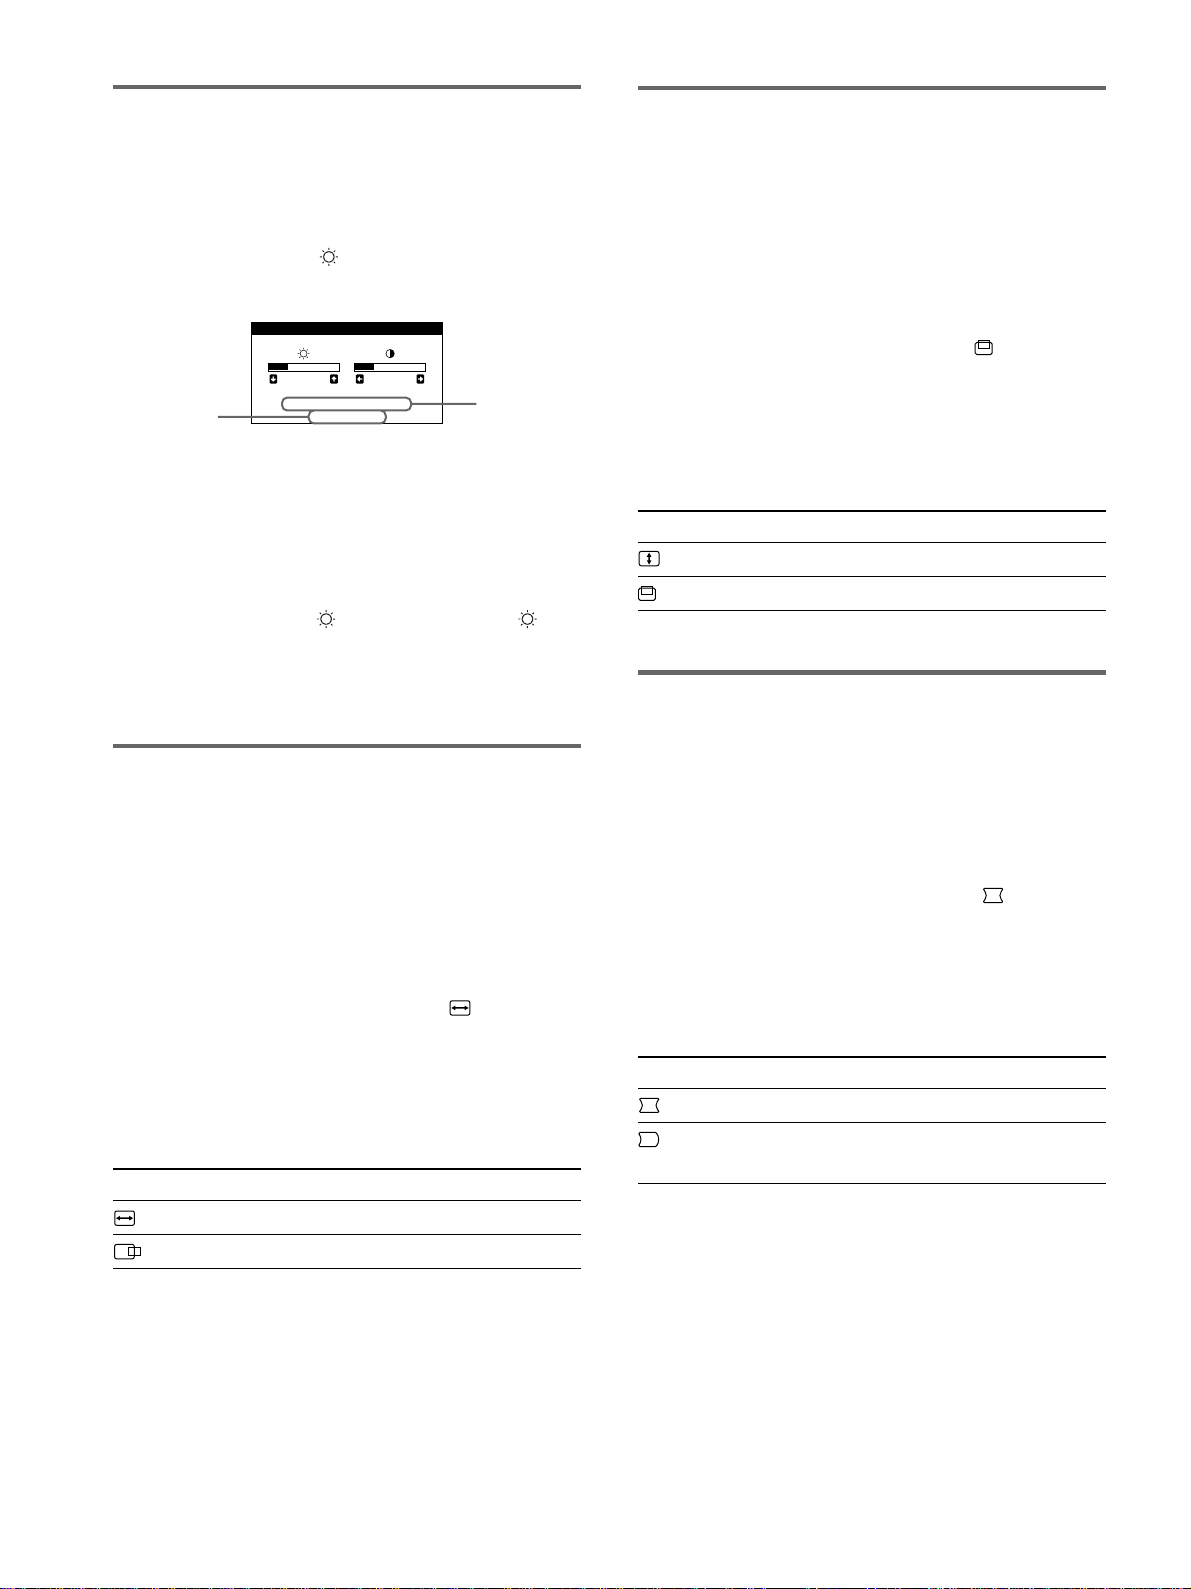
10
26 26
68.7kHz/85.0Hz
1024X768
ブライトネス/コントラスト
現在入力中の
信号の解像度
現在入力中の
信号の水平
/
垂直周波数
垂直方向での画像の大きさや位
置を調整する
(垂直サイズ調整
/
位置調整)
この調整は、現在入力中の信号に対して有効です。
1
コントロールボタンを押す。
MENU
画面が出ます。
2
コントロールボタンをm
/
Mに動かして「
垂直サイズ調
整/位置調整」を選び、コントロールボタンを押す。
垂直サイズ調整
/
位置調整画面が出ます。
3
コントロールボタンをm
/
Mに動かして調整したい項目を
選び、<
/
,に動かして調整する。
項目 調整する内容
垂直サイズ調整 画像の垂直方向のサイズ
垂直位置調整 画像の垂直方向の位置
画像の歪みを調整する
(糸巻歪
/
糸巻歪バランス)
この調整は、現在入力中の信号に対して有効です。
1
コントロールボタンを押す。
MENU
画面が出ます。
2
コントロールボタンをm
/
Mに動かして「
糸巻歪
/
糸巻
歪バランス」を選び、コントロールボタンを押す。
糸巻歪
/
糸巻歪バランス画面が出ます。
3
コントロールボタンをm
/
Mに動かして調整したい項目を
選び、<
/
,に動かして調整する。
項目 調整する内容
糸巻歪 画像側面のふくらみ
/
へこみ
糸巻歪バランス 画像側面のふくらみ
/
へこみの左右バ
ランス
明るさとコントラストを調整する
MENU
画面(
8
ページ)とは別のブライトネス
/
コントラス
ト画面で調整します。
この調整は、すべての入力信号に対して有効です。
1
コントロールボタンを m
/
Mまたは6<
/
,に動かす。
ブライトネス
/
コントラスト画面が出ます。
現在入力中の信号の水平
/
垂直周波数がブライトネス
/
コ
ントラスト画面の下に表示されます。また、本機に設定
されている表示モードの信号のときは、解像度も表示さ
れます。
2
コントロールボタンを m
/
Mに動かして明るさ( )を、
6<
/
,に動かしてコントラスト(6)を調整する。
調整画面は、約
3
秒後に自動的に消えます。
水平方向での画像の大きさや位
置を調整する
(水平サイズ調整
/
位置調整)
この調整は、現在入力中の信号に対して有効です。
1
コントロールボタンを押す。
MENU
画面が出ます。
2
コントロールボタンをm
/
Mに動かして「
水平サイズ調
整
/
位置調整」を選び、コントロールボタンを押す。
水平サイズ調整
/
位置調整画面が出ます。
3
コントロールボタンをm
/
Mに動かして調整したい項目を
選び、<
/
,に動かして調整する。
項目 調整する内容
水平サイズ調整 画像の水平方向のサイズ
水平位置調整 画像の水平方向の位置
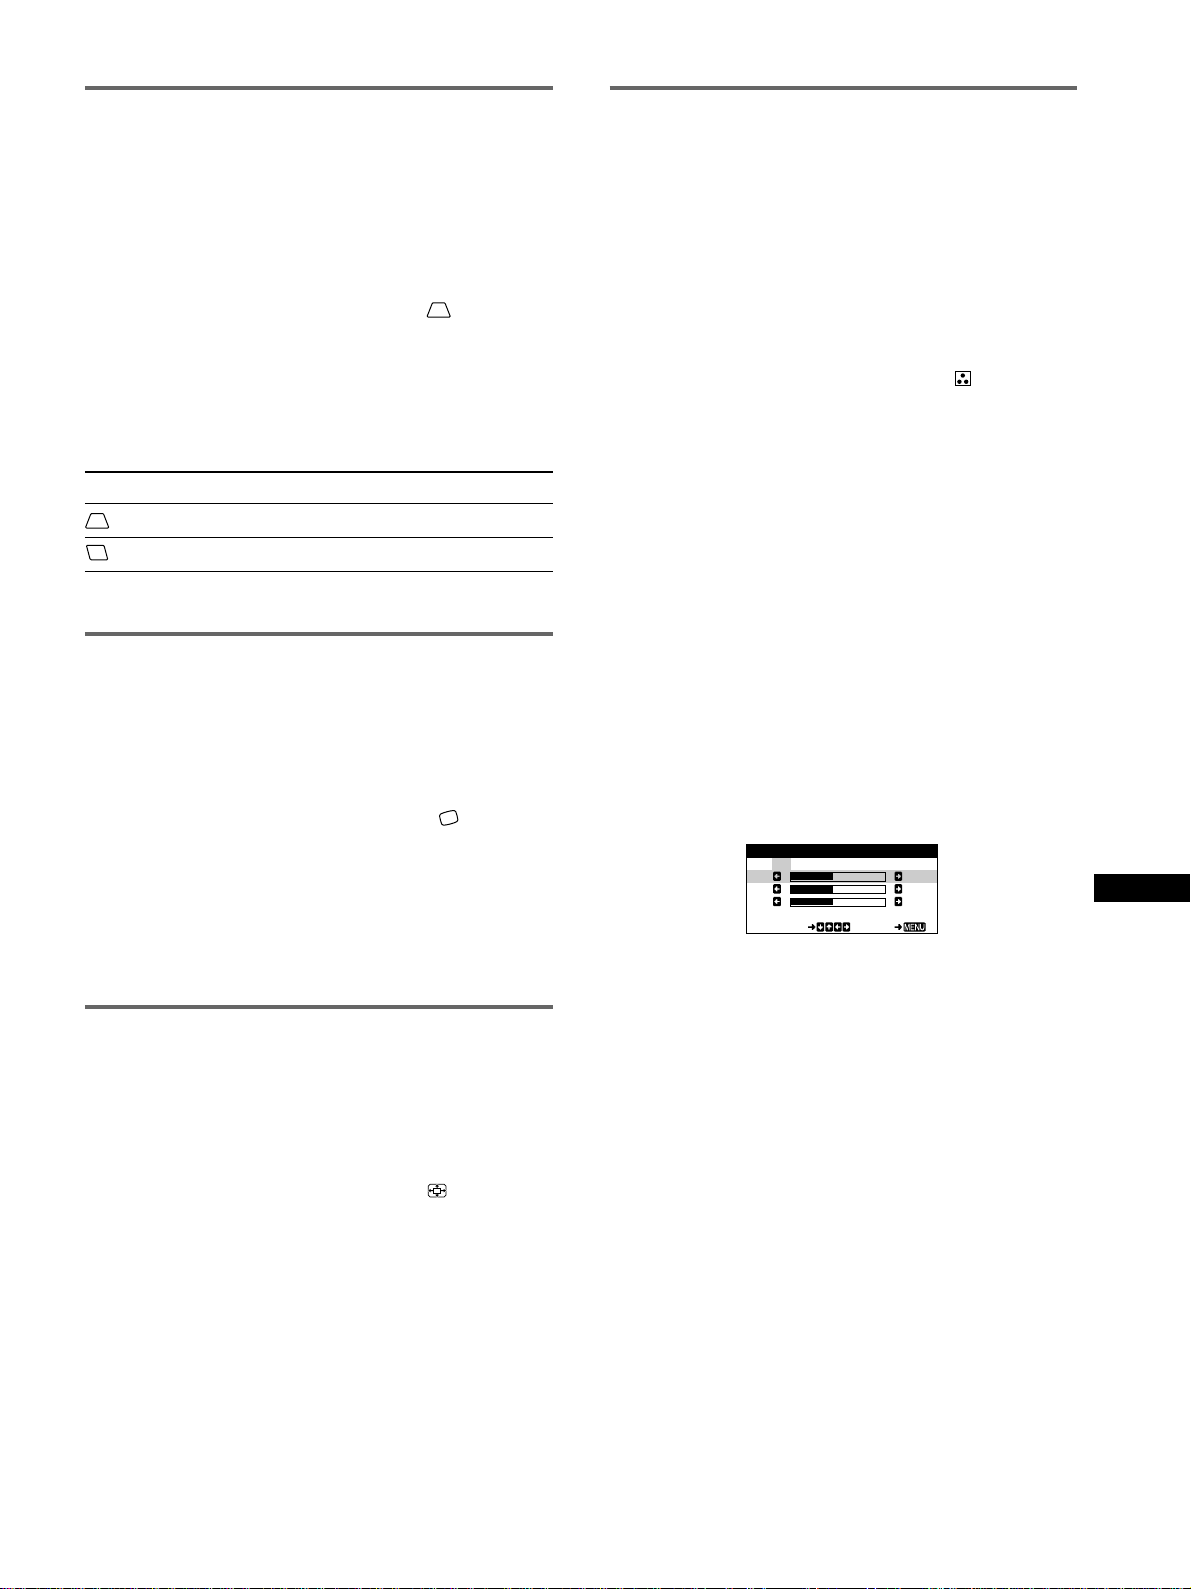
11
JP
画像の側面の角度を調整する
(台形歪
/
台形歪バランス)
この調整は、現在入力中の信号に対して有効です。
1
コントロールボタンを押す。
MENU
画面が出ます。
2
コントロールボタンをm
/
Mに動かして「
台形歪
/
台形
歪バランス」を選び、コントロールボタンを押す。
台形歪
/
台形歪バランス画面が出ます。
3
コントロールボタンをm
/
Mに動かして調整したい項目を
選び、<
/
,に動かして調整する。
項目 調整する内容
台形歪 画像上部と下部の幅のずれ
台形歪バランス 画像上部の位置のずれ
画像の傾きを調整する(傾き)
この調整は、すべての信号に対して有効です。
1
コントロールボタンを押す。
MENU
画面が出ます。
2
コントロールボタンをm
/
Mに動かして「
傾き」を選
び、コントロールボタンを押す。
傾き画面が出ます。
3
コントロールボタンを<
/
,に動かして画像の傾きを調
整する。
画像を拡大
/
縮小する(ズーム)
この調整は、現在入力中の信号に対して有効です。
1
コントロールボタンを押す。
MENU
画面が出ます。
2
コントロールボタンをm
/
Mに動かして「
ズーム」を選
び、コントロールボタンを押す。
ズーム画面が出ます。
3
コントロールボタンを<
/
,に動かして画像を拡大
/
縮
小する。
ご注意
ズーム調整は、水平または垂直サイズが最大または最小になると止
まります。
色温度を調整する(色温度調整)
色温度は白色の度合いで表され、これを変えることによっ
て画面の色を調整します。温度が低いと画面が赤みがかっ
た白色になり、高いと青みがかった白色になります。画面
の色を、印刷時の色に近づけたいときなどに使います。
この調整は、すべての入力信号に対して有効です。
1
コントロールボタンを押す。
MENU
画面が出ます。
2
コントロールボタンをm
/
Mに動かして「
色温度調整」
を選び、コントロールボタンを押す。
色温度調整画面が出ます。
3
コントロールボタンを<
/
,に動かして、色温度を選
ぶ。
5000K
、
6500K
、
9300K
の
3
種類の色温度があらかじ
め設定されています。お買い上げ時は
9300K
になって
います。
9300K
t
6500K
t
5000K
となるにつれて、
青みがかった白色から赤みがかった白色へと画面の色が
変わります。
4
必要に応じて色温度を微調整する。
コントロールボタンを<
/
,に動かして「
USER
」を選
びます。
コントロールボタンをm
/
M に動かして
R
(赤)、
G
(緑)、
B
(青)のいずれかを選び、<
/
,に動かして調
整します。
微調整すると新しい色温度が「
USER
」に設定され、
「
USER
」を選ぶとこの色温度設定になります。
KKK
R50
G50
B50
SELECT EXI T
5000 6500 9300
USER
色温度調整
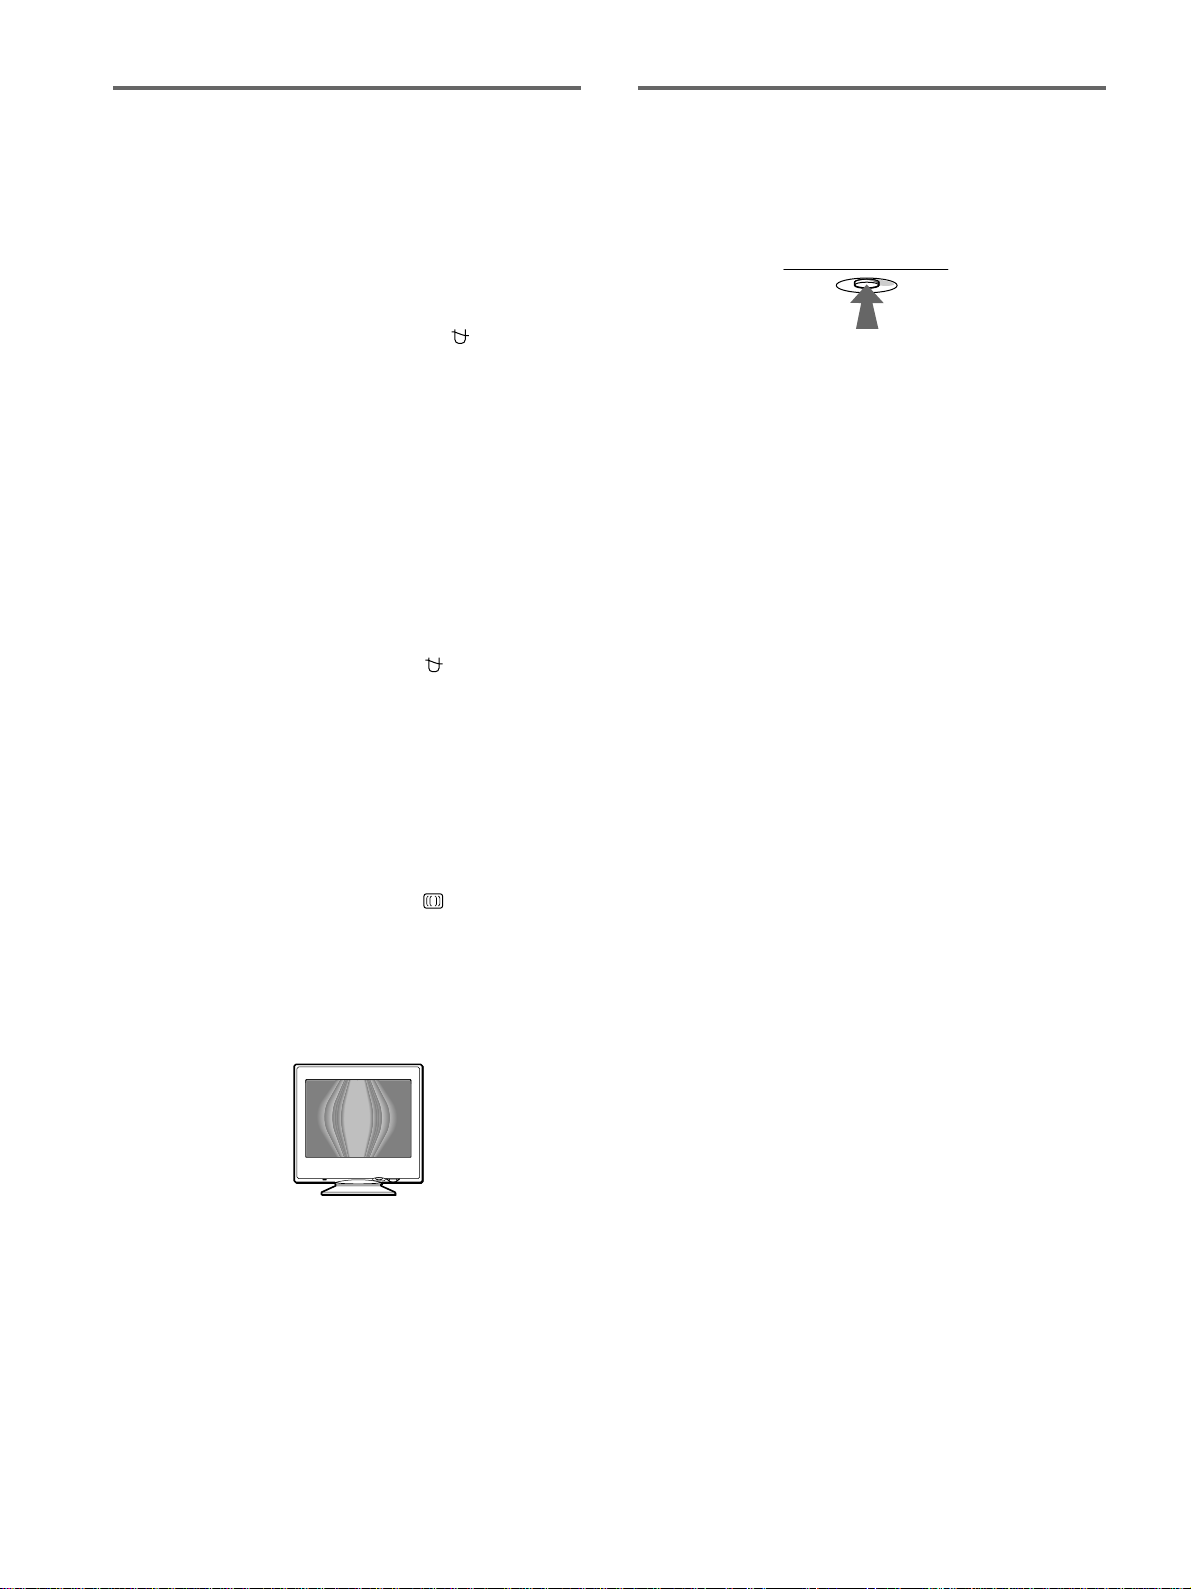
12
お買い上げ時の設定に戻す
いったん調整した設定を元に戻すには、次の
3
つの方法があ
ります。リセットには、
RESET
ボタンを使います。
調整した項目ごとにリセットする
コントロールボタンを使ってお買い上げ時の設定に戻した
い調整項目を画面に表示し、
RESET
ボタンを押す。
入力中の信号の調整値をすべてリセットする
調整画面が出ていないときに、
RESET
ボタンを押す。
ただし以下の調整値は、この操作をしてもリセットされま
せん。
•
メニュー言語(
9
ページ)
•
画像の傾き(
11
ページ)
すべての調整値をリセットする
リセットボタンを
2
秒以上押したままにする。
ただし以下の調整値は、この操作をしてもリセットされま
せん。
•
色温度調整画面の「
USER
」設定(
11
ページ)
RESET
その他の調整をする
(デガウス/モアレキャンセル)
画面を消磁したり、モアレ(波模様や点状の模様)を調整し
たりできます。
1
コントロールボタンを押す。
MENU
画面が出ます。
2
コントロールボタンをm
/
Mに動かして「
デガウス/モ
アレキャンセル」を選び、コントロールボタンを押す。
デガウス/モアレキャンセル画面が出ます。
3
コントロールボタンをm
/
Mに動かして調整したい項目を
選ぶ。
各項目は以下のように調整します。
画面を消磁する
本機は、電源を入れると自動的に消磁します。手動で消磁
するときは、次のようにします。
コントロールボタンをm
/
Mに動かして「
(デガウス)」を選
び、,に動かす。
約
5
秒間、消磁します。続けて消磁するときは、
20
分以上
間隔をあけてください。
モアレ
*
を調整する
モアレが最も目立たなくなるように調整します。
コントロールボタンをm
/
Mに動かして「
(モアレキャンセ
ル)」を選び、<
/
,に動かして調整する。
*
モアレとは、画面に出るうすい波模様や点状の模様のことです。
入力信号によっては、本機のブラウン管の蛍光体と干渉し合い、
モアレが発生することがあります。故障ではありません。
モアレの例
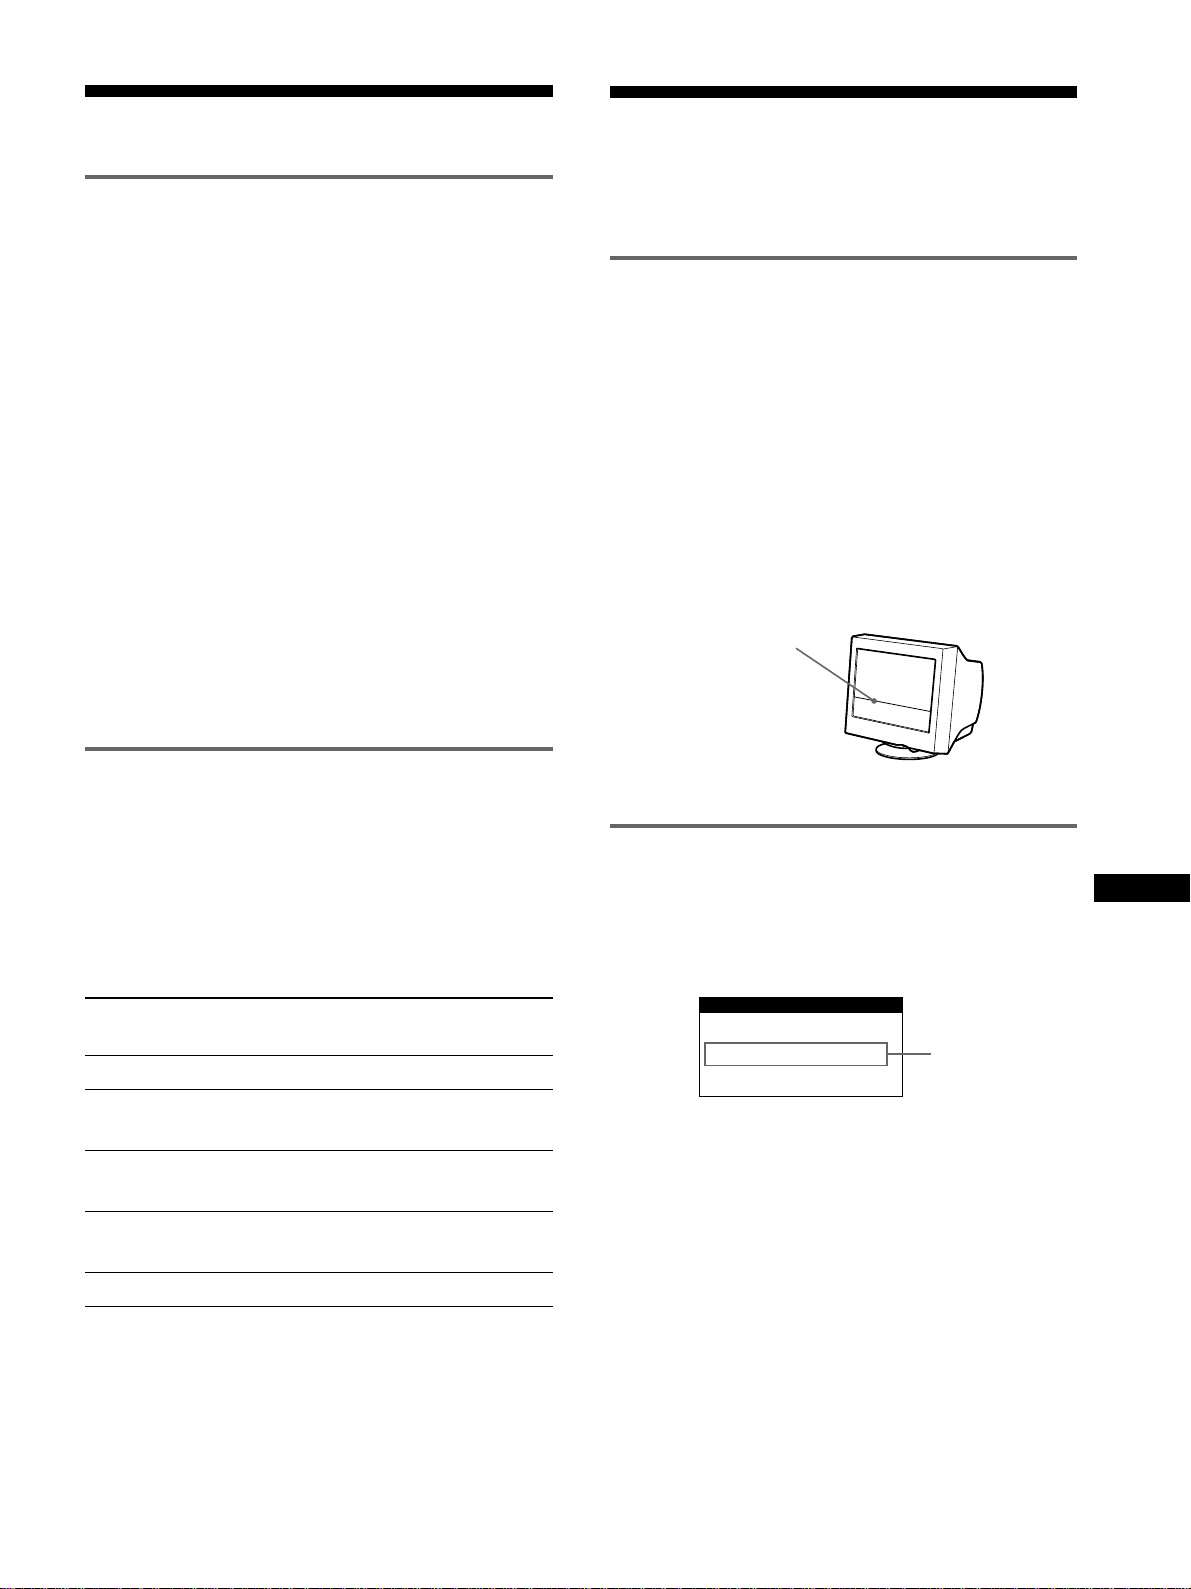
13
JP
故障かな?と思ったら
お買い上げ店などにご相談いただく前に、次の事項をご確
認ください。
画面に細い横線が出たら
(ダンパーワイヤー)
本機で使用しているトリニトロン管では、画面に細い水平
の線が見えることがありますが、故障ではありません。
この線は、トリニトロン管内部のアパチャーグリルに取り
付けられたダンパーワイヤーの影です。ダンパーワイヤー
が最も目立つのは、白色のような明るい背景のときです。
ダンパーワイヤーはアパチャーグリルの振動を抑える働き
をしています。アパチャーグリルはトリニトロン管特有の
構造で、鮮明できめ細かな画質のために欠かせない役割を
果たしています。
表示メッセージについて
入力信号が正しくないときは、画面に次のような表示メッ
セージが出ます。この場合は、次ページの「本機の症状と
対処のしかた」に従ってください。
入力信号の状態を表示する
OUT OF SCAN RANGE
入力信号の周波数が、本機の仕様に合っていない。
NO INPUT SIGNAL
ビデオ信号ケーブルからの入力信号がない。
ダンパーワイヤー
機能解説
本機の対応信号
本機では、入力信号に合わせて自動的に最適な画質で表示
できるように、代表的な表示モードがお買い上げ時に設定
されています(表示モードについては
Appendix
の
「
Preset mode timing table
」をご覧ください)。
設定されている表示モード以外の入力信号に対しても、水
平周波数
30
〜
70kHz
、垂直周波数
48
〜
120Hz
の範囲であ
れば、デジタルマルチスキャン機能で調整が行われるた
め、歪みのほとんどない画像を表示できます。画像を微調
整する場合は、調整値が自動的にユーザーモードとして設
定され、同じ信号が入力されるたびに同じ調整値が選ばれ
ます。
Windows
でお使いのときは
本機の性能を充分に引き出すために、コンピューターやグラフィッ
クボード付属のユーティリティプログラムを使って、最大のリフ
レッシュレート(垂直周波数)を選んでください。
ご注意
Macintosh 21"
カラーモード(解像度
: 1152
ドット
×
870
ライ
ン)には対応していません。
省電力(パワーセービング)機能
本機は、
VESA
、
NUTEK
および
ENERGY STAR
のパワー
セービングガイドラインに対応しています。
DPMS
(
Display Power Management Signaling
)に対応して
いるコンピューターやグラフィックボードにつなぐと、操
作をしていないときは自動的に次の
3
段階の省電力状態にな
ります。
本機の状態
通常動作時
1
スタンバイ
2
サスペンド
(スリープ)
*
3
アクティブオフ
**
(ディープスリープ)
*
電源:切
消費電力
95W
以下
15W
以下
15W
以下
5W
以下
0W
1(電源)
インジケーター
緑点灯
緑、オレンジ
点滅
緑、オレンジ
点滅
オレンジ点灯
消灯
*
「スリープ」と「ディープスリープ」は、
EPA
(
Environmental
Protection Agency
)の定めた待機時の消費電力抑制状態です。
**
コンピューターが省電力状態になると、信号が入力されないた
め、「
NO INPUT SIGNAL
」表示が出ます。その後
20
秒たつと、
本機も省電力状態になります。
入力信号の状態
INFORMATION
OUT OF SCAN RANGE

14
本機の症状と対処のしかた
コンピューターなど本機に接続している機器が原因の場合は、接続機器の取扱説明書をご覧ください。
下記のように対処しても正常にならない場合は、「自己診断表示機能」をご覧ください(
16
ページ)。
こんなときは 原因と対処のしかた
画像が出ない。
1(電源)インジケーターが
点灯していない。
「
NO INPUT SIGNAL
」と
いう警告表示が出ている。
または、1(電源)インジ
ケーターがオレンジ色に点
灯、または緑色とオレンジ
色に点滅している。
「
OUT OF SCAN RANGE
」
という警告表示が出てい
る。
1(電源)インジケーターが
緑色に点灯、またはオレン
ジ色で点滅している。
Windows95/98
を使用して
いる。
Macintosh
と接続してい
る。
NEC PC-98
シリーズと接
続している。
画像が乱れる、ゆれる、ちらつ
く。
画像がくっきりしていない。
•
電源コードを接続し直す。
•
1(電源)スイッチを入れる。
•
ビデオ信号ケーブルを正しくつなぐ(
6
ページ)。
• HD15
ビデオ信号ケーブルのピンが曲がっている。まっすぐに直す。
■コンピューターなど本機につないでいる機器が原因の場合
•
コンピューターが省電力状態になっている。キーボードのキーのどれかを押してみる。
•
コンピューターの電源を入れる。
•
コンピューターのグラフィックボードを正しいバススロットに差し込む。
■コンピューターなど本機につないでいる機器が原因の場合
•
入力信号の周波数が、本機の仕様に合っていない。本機をつなぐ前につないでいたディスプレイがある
ときは、それにつなぎ換えてみる。画像が出たら、周波数を以下の範囲に設定する。
水平周波数:
30
〜
70kHz
垂直周波数:
48
〜
120Hz
•
「自己診断表示機能」で確認する(
16
ページ)。
•
本機とつなぎ換えたディスプレイがあるときは、つないでみる。画像が出たら、以下を行う。
Windows95/98
のデバイス選択画面で製造元に
SONY
を選び、本機の型名(
CPD-E100
)を選ぶ。本機の型
名が表示されないときは、「プラグ
アンド
プレイ」を選ぶか、「
Windows Monitor Information Disk
」(
7
ペー
ジ)からソニーコンピューターディスプレイの新機種情報をインストールする。
• Power Mac G3
(
1999
年
1
月以降発売)シリーズを使用している場合は、付属の
Power Mac G3
(
1999
年
1
月以降発売)用アダプターを正しくつないでいるかを確認する(
6
ページ)。
• Power Mac G3
(
1999
年
1
月以降発売)シリーズ以外の
Macintosh
シリーズを使用している場合は、お
買い上げ店またはソニーサービス窓口にご相談ください。
•
変換アダプターが必要な場合、別売りの
PC-98
シリーズ用アダプターを使っているかを確認する。
■コンピューターなど本機につないでいる機器が原因の場合
•
本機で対応していない表示モード(水平周波数:
24.8kHz
、解像度:
640x400
ドット)になっている。
「
GRAPH
」「
2
」キーを押しながらコンピューターの電源を入れて、水平周波数を
31.5kHz
に変える
(
7
ページ)。
•
他のモニター、レーザープリンター、蛍光灯、テレビチューナー、扇風機など、磁界を発して干渉する
可能性のあるものから本機を離して置く。
•
近くに送電線がある場合は、本機を離して置くか、シールド板を本機の近くに置く。
•
離れたところにある他の電源につないでみる。
•
モニターの向きを
90
度変えてみる。
■コンピューターなど本機につないでいる機器が原因の場合
•
コンピューターのグラフィックボードで、本機が正しく設定されているかを確認する。
•
入力信号のグラフィックモード(
VESA
、
Macintosh16”
カラーなど)と周波数が、本機で使用できる範
囲かを確認する(
Appendix
)。ただし本機で使用できる範囲でも、グラフィックボードによっては同期
パルス幅が合わないため、きれいに画像を映せない場合があります。
•
コンピューターのリフレッシュレート(垂直周波数)を、最適な画面になるように設定する。
•
コントラストや明るさを調整する(
10
ページ)。
•
画面を消磁する
*
(
12
ページ)。
•
モアレが最も目立たなくなるように調整します。(
12
ページ)。
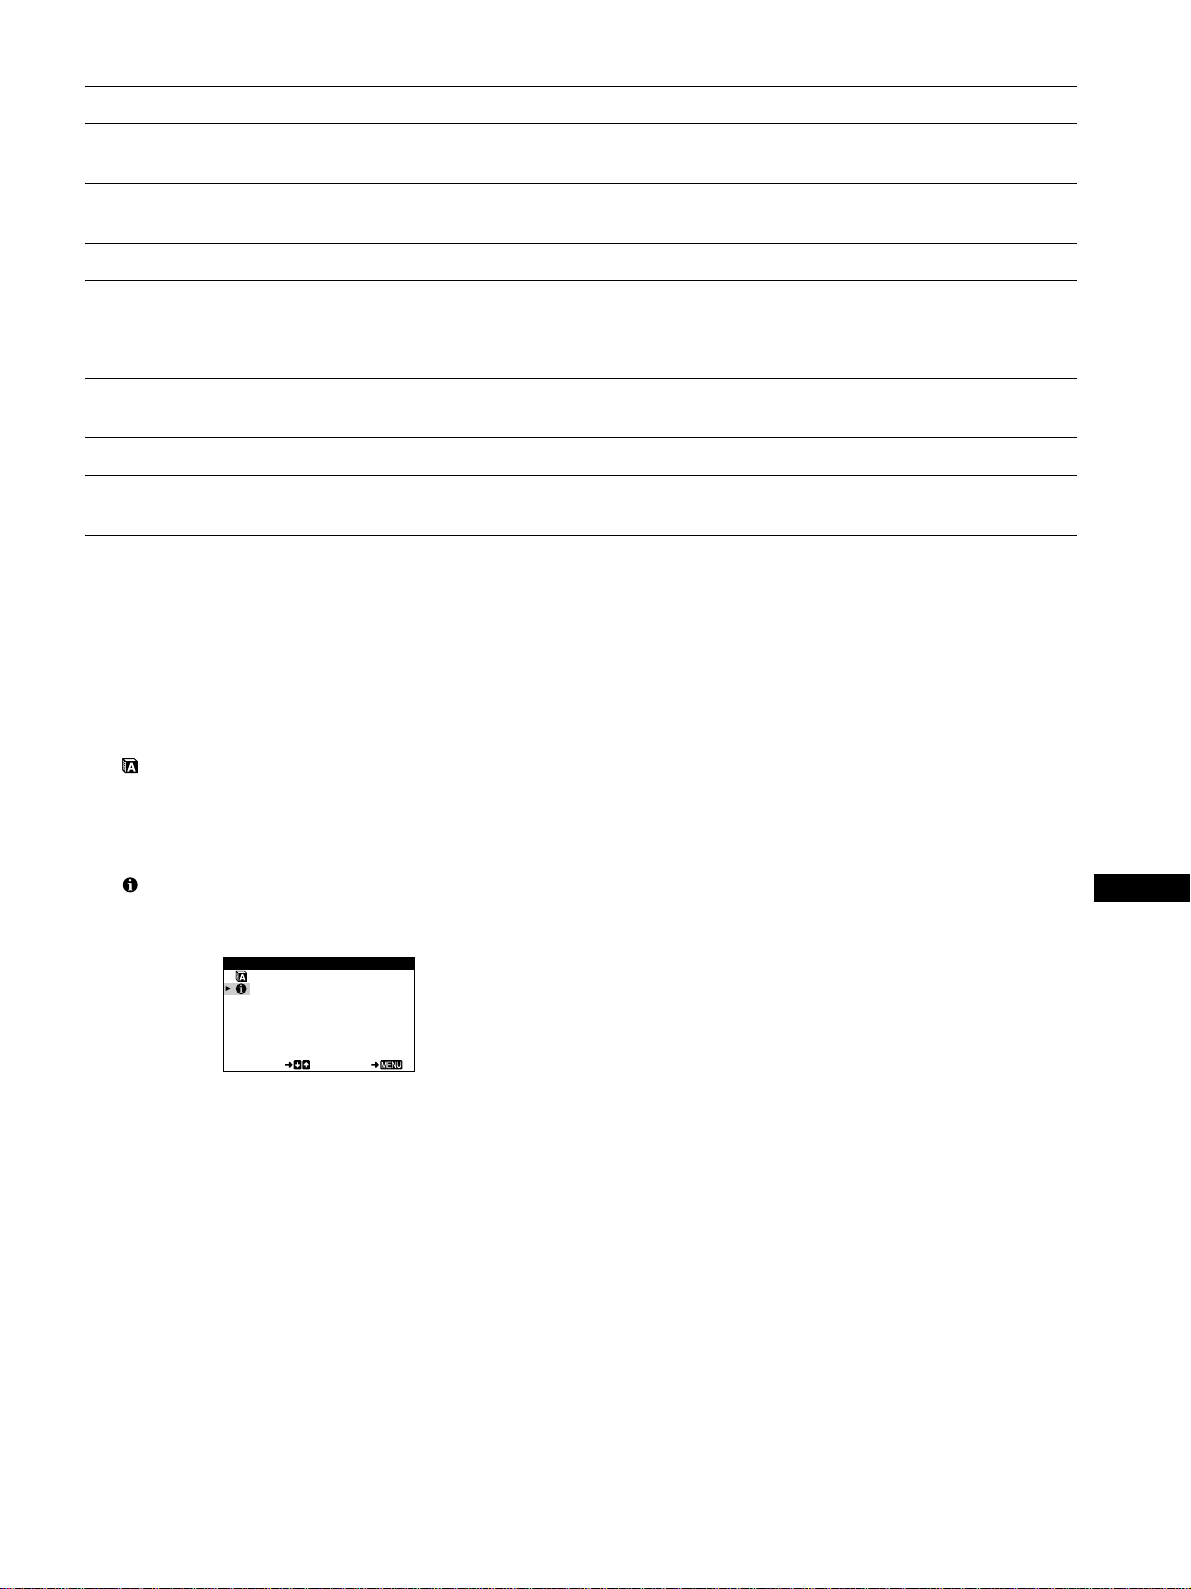
15
JP
例:
本機の型名、製造番号、製造年と週を表示する
1
コントロールボタンを押す。
MENU
画面が出ます。
2
コントロールボタンをm
/
Mに動かして
「
LANGUAGE/INFORMATION
」を選び、コント
ロールボタンを押す。
LANGUAGE/INFORMATION
画面が出ます。
3
コントロールボタンをm
/
Mに動かして
「
(
INFORMATION
)」を選ぶ。
INFORMATION
画面が出ます。
MODEL :CPD- E100
SERIAL:12345678
MANUFACTURED: 1999 - 52
SELECT EXIT
LANGUAGE / INFORMAT ION
故障のときは、お買い上げ店またはソニーサービス窓口にご連絡く
ださい。また、お問い合せのときは次のことをお知らせください。
•
型名:
CPD-E100
•
製造番号
•
接続しているコンピューター、およびグラフィックボードの仕様
と名称
こんなときは 原因と対処のしかた
画像が二重、三重になる。
画像の位置がずれている、また
は画像の大きさが正しくない。
画像の両端が曲がっている。
画面に波模様や点状の模様
(モアレ)が出る。
色むらがある。
白色が白く見えない。
電源を入れた直後に「ブーン」と
いう音がする。
•
ビデオ信号ケーブルの延長コードやインプットセレクターの使用をやめる。
•
接続ケーブルを端子にしっかりと差し込む。
•
画像の位置や大きさを調整する(
10
ページ)。入力信号やグラフィックボードによっては、画像が画面
全体に広がらない場合があります。
•
画像の歪みを調整する(
10
〜
11
ページ)。
•
モアレが最も目立たなくなるように調整します。(
12
ページ)。
■コンピューターなど本機につないでいる機器が原因の場合
•
コンピューターでデスクトップパターンを変える。
•
画面を消磁する
*
(
12
ページ)。本機にスピーカーなどの磁気を発するものを近づけたり、電源を入れた
まま向きを変えたりすると起こることがあります。
•
色温度を調整する(
11
ページ)。
•
自動消磁機能が働いている。本機は電源を入れると、約
5
秒間自動的に消磁します。
*
何度も消磁するときは、
20
分以上間隔をあけてください。また、消磁すると「ブーン」という音がしますが、故障ではありません。
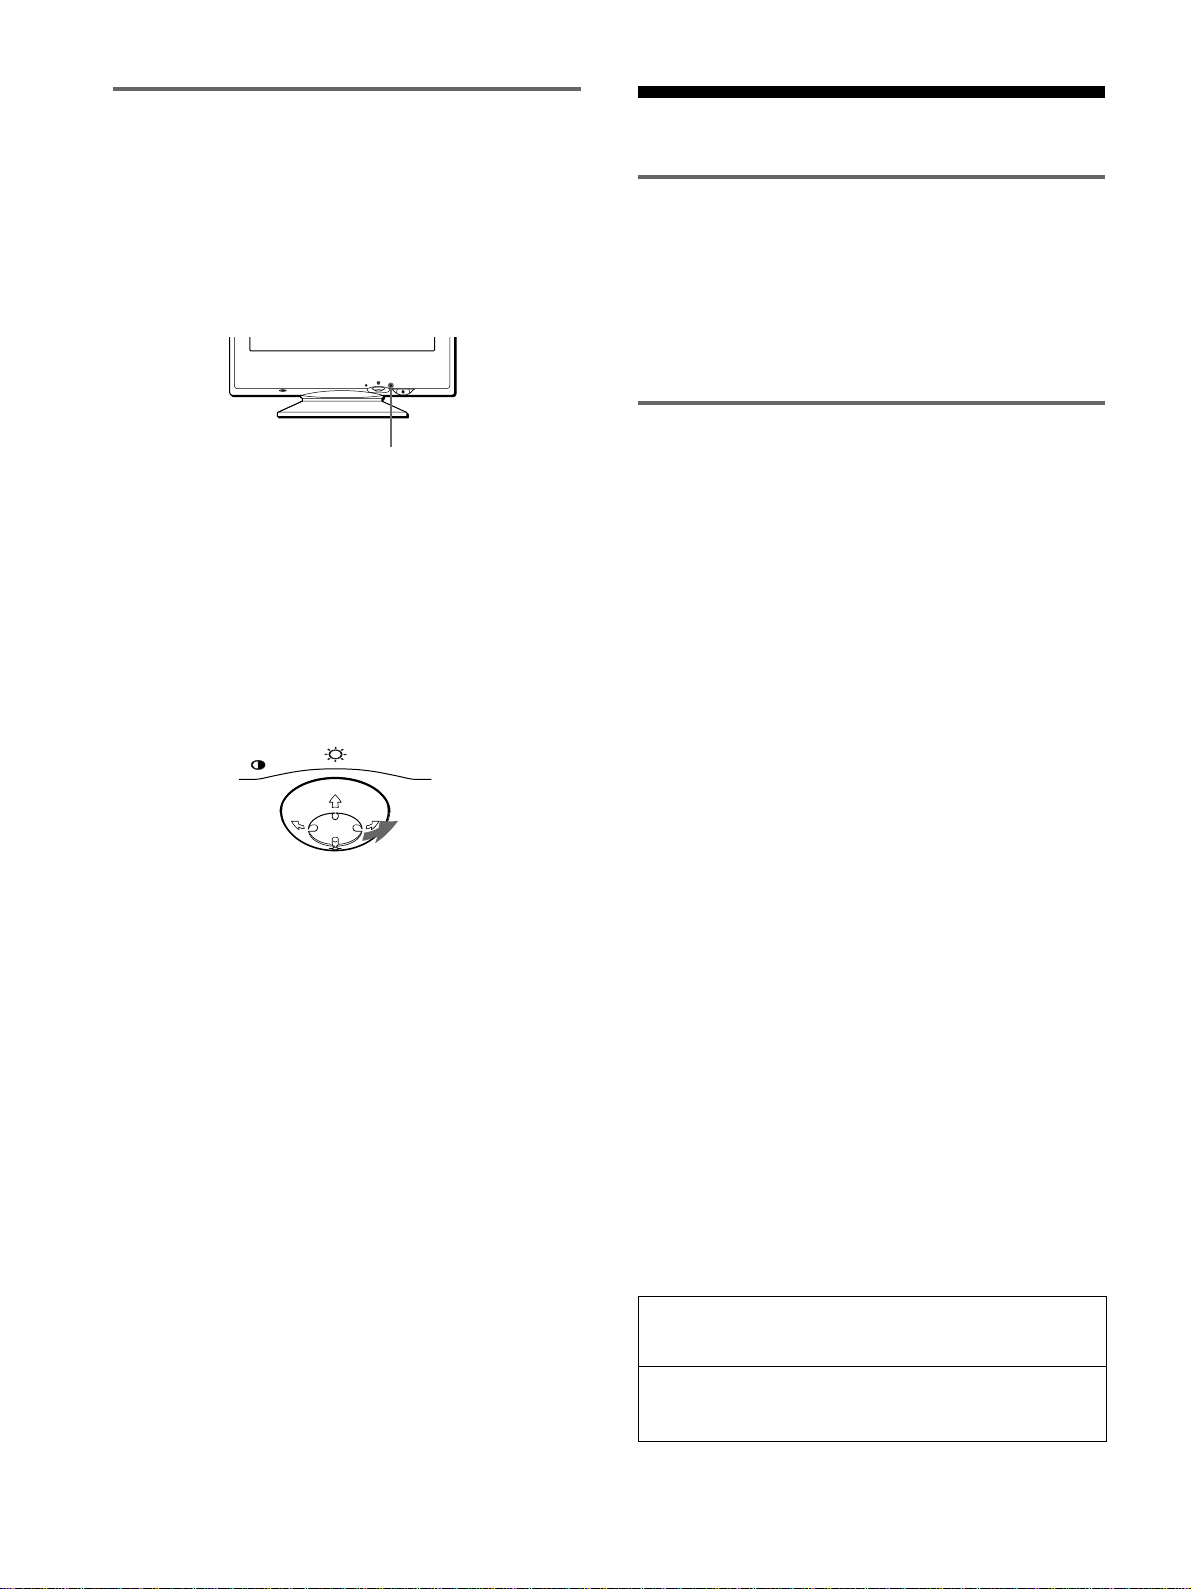
16
MENU
RESET
自己診断表示機能
本機には自己診断表示機能がついています。本機またはコ
ンピューターに異常が起きたときには、画像が消えて、1
(電源)インジケーターが緑色に点灯するか、オレンジ色に
点滅します。1(電源)インジケーターがオレンジ色に点灯
しているときは、コンピューターが省電力状態になってい
ます。キーボードのキーのどれかを押してみてください。
1(電源)インジケーターが緑色に点灯しているとき
1
ビデオ信号ケーブルを抜くか、接続しているコンピュー
ターの電源を切る。
2
1(電源)スイッチを押して、本機の電源を入れ直す。
3
本機が省電力状態になる前に、コントロールボタンを
2
秒間,へ動かしたままにする。
4
本のカラーバー(白、赤、緑、青)が出れば、本機は正常
な状態です。ビデオ信号ケーブルを接続し直して、コン
ピューターの状態を確認してください。
カラーバーが出ないときは、本機が故障している可能性が
あります。お買い上げ店またはソニーサービス窓口にご相
談ください。
1(電源)インジケーターがオレンジ色に点滅してい
るとき
1(電源)スイッチを押して、本機の電源を入れ直す。
1(電源)インジケーターが緑色に点灯すれば、本機は正常
な状態です。
1(電源)インジケーターが点滅したままのときは、本機が
故障している可能性があります。1(電源)インジケーター
が何秒おきにオレンジ色に点滅するかを数えて、お買い上
げ店またはソニーサービス窓口にご相談ください。お問い
合わせのときは、本機の型名と製造番号、接続しているコ
ンピューターとグラフィックボードの仕様および名称をお
知らせください。
1(電源)インジケーター
保証書とアフターサービス
保証書
•
この製品は保証書が添付されていますので、お買い上げ
の際、お買い上げ店でお受け取りください。
•
所定事項の記入および記載内容をお確かめのうえ、大切
に保存してください。
•
保証期間は、お買い上げ日より
1
年間です。
アフターサービスについて
調子が悪いときはまずチェックを
b「故障かな?と思ったら」の項を参考にして、故障かど
うかをお調べください。
それでも具合が悪いときはサービス窓口へ
b お買い上げ店、または添付の「ソニーご相談窓口のご案
内」にある、お近くのソニーサービス窓口にご相談くだ
さい。
保証期間中の修理は
b 保証書の記載内容に基づいて修理させていただきます。
くわしくは保証書をご覧ください。
保証期間経過後の修理は
b 修理によって機能が維持できる場合は、ご要望により有
料で修理させていただきます。
部品の保有期間について
当社では、コンピューターディスプレイの補修用性能部品
(製品の機能を維持するために必要な部品)を、製造打ち切
り後最低
8
年間保有しています。この部品保有期間を修理可
能の期間とさせていただきます。
保有期間が経過した後も、故障箇所によっては、修理可能
の場合がありますので、お買い上げ店か、サービス窓口に
ご相談ください。なお、補修用性能部品の保有期間は通商
産業省の指導によるものです。
ご相談になるときは次のことをお知らせください。
型名:
CPD-E100
製造番号:
故障の状態:できるだけくわしく
購入年月日:
お買い上げ店
TEL.
お近くのサービスステーション
TEL.
This display is designed for use in Japan only and
cannot be used in any other country.
MENU
17
JP
主な仕様
CRT 0.24mm
アパチャーグリルピッチ
(中心部)
90
°偏向
15
インチ
有効表示画面 約
285
×
214mm
(幅
/
高さ)
解像度
最大 水平:
1280
ドット
垂直:
1024
ライン
推奨 水平:
800
ドット
垂直:
600
ライン
表示画面 約
270
×
202mm
(幅
/
高さ)
偏向周波数
*
水平:
30
〜
70kHz
垂直:
48
〜
120Hz
入力電圧/電流
100V
、
50-60Hz
、
1.6-0.8A
消費電力量 最大
95W
最大外形寸法 約
356
×
378
×
388mm
(幅
/
高さ
/
奥行き)
質量 約
15kg
プラグ&プレイ機能
DDC1/DDC2B
付属品
6
ページをご覧ください。
*
推奨周波数タイミング
•
水平同期幅率:
1.0
µ
s
以上
•
水平ブランキング幅:
3.6
µ
s
以上
•
垂直ブランキング幅:
500
µ
s
以上
本機の仕様および外観は、改良のため予告なく変更するこ
とがありますが、ご了承ください。
•
煙が出たら
•
変なにおいや音がしたら
•
内部に異物が入ったら
•
画面が映らないときは
•
ディスプレイを落とした
り、キャビネットを破損
したときは
b
1 電源プラグをコン
セントから抜く
2 お買い上げ店また
はソニーサービス
窓口に修理を依頼
する
万一、異常が起きたら
「
Sony online
」は、インターネット上のソニーのエレク
トロニクスとエンターテインメントのホームページです。


C:\WIN95-E\DESKTOP\CPD
E100\386765901CPDE100UC\386765901CPDE100UC\01US04APP-UC.fm
masterpage:Right
CPD-G200
3-867-659-
12
(1)
i
Appendix
Preset mode timing table
No. Resolution
(dots
×
lines)
Horizontal
Frequency
Vertical
Frequency
Graphics
Mode
1640 × 480 31.5 kHz 60 Hz VGA-G
2640 × 480 43.3 kHz 85 Hz VESA
3720 × 400 31.5 kHz 70 Hz VGA-Text
4800 × 600 46.9 kHz 75 Hz VESA
5800 × 600 53.7 kHz 85 Hz VESA
6832 × 624 49.7 kHz 75 Hz Macintosh 16"
Color
7 1024 × 768 60.0 kHz 75 Hz VESA
8 1024 × 768 68.7 kHz 85 Hz VESA
9 1280 × 1024 64.0 kHz 60 Hz VESA
01US01COV-UC.book Page i Thursday, July 1, 1999 5:01 PM

Sony Corporation Printed in Thailand
01US01COV-UC.book Page ii Thursday, July 1, 1999 5:01 PM