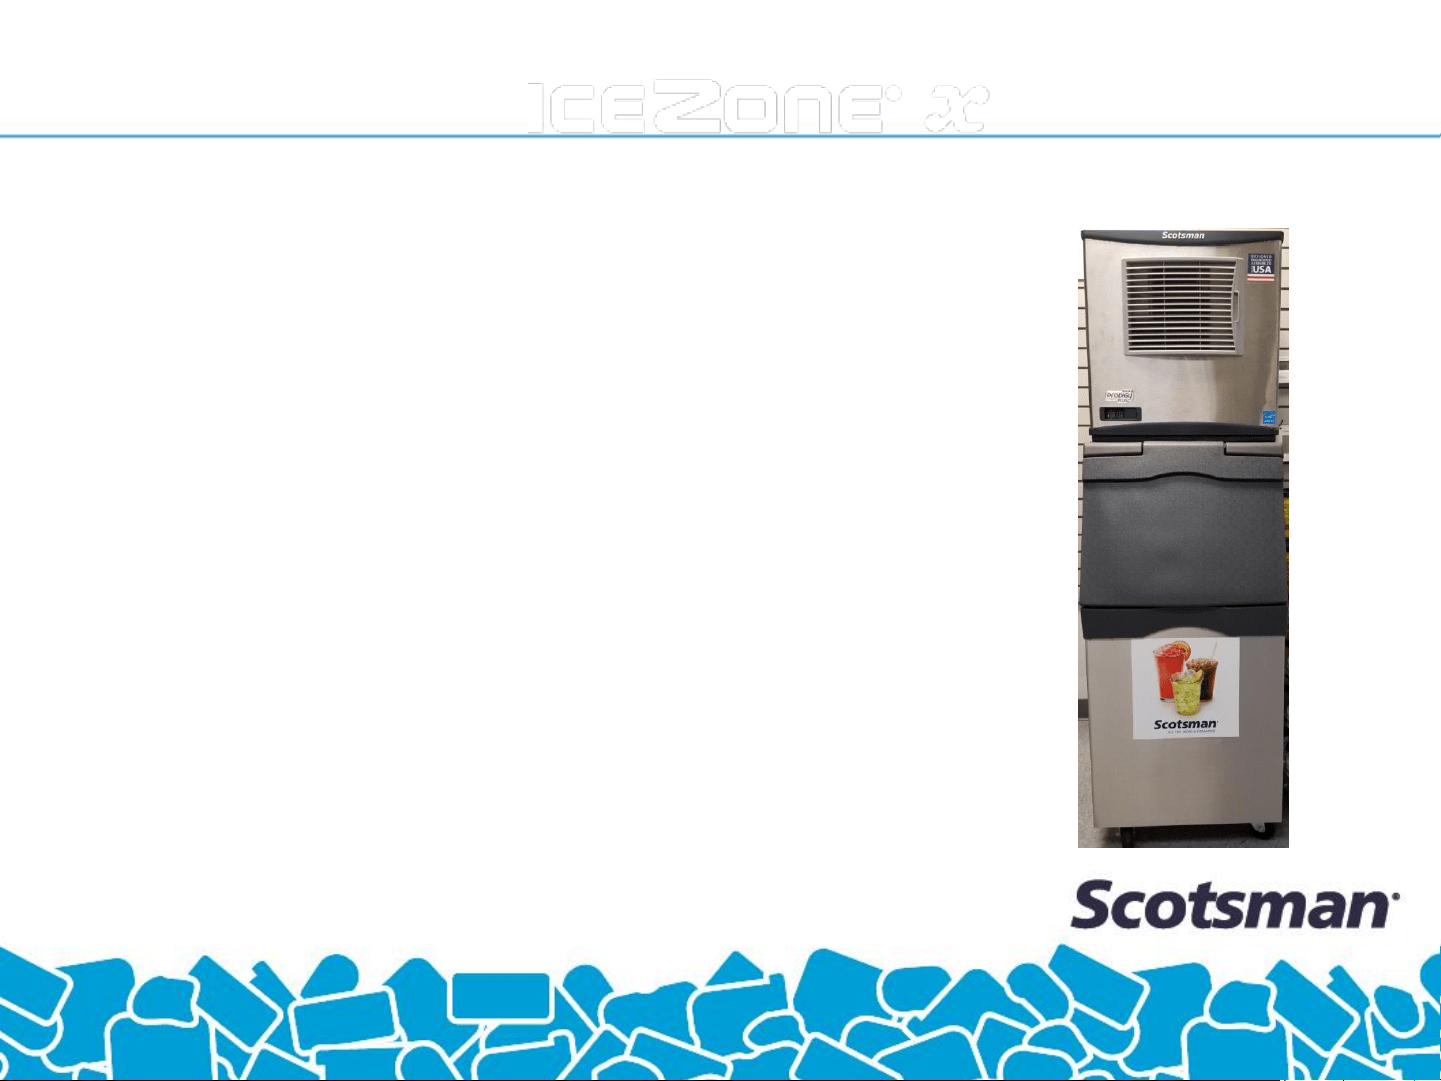
Installation for Scotsman Prodigy Cubers
This guide will show the steps to install Scotsman XSafe®
on the Scotsman Prodigy Cube making Ice Machines.
Please review the entire instructions prior to installation
Caution: Installation should be done by a qualified technician using appropriate safety equipment and procedures.
Scotsman XSafe Sanitation System
for Bacteria and Virus Elimination

Follow the manufacturers
guidelines for cleaning the ice
machine and bin thoroughly.
Before installing XSafe, clean and sanitize the interior of the ice
machine and water dispenser thoroughly according to the
manufacturer’s guidelines. All surfaces should be free of slime and
scale before starting the installation.
Scotsman XSafe Sanitation System
Recommended Tools
Hand Drill
Phillips (+) Screw Driver
1 inch (25mm) Hole Saw
1/8 inch drill bit
Hose Cutter or Utility Knife
1 ¼ “ Crescent Wrench
Tape Measure
Permanent Marker
File, Knife, or Side cutters to de-burr holes
Step Ladder
Personal Protective Equipment (Gloves, Glasses, etc.)
Scotsman XSafe Sanitation System
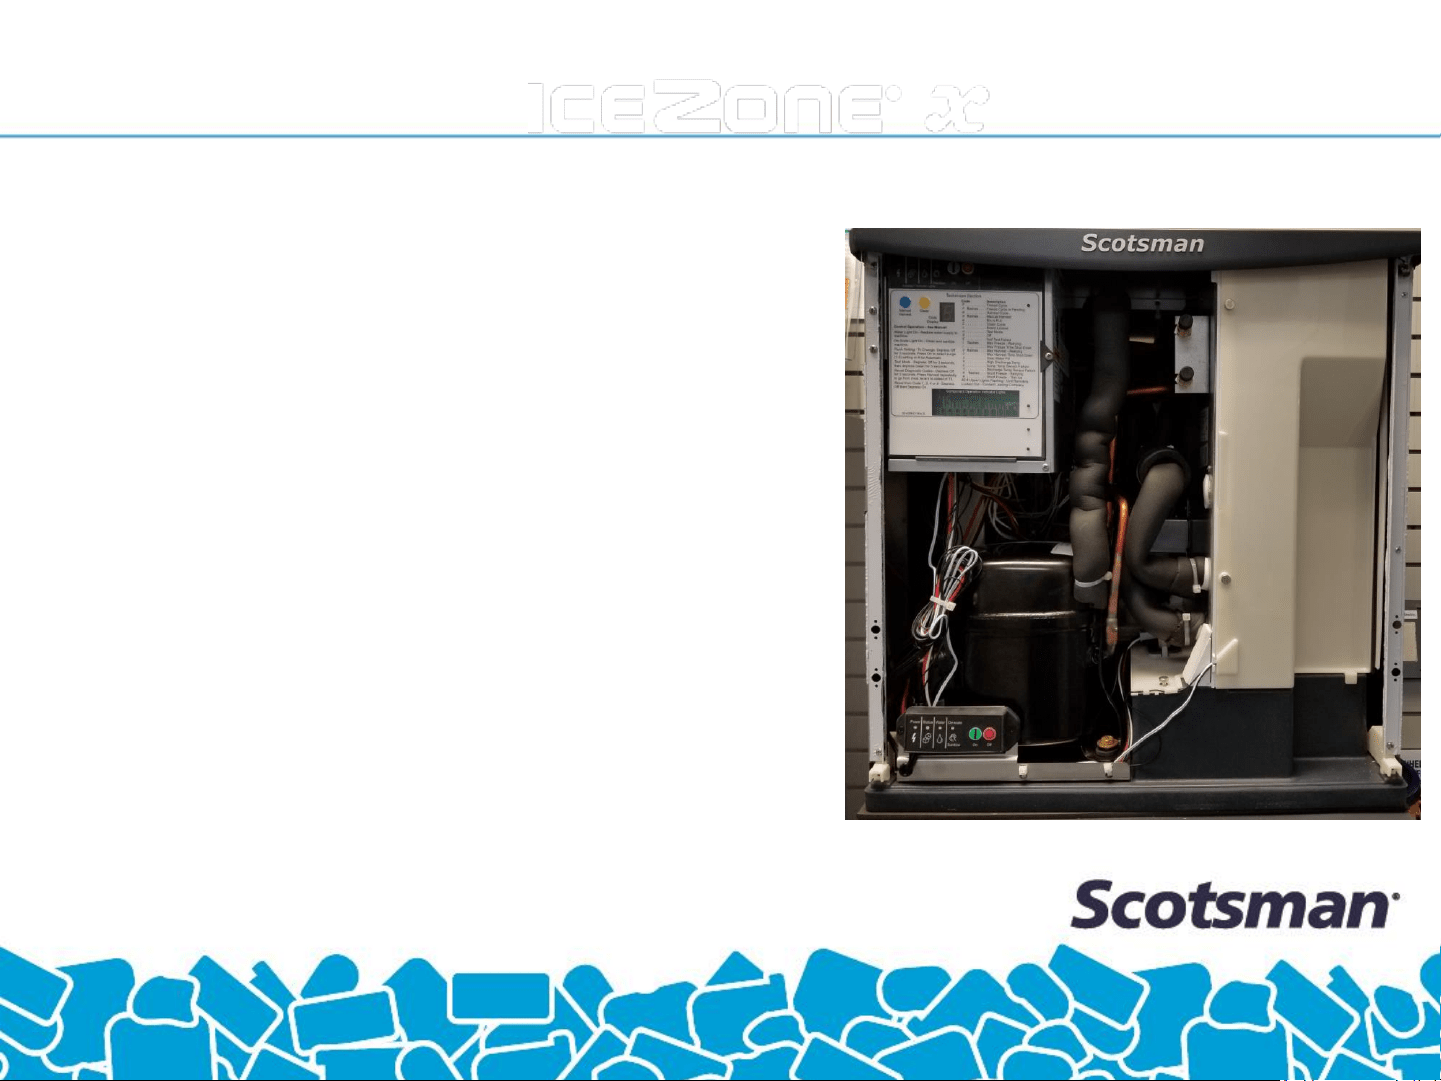
Before working on the ice
machine, the ice in the bin must
be removed.
Turn the ice machine power to off
or unplug the unit.
Scotsman XSafe Sanitation System
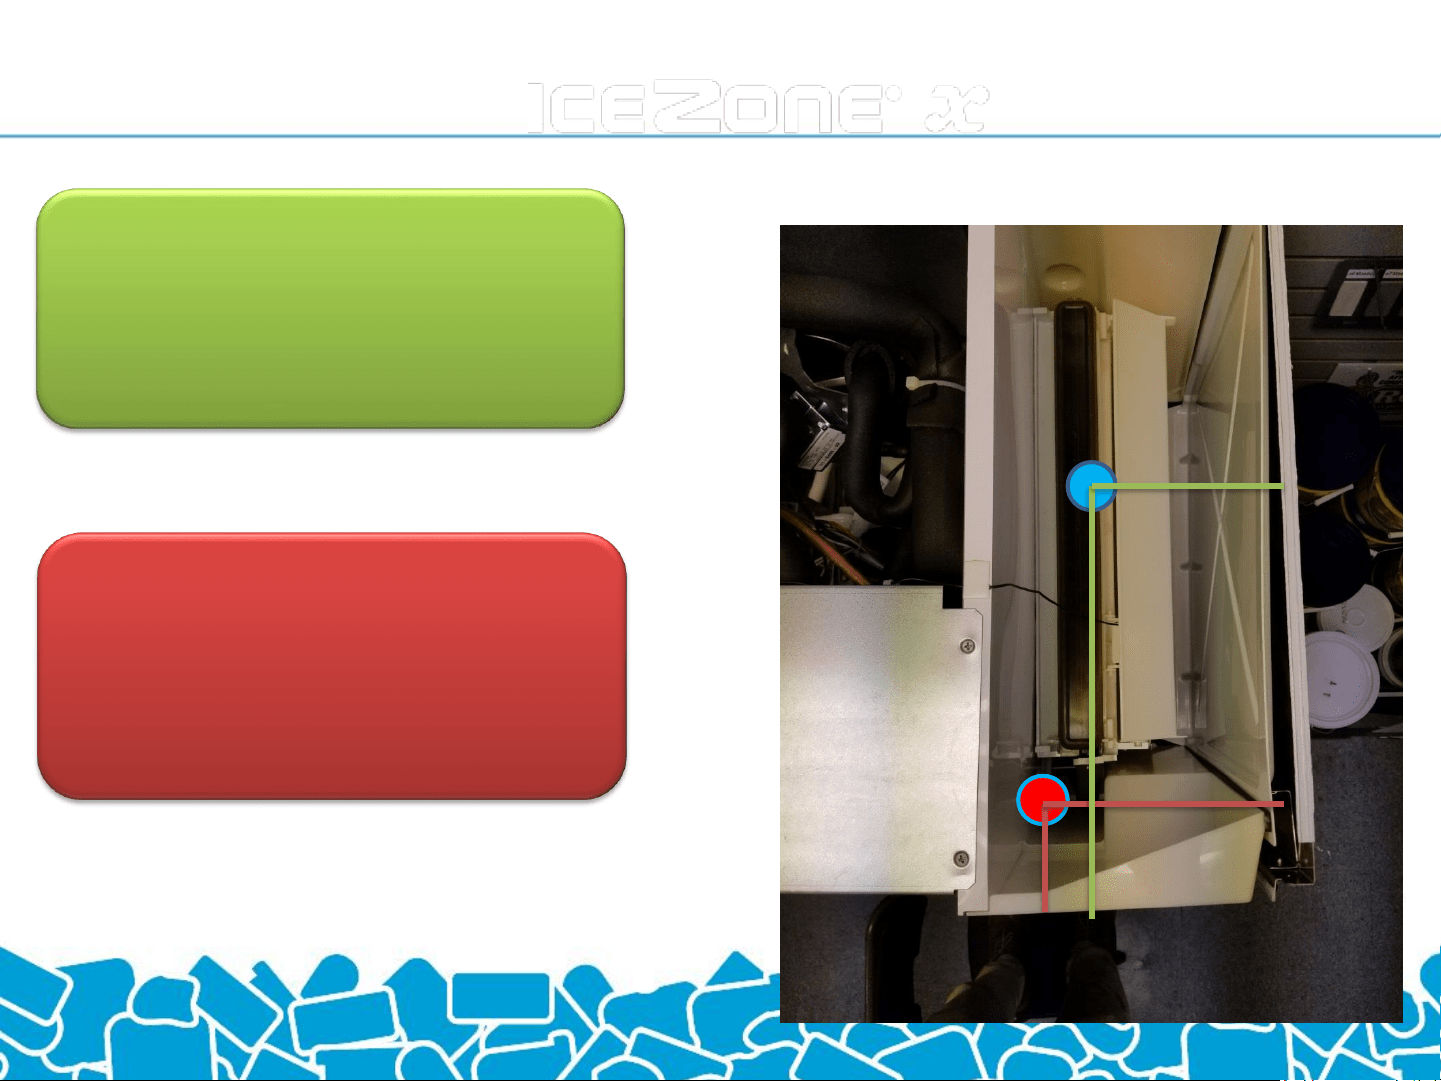
Measure from outside of the front
wall to center of the evaporator and
from the outside side wall to the
center.
Measure from the outside of the
front wall to the center of the open
space, next to the evaporator. Then
from the outside of the side wall.
Scotsman XSafe Sanitation System
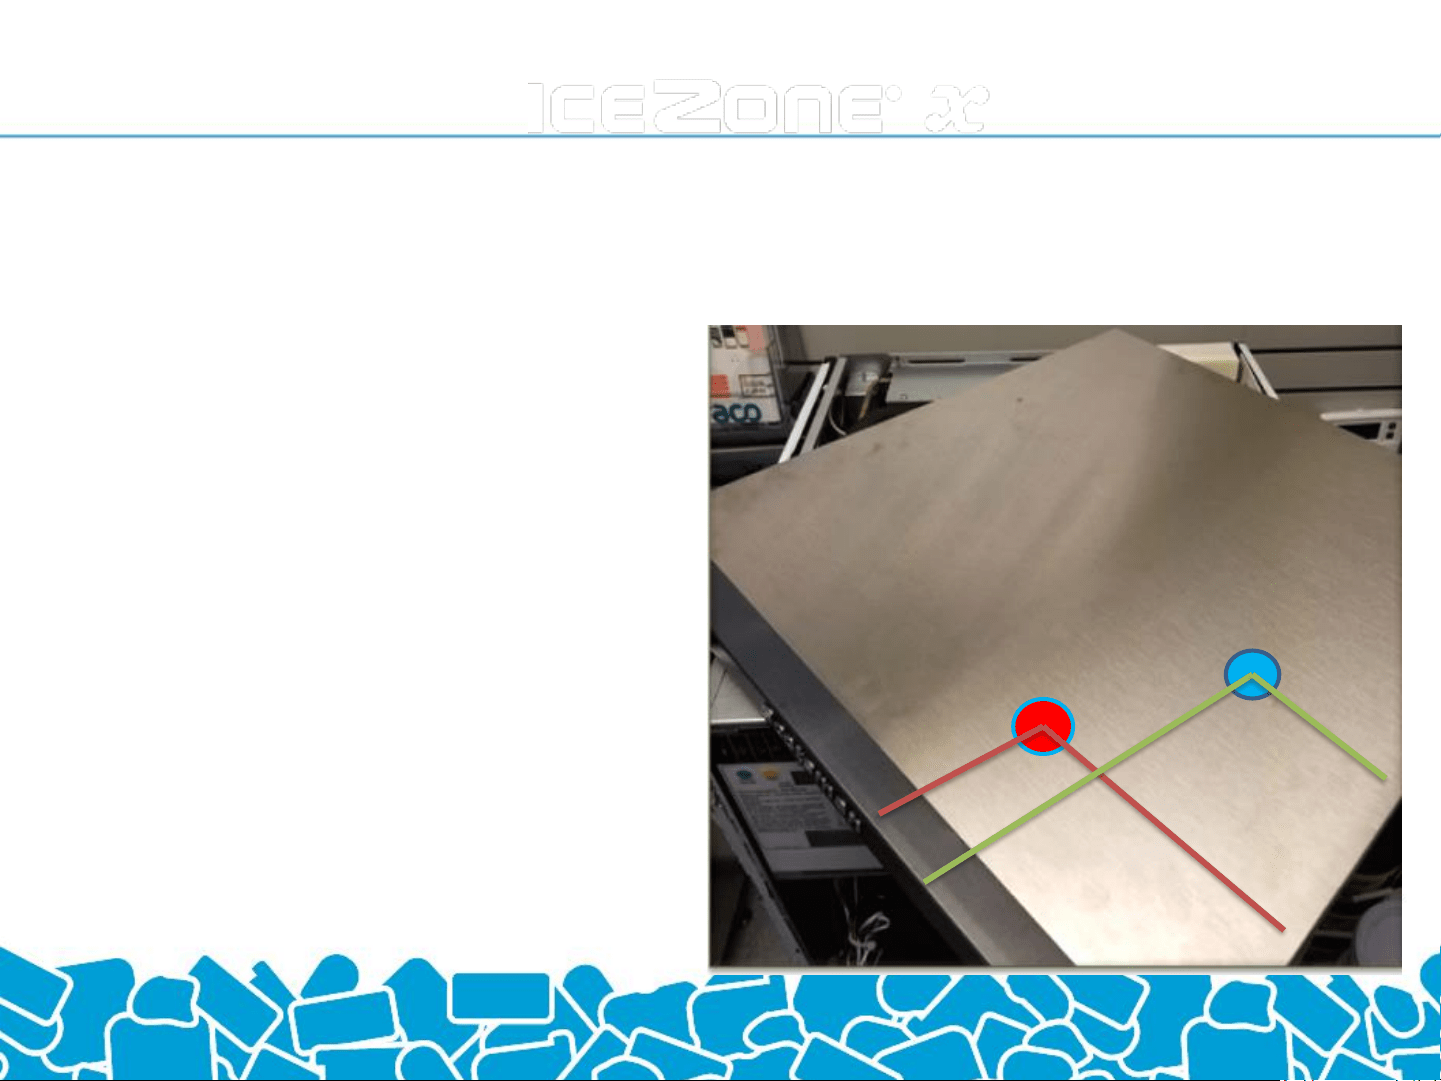
Using the measurements, mark the
locations for the supply and return fittings.
REMOVE THE TOP COVER FROM THE ICE
MACHINE BEFORE DRILLING
Scotsman XSafe Sanitation System
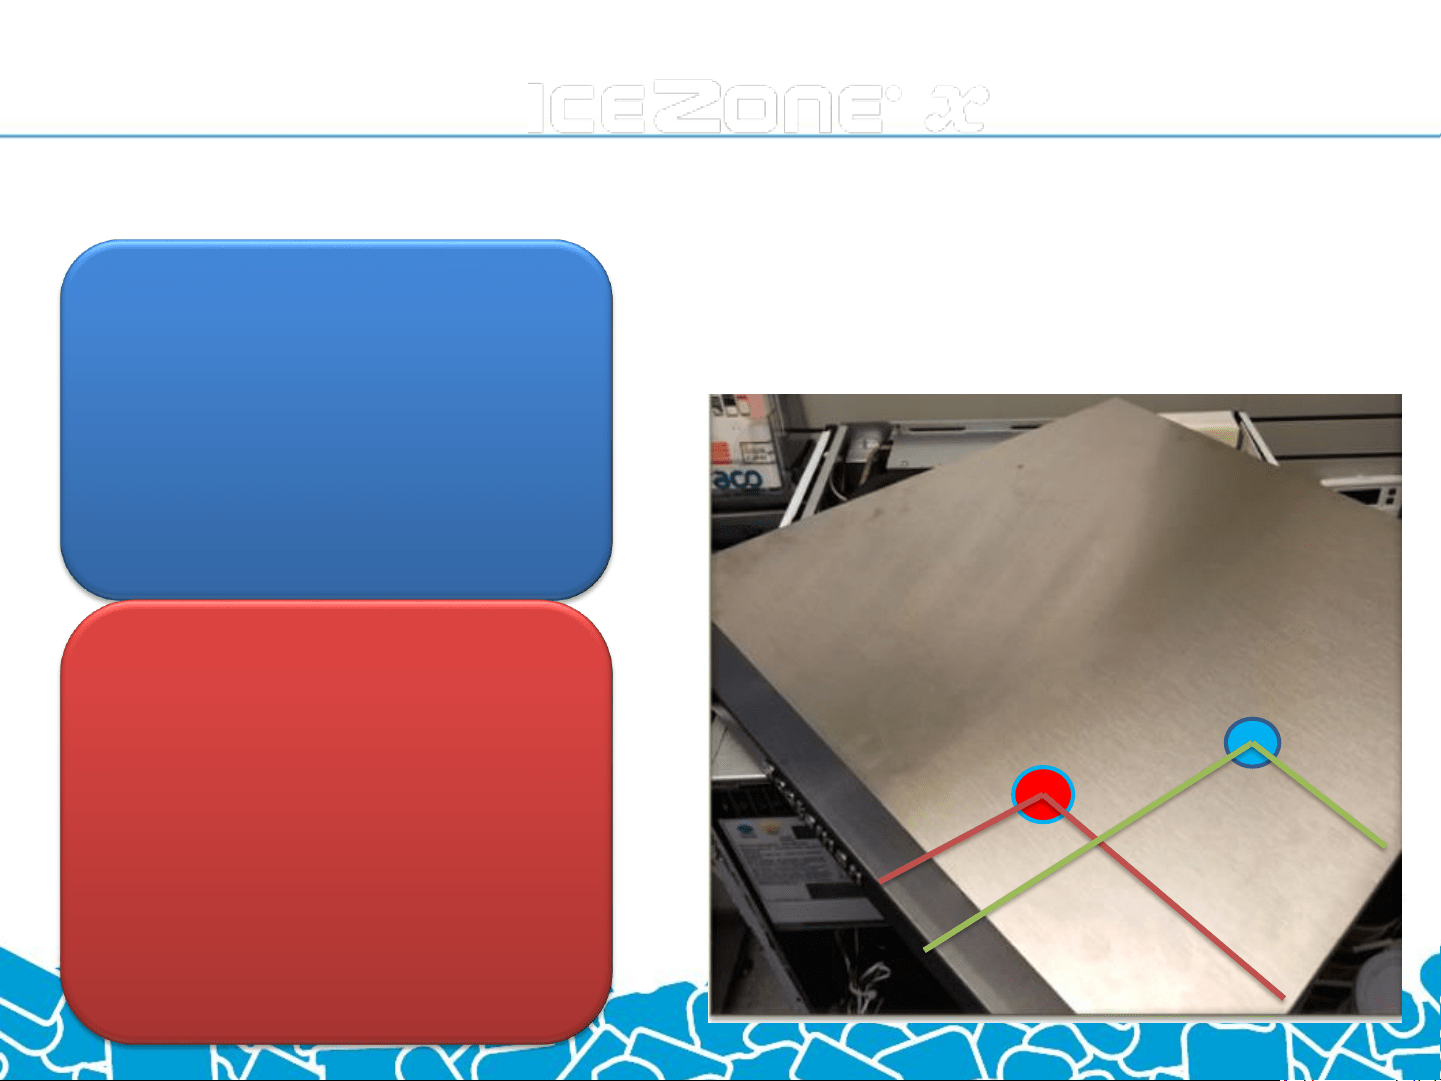
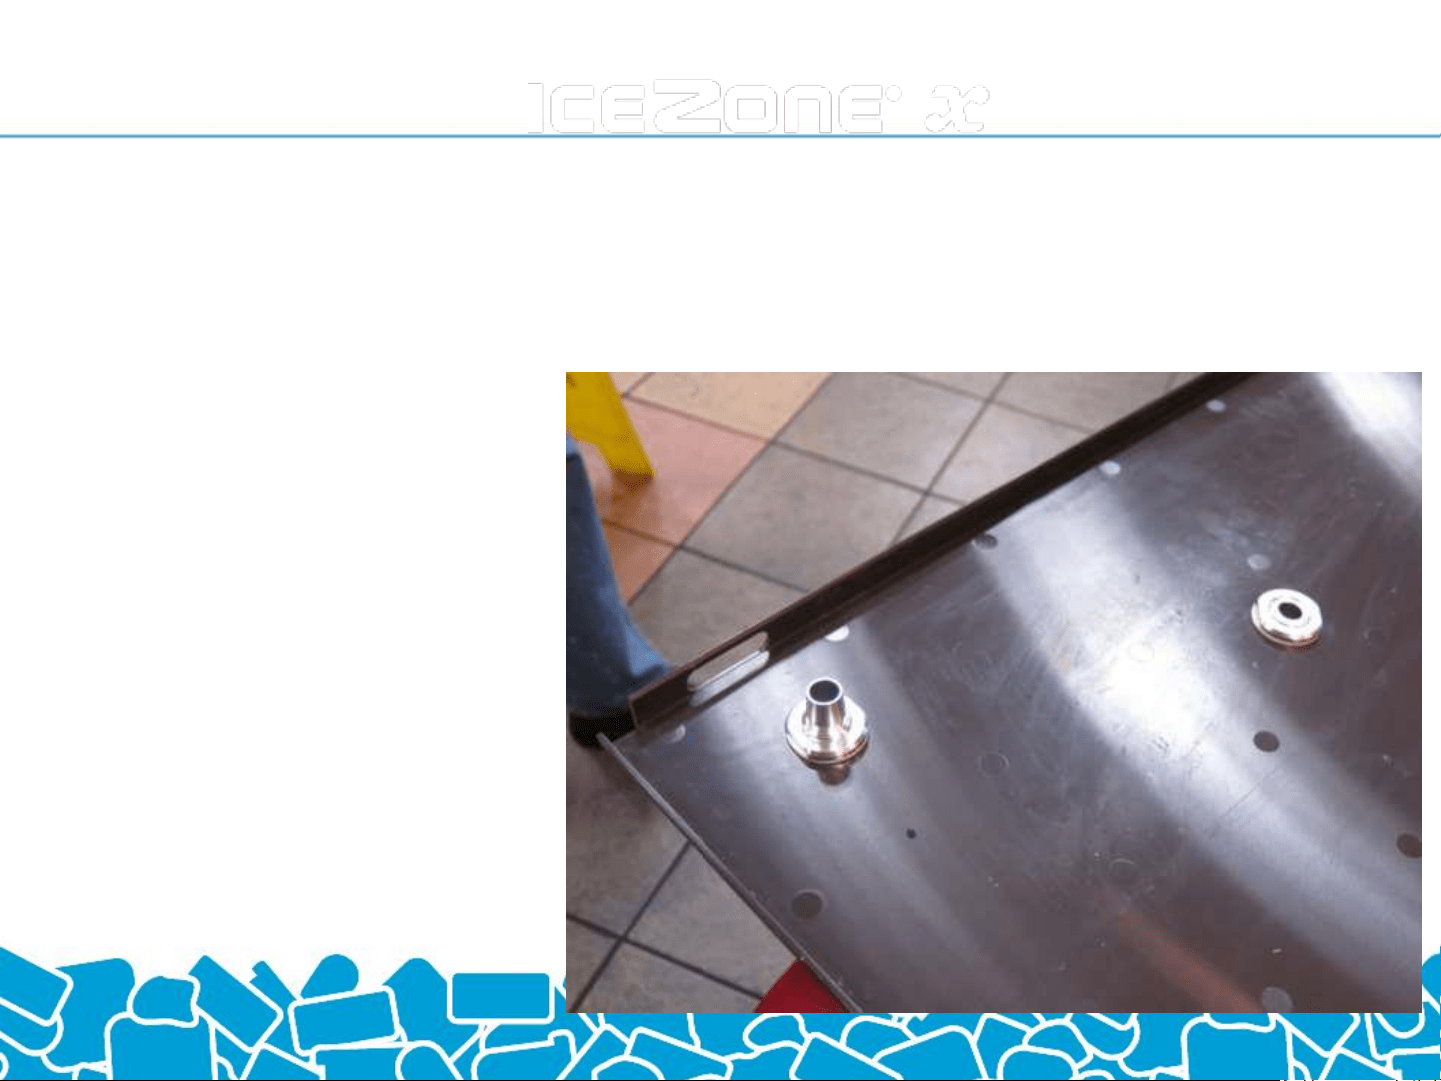
Drill one inch (25mm) hole in the
top cover of the ice machine.
Install single barbed bulkhead
fitting for the supply from the
IceZone-X. Use two white gaskets
and two nuts. No threads should
be exposed inside of the ice
production area.
Drill one inch (25mm) hole in
the top cover of the ice
machine.
Install double barbed bulkhead
fitting for the return to the
IceZone-X. Use two white
gaskets and two nuts. No
threads should be exposed
inside of the ice production
area.
Scotsman XSafe Sanitation System
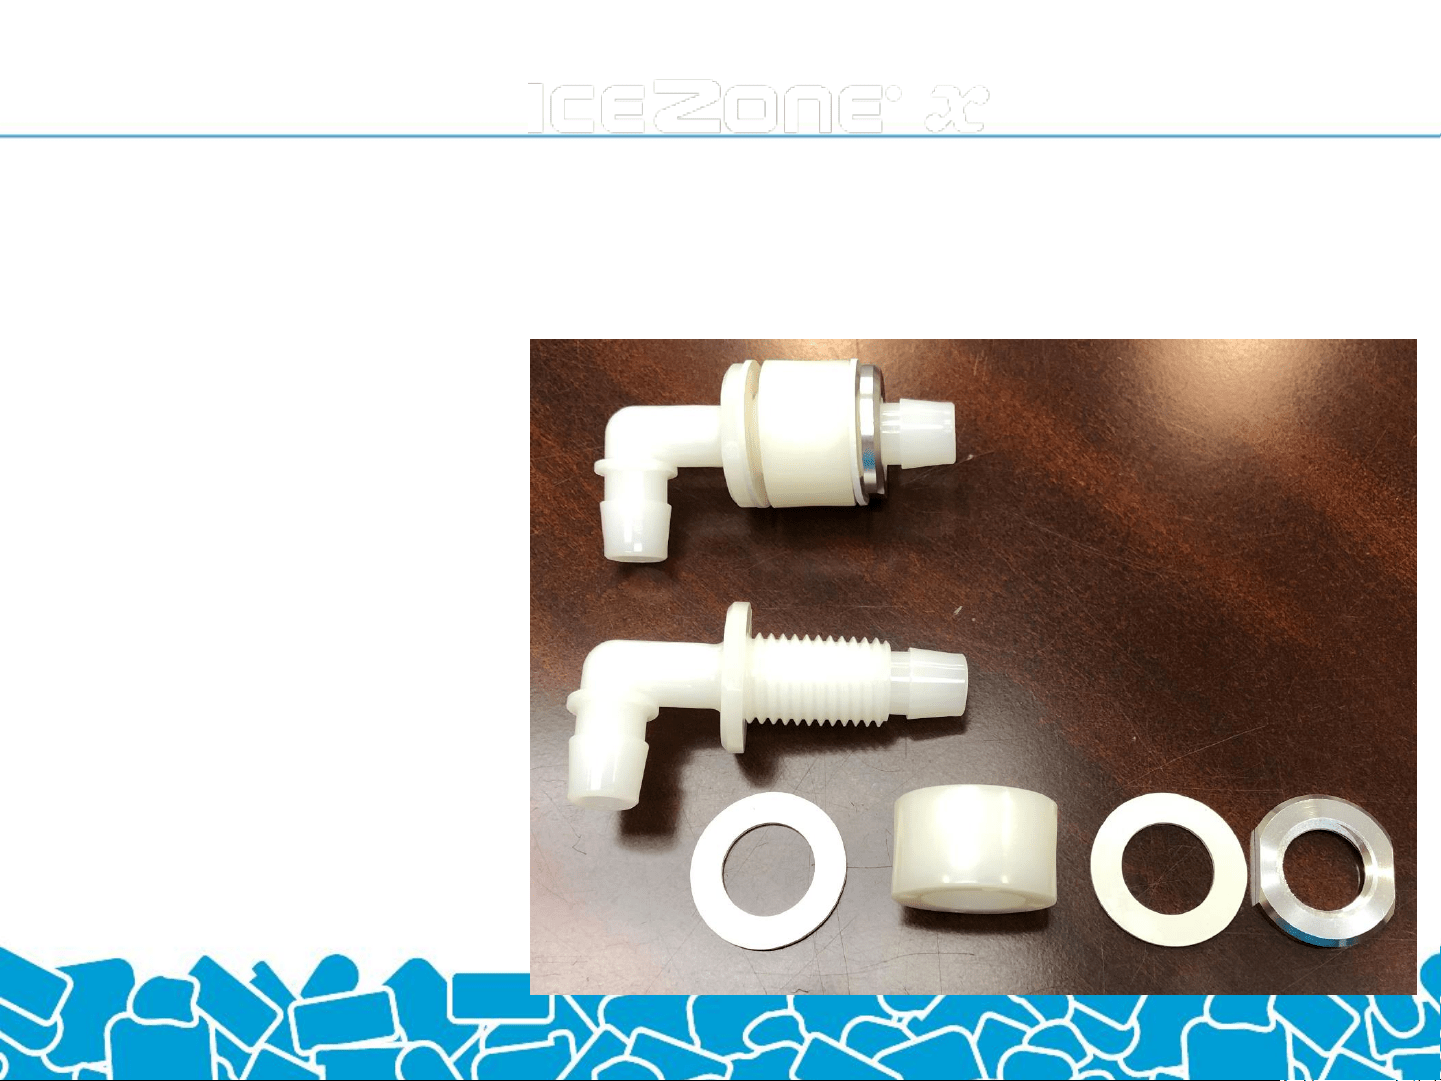
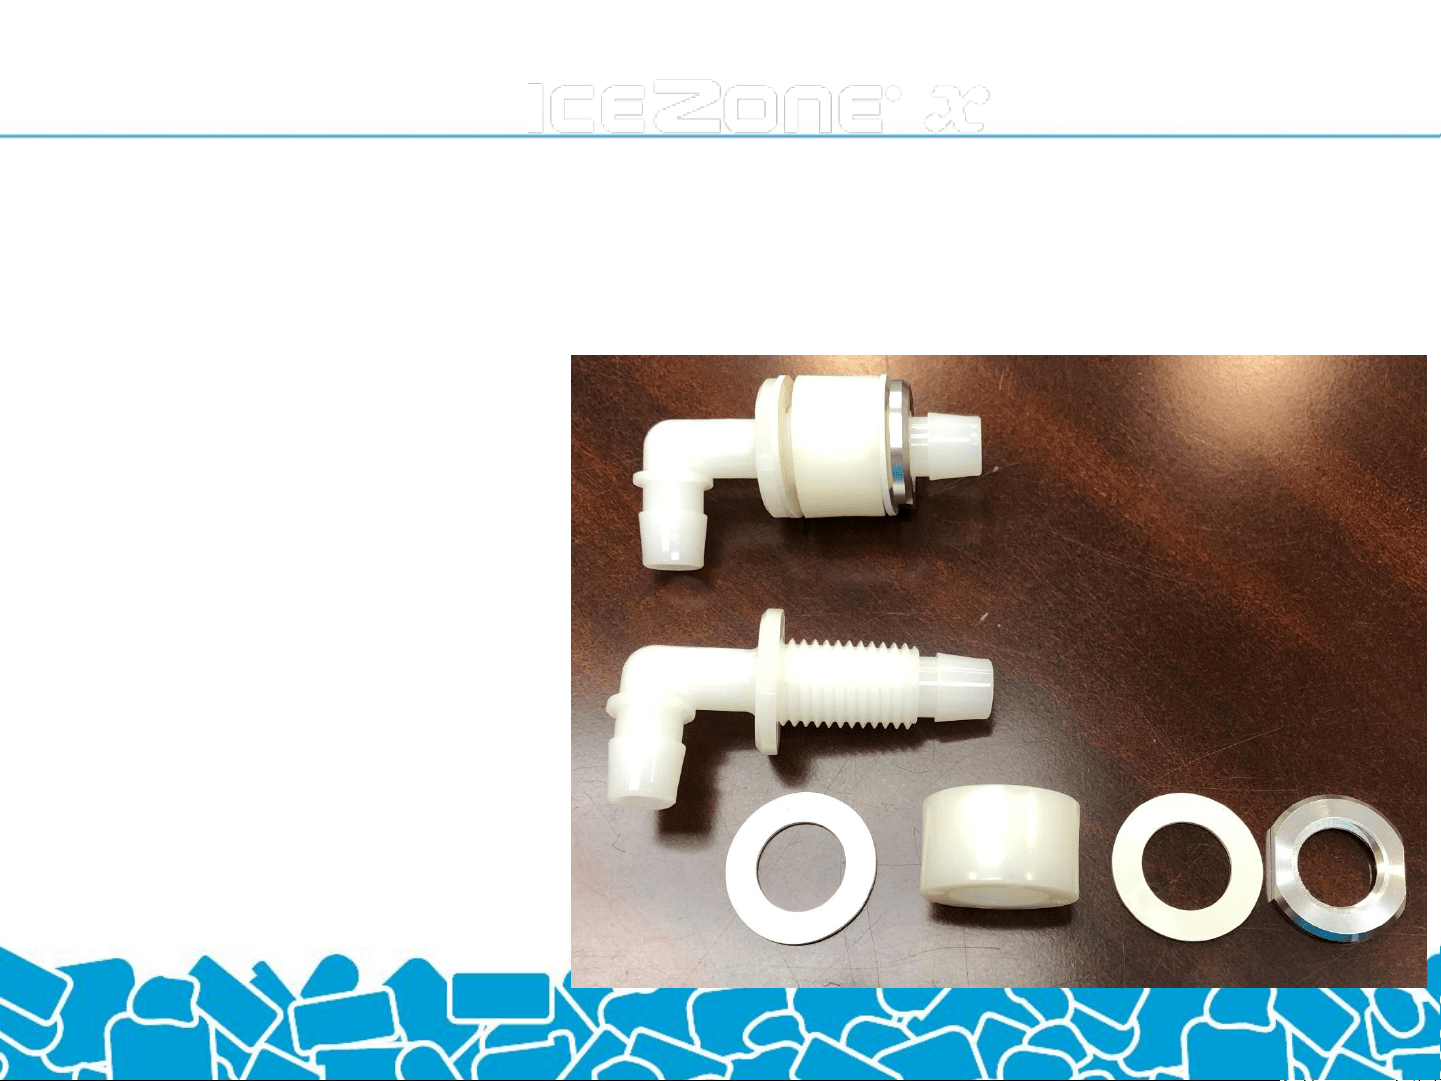
Assemble the supply fitting
as shown
This includes the 90°
bulkhead fitting, low profile
nut and a white rubber
washers.
Scotsman XSafe Sanitation System
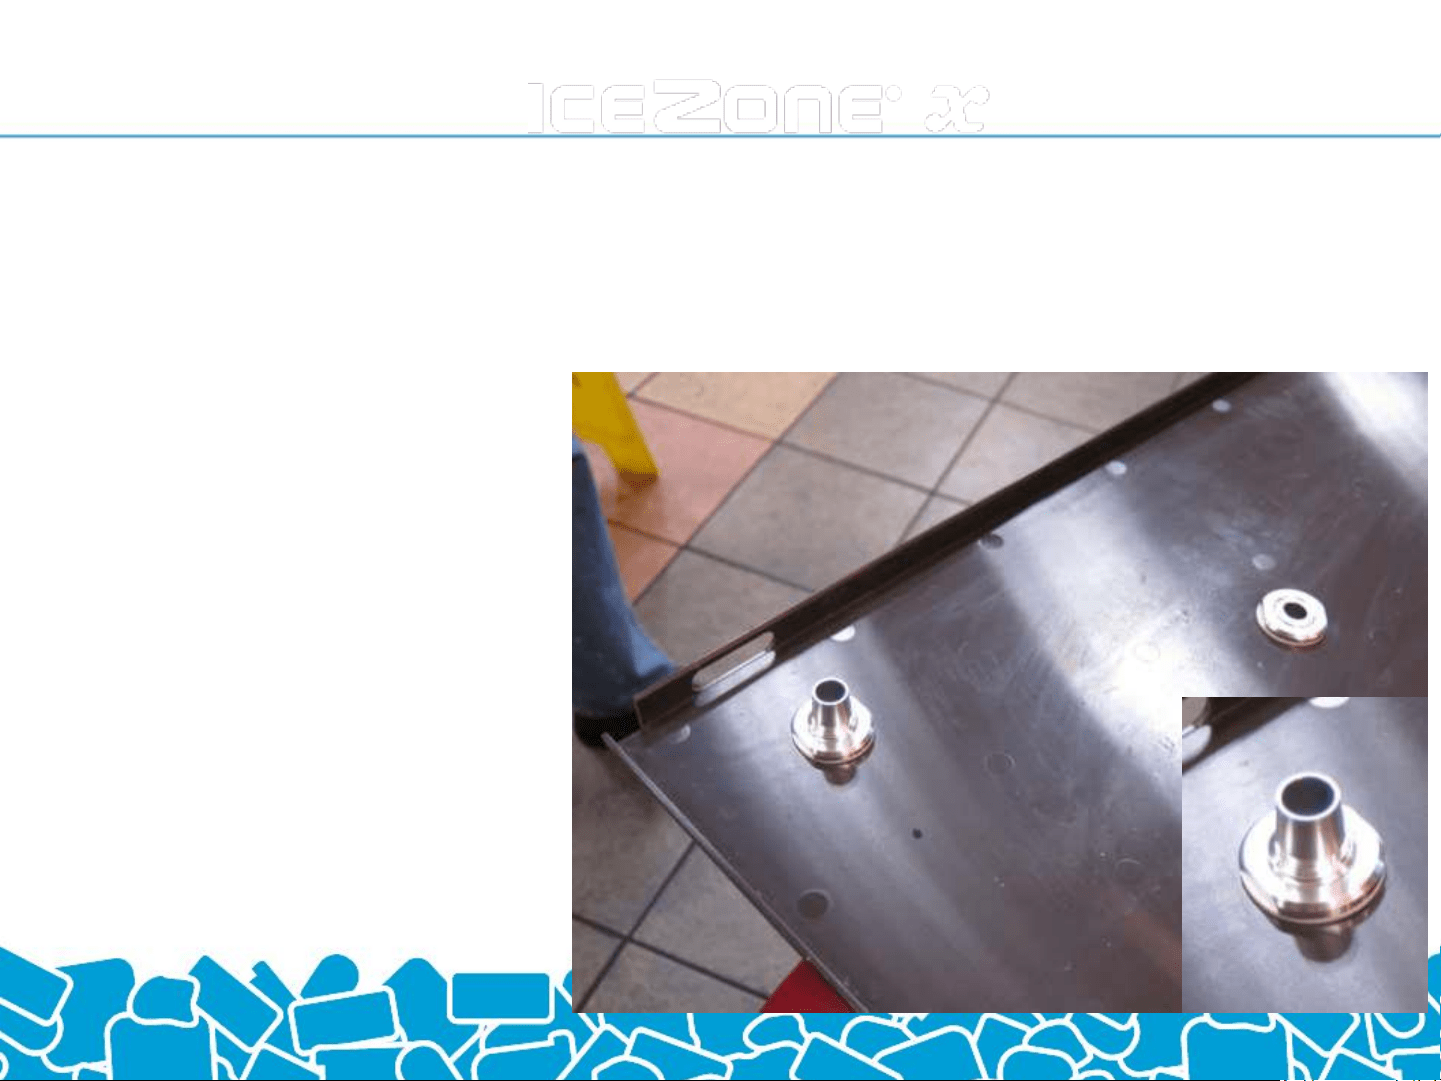
Install the supply fitting as
shown.
This includes a low
profile nut and white rubber
Washer (insulation spacer is used
on units without insulation under
the top cover).
There should be no exposed
threads on the interior surface
of the lid per NSF guidelines.
Scotsman XSafe Sanitation System
Assemble the return fitting as
shown.
This includes a 90° bulkhead
fitting, low profile nut
and white rubber washers.
Scotsman XSafe Sanitation System
Install the supply fitting as
shown.
This includes a low
profile nut and white rubber
washer.
There should be no exposed
threads on the interior surface
of the lid per NSF guidelines.
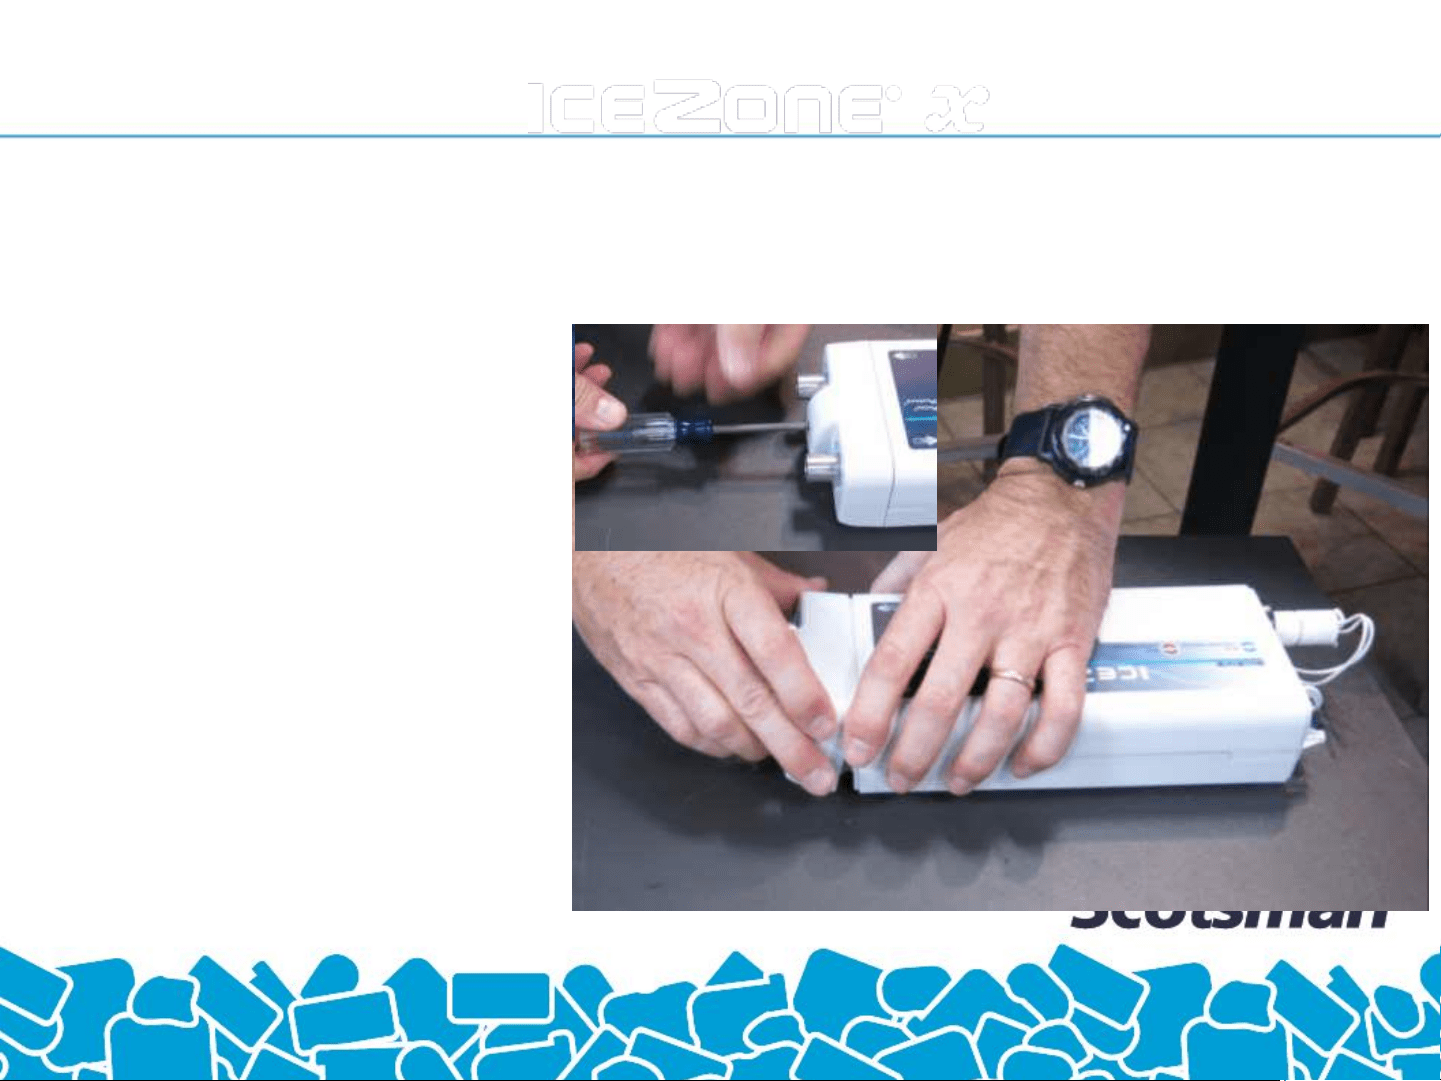
Scotsman XSafe Sanitation System
Remove the service cover from
the XSafe® unit.
This provides access to the
lamp, power input and
mounting boss.
As the screw is removed from
the cover, be sure to keep it
with the cover so it is available
for re-assembly.
Scotsman XSafe Sanitation System
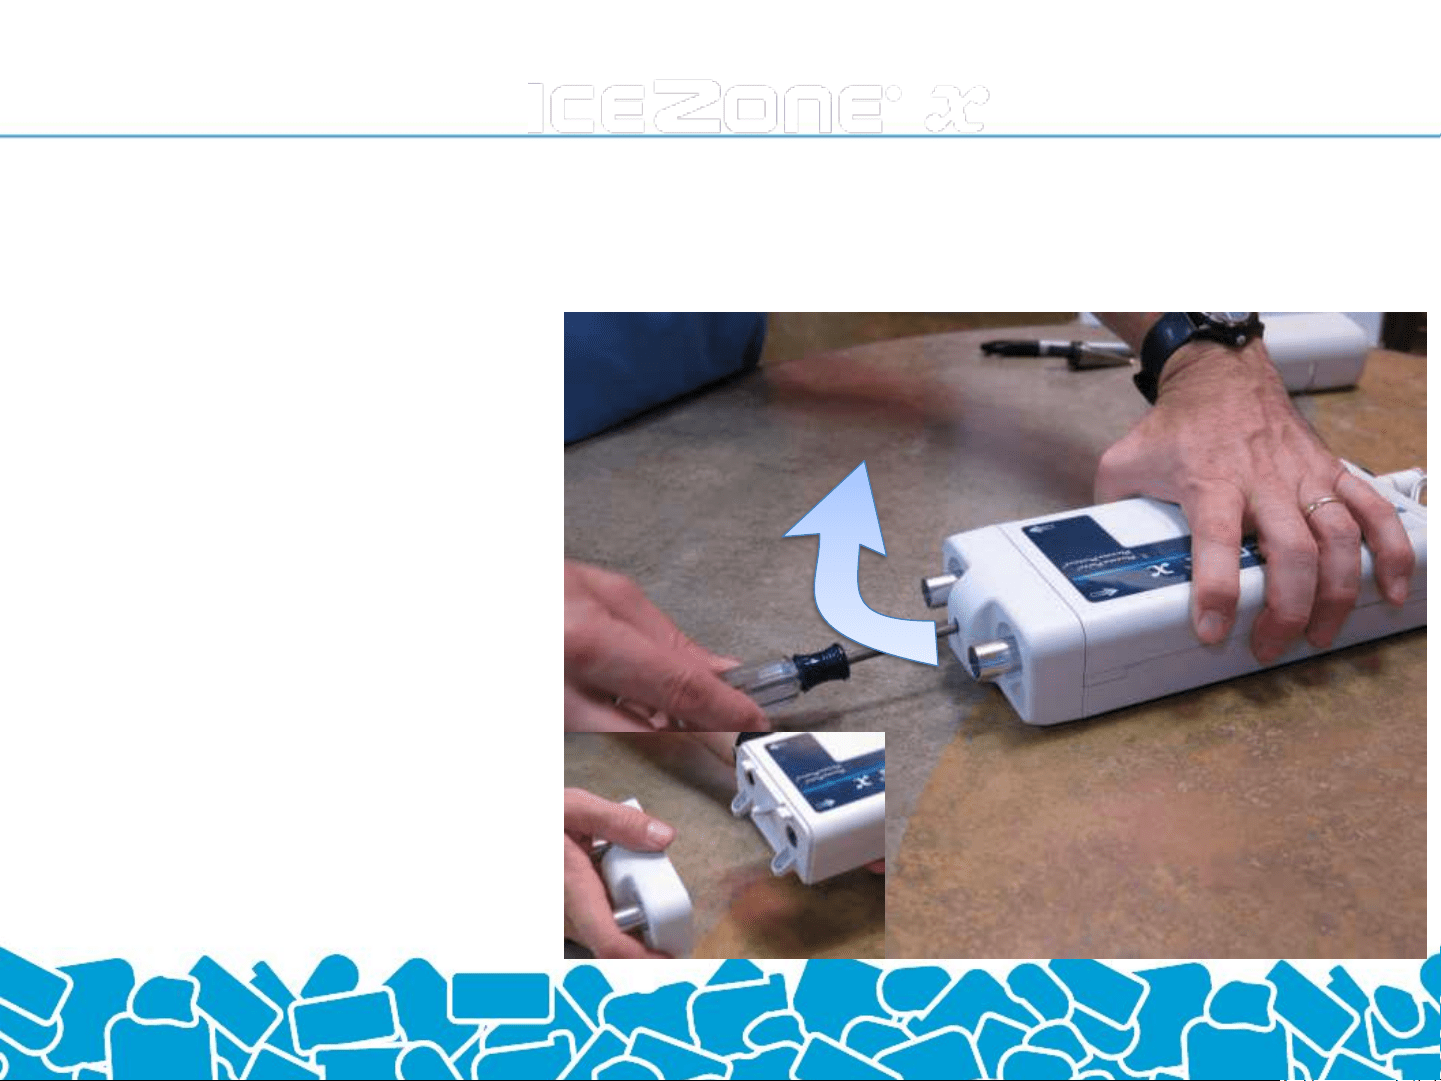
Remove the
Input/Output cover from
the XSafe® unit.
This provides access to
additional mounting bosses.
As the screw is removed
from the cover, be sure
to keep it with the cover
so it is available for reassembly.
The cover requires a firm
pull while rotating
towards the top for removal
Scotsman XSafe Sanitation System
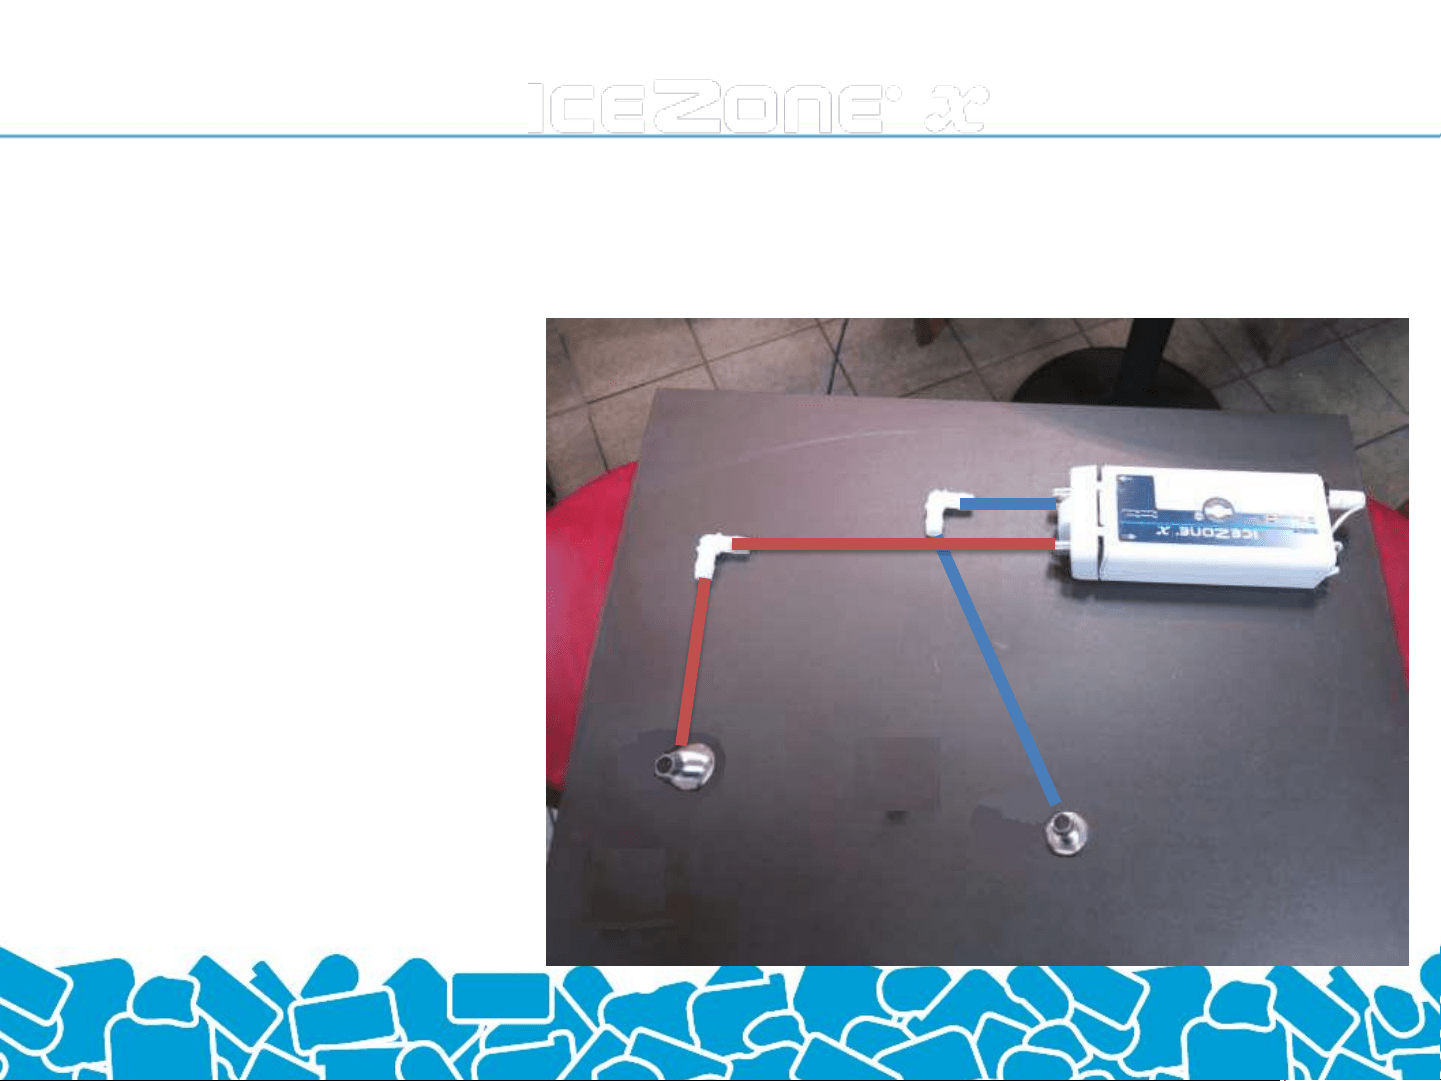
Place the XSafe® Unit
on the lid and layout the
routing of the supply and
return tubing.
The XSafe® Unit should
be placed in the back
left corner of the cover
(looking at the front of
the ice machine)
Place the 90 degree hose
Barbs in place to visualize the
routing.
Observe the flow
direction arrows on the
XSafe® Unit.
Return Supply
Scotsman XSafe Sanitation System

Mark the holes to mount the
XSafe® Unit on the lid.
Use a pen to locate the three
mounting holes.
Scotsman XSafe Sanitation System
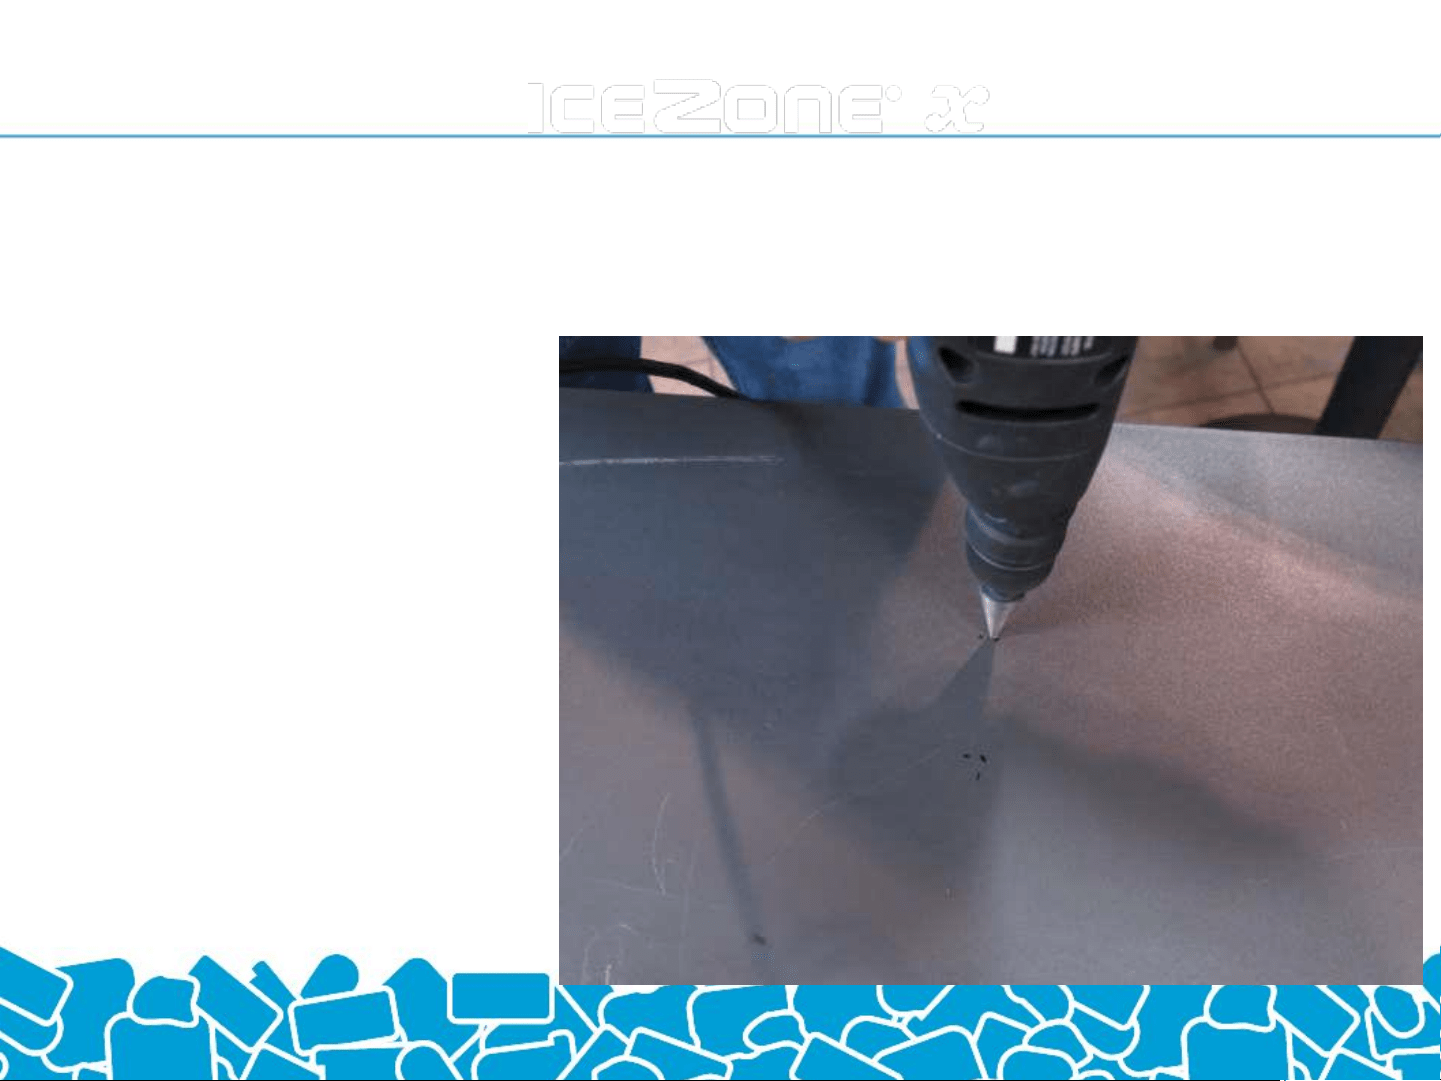
Drill the holes to mount the
XSafe® Unit on the lid.
Drill three 1/8” holes.
Scotsman XSafe Sanitation System
Place the mounting rivets or
self drilling screws into the
mounting holes.
Scotsman XSafe Sanitation System
Re-attach the Input/Output
cover and secure with the
original screw.
Scotsman XSafe Sanitation System
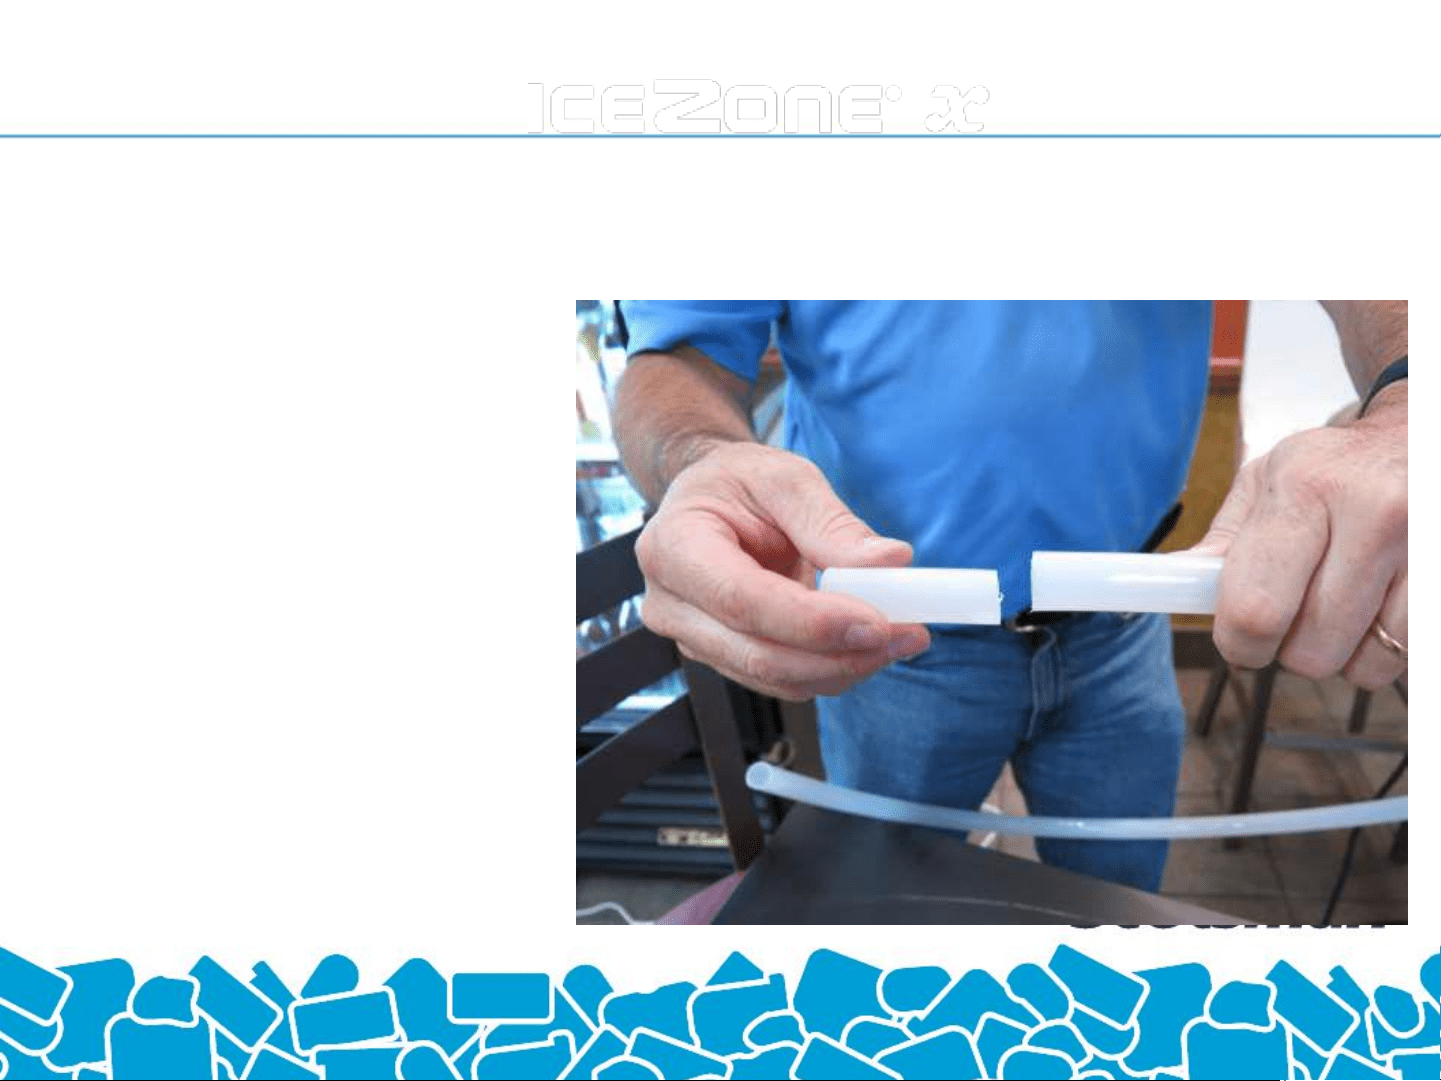
Cut two 2.5 inch pieces of
tubing to connect the supply
and return fittings to the 90
degree hose barbs.
Scotsman XSafe Sanitation System
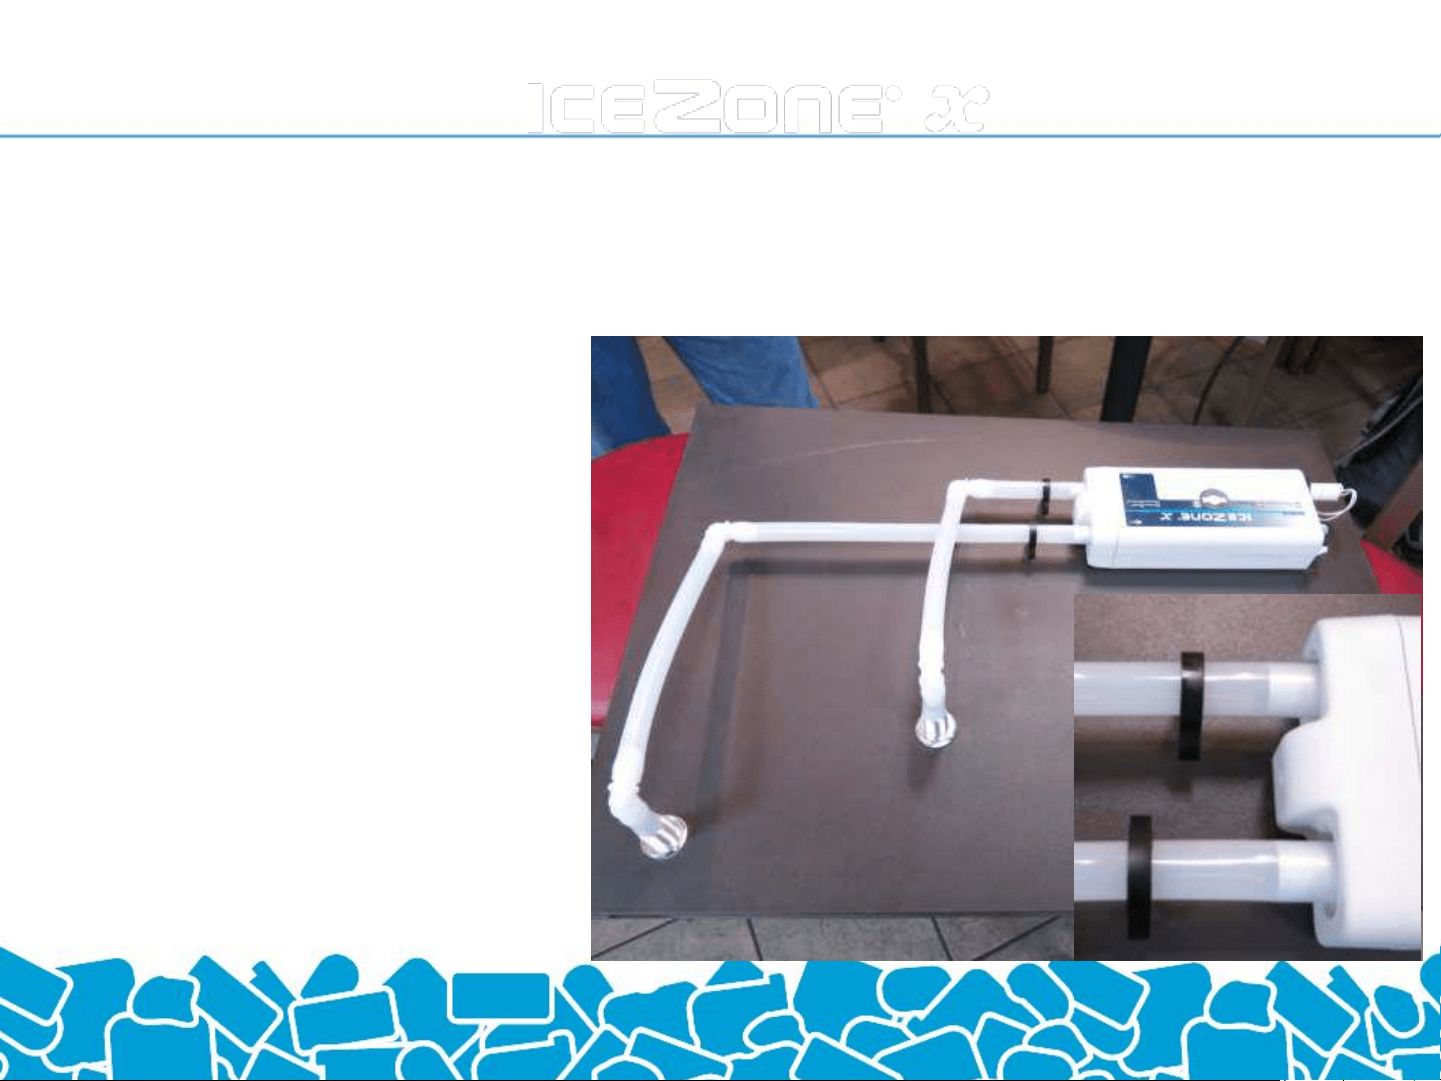
Cut and assemble the
remaining supply and
return tubing and fittings.
There should be 12” of unused
tubing.
Place the handy clamps
(black) on the tubing
which is placed over the
ports on the IceZone® Unit.
Installer’s Tip: Heating
the tubing in hot water
eases the installation of
the tubing onto the fittings.
Scotsman XSafe Sanitation System
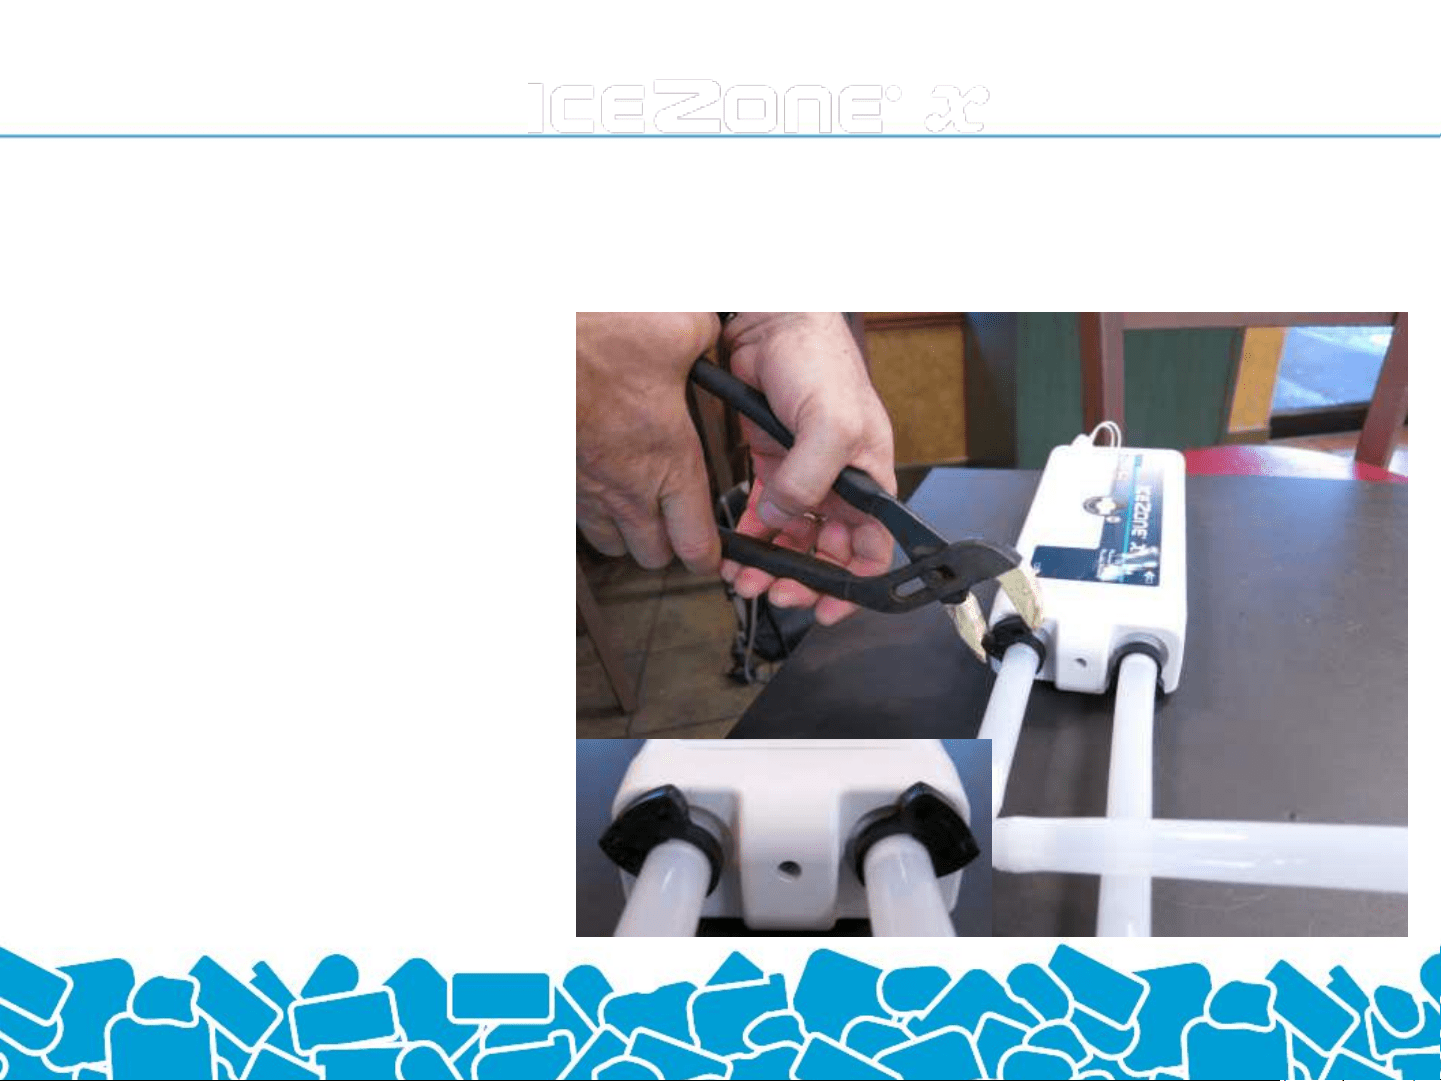
Tighten the handy clamps with
a pliers to secure the tubing on
the XSafe® unit.
Scotsman XSafe Sanitation System
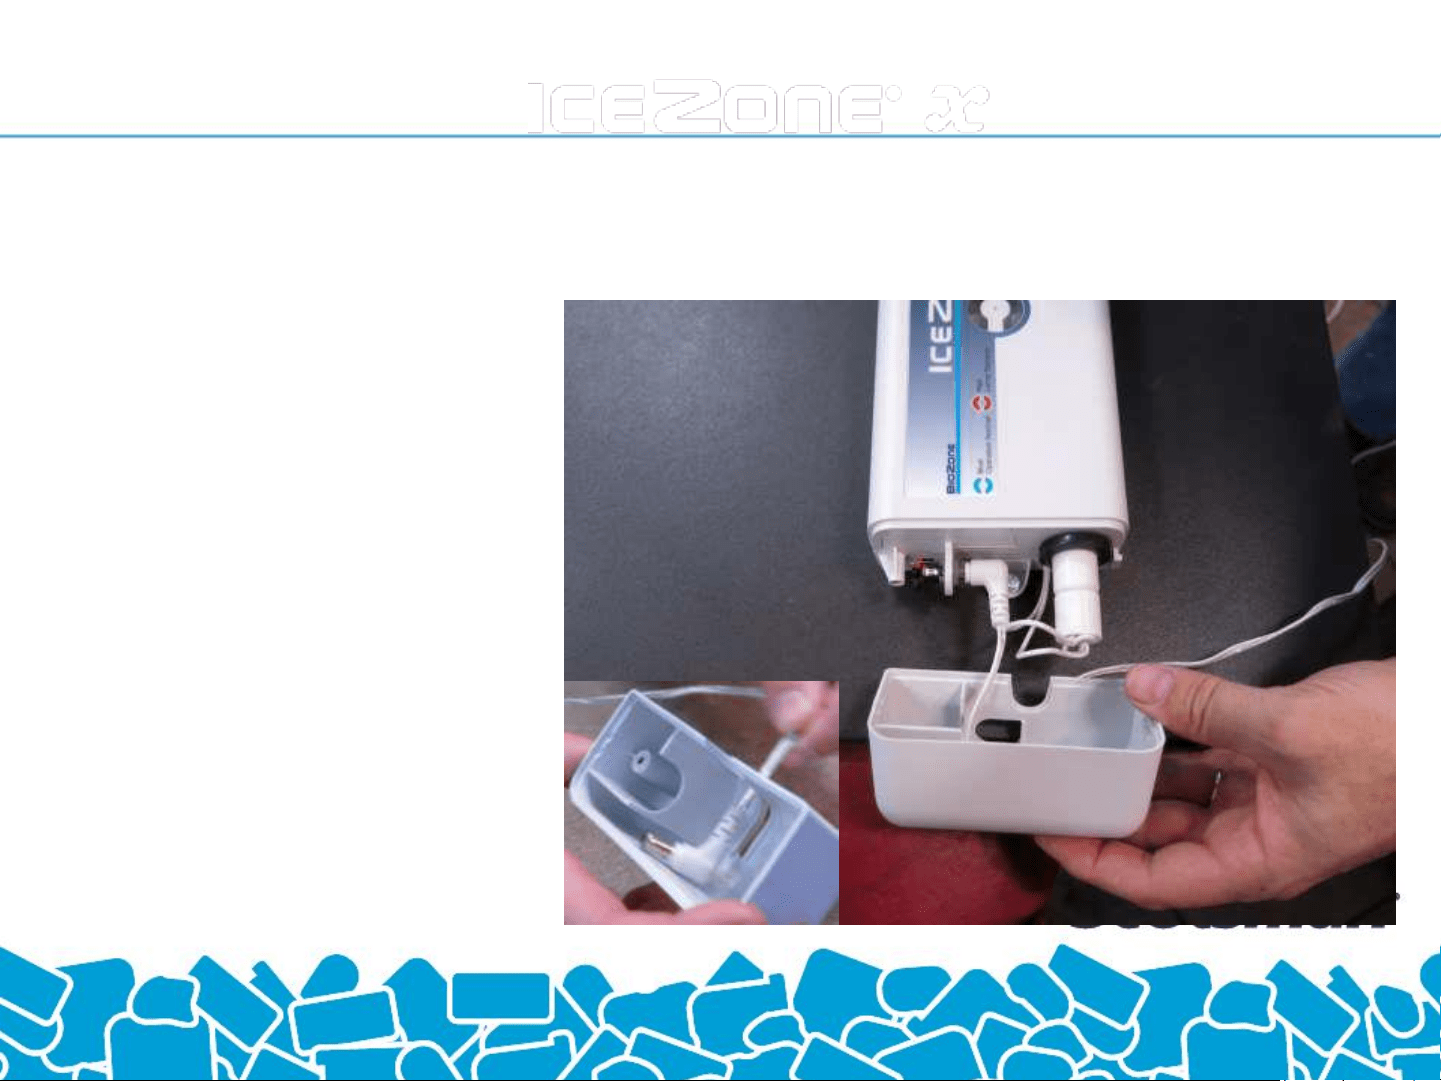
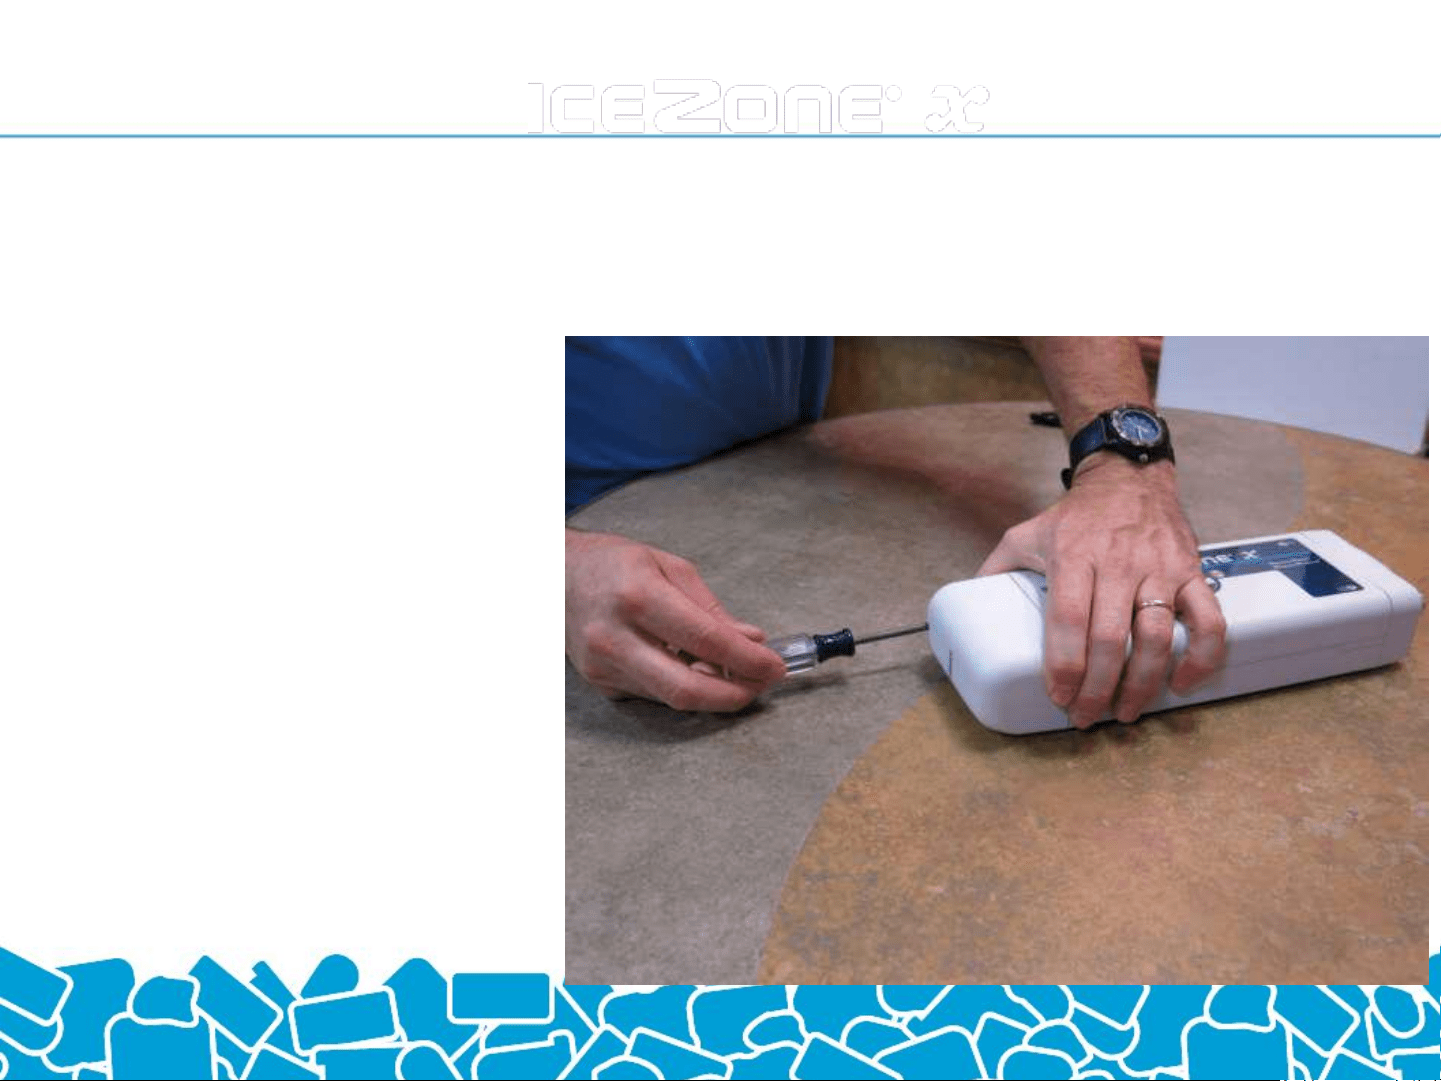
Insert the DC plug from the
wall adapter through the “P”
shaped hole in the service
cover.
Plug the DC connector into the
XSafe® Unit’s power input
plug.
Scotsman XSafe Sanitation System

Reinstall the service cover and
secure with the original screw.
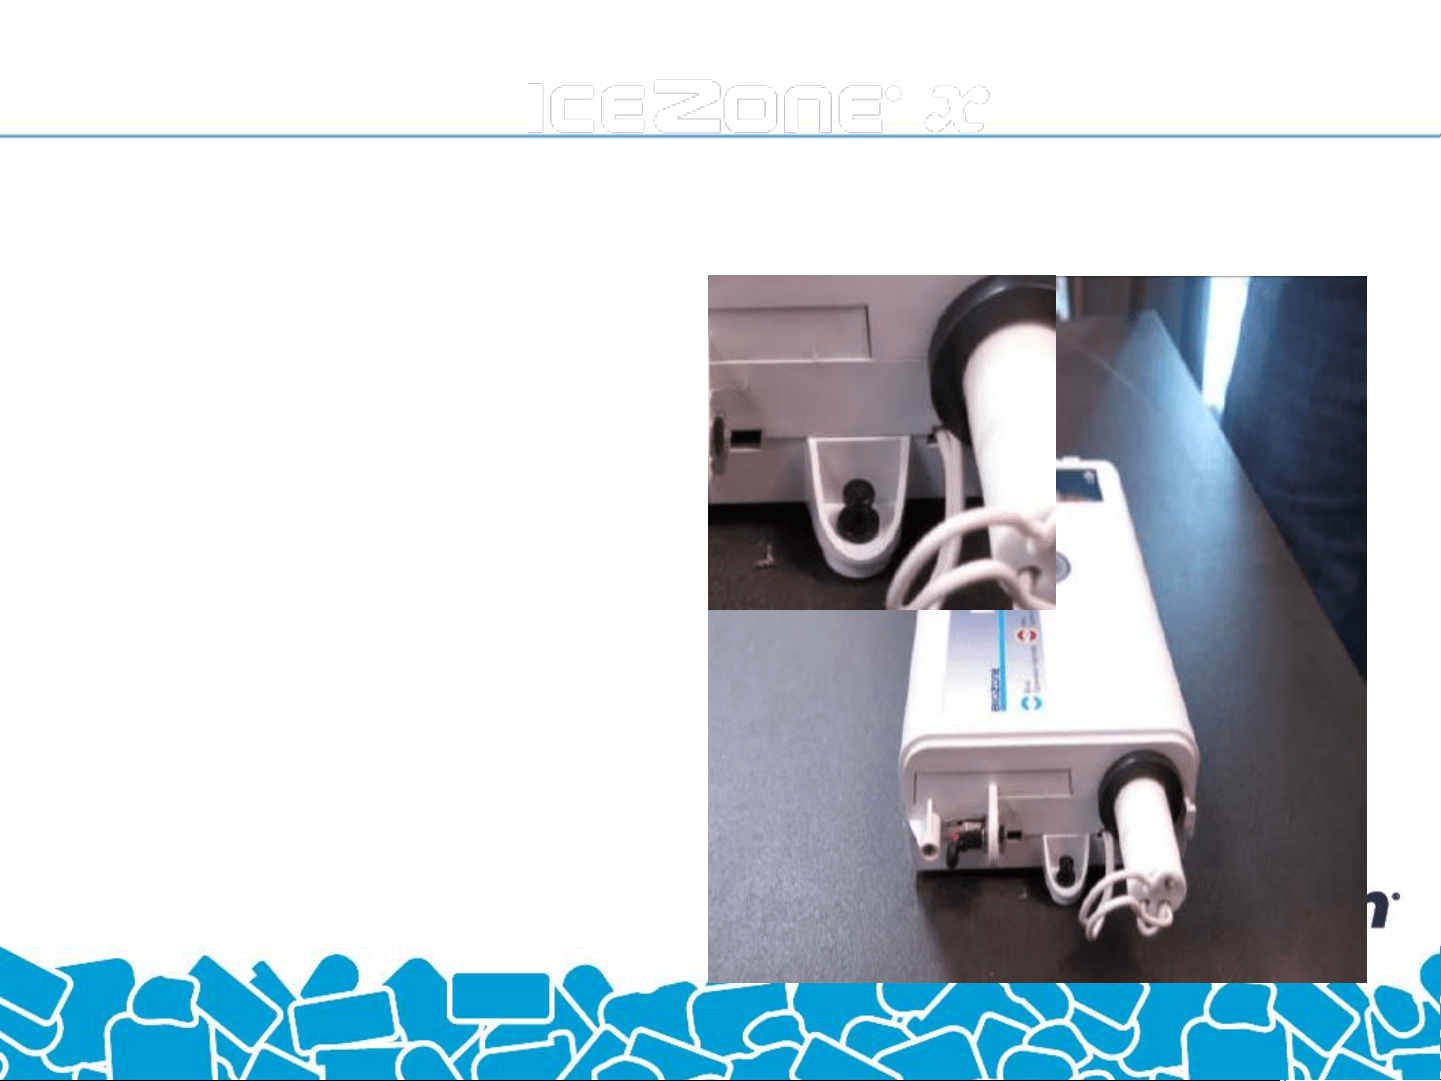
Scotsman XSafe Sanitation System
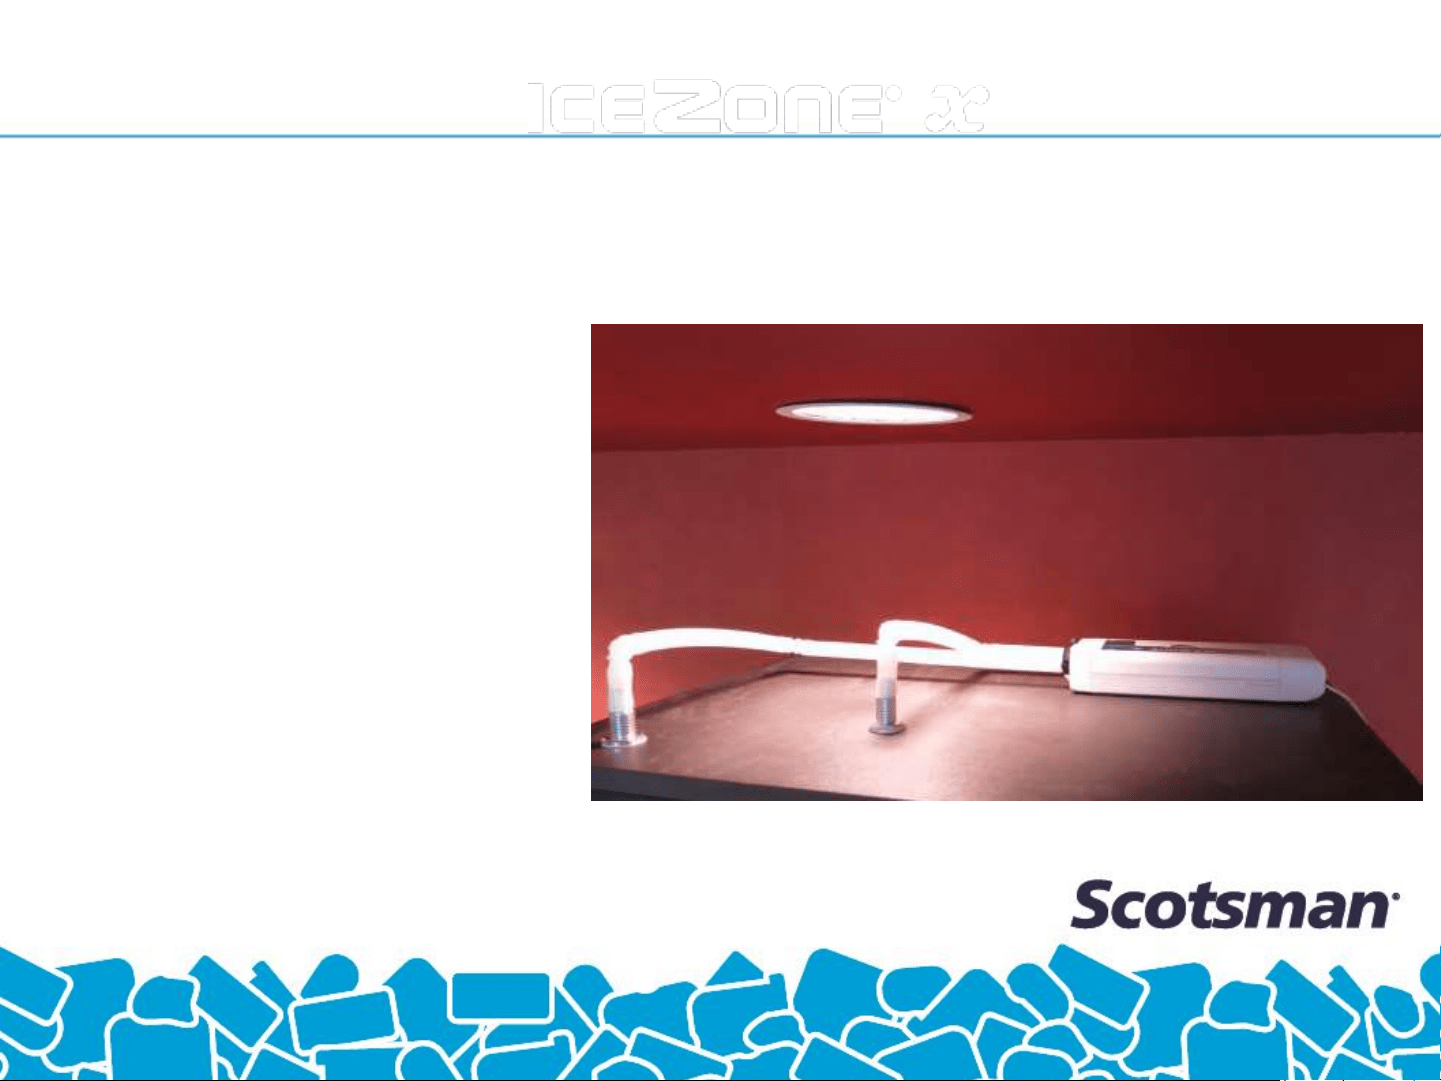
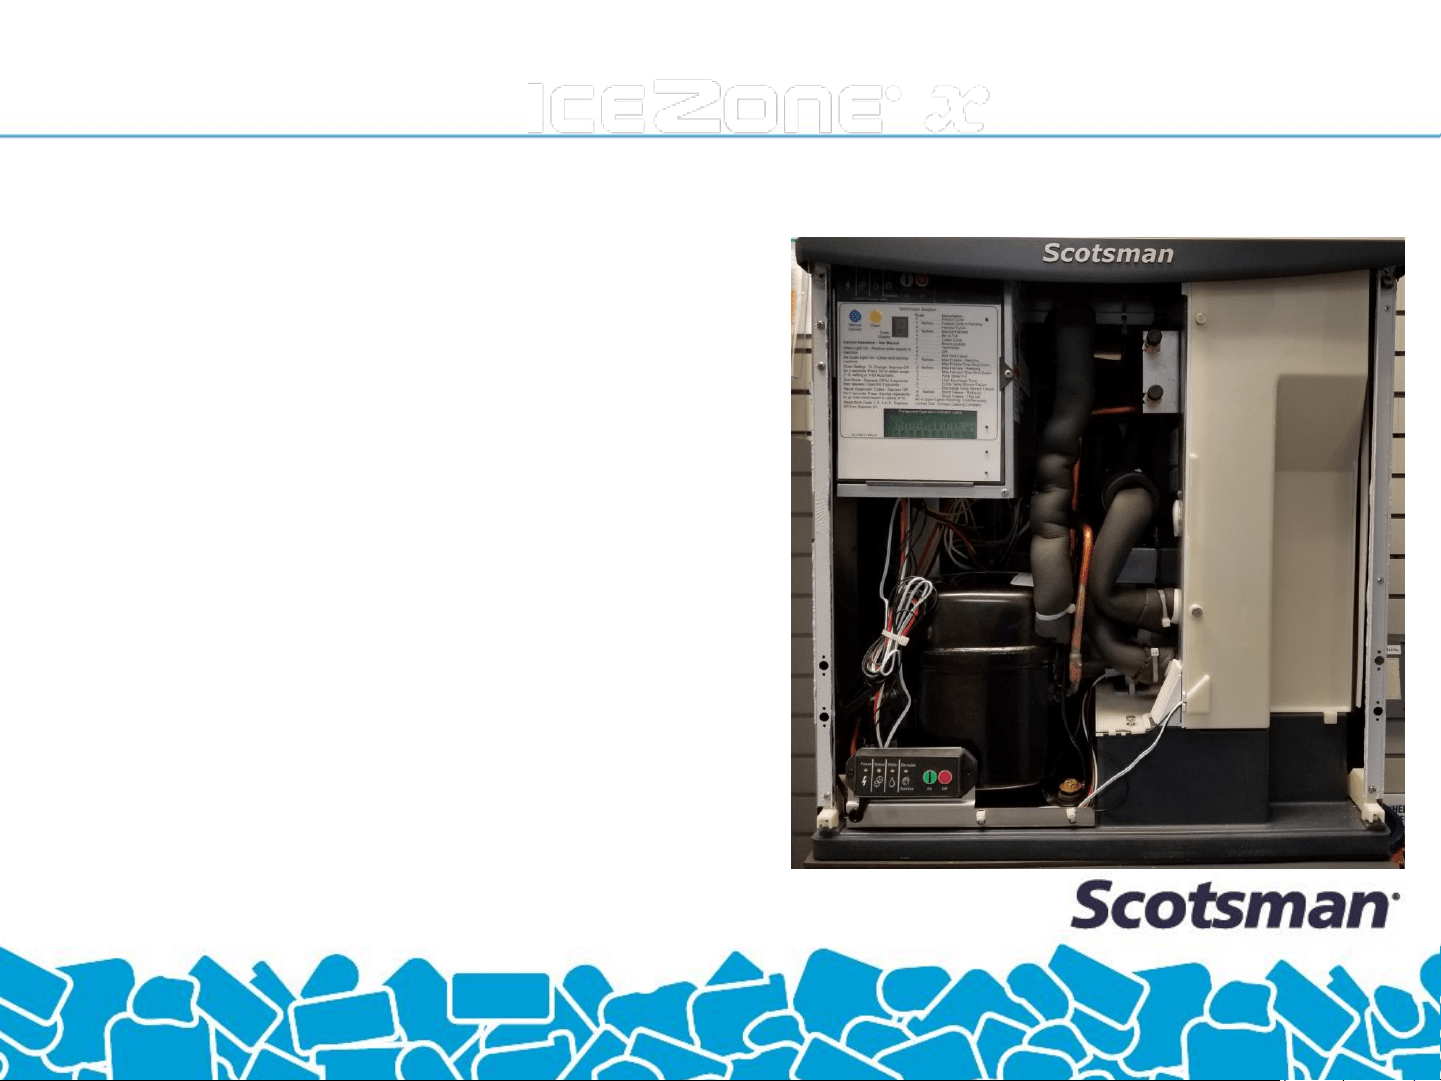
The completed installation on
the cover should look similar to the
picture shown.
Scotsman XSafe Sanitation System
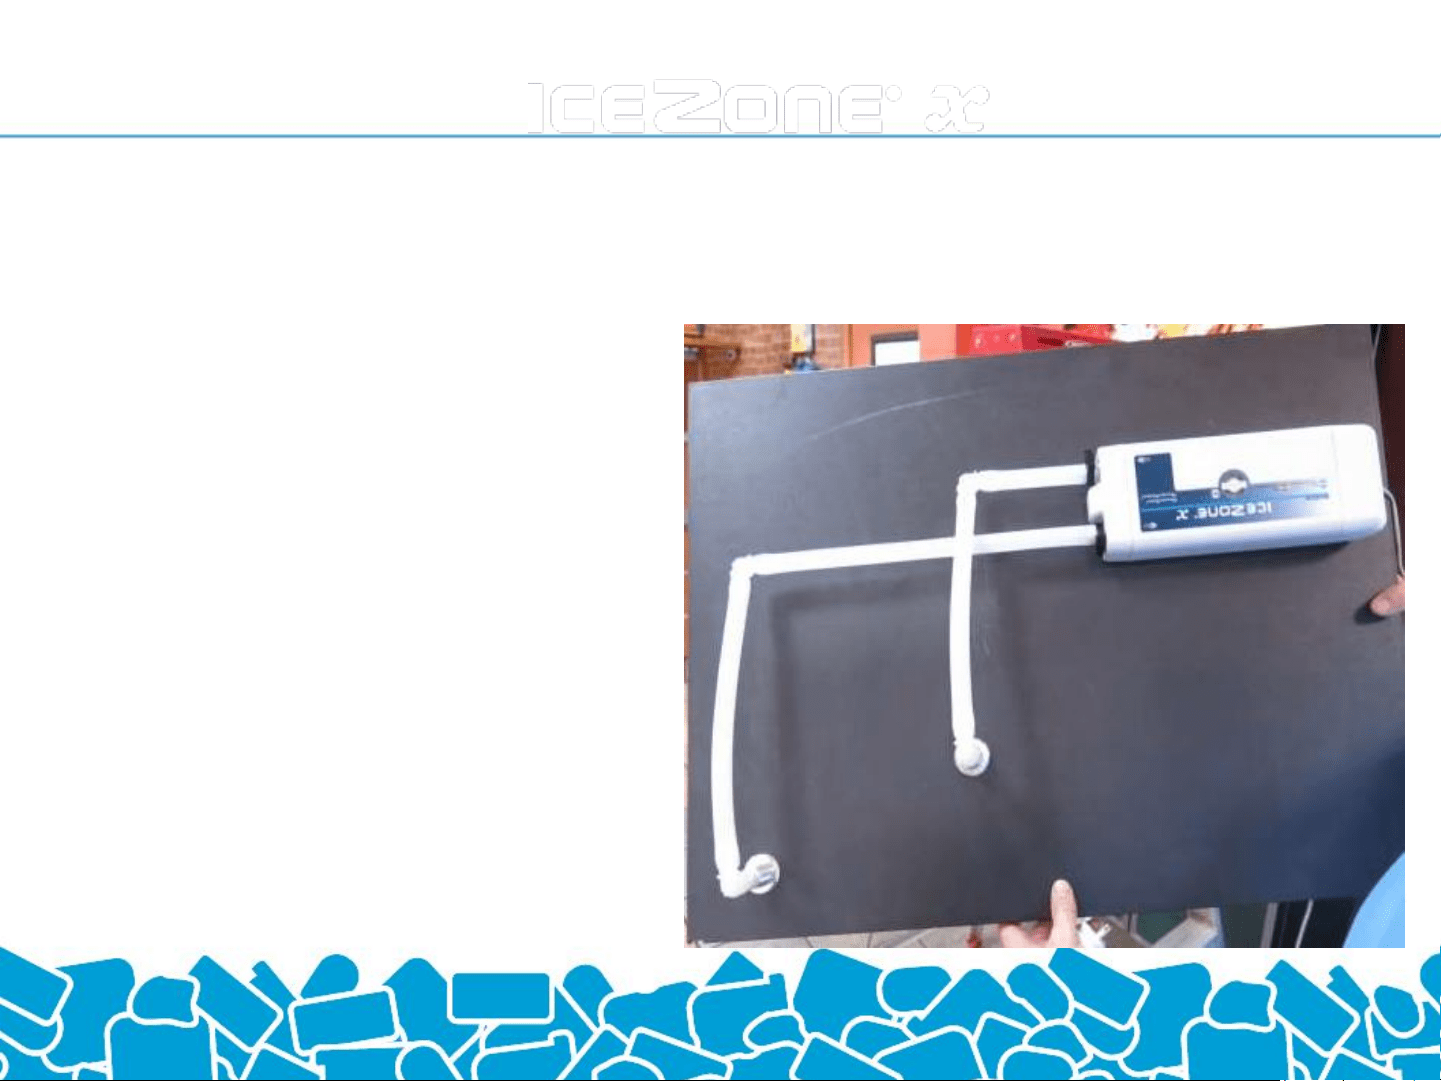
Install the top cover .
The completed installation on the top
cover should look similar to the
picture shown.
Scotsman XSafe Sanitation System
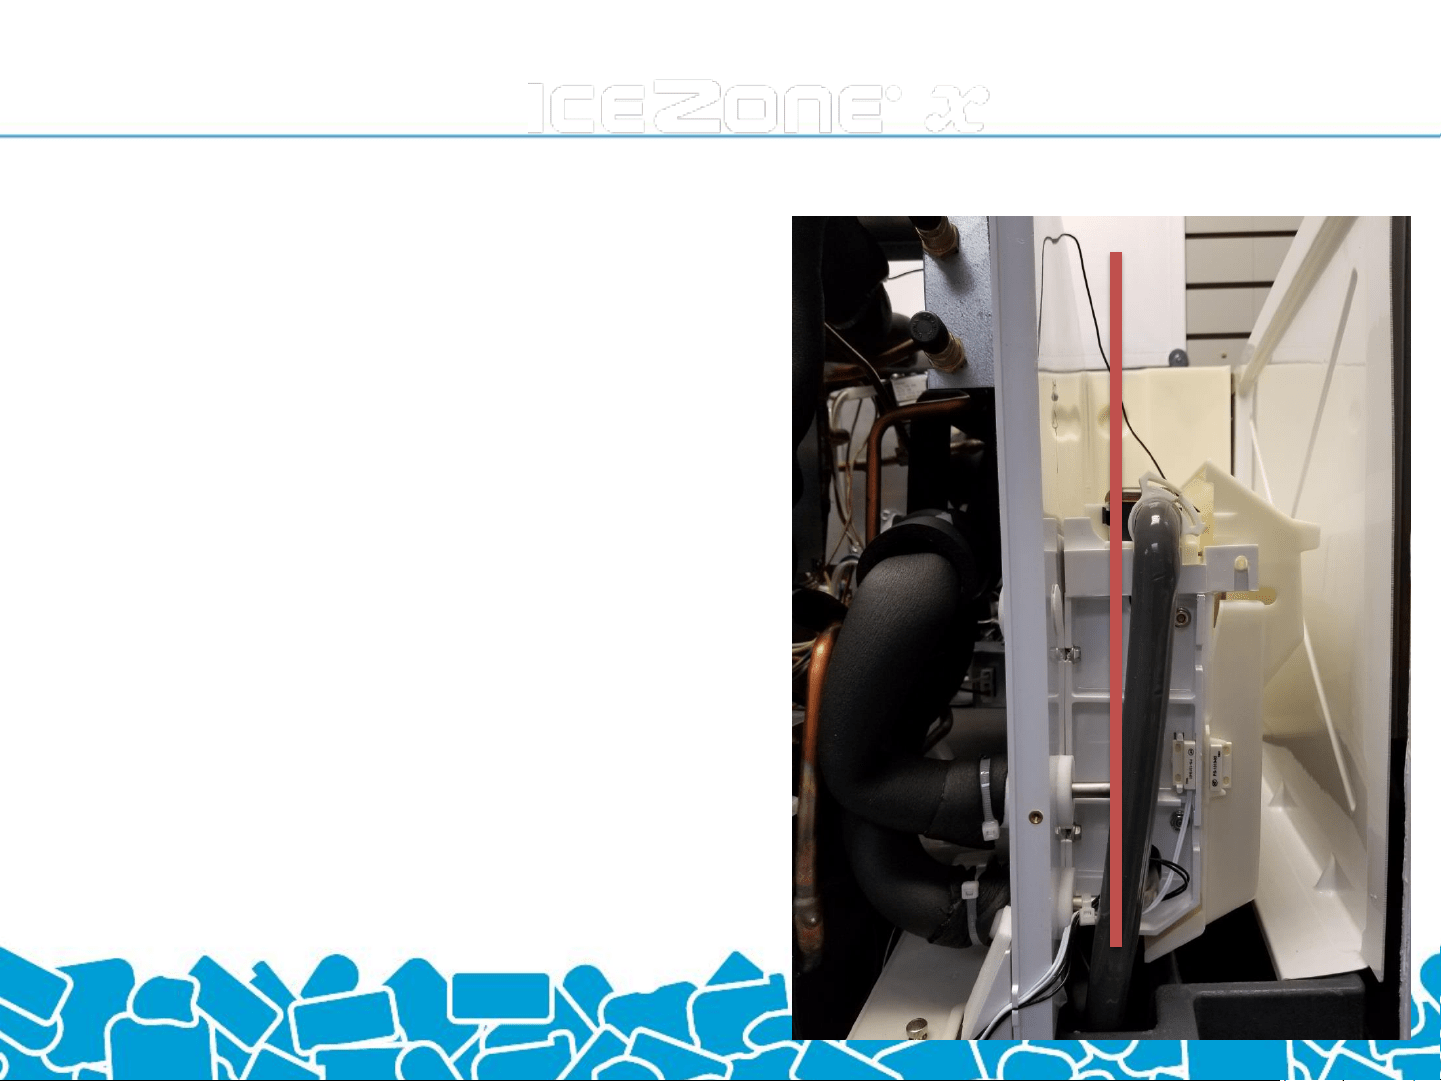
Install the remaining 12 inch length of
tubing onto the return fitting.
Return tubing should be routed from
the return fitting down the side of the
evaporator.
It is important that the return tubing
does not interfere with the operation
of the curtain and the ice level sensor.
Verify that the curtain has the normal
range of motion and resets to the
natural position on its own.
Scotsman XSafe Sanitation System
Install the white plastic wall.
Sanitize this as well before
turning the ice machine on
and closing the cover.
Scotsman XSafe Sanitation System
Close the ice machine after turning it on.
Plug the unit into a nearby 100VAC outlet that
is not switched off.
The unit runs 24 hours/day, 7 days per
week.
Check to make sure the blue light is lit on the
top
Scotsman XSafe Sanitation System
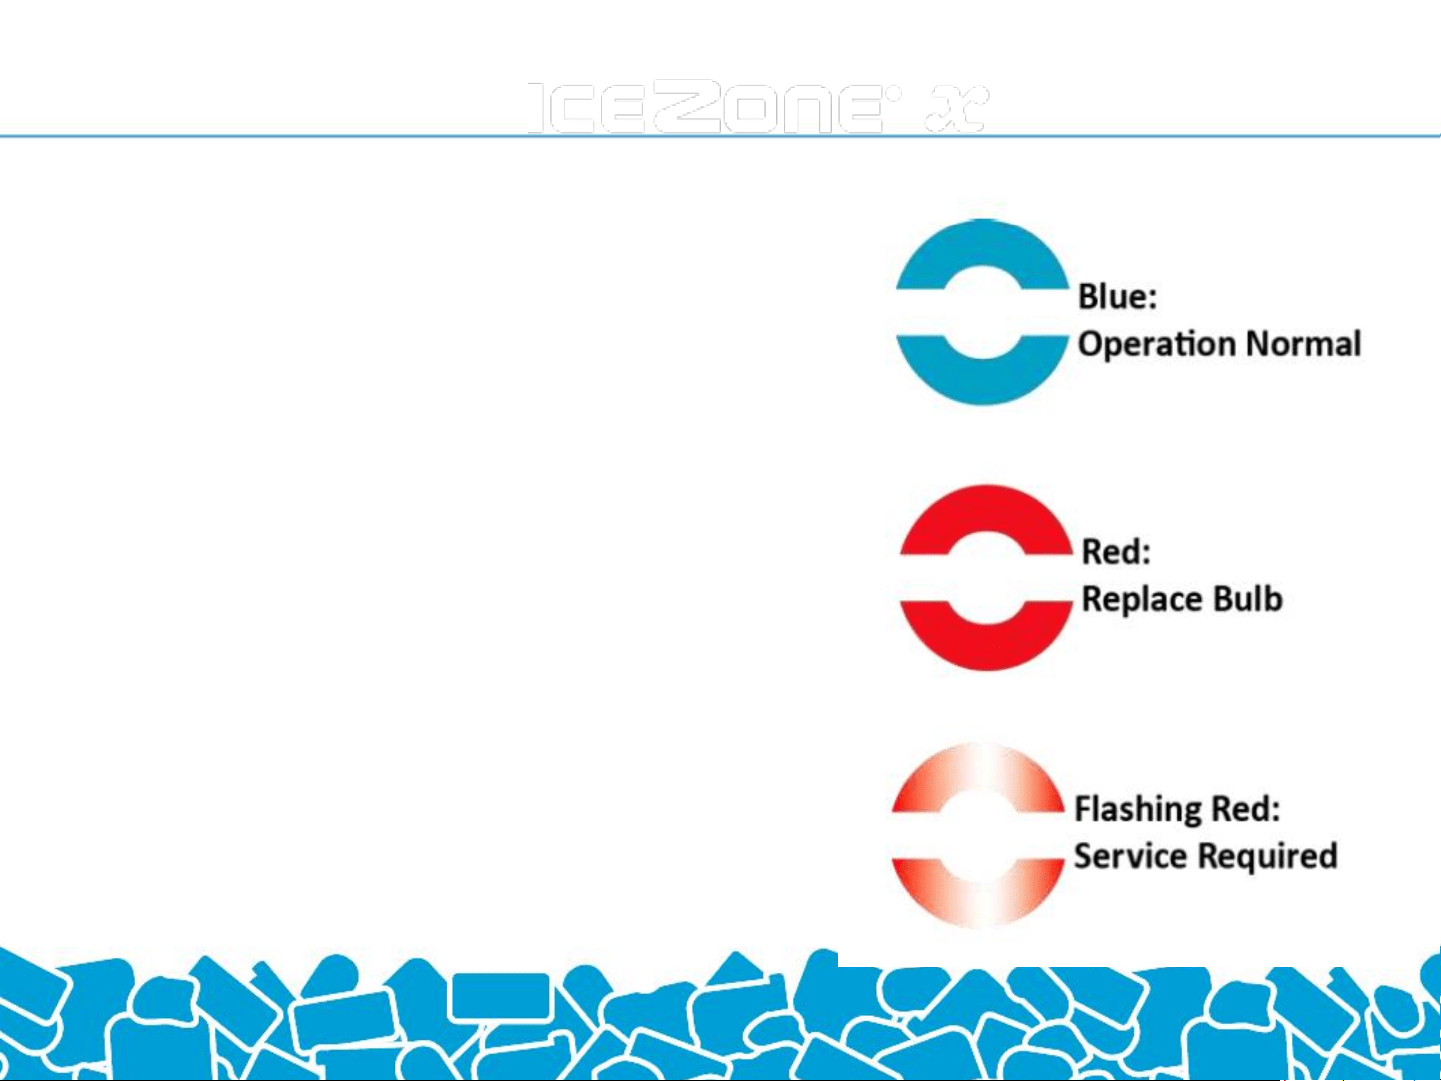
When IceZone® X is connected
to power correctly and the
operation is normal a blue light
shows on top of the unit.
When the red light is steady
on top of the IceZone® X,
the lamp needs to be changed.
When the red light is flashing
on top of the IceZone® X,
the unit requires service.
Scotsman XSafe Sanitation System

| Installation
XSafe by Scotsman
Phone: 1-800-SCOTSMAN (726-8762)
Email: technical.service@scotsman-ice.com
Web: www.scotsman-ice.com
