Loading ...
Loading ...
Loading ...
operating for the first time
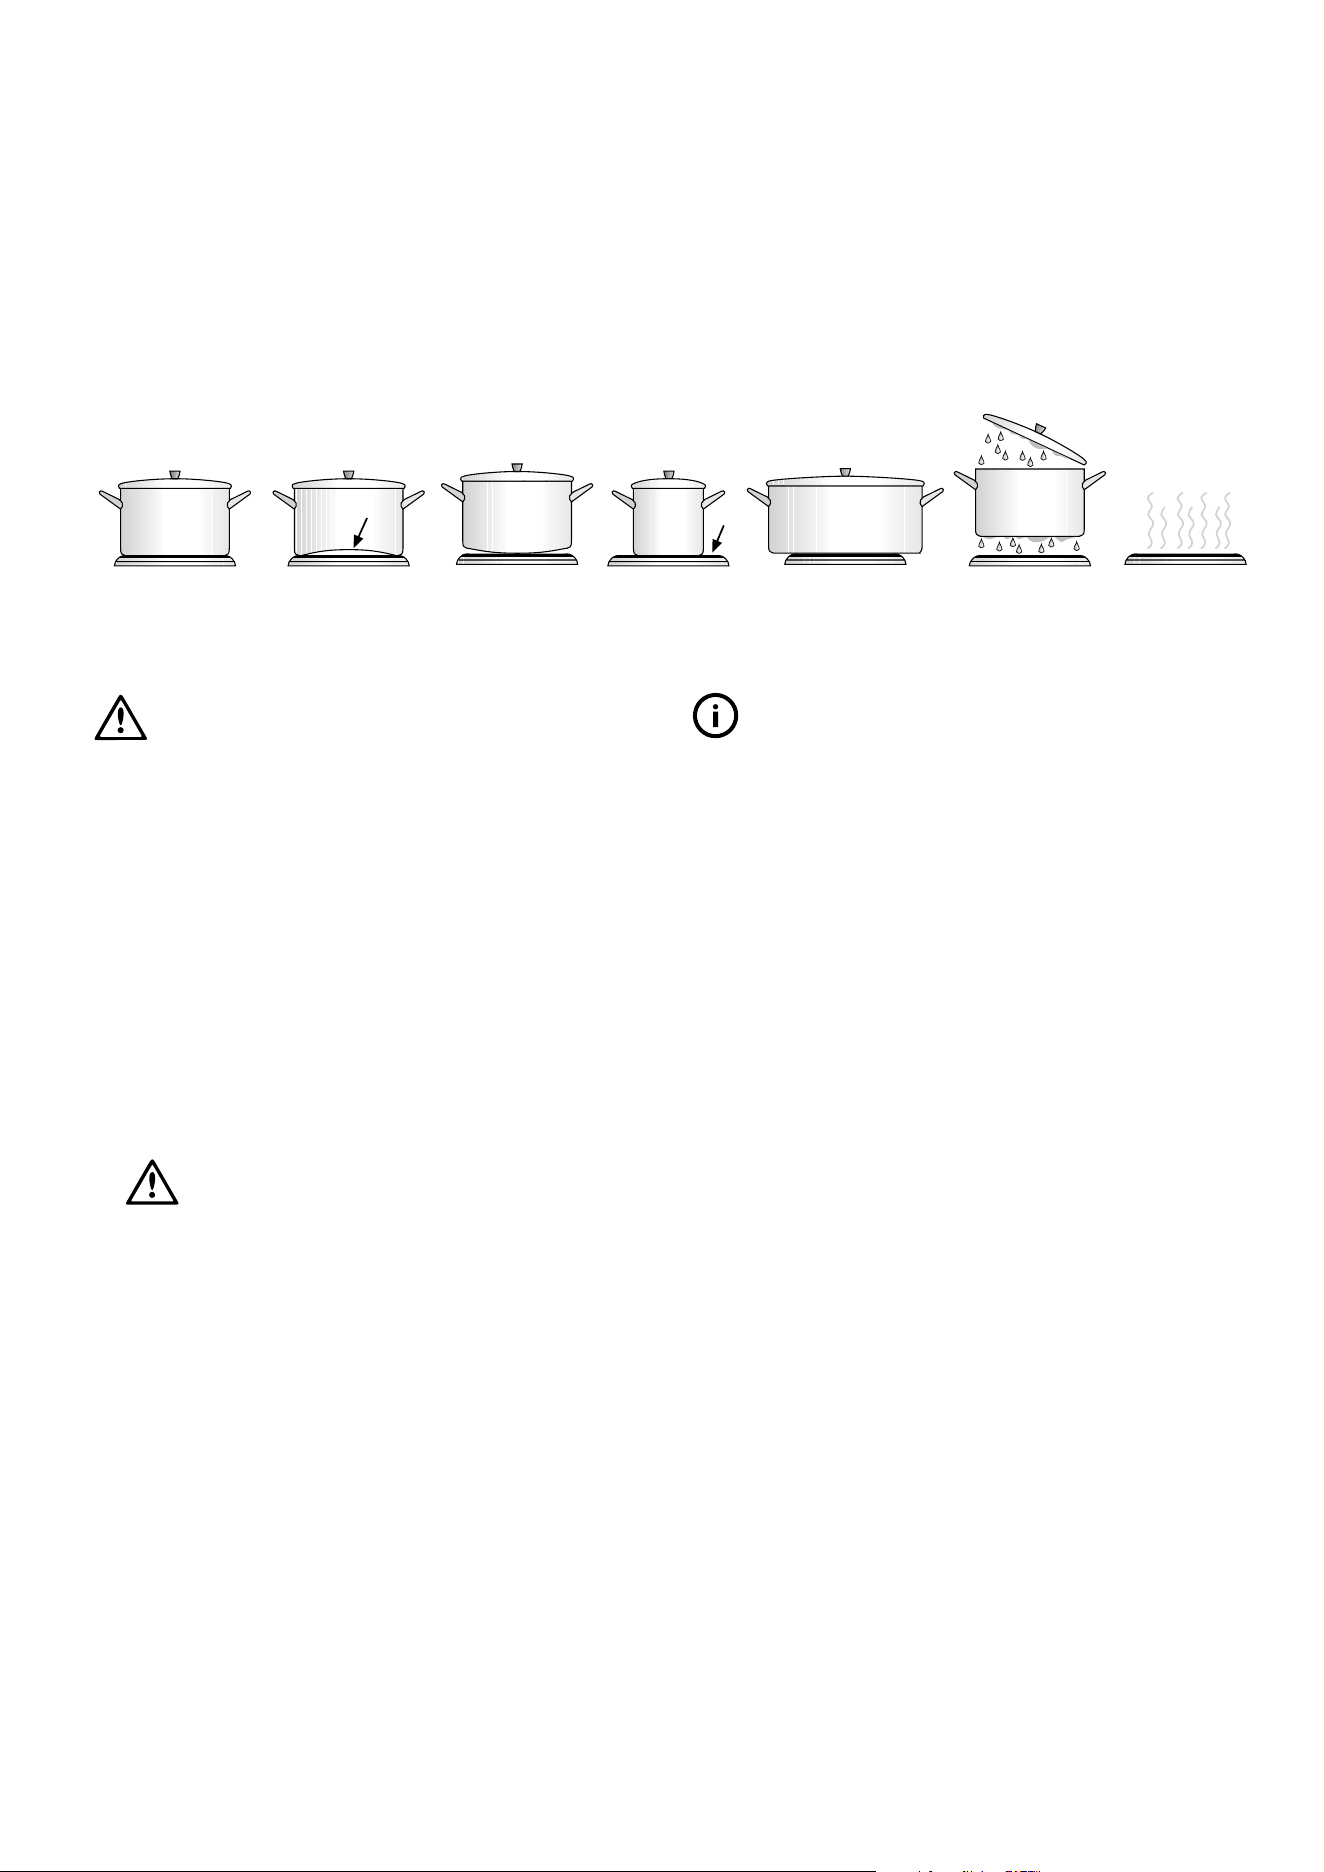
Choosing utensils for gas and electric hotplates
Refer to diagram below
installing your oven accessories
WARNING
Installation and service warning
• Only an authorised person must install and service this
appliance (Certificate of Compliance to be retained)
• In order to avoid tipping of appliance the anti-tilt plate
MUST be installed
• Appliances requiring connection to 230 – 240V MUST
be earthed
• An authorised person should inspect this appliance
every 5 years
• This appliance must NOT be installed on a base, box or
in a closed cupboard
• If the electrical supply cord is damaged, a qualified
person MUST replace the cord to avoid a hazard or
void your warranty
•
WARNING
Surrounding kitchen cabinets MUST
WITHSTAND 85°C
• In order to avoid a hazard the installation instructions
MUST be followed.
Fitting oven shelves
1. Ensure shelf orientation is correct (refer to diagram below).
2. Slide oven shelves onto oven supports (side runners) at an
angle until raised back of shelf is past the stop on oven
supports (side runners).
3. Lower front of shelf and push in until stop is reached.
4. To remove oven shelves, withdraw to the stop and raise
the front of shelf to clear the stop.
Oven shelf location
NOTE: the top ledge is not a shelf position.
There are no stops for shelf withdrawal.
Fitting the grill dish
Separate Grill: Ensure rear of the dish is engaged with the
side support before sliding backwards. To remove, simply
pull forwards and upwards.
To ensure proper grill operation, slide the grill dish fully
rearward to the stop.
To remove, simply pull forwards and upwards.
Engagement of
rear of dish
Engagement of rear of dish
Grill in Oven: see Fitting Oven Shelves
The grill dish with wire insert can be used in any of the two upper
height positions (shelf positions 4 and 5) between the runners.
NOTE: You must remove the grill dish when baking in the oven.
Replacing the oven light
WARNING
warning
Ensure the appliance is switched off at power supply (not just
the control knobs) before replacing the light globe to avoid
possibility of electric shock.
TIPS & INFORMATION
Before operating first time
1. Read all the Warning and Safety information.
2. Remove all internal boxes and bags from oven.
3. Clean out the oven interior with detergent and hot water
and polish with a soft cloth. DO NOT close oven door
until the oven is completely dry.
4. New appliances can have an odour during first
operation. It is recommended to ‘run in’ the oven before
you cook. Run the oven at 180°C for 2 – 4 hours and
ensure that the room is well ventilated.
5. If your appliance is fitted with solid hotplates, turn
heat setting to high for 3 minutes to fully harden the
hotplate coating.
GOOD BAD
(moisture on hotplate)
BAD
(convex base)
BAD
(oversize)
BAD
(recessed base)
BAD
(undersize)
BAD
(no utensil)
GOOD BAD
(recessed base)
BAD
(convex base)
BAD
(undersize)
BAD
(oversize)
BAD
(moisture on hotplate)
BAD
(no utensil)
4 OPERATING FOR THE FIRST TIME Chef 540 Upright Cooker Chef 540 Upright Cooker INSTALLING YOUR OVEN ACCESSORIES 5
Note the orietaton of the
side and rear features
1
2
3
4
5
Not a shelf
position
Turn light anti-clockwise
to remove it for globe
Loading ...
Loading ...
Loading ...