NOTE: This manual may be subject to updates or changes. Up to date manuals are available through our website
at www.lifespanfitness.com.au
Product may vary slightly from the item pictured due to model upgrades
Read all instructions carefully before using this product. Retain this
owner’s manual for future reference.
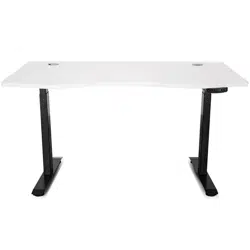
ERGODESK AUTO
SERIES
OWNER’S MANUAL

2
TABLE OF CONTENTS
SPECIFICATIONS................................................................................... 4
INSTALLATION INSTRUCTION .............................................................. 5
USAGE INSTRUCTION .......................................................................... 7
CODE MEANING & TROUBLE SHOOTING .......................................... 10
WARRANTY .......................................................................................... 11
Product Technical Data
Item
Data
Input
220~240VAC / 100~130VAC
50~60Hz
Output
29VDC
Max Loading
220 lbs / 100 kg
Height Range(Without Desktop)
27.6"~47.3"/70CM~120CM
Working Ability
2 Min / 20 Min

3
SAFETY INSTRUCTIONS
1. Please read this manual before operating this equipment.
2. NOTE: Please use this equipment according to the instructions in this brochure
to avoid accidents.
3. Keep children and pets away from the electric height-adjustable desk during the
operation. Unplug the power cord during a thunderstorm or if you do not intend to
use the desk for a long time.
4. DO NOT sit or stand or lying on the desk.
5. DO NOT immerse in water. Keep away from liquid or heat sources.
6. DO NOT adjust the height continuously for more than 20 times in short time. Allow
the product to rest for 10 minutes before re-using.
7. DO NOT put objects over 100kg on the desk.
8. Please DO NOT place anything under the table top when lower down the desk.
Ensure no obstacles in the desk’s path and no object above and 20” under the desk.
8. Make sure desktop not touching the wall.
9. Although the product comes with anti-collision function, in order to avoid any
pinching, please ensures that hands or other parts of your body are in a safe
position during the operation. Anti-collision will be closed during resets process.
10. Working environment temperature 0-40℃, keep products away from extreme
temperature, humidity environment, corrosive gas, liquid and dusty objects.
11. Please DO NOT disassemble or repair the equipment by uncertified personnel
to avoid the failure or damage of product or electric shock to the human body.
12. It is necessary to reset manually after the initial installation or power off.
13. DO NOT use this equipment in case of failure!
14. Before checking or wiping this equipment, please cut off the power!
15. Please DO NOT use water or alcohol to clean the equipment!
16. The company does not bear any warranty or liability for damage and human
injury caused by any abnormal operation.
4
SPECIFICATIONS
3
4
5
Two people
6
2
7
8
1
Tools
min
Assembling time
10
11
9
12
13
14
15
16
NO
Part name
Qty(PCS)
1
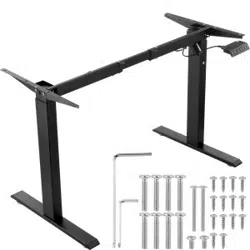
Foot
2
2
Column
2
3
Side Bracket
2
4
Right Tube
2
5
Left Tube
2
6
Extension Tube
2
7
M6*8 Bolt
8
8
M6*10 Bolt
12
NO
Part name
Qty(PCS)
9
M6*30 Bolt
8
10
ST4.8*16 Screw
8
11
ST2.9*15 Screw
2
12
Power Cord
1
13
Power Adapter
1
14
Control Box
1
15
Extension Cable
1
16
Cable Clip
8
5
INSTALLATION INSTRUCTION
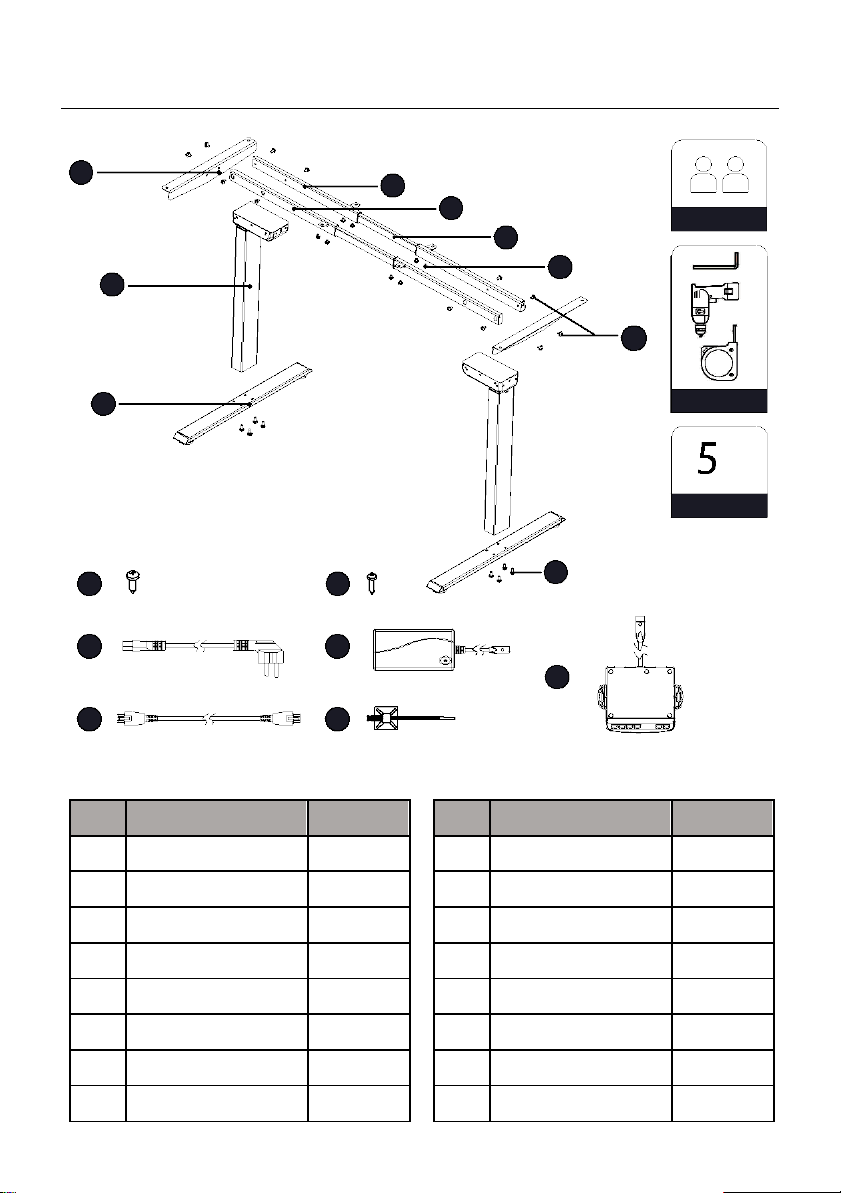
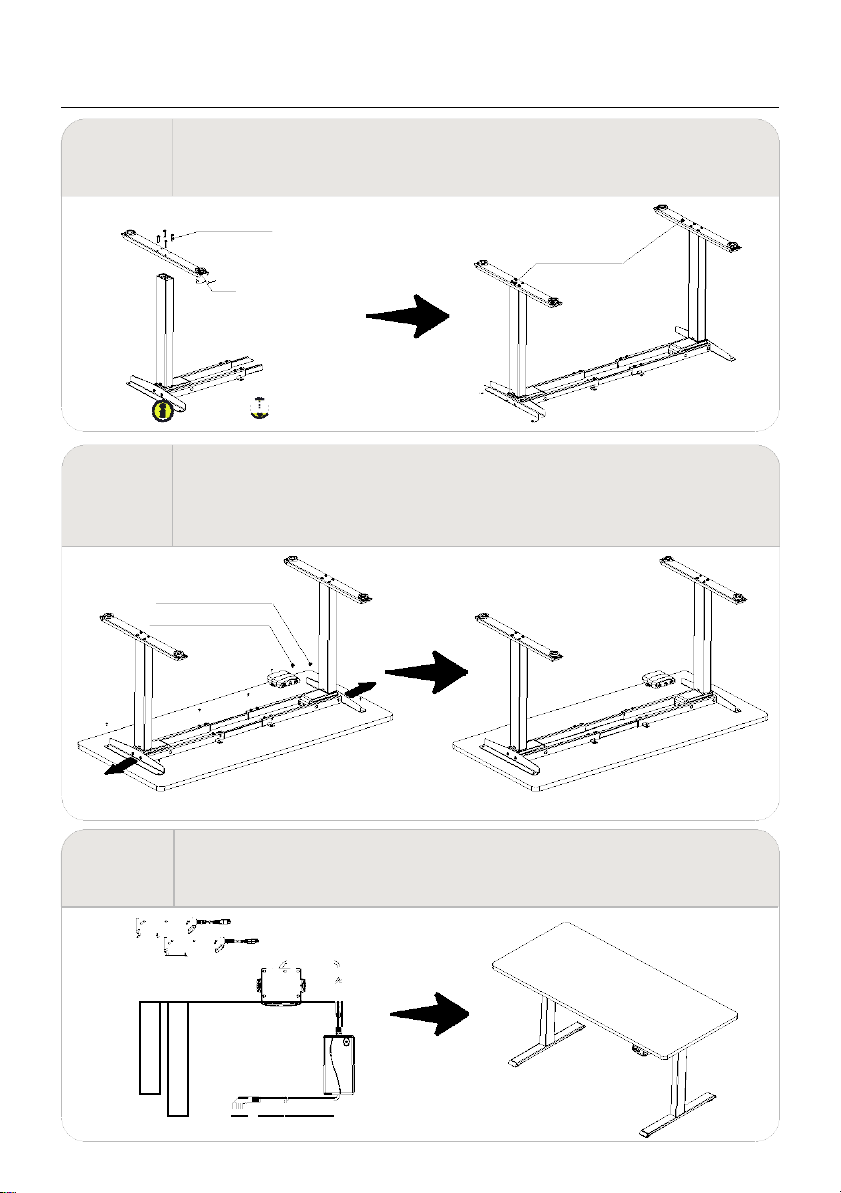
STEP 1
·Set the right tube and left tube flat.
·Insert the extension tube to the right tube and left tube as is shown in the picture,
pre-tightening the bolts.
M6*8 bolts
Left Tube
Right Tube
Extension Tube
Avoid excessive tightening bolts
This step has been pre-installed before shipment,
please check whether there is a lack of spare
parts, and adjust the frame expansion tube to the
appropriate length.
Extension Tube
STEP 2
·Insert the columns into the place which is between the left and right tubes
respectively, line up the holes on the frame and column.
·Pre-tighten the bolts.
Fasten the bolts M6*10 bolts
Avoid excessive tightening bolts
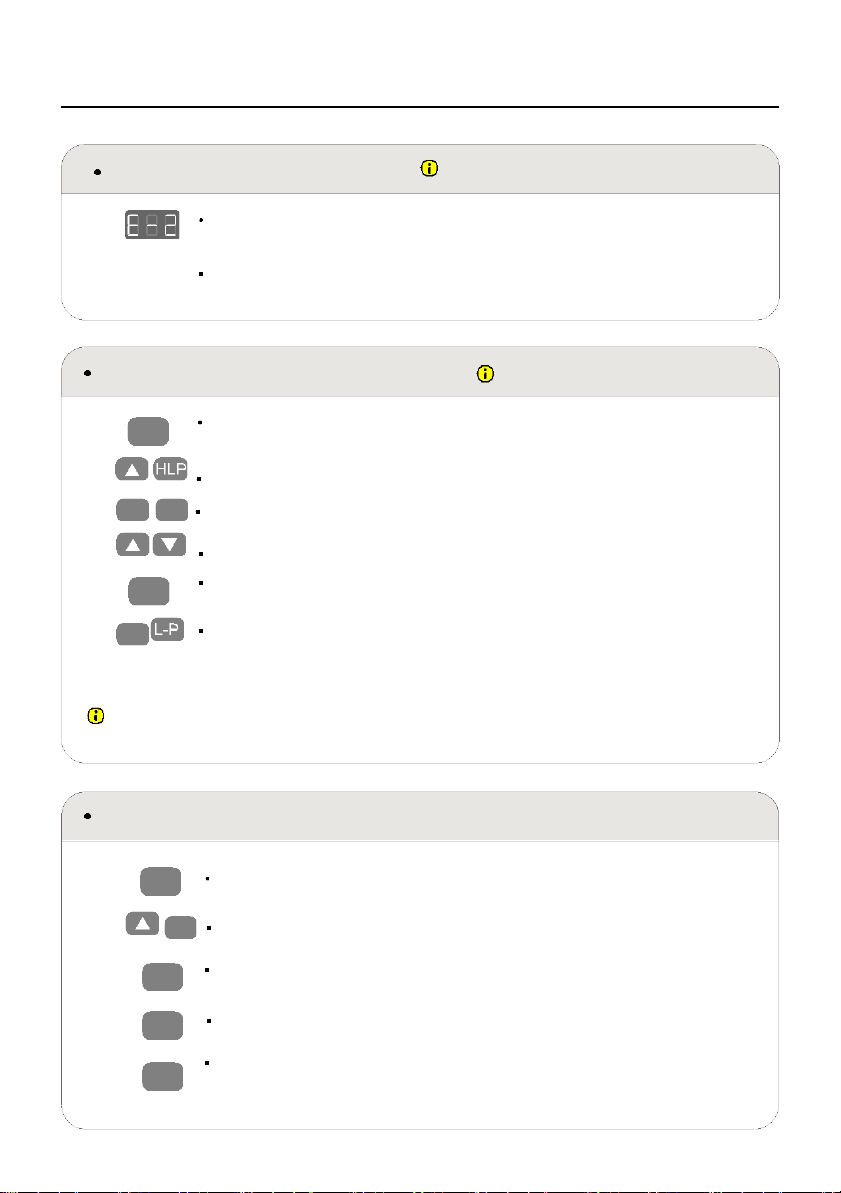
STEP 3
·Mounting the side bracket on each side of the column.
·Fasten the screws.
Side bracket
Fasten the bolts
M6*10 bolt
Avoid excessive tightening screws
6
INSTALLATION INSTRUCTION
STEP 4
·Line up the screw holes on the feet and columns.
·Fasten the bolts.
M6*30 Bolts
Fasten the bolts
Foot
Avoid excessive tightening bolts
·Check both side of desktop before placing the base on the bottom side of the desktop.
Adjust the suitable width. It is suggested that the two sides of the frame side brackets are
STEP 5 2~4inch/5cm~10cm from the edge of the desktop and fasten screws.
·As shown below, connect related parts, including control box, extension cable and power cord.
·Check all bolts and screws. Make sure all bolts and screws are tightened.
ST4.8x16 Tapping Screw
ST2.9x15 Tapping Screw
▲The frame width is adjustable: 42 inch~70 inch,which is suitable for diffrent desktop.
STEP 6
·Insert the handset on suitable position of desktop edge to avoid interference
with humans or chairs.
·Tidy up all the power cables, and fasten with cable clip.

7
USAGE INSTRUCTION
S 1 2 3
Manual Reset
It is necessary to be reset manually after
the initial installation and power off.
1.
Keep pressing down key until the display shows “E-1” and “rES" alternately
and release the key.
2.
Keep pressing down key again, the desktop will move slowly down and return
back till the display shows “70 (27.6") /60 (23.7")”
3. Release the key, the height-adjustable desk resetting finished.
Note: The anti-collision function is not enabled during all resets. Please note that there is a
potential risk of pinching in this case and be sure no obstacles in the desk's path.
Up and Down
1.
Keep pressing "up" key till the required height is reached.
2.
Keeping pressing "down" key till the required height is reached.
Saving Position
Adjust the desktop to the height you want to save
S Press"S" key, until the display will show "S --"
3.
Press "1",and the display will show alternately as "S-1" and the
desktop height.
4.
S
Press "S" key
the first memory position is set successfully. Similar progress
for 2 and 3 memory positions.
res
8
USAGE INSTRUCTION
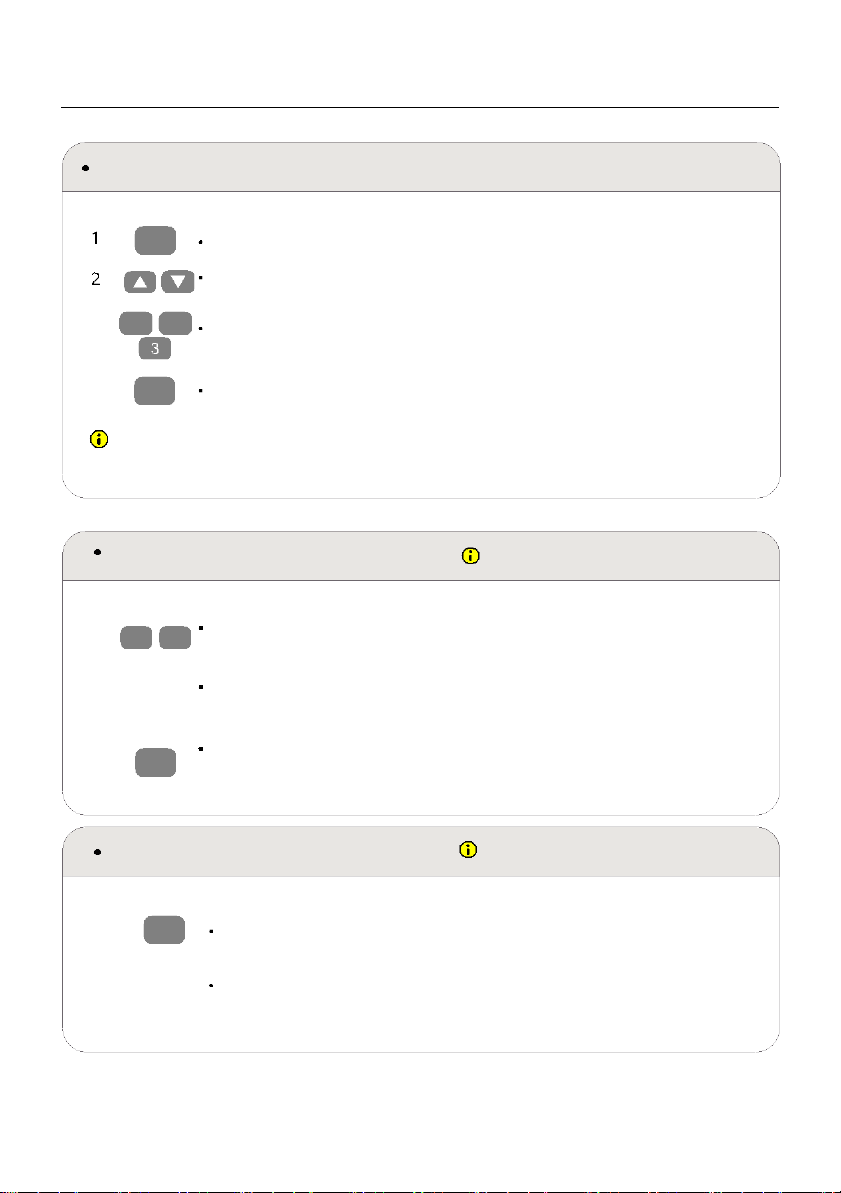
Anti-Collision Function
Before use, please make sure removing obstacle in
advance and human body is in the safe position.
1.
Once the desktop encounters any obstacle in its path, the screen displays
"E-2"
The desktop will move a defined distance in opposite direction, and it
would be used normally after removing the obstacle.
Movement Limit & Self-stop Positions
Enable this function only when you are
really need in some situation.
1.
S
Keep pressing the key "S" for 3 seconds until the display shows "S--" to enter
setup menu.
2. Press up key till the display flash as "HLP".
3.
1 H-P
Press "1", the display shows alternately as "H-P" and current height.
4. Keep pressing up or down key till the required upper limit position is reached.
5.
S
6.
2
Press "S",the desktop height will be shown and the self-stop position
has been set.
Press "2",the display will show alternately "L-P" and current height, keep
pressing down key till the low limit position is reached, press S the
Movement limit & self-stop position has been set.
Note: By this function would be used to limit the height movement of desk. Once it is set, the new
upper or lower limitation position will be stored.
Change the Displayed Unit (cm / inch)
1.
S
Keep pressing the key "S" until the display show "S--" to enter the setup
menu.
2. Unt
3.
1
4.
S
5. 2
Press up key until the display will show "Unt".
Press "1", and the display will show alternately as "Unt" and the
desktop current height value of by "cm".
Press "S" key to save the unit as cm.
Press "2", and the display will show alternately as "Unt" and the
desktop current height value by "inch", press key "S" to save the unit as
inch.
9
USAGE INSTRUCTION
Amend the Desktop Height Displayed
.
S
Keep pressing key "S" till the display show "A--" .
.
Briefly Press "Up" or "Down" key, until the display show alternately as "End"
and current height. (At this point, the units display mm or inch).
3.
1
2
Press "1", "2" ,"3" to choose the first, second and the third number, each click
will increase one value.
4.
S
Press "S" , the amending has been set.
Note: The function enables you to change the height shows on the display based on the actual measurement.
Plug Detection
The function can detect whether the motors
are connected properly.
1. E-3 rES
2.
3. rES
Once the display shows "E-3" and "rES", it means the motors are failed
to connected with control unit.
Please unplug the main cable, check all connection and make sure
all cables are connected properly, plug the main cable then.
Follow the Manual Reset Progress to reset system.
Reset to Factory Setting
With this function, you can make the
control unit to factory setting.
1.
S
Keep pressing "S" until the display shows "FAC".
2.
Press“S" again to confirm to store the control system to factory setting.
10
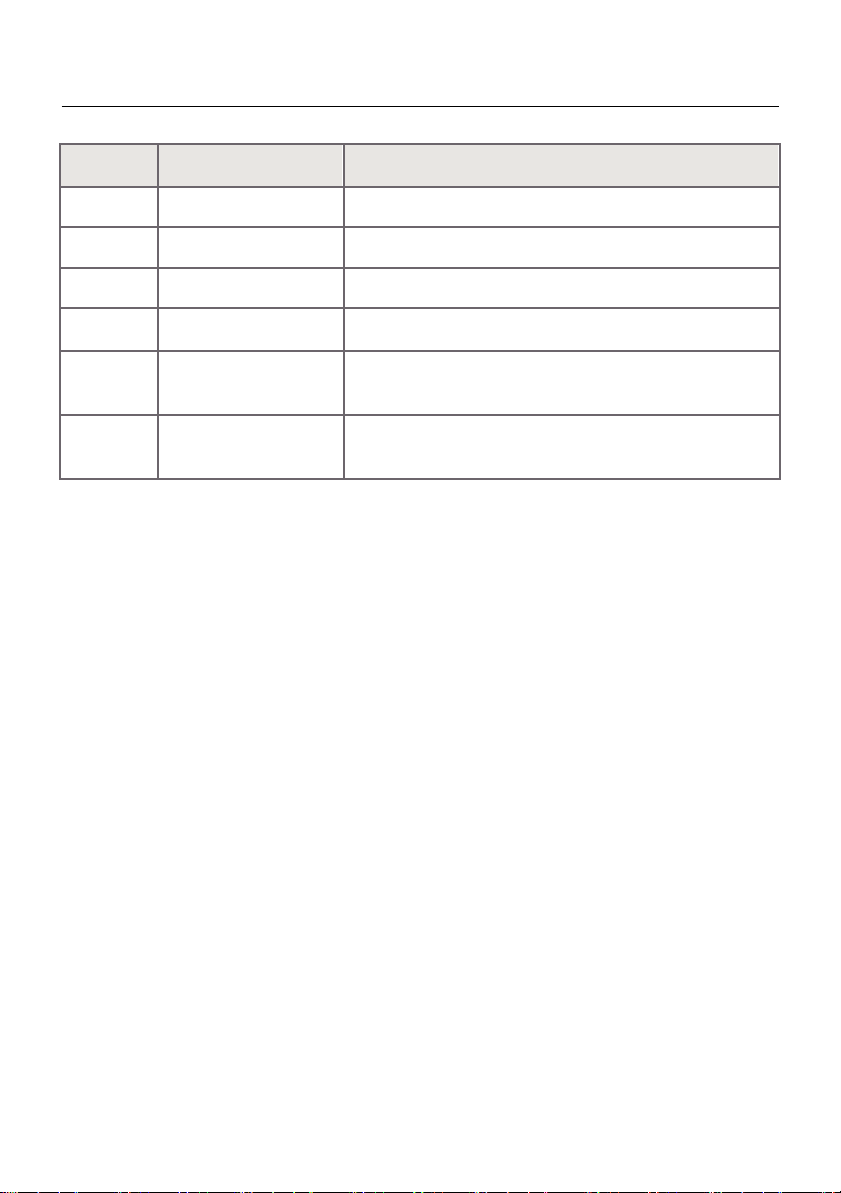
CODE MEANING & TROUBLE SHOOTING
Code
Information
Operating
rES
Manual Resetting
Refer to the progress of Manual Reset.
ovr
Over Load
Remove the load on desktop until it less than 1000N (220
lbs) before further operation
E-2
Anti-Collision Function
It can be used normally after removing the obstacle.
dut
Too Frequent Operation
Make the desk rest for 15minutes before further operation.
E-4
The Height Difference
Stop the operation and reset, refer to Manual reset
between Two Legs Exceed
1 Inch
E-3
Check the Connection
Check the cables and ensure they are well connected,
manual reset before re-use.

11
WARRANTY
AUSTRALIAN CONSUMER LAW
Many of our products come with a guarantee or warranty from the manufacturer. In
addition, they come with guarantees that cannot be excluded under the Australian
Consumer Law. You are entitled to a replacement or refund for a major failure and
compensation for any other reasonably foreseeable loss or damage.
You are entitled to have the goods repaired or replaced if the goods fail to be of
acceptable quality and the failure does not amount to a major failure. Full details of your
consumer rights may be found at www.consumerlaw.gov.au
Please visit our website to view our full warranty terms and conditions:
http://www.lifespanfitness.com.au/warranty-repairs
Warranty and Support:
Please email us at support@lifespanfitness.com.au for all warranty or support issues.
For all warranty or support related enquiries, please lodge a support ticket first by sending
us an email.