Loading ...
Loading ...
Loading ...
97
Before Use
Basic Guide
Advanced Guide
Wi-Fi Functions
Camera Basics
Auto Mode /
Hybrid Auto Mode
Other Shooting Modes
P Mode
Playback Mode
Setting Menu
Accessories
Appendix
Index
10
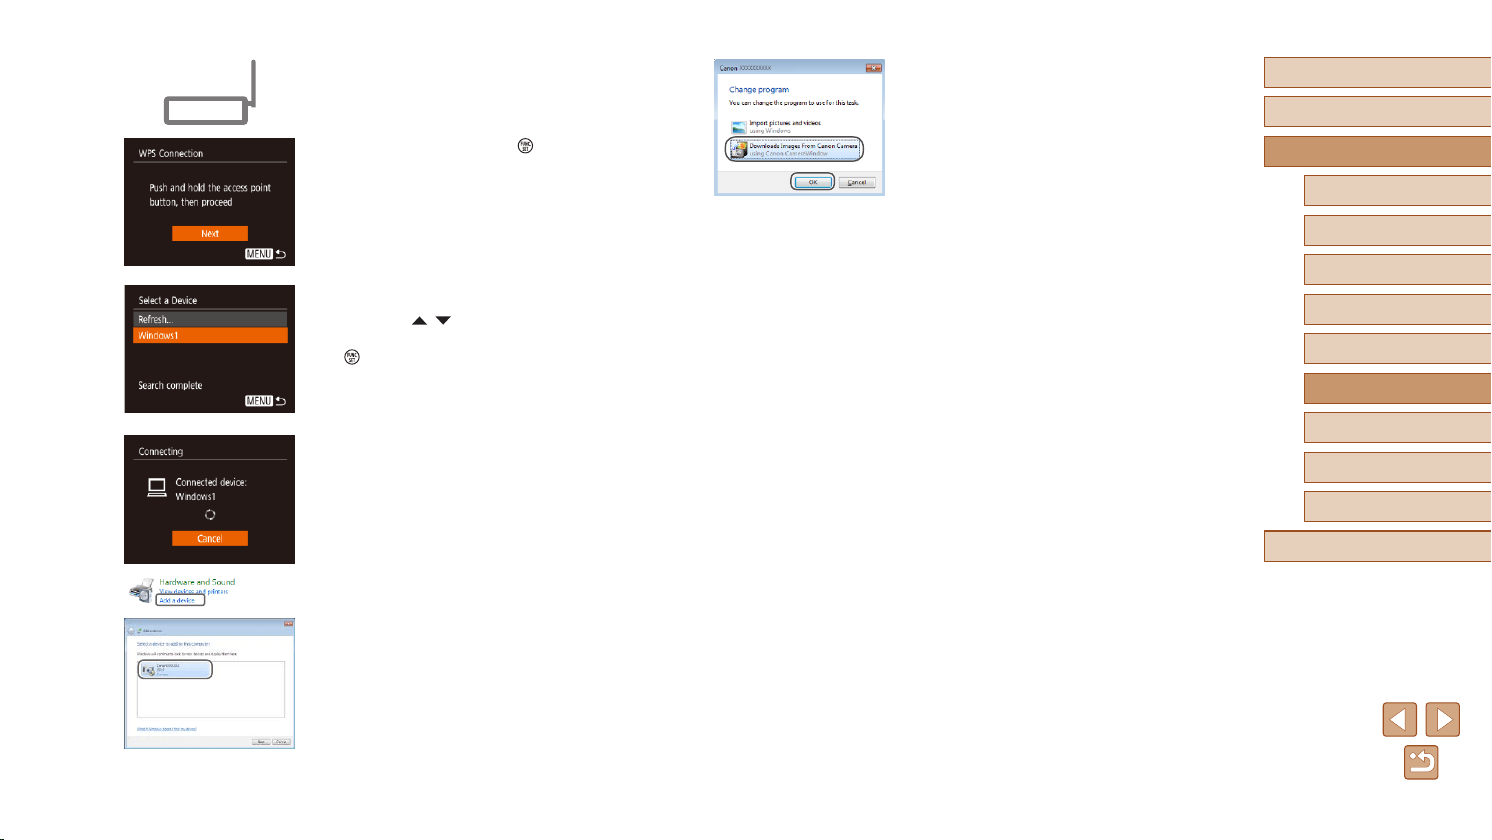
Display CameraWindow.
● Windows: Access CameraWindow by
clicking [Downloads Images From Canon
Camera].
● Mac OS: CameraWindow is automatically
displayed when a Wi-Fi connection is
established between the camera and
computer.
11
Import images.
● Click [Import Images from Camera], and
then click [Import Untransferred Images].
● Images are now saved to the Pictures
folder on the computer, in separate
folders named by date.
● Click [OK] in the screen that is displayed
after image import is complete.
● To view images you save to a computer,
use preinstalled or commonly available
software compatible with images
captured by the camera.
7
Establish the connection.
● On the access point, hold down the WPS
connection button for a few seconds.
● On the camera, press the [
] button to
go to the next step.
● The camera connects to the access point
and lists devices connected to it on the
[Select a Device] screen.
8
Choose the target device.
● Press the [ ][ ] buttons to choose the
target device name, and then press the
[ ] button.
9
Install a driver (rst Windows
connection only).
● When this screen is displayed on the
camera, click the Start menu on the
computer, click [Control Panel], and then
click [Add a device].
● Double-click the connected camera icon.
● Driver installation will begin.
● After driver installation is complete, and
the camera and computer connection
is enabled, the AutoPlay screen will be
displayed. Nothing will be displayed on
the camera screen.
Loading ...
Loading ...
Loading ...