
Loading ...
Loading ...
Loading ...
13
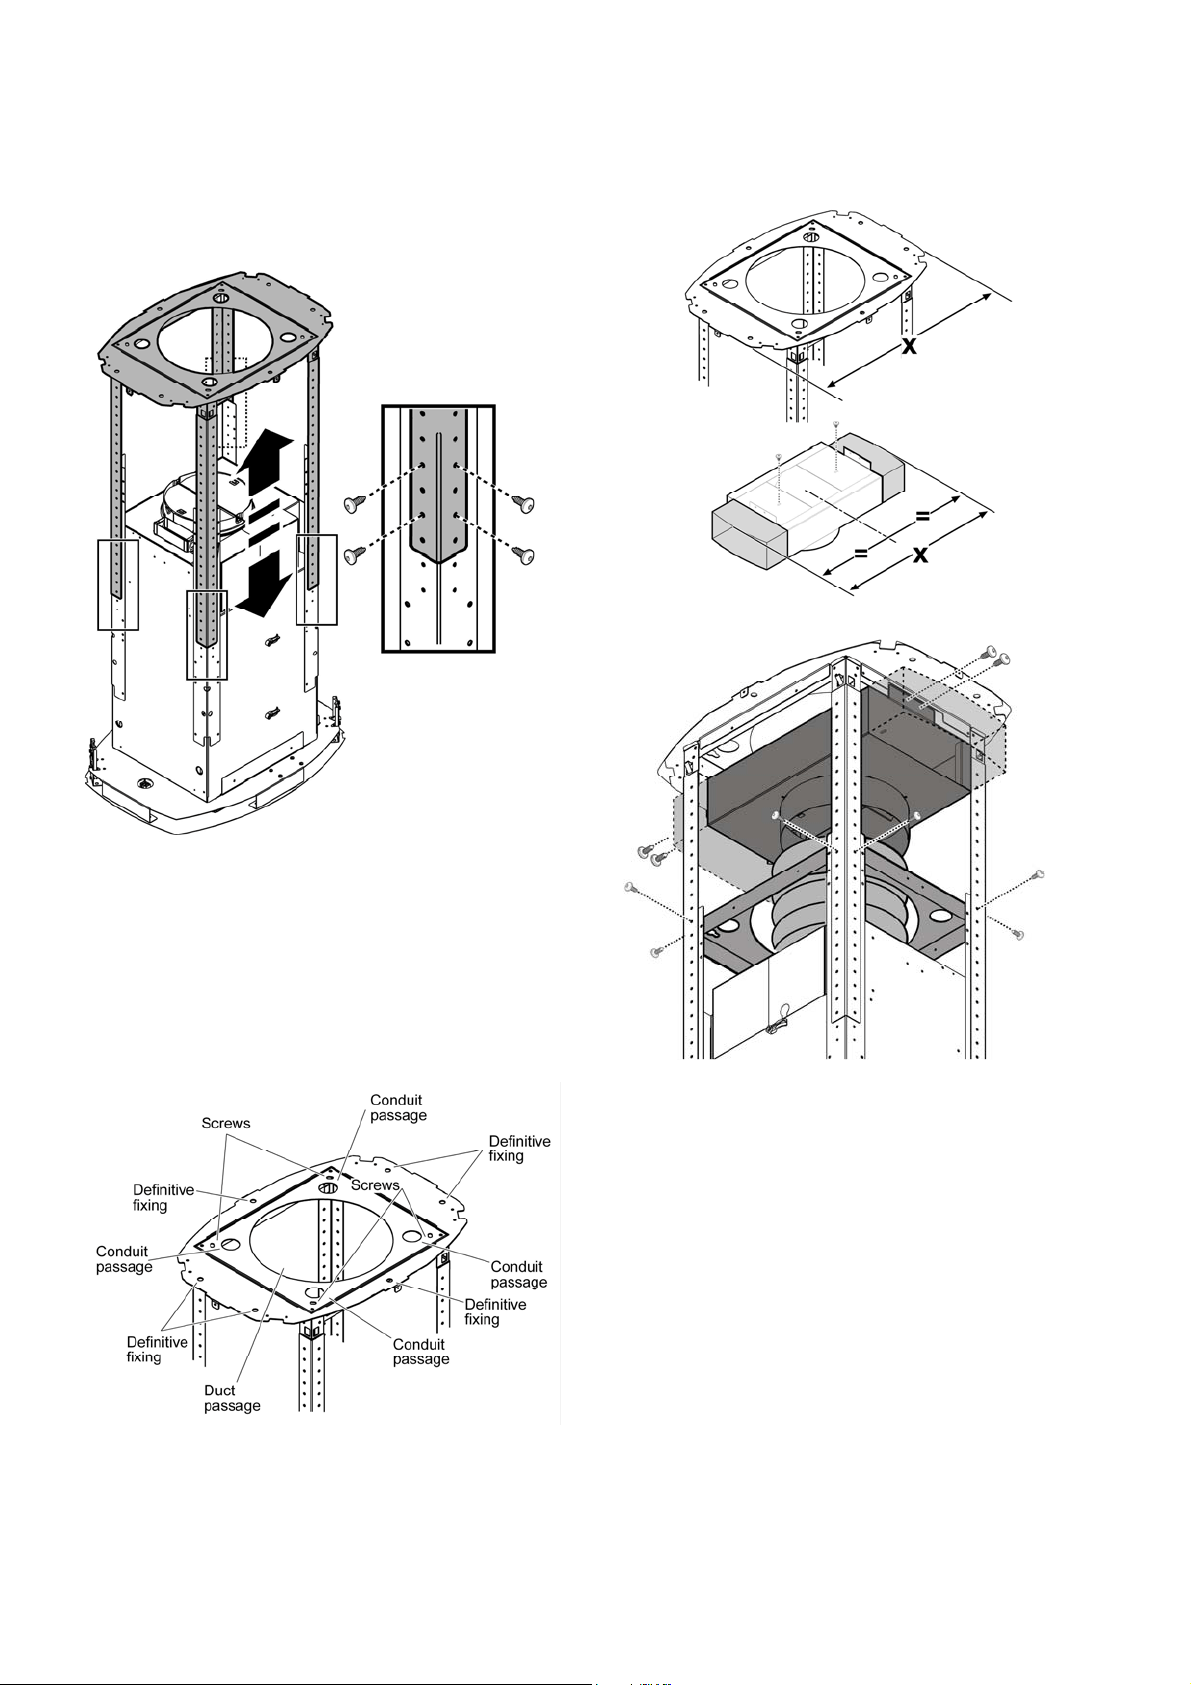
3. Regulate chimney structure and fix all assembly parts
with 4 screws to each bracket (16 screws in total), check
structure is well assembled.
Note: If supplied, temporarily remove the screws fixing
the reinforcement bracket to the perforated frame (keep
these screws in a safe place) and position it over the
motor assembly.
The bracket should be fixed in place again only after the
perforated frame has been fitted to the ceiling.
4. Hook the frame onto the 4 screws.
WARNING
Excessive Weight Hazard
Use two or more people to move and install range hood.
Failure to do so can result in back or other injury.
Make final angular adjustment to structure at ceiling if
necessary then securely tighten 4 ceiling lag screws.
Fit six additional screws for definitive fixing.
5. Fit deflector to the truss and secure it to the bracket
supplied using 4 screws, then connect the exhaust pipe
to the connection ring located on the deflector.
Note: If supplied, fix the reinforcement bracket to the
perforated frame in a position which is as near to the
middle as possible.
6.
Electrical connection
WARNING
Electrical Shock Hazard
Warning: Turn off power circuit at the service panel
before wiring this unit.
120 VAC, 15 or 20 Amp circuit required.
ELECTRICAL GROUNDING INSTRUCTIONS
THIS APPLIANCE IS FITTED WITH AN ELECTRICAL
JUNCTION BOX WITH 3 WIRES, ONE OF WHICH
(GREEN/YELLOW) SERVES TO GROUND THE
APPLIANCE. TO PROTECT YOU AGAINST
ELECTRIC SHOCK, THE GREEN AND YELLOW WIRE
MUST BE CONNECTED TO THE GROUNDING WIRE
IN YOUR HOME ELECTRICAL SYSTEM, AND IT
MUST UNDER NO CIRCUMSTANCES BE CUT OR
REMOVED.
Failure to do so can result in death or electrical
shock.
Loading ...
Loading ...
Loading ...