Loading ...
Loading ...
Loading ...
11
GAS CONVERSION
WARNING!
Isolate the appliance’s gas and electricity supplies
before performing any maintenance.
The gas conversion procedure involves two steps:
• Replacing the nozzles
• Burner minimum adjustment
WARNING: After performing the above-mentioned
procedures, the technician must apply the label
corresponding to the new gas regulation to replace
the old one. This label is contained in the bag of
spare nozzles.
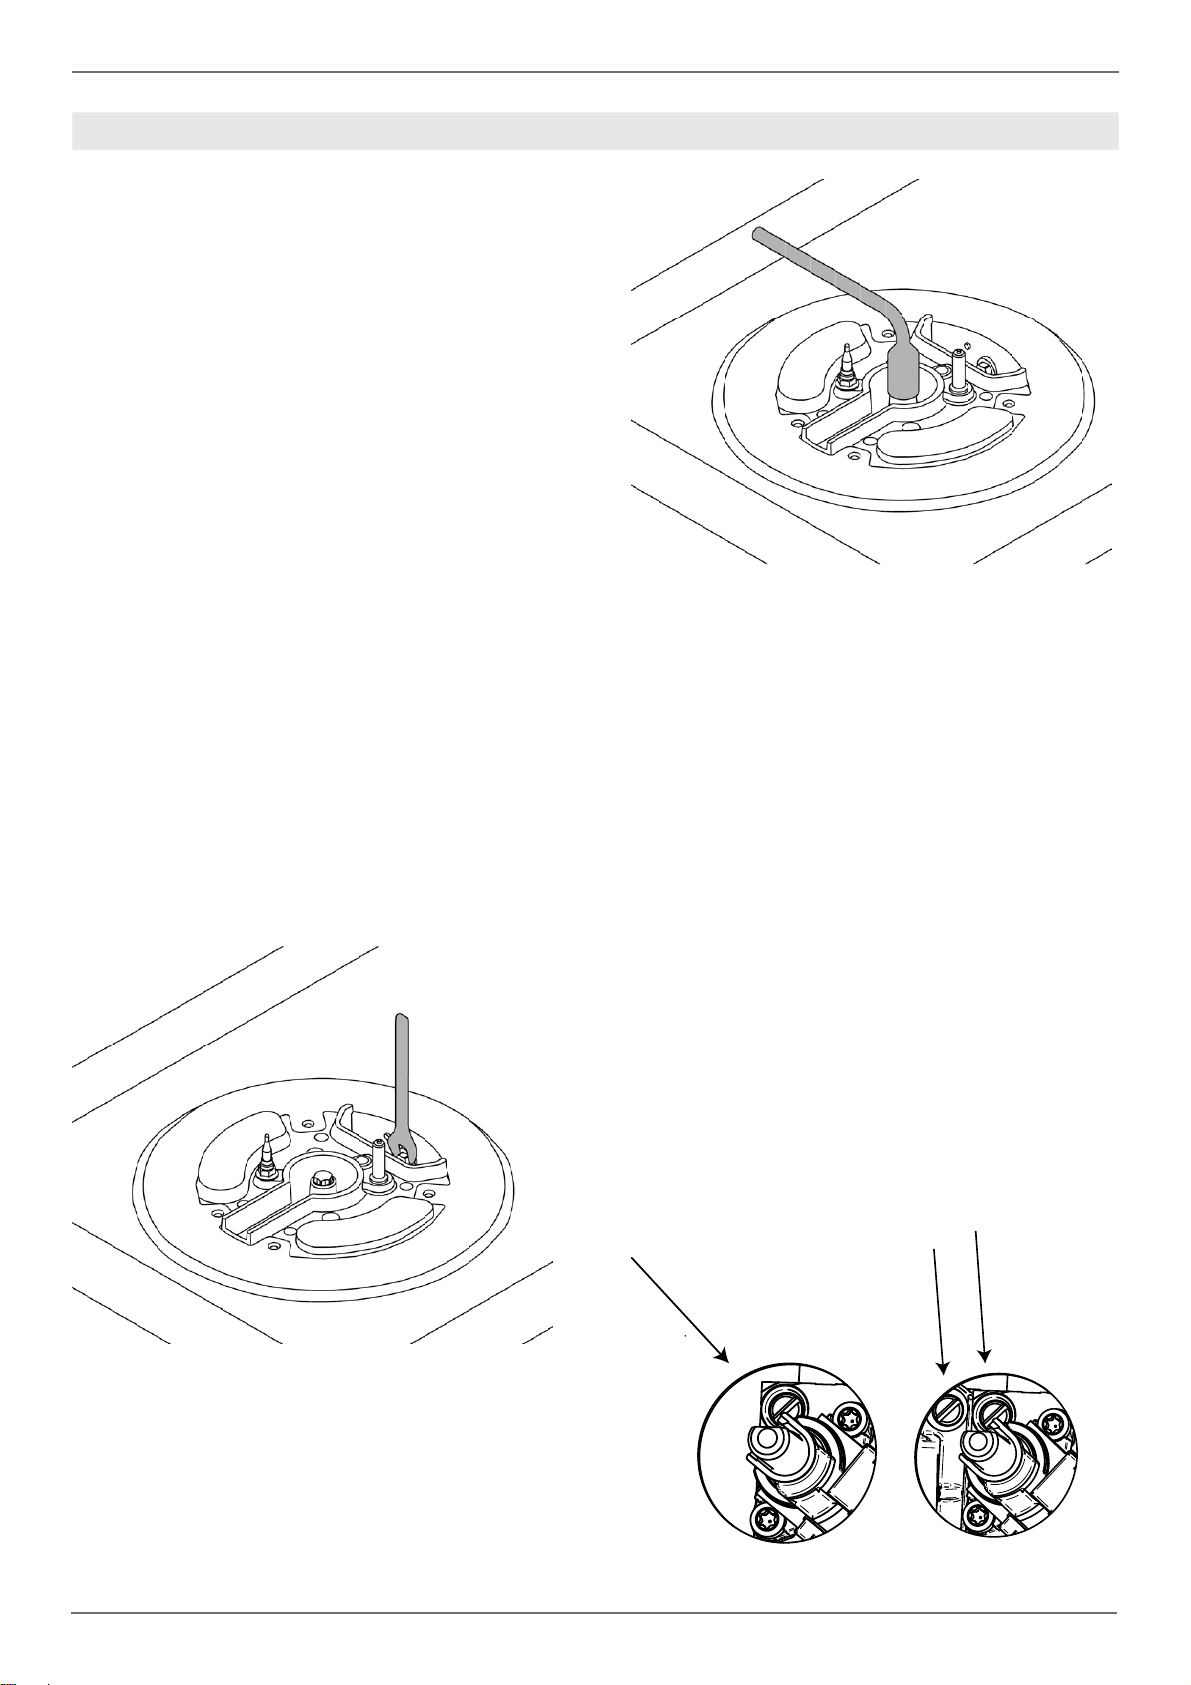
Step 1: Replacing the nozzles
Proceed as follows to change the burner nozzles:
lift the fl ame spreaders and unscrew the nozzles
using a 7 mm spanner, then replace them with
those required for new gas in accordance with the
TABLE (each nozzle has the number indicating its
diameter stamped on its body).
Keep the old nozzles in case they are required in
future.
Step 2: Burner minimum adjustment
Light the nozzle and turn the knob to the MINIMUM
position (small fl ame).
2) Remove the knob, which is simply friction fi tted
to the spindle.
3) Use a small screwdriver on the gold screw next
to the knob shank (see fi gure) and turn the fl ow
control screw to the left or right until the burner
fl ame is suitably regulated to the MINIMUM
setting.
For dual burner knobs there are two fl ow control
screws: screw A to adjust the inner ring, and screw
B to adjust the outer ring.
4) Ensure that, when moving from the MAXIMUM
to the MINIMUM position, the fl ame does not go
out.
WARNING: The above-mentioned regulation
must only be performed for burners running on
natural gas (methane): when using LPG (butane
or propane), the screw must be locked all the way
to the right.
/ Gas conversion
A
B
Loading ...
Loading ...
Loading ...