Loading ...
Loading ...
Loading ...

7
Note: Unit will auto shutoff after 2 minutes without use.
12. Always unplug the appliance when not in use.
USING THE PREPROGRAMMED FUNCTIONS
• Fill the assembled blender jar with the desired ingredients.
• Place the dual-opening lid on the jar.
• Place the jar on the base.
• Press desired preprogrammed button. The blender will automatically mix
and blend the following recipes with the press of a button:
- Smoothie: 35 seconds to blend fruits and vegetables to a smooth
consistency.
- Infuse: Create infused water in seconds.
- Shake/Mix: Create thick, smooth and creamy frozen treats or use to
combine other ingredients together.
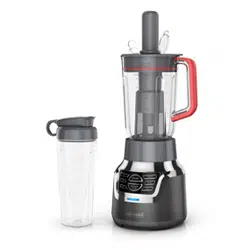
USING THE SINGLE SERVE JAR
Note: Do not blend hot liquids in the single serve jar.
1. Place the single serve jar on a flat surface with the open end facing up.
Fill the jar with ingredients. Do not fill ingredients past the max fill line.
Note: For best results, add ingredients in the following order:
A. Frozen ingredients
b. Fresh ingredients
c. Yogurts
d. Powders
e. Leafy greens
f. Liquids
2. Place blade assembly in the jar opening with blades down.
3. Place jar base onto jar and rotate clockwise until it is tight. It is
important to tighten to prevent leaking during blending.
4. Turn single serve jar upside down, place on the blender base, and twist
clockwise to lock.
5. Select speed 1 or use pulse/ice crush to blend to desired consistency.
6. Once blending has finished, remove the single serve jar by grasping the
jar base and turning it counter-clockwise then lifting it off the blender
base. Turn the jar over and place it on a flat surface.
Note: Always make sure blades have stopped moving before removing jar.
Important: If the jar gets stuck on the blending base or begins to loosen
from the jar base, follow these steps:
A. Unplug the unit
B. Turn the jar clockwise to tighten jar onto the jar base
7. Remove the jar base from the single serve jar by turning
counterclockwise. Then carefully remove blade assembly.
Loading ...
Loading ...
Loading ...