Loading ...
Loading ...
Loading ...
Maintenance Your new faucet is designed for years of trouble-free performance. Keep it looking new by cleaning it periodically with a soft
cloth. Avoid abrasive cleaners, steel wool and harsh chemicals as these will dull the finish and void your warranty.
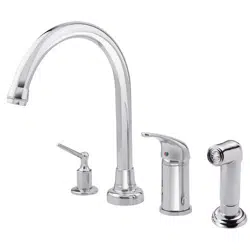
11.
Attach the supply hoses to the adaptor of the spout shank.
Una la manguera de alimentación al adaptador del vástago del vertedor.
Fixer le tuyau d’alimentation à l’adaptateur de la tige du bec.
Apply pipe tape. Attach the water supply hoses to the copper inlet tubes of
the faucet. (Supply hoses are not included).
Aplique cinta selladora para tuberías. Coloque las mangueras de suministro
de agua en los tubos de cobre de admisión del grifo. (Las mangueras de
suministro no están incluidas).
Appliquez du ruban pour tuyau. Fixez les flexibles d'alimentation en eau aux
tuyaux d'entrée en cuivre du robinet. (Les flexibles d'alimentation ne sont pas
compris).
12.
Apply pipe tape to the inlet port. Slip the coupling nut onto
the inlet port and tighten with a wrench.
antes de realizar la instalación, cierre el suministro principal
de agua girando las válvulas en sentido horario
Appliquez du ruban pour tuyau à l'orifice d'entrée. Glissez l'écrou
de raccordement sur l'orifice d'entrée et serrez-le à l'aide d'une clé.
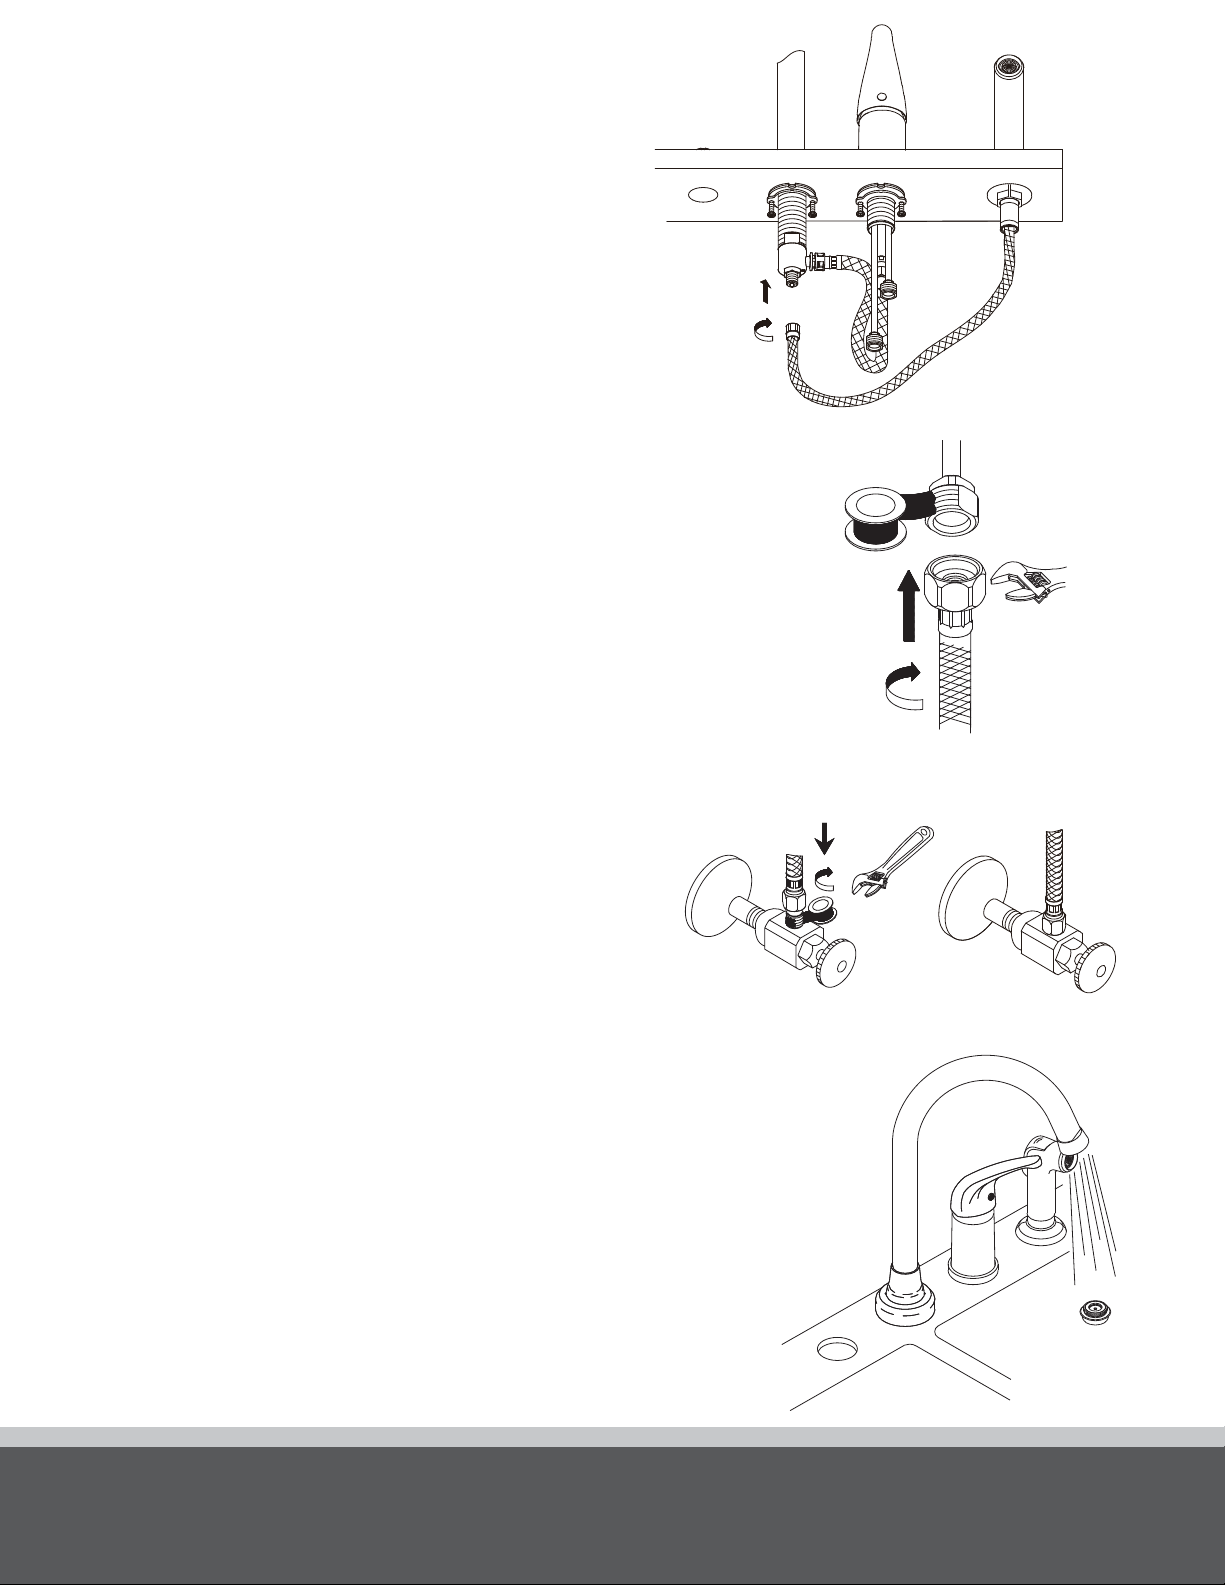
13.
14.
After installing the faucet, remove the aerator and turn on the water to
remove any left over debris. Re-assemble the aerator.
Despues de instalar el grifo, quite el aereador y abra el suministro del
agua para remover cualquier desecho que haya quedado. Reemsamble el aereador.
Lorsque l’installation du robinet est terminée, ôter le brise-jet et faire couler
l’eau pour enlever tout débris pouvant se trouver à l’intérieur. Remettre le brise-jet en place.
Loading ...
Loading ...