Loading ...
Loading ...
Loading ...
Other features 11
2 To adjust projection to the correct position,
press on remote control to access the
settings menu, then navigate to select Proj.
Direc. - Rev. front proj., then press OK.
Rear table
1 Place the projector on a table behind the
projection screen. A special rear projection
screen is required.
2 To adjust projection to the correct position,
press on remote control to access the
settings menu, then navigate to select Proj.
Direc. - Rear proj., then press OK.
Rear ceiling
1 Mount the projector on ceiling with upside
up behind the projection screen. To mount
the projector on ceiling behind the screen,
a projector mount and a special rear
projection screen is required.
2 To adjust projection to the correct position,
press on remote control to access the
settings menu, then navigate to select Proj.
Direc. - Rev. rear proj., then press OK.
5
Other features
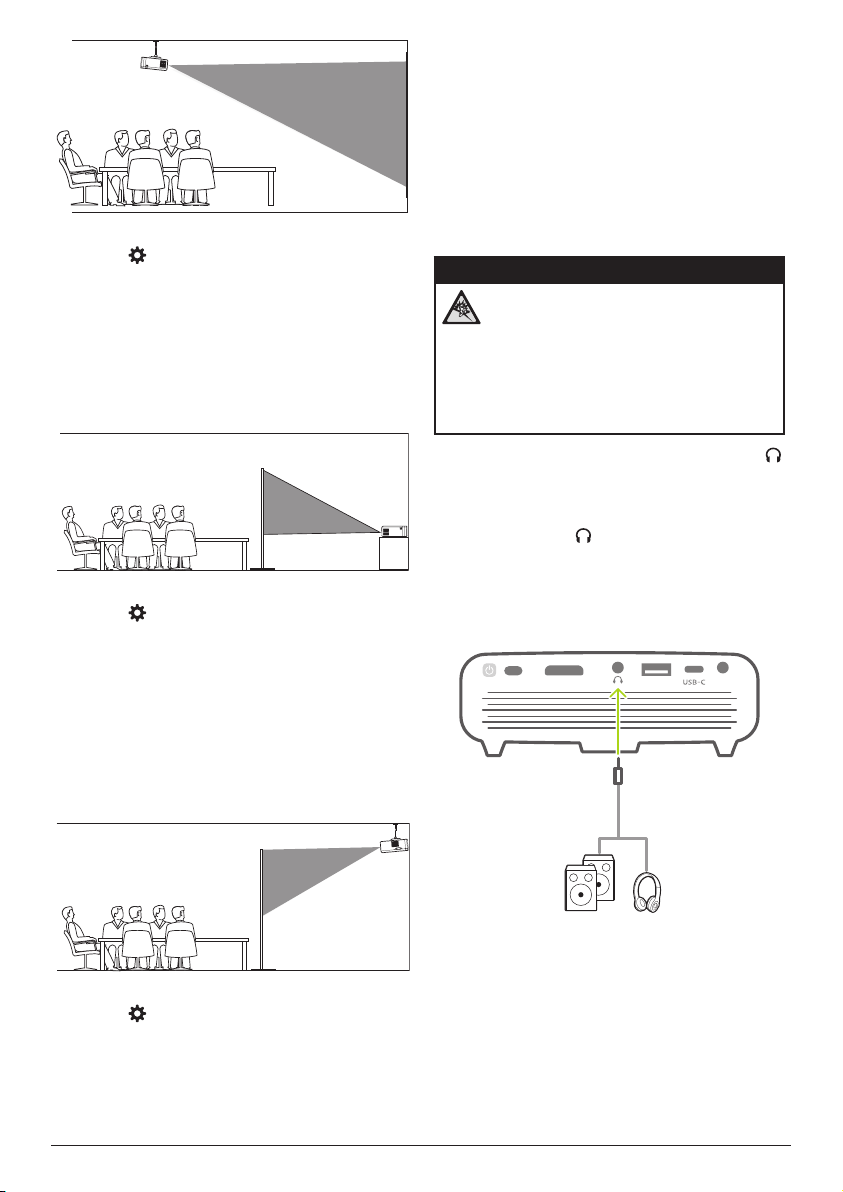
Listen through external
speakers or headphones
Connect external speakers or headphones to
the projector. With this connection, audio from
the projector is played through the external
speakers or headphones.
DANGER!
Danger of hearing damage!
Before connecting the headphones,
turn down the volume on the projector.
Do not use the projector over a longer
time at high volume – especially when
using headphones. This could lead to
hearing damage.
1 Using a 3.5 mm audio cable, connect the
connector on the projector to the analogue
audio input (3.5 mm jack, or red and white
jacks) on the external speakers.
Or connect the connector on the
projector to your headphones.
• The speakers of the projector are
deactivated automatically when the
external speakers or headphones are
connected to the projector.
HDMI USB
DC
When connecting to the headphones, use the
volume control on the remote control (or on the
projector) to adjust the volume to a comfortable
level.
Loading ...
Loading ...
Loading ...