User Guide Grill
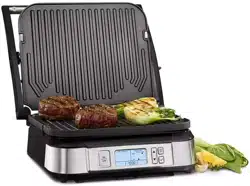
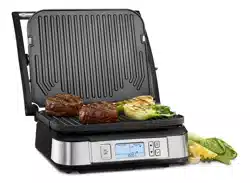
Parts and Features
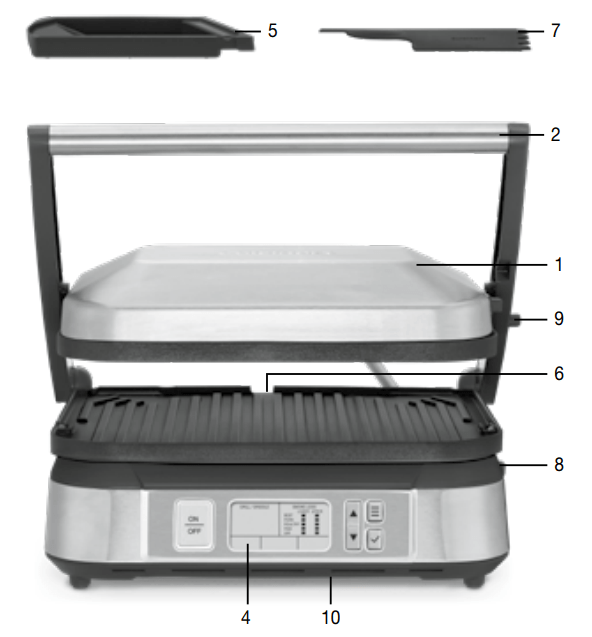
1. Top Cover
Solid construction with stainless steel, self-adjusting cover, adjusts to accommodate thickness of food.
2. Stainless Steel Handle
Sturdy stainless steel handle for opening and closing top cover.
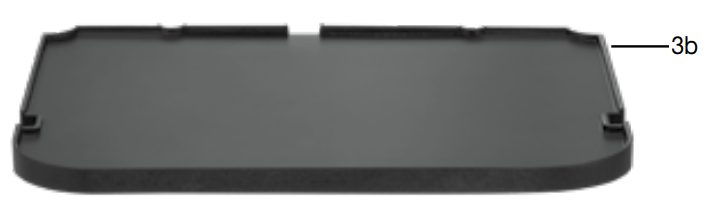
3. Removable and Reversible Cooking Plates
Nonstick and dishwasher safe for easy cleanup.
a. Grill Side: Perfect for grilling steak, burgers, chicken and vegetables.
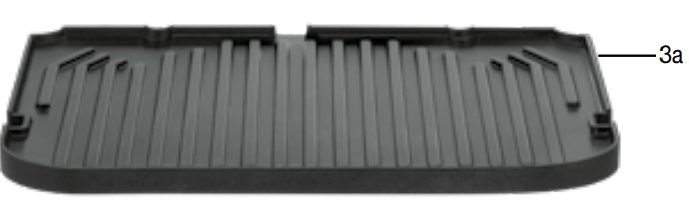
b. Griddle Side: Prepare flawless pancakes, eggs, bacon and seared foods.

4. Control Panel and Display
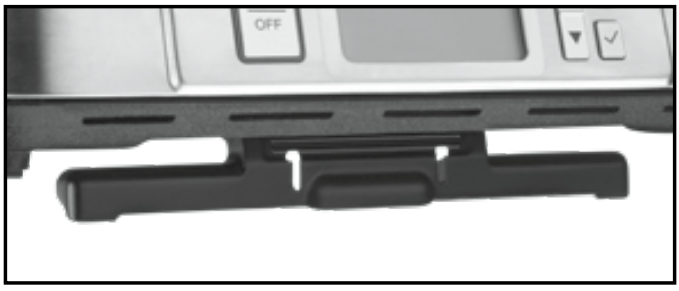
5. Drip Tray
Collects grease and removes from base for easy cleanup (top rack dishwasher safe).
6. Drip Spout
Allows grease to drip into the drip tray.
7. Cleaning/Scraping Tool
Helps clean grill and griddle plates after cooking (top rack dishwasher safe).
8. Plate Release Buttons
Push in to release and remove cooking plates.
9. Hinge Release
Lever Allows the cover to extend back for cooking in alternate positions.
10. Foot Extension
Fold-out front foot extension for cooking in the Smoke-less Mode.
11. BPA Free
All parts that come in contact with food are BPA free.
Before the First Use
Remove all packing materials and any promotional labels or stickers from your grill. Be sure all parts (listed under Parts and Features) of your new appliance have been included before discarding any packing materials. You may want to keep the box and packing materials for use at a later date.
ATTENTION: Be sure to unpack your new Cuisinart® Smoke-less Contact Griddler® carefully. It comes with two accessories: an integrated drip tray inserted at the base of the unit, and a scraping tool. The Smokeless Contact Griddler® base and cover will become hot during cooking. If you need to adjust the cover into an alternate position, be sure to use an oven mitt to protect your hand. The reversible grill and griddle plates are interchangeable.
Before using your Cuisinart® Smoke-less Contact Griddler® for the first time, remove any dust from shipping by wiping the base, cover and control panel with a damp cloth. Thoroughly clean cooking plates, drip tray and scraping tool. Refer to Assembly Instructions for plate removal.
Getting to Know Your Control Panel

1. ON/OFF Button
Press to turn unit on and off.
2. Large LCD
The backlit LCD screen is easy to read; it displays the cooking function (Grill/Griddle or Smoke-less), Upper Plate Temperature, Lower Plate Temperature, Timer, Sear, Upper and Lower Preheat, and food selections.
3. Up and Down Arrow Buttons
Use the ▲ and ▼ buttons to increase or decrease the upper and lower plate temperatures, select food while in Smoke-less Mode and to set the timer if using.
4. Select Button
Use to Select cooking function; Grill/Griddle or Smoke-less Mode.
5. Confirm Button
Use to confirm your cooking function (Grill/ Griddle or Smoke-less Mode), confirm the temperature(s), food(s) and start the timer.
START-UP SCREEN
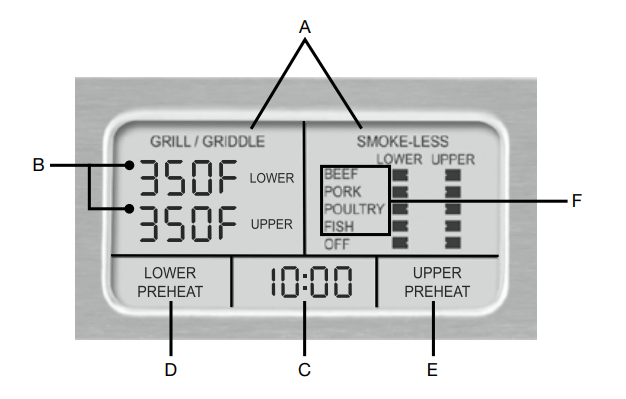
A. Cooking Function
Grill/Griddle or Smoke-less.
B. Upper and Lower
Plate Temperatures
175˚F – Sear in 25˚ increments.
C. Timer
Set to count up or count down.
See Operating Instructions.
D. Lower Plate Preheat
Appears in LCD when Lower Plate is preheating.
E. Upper Plate Preheat
Appears in LCD when Upper Plate is preheating.
F. Food Selections for Upper and Lower Plates
Appear in LCD while in Smoke-less Mode.
The Smoke-less Contact Griddler® is the ultimate kitchen appliance, offering you seven separate cooking options. Simply flip the reversible cooking plates and adjust the hinge to use as a contact grill, panini press, full grill, full griddle, half grill/half griddle, or smoke-less grill with independent temperature controls. See Assembly Instructions and Operating Instructions.
CONTACT GRILL
Use the Smoke-less Contact Griddler® as a Contact Grill to cook burgers, boneless pieces of meat and thin cuts of meat and vegetables. The Contact Grill function works best when you want to cook something in a short amount of time or when you are looking for a healthy method of grilling.
When cooked on the Contact Grill, food will cook quickly because you are grilling both sides of the food at the same time. The ribs on the grill side of the plates, combined with the grease spout at the rear of the plate, allow the grease to drip from the meat and drain off the plates.
When the Smoke-less Contact Griddler® is used as a Contact Grill, the grill side of both plates is recommended. Rest the cover evenly on top of the food until it has reached the desired, cooked temperature.
The Smoke-less Contact Griddler® was designed with a unique handle and hinge that allow the cover to adjust to the thickness of the food. You can easily grill anything from a thinly sliced potato to a thick sirloin steak with even results.
When cooking more than one food item in the Contact Grill, it is important that the thickness of each food item is consistent, so the cover will close evenly on the food.
PANINI PRESS
Use the Smoke-less Contact Griddler® as a Panini Press to grill sandwiches, breads and quesadillas.
The word panini is Italian for grilled sandwiches. Panini can include any combination of ingredients, such as vegetables, meat and cheese layered between two pieces of fresh-baked bread. The sandwich is then pressed between two grill or griddle plates to toast the bread and warm the sandwich. Experiment to make a variety of savory or sweet sandwiches for any meal. We recommend using fresh-baked bread to produce the best-tasting panini.
Popular breads used for panini are focaccia (a flat bread frequently baked with rosemary, salt and onion on top), ciabatta (a rectangular bread with a slightly domed crust) and thick slices of classic Italian bread. But any type of sliced bread or roll can be used to make a great panini!
When the Smoke-less Contact Griddler® is used as a Panini Press, the grill side of both plates is recommended. We recommend the grill side of the plates because traditional-style panini sandwiches have grill marks on the bread. However, depending upon the type of sandwich you are preparing, you may wish to use the griddle side of the plates or any combination of the two. The Smoke-less Contact Griddler® functions as a Panini Press in the same manner that it functions as a Contact Grill. The Smoke-less Contact Griddler® was designed with a unique handle and hinge that allow the cover to adjust to the thickness of the sandwich you are preparing, and to rest there evenly. Light pressure can be applied to the handle to press and heat the sandwich to your liking.
When cooking two or more panini, it is important that the thickness of the sandwiches is consistent, so the cover will close evenly on all the panini.

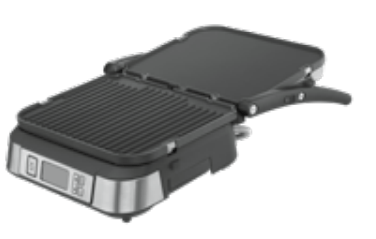
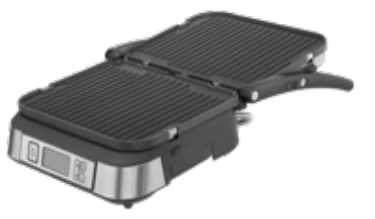
FULL GRILL
Use the Smoke-less Contact Griddler® as a Full Grill to cook burgers, steak, poultry (we do not recommend cooking bone-in chicken, since it does not cook evenly on an open grill), fish and vegetables. Full Grill refers to using the Smoke-less Contact Griddler® in a fully open position, creating a double flat cooking surface. In this position, the foods you are grilling will have to be turned over for cooking. When the Smoke-less Contact Griddler® is used as a Full Grill, the grill side of both plates should be used.
Cooking on the Full Grill is the most versatile method of using the Smoke-less Contact Griddler®.
With the Full Grill, you have double the surface area (200 sq. inches) for grilling. You have the option of cooking different types of foods on separate plates without combining their flavors, or cooking large amounts of the same type of food.
The Full Grill also accommodates different cuts of meat with varying thicknesses, allowing you to cook each piece to your liking.
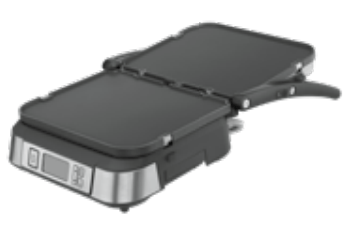
FULL GRIDDLE
Use the Smoke-less Contact Griddler® as a Full Griddle to cook pancakes, eggs, French toast, hash browns and breakfast meats.
When you use the Smoke-less Contact Griddler® as a Full Griddle, open the cover so it lies flat, creating a double, flat cooking surface. In this position, the foods you are preparing will have to be turned over for cooking. When using this cooking function, the griddle side of both plates should be used.
Cooking on the Full Griddle is a wonderful way to prepare breakfast for two or for a large family. The large surface area allows you to cook a variety of different foods at the same time, or large amounts of your favorite food.
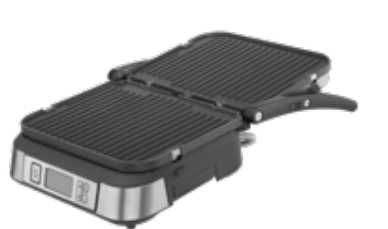
HALF GRILL/HALF GRIDDLE
Use the Smoke-less Contact Griddler® as a Half Grill/ Half Griddle in order to create full meals like bacon and eggs or steak and potatoes at the same time.
When using the Smoke-less Contact Griddler® as a Half Grill/Half Griddle, simply place the unit in the flat position and insert the grill plate on the lower portion of the Smoke-less Contact Griddler® and the griddle plate on the upper portion.
SMOKE-LESS MODE
Smoke-less mode can be used with any of the previous five cooking options: Contact Grill, Panini Press, Full Grill, Full Griddle and Half Grill/Half Griddle. Smoke-less mode offers precise temperature control based on the foods being cooked, and limits the amount of smoke generated by reducing the amount of fats that are burned with certain foods.
To use the Griddler in Smoke-less mode see Smokeless Mode under Assembly Instructions.
DUOCONTROL™ HEATING ADVANTAGE
Provides independent temperature control for each plate so you can program the top and bottom plates to reach different temperatures in order to cook different foods at the same time.
Operating Instructions
When you are ready to begin cooking and the Smokeless Contact Griddler® is positioned on a flat surface, make sure the drip tray, desired plate surfaces and cooking position(s) are set. Plug your Smoke-less Contact Griddler® into an electrical outlet and press any button. The LCD will show the start-up screen for several seconds.
Select Cooking Function:
When GRILL/GRIDDLE is flashing, this indicates you need to select and confirm your cooking function. To do so, press the Select button until your desired function is flashing: Grill/Griddle or Smoke-less Mode. To confirm your cooking function, press the Confirm button. The selected cooking function is now confirmed and no longer flashing.
COOKING IN GRILL/ GRIDDLE MODE
Set Temperature:
After you have confirmed GRILL/GRIDDLE, the words LOWER, UPPER and the temperature will flash in sequence. At this point, you have three options for setting the plate temperatures: Set the lower plate, set the upper plate or set both plates to be the same temperature. Press the Confirm button to select the plate(s) you wish to set the temperature for. Once the plate(s) have been confirmed, the word LOWER and or UPPER will go solid and the associated temperature will start flashing.
To set temperature of either the upper or lower plate, press the ▲button to increase temperature or the ▼ button to decrease temperature. This will allow you to scroll through temperature(s) at 25-degree increments. When your desired temperature is flashing, press the Confirm button. If you are only using one plate to cook, select OFF for the plate you do not wish to cook on.
Follow the above steps to set the temperature for the other plate. If you wish to cook on one plate in SMOKE-LESS MODE, press and hold the Select button to go back to function Selection mode.
NOTE: If both plates are confirmed, use the ▲ button and ▼ button to adjust both temperatures at the same time.
With the confirmed temperature(s) flashing, your Smoke-less Contact Griddler® will begin to preheat, and the word(s) LOWER PREHEAT and/or UPPER PREHEAT will appear for the plate(s) that are in use. Once set temperature(s) is reached, the unit will beep 3 times. Temperature(s) will become solid and the word(s) PREHEAT will disappear.
Set Timer:
After your Smoke-less Contact Griddler® has reached the set temperature, the timer will appear in the LCD, flashing 00:00.
• Countdown Timer – To select your cook time to count down, press the ▲button (increase time) or the ▼ button (decrease time). Press and hold the ▲or ▼to adjust in 1 minute increments. NOTE: Timer adjusts in 30-second increments (60:00 max cooking time).
Add food to the Smoke-less Contact Griddler®, then press the Confirm button to start the timer. If timer is not set within 1 minute of preheating, the flashing 00:00 will change to _ _ : _ _. The timer can be activated at any time during the cooking process by pressing the ▲or ▼ button. After set time has elapsed, the Smoke-less Contact Griddler® will beep 3 times and the timer will begin counting up – this indicates how much time has elapsed after the cooking time has expired. Unit will also beep 3 times every 10 seconds continuously until cooking is stopped. To disable counting up and beeping, press Confirm button.
• Count-Up Timer – After the Smoke-less Contact Griddler® is preheated, you will see 00:00 flashing in the LCD. Add food to the Smoke-less Contact Griddler® and press the Confirm button. Timer will begin counting up from 00:00 (60:00 max cooking time). If the timer reaches 60:00, the unit will beep 3 times and then turn off.
Changing Settings:
To change any of your settings (Cooking Function, Temperature and Time) at any time during use, press and hold the Select button to scroll through Time, Temperature and Function continuously, until the Select button is released. When button is released, the setting you wish to change should be flashing. After desired setting is changed and confirmed, the display will move to the next function.
COOKING IN SMOKE-LESS MODE
In Smoke-less Mode there are 4 preset food groups: Beef, Pork, Poultry and Fish. You also have the option of turning either plate off, which is the default setting.
Food selection:
After you have confirmed SMOKE-LESS MODE, the words LOWER and UPPER will flash in sequence. At this point you have three options: Set the lower plate, set the upper plate or set both plates to be the same food group. Press Confirm to select the plate(s) you wish to set the food group for. Once the plate(s) have been confirmed, the word LOWER and/or UPPER will go solid and the associated food group will start flashing. If you are only using one plate to cook, select OFF for the plate you do not wish to cook on.
Follow the above steps to set the food group for the other plate. If you wish to cook on one plate in GRILL/ GRIDDLE MODE, press and hold the Select button to go back to function Selection mode.
NOTE: If both plates are confirmed, use the up (arrow) button and down (arrow) button to adjust both food groups at the same time.
With the confirmed food group(s) flashing, your Smoke-less Contact Griddler® will begin to preheat, and the word(s) LOWER PREHEAT and/or UPPER PREHEAT will appear for the plate(s) that are in use.
Once set plate(s) are preheated, the unit will beep 3 times. The boxes associated with the selected food group(s) will become solid and the word(s) PREHEAT will disappear.
Tips & Hints
• It may take up to 10 minutes to reach operating temperature, depending on the temperature level that was set.
• For cooking recommendations, refer to the Cooking Guide and Food Temperature Chart on page 24 of the Recipe Book.
• Always exercise caution when handling the Smoke-less Contact Griddler® during cooking, as the Smoke-less Contact Griddler® housing will become hot during use. To open the Smoke-less Contact Griddler®, grasp the handle. The arms are made of die-cast aluminum and will become hot during use. Do not touch them during or immediately following cooking.
• The cover is made of stainless steel and will become very hot and should not be touched during or immediately following cooking. If you need to adjust the cover, be sure to use an oven mitt to prevent burns.
• The lower housing is made of plastic and can become very warm. If you need to move the Smokeless Contact Griddler® during cooking, be sure to handle it from the base only while wearing an oven mitt. Do not touch the cover.
• Allow the Smoke-less Contact Griddler® to cool down before handling (at least 30 minutes).
• The first time you use the Smoke-less Contact Griddler®, it may have a slight odor and may smoke a bit. This is normal and common to appliances with nonstick surfaces.
• The Smoke-less Contact Griddler® comes with a black cleaning/scraping tool. This can be used for cleaning both the grill and griddle sides of the plates after you have finished cooking and the unit has cooled down completely (at least 30 minutes). Using the cleaning tool on a hot surface for too long will cause the plastic to melt.
• Never use metal utensils, as they will scratch the nonstick plates.
• Never leave plastic utensils in contact with the hot grill plates. This includes the provided cleaning tool.
• In between recipes, use a wooden or heatproof plastic utensil to scrape excess food buildup through grease channels and into drip tray. Then, carefully wipe off any residue with a paper towel before proceeding with the next recipe.
Cleaning and Maintenance
Allow the unit to cool down for at least 30 minutes before handling.
• Once you have finished cooking, press the ON/OFF button to power off and unplug the power cord from the wall outlet.
• Use the cleaning/scraping tool to remove any leftover food from the cooking plates. The scraping tool can be washed by hand or in the top rack of the dishwasher.
• Dispose of grease from the drip tray once cooled. The drip tray can be cleaned by hand or in the top rack of the dishwasher.
• Press the plate release buttons to remove plates from the housing. Be sure that the plates have cooled completely before handling (at least 30 minutes). The cooking plates can be washed in the dishwasher. Do not use metallic objects, such as knives or forks, for cleaning. Do not use a scouring pad for cleaning; the nonstick coating can be damaged.
• If you have been cooking seafood, wipe the cooking plates with lemon juice to prevent seafood flavor transferring to the next recipe.
• The housing base, cover and control panel can be wiped clean with a soft, dry cloth. For tough stains, dampen cloth. Never use an abrasive cleaner or harsh pad. Any other servicing should be performed by an authorized service representative.