Loading ...
Loading ...
Loading ...
13
ENGLISH
INSTALLATION INSTRUCTIONS
Unpacking and removing shipping bolts
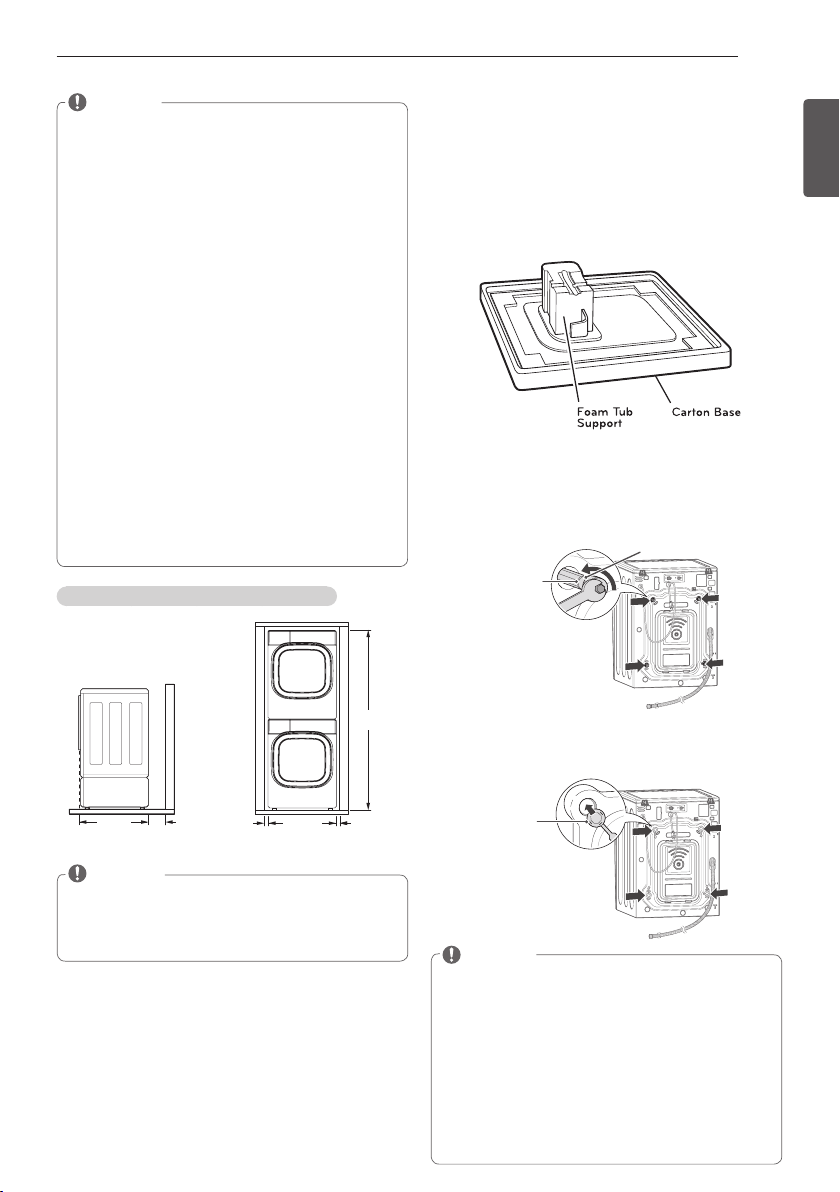
When removing the washer from the carton base,
be sure to remove the foam drum support in the
middle of the carton base.
If you must lay the washer down to remove the
base packaging materials, always lay it carefully on
its side.
DO NOT lay the washer on its front or back.
1
Starting with the bottom two shipping bolts,
use the wrench (included) to fully loosen all four
shipping bolts by turning them counterclockwise.
Remove the bolt assemblies by wiggling them
slightly while pulling them out.
Shipping
bolt
Retainer
2 Locate the four hole caps included in the
accessory pack and install them in the
shipping bolt holes.
Cap
NOTE
y
Save the bolt assemblies for future use. To
prevent damage to internal components,
DO NOT transport the washer without
reinstalling the shipping bolts.
y
Failure to remove shipping bolts and
retainers may cause severe vibration and
noise, which can lead to permanent damage
to the washer. The cord is secured to the
back of the washer with a shipping bolt to
help prevent operation with shipping bolts in
place.
NOTE
y
The floor must be strong and rigid enough to
support the weight of the washer, when fully
loaded, without flexing or bouncing. If your
floor has too much flex, you may need to
reinforce it to make it more rigid.
A floor that is adequate for a top-loading
washer may not be rigid enough for a front
loading washer, due to the difference in the
spin speed and direction. If the floor is not
solid, your washer may vibrate and you may
hear and feel the vibration throughout your
house.
y
Before installing the washer, make sure
the floor is clean, dry and free of dust, dirt,
water and oils so the washer feet can not
slide easily. Leveling feet that can move or
slide on the floor can contribute to excess
vibration and noise due to poor contact with
the floor.
y
If a drip pan must be used, take extra care
to follow the instructions provided with the
drip pan and make sure the leveling feet are
adjusted for firm and even contact with the
pan. Use of drip pans and failure to properly
level the machine may result in increased
vibration and noise during operation.
Installing on a pedestal or stacking kit
33.1"
(84 cm)
4"
(10 cm)
29"
(73.6cm)
1"
(2.5 cm)
1"
(2.5 cm)
81.61"
(207.3 cm)
NOTE
y
Refer to the instructions packaged with the
optional PEDESTAL or STACKING KIT before
installing with a PEDESTAL or a STACKING
KIT.
Loading ...
Loading ...
Loading ...