
Loading ...
Loading ...
Loading ...
www.PyleUSA.com
3
Fig.A Fig.B
4“AA”Batteries(Not Included)
Fig.1 Fig.2 Fig.3
LITHIUM BATTERY CHARGING INSTRUCTION
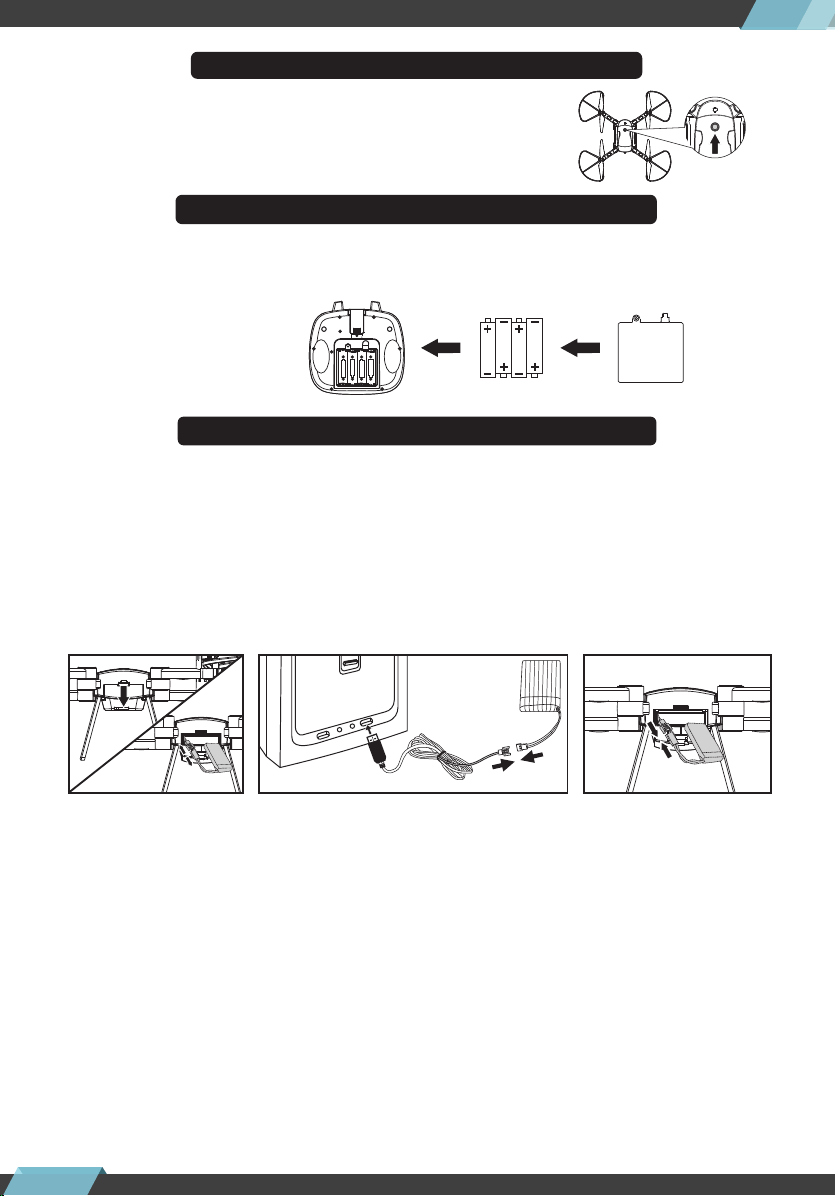
DRONE POWER SWITCH INTRODUCTIONS
REMOTE CONTROL BATTERY INSTALLATION
1. Open the battery cover of drone.,Take out lithium battery of drone from battery
case.(Fig.1)
2. Plug the USB charger into the power supply, and connect charger cord socket
with lithium battery socket. When charging, the USB LED light is o ; when the
charger LED light turns red again , charging is complete. Charging time is
approximately 150 minutes.
3. Connect the battery plug with the circuit board plug after charging. Please pay
attention to the correct polarity. (Fig.3)
4. Close battery cover of drone.
Attention:
1. Make sure the USB Charger ts properly into the USB port that is being used for
charging. If the charger is not inserting easily into the port, do NOT forcefully
insert the charger, as it could cause damage to the charger or battery.
2. The charging plug will overheat if overcharged for long periods of time. Do not
leave the battery on the charger for longer than 3 hours as it may cause damage
to the battery.
3. Do not leave the battery inside the drone when charging.
4. Do not use any chargers other than the one supplied, as it could cause damage
to the battery.
5. Wait 15-20 minutes after ying the drone before recharging the battery, to
prevent the battery from overheating.
6. Do not leave the battery near any hot surfaces or in direct sunlight for long
periods of time, as this can cause serious damage to the battery.
7. Do not puncture or damage the battery. If the battery is damaged, stop using it
and contact the manufacturer.
To turn ON the drone, press the power button located
on top of the drone. To turn OFF the drone, PRESS and
HOLD the power button for 3 seconds.
1. Remove the battery cover from the back of controller (Fig. A)
2. Install 4 “AA” batteries into the controller, make sure to install batteries to their
correct polarity. (Fig. B) Do not mix old and new batteries or battery types.
3. Replace the battery cover
Loading ...
Loading ...