User manual Vacuum
-155594.png)
IMPORTANT SAFETY INSTRUCTIONS SAVE THESE INSTRUCTIONS
READ ALL SAFETY WARNINGS AND INSTRUCTIONS BEFORE USING THIS PRODUCT.
WARNING: When using an electrical product, basic precautions should always be followed to avoid electric shock, fire, and/or serious injury, including the following:
- Fully assemble or install product prior to use.
- Do not use charger outdoors.
- Do not use product or charger outdoors or on wet surfaces.
- Do not allow to be used as a toy. Not intended for use by children age 12 and under. Close supervision is necessary when used by or near children. To avoid injury or damage, keep children away from product, and do not allow children to place fingers or other objects into any openings.
- Use only as described in this user manual. Use only HOOVER® recommended attachments and parts.
- Do not use charger with damaged cord or plug. If product or charger is not working as it should, has been dropped, damaged, left outdoors, or dropped into water, call customer service at 1-800-406-2005 prior to continuing use.
- Do not pull or carry charger by cord. Keep cord away from heated surfaces.
- Do not unplug charger by pulling on cord. To unplug charger, grasp the plug, not the cord.
- Do not handle charger, plug, or charger terminals with wet hands.
- Do not put any object into openings. Do not use with any opening blocked; keep free of dust, lint, hair, and anything that may reduce air flow.
- Keep hair, loose clothing, fingers, and all parts of body away from openings and moving parts.
- Use extra care when cleaning on stairs. To avoid personal injury or damage, and to prevent the products from falling, always place product at bottom of stairs or on floor. Do not place product on stairs or furniture.
- Do not use to pick up flammable or combustible liquids, such as gasoline, or fine wood sandings, or use in areas where they may be present.
- Do not pick up anything burning or smoking, such as cigarettes, matches, or hot ashes.
- Do not use without filters, separator and dirt cup in place.
- Put product away after use to prevent tripping accidents
WARNING: RISK OF FIRE, PROPERTY DAMAGE, AND INJURY. NEVER EXPOSE YOUR BATTERY PACK OR CHARGER TO WATER, MOISTURE, OR FLUIDS, INCLUDING BUT NOT LIMITED TO CORROSIVE OR CONDUCTIVE FLUIDS, OR ALLOW FLUIDS TO FLOW INSIDE THESE ITEMS.
Corrosive or conductive fluids, such as salt water, chlorine, certain industrial chemicals, and bleach or bleach containing products, etc., can cause a short circuit in the battery pack. If your battery pack is exposed to a corrosive or conductive fluid, do not attempt to use or charge the battery pack and immediately perform the following steps:
- Wear appropriate personal protective equipment, including eye protection and rubber gloves.
- Place your exposed battery pack in a large bucket, such as a 5 gallon or similar bucket, and fill the bucket with regular tap water. Do not place more than two packs in the bucket.
- Locate the bucket outdoors in an area inaccessible to children and pets and away from all buildings, garages/sheds, structures, vehicles, and combustible/flammable materials.
- Leave the battery pack(s) in the bucket filled with tap water and call Customer Service at 1-800-406-2005 for additional instructions on the proper disposal of the exposed battery pack(s)
- Prevent unintentional starting. Ensure the switch is in the off-position before (connecting to battery pack,) picking up or carrying the product. Carrying the appliance with your finger on the switch or energizing appliance that have the switch on invites accidents.
- Disconnect the battery pack before making any adjustments, changing accessories or storing product. Such preventative measure reduce the risk of starting the product accidentally.
- Recharge only with the HOOVER® charger. A charger that is suitable for one type of battery pack may create a risk of injury and fire when used with another battery pack.
- Use products only with specifically designated battery packs. Use of any other battery packs may create a risk of injury and fire. When battery pack is not in use, keep it away from other metal objects, like paper clips, coins, keys, nails, screws or other small metal objects, that can make a connection from one terminal to another. Shorting the battery terminals together may cause burns or a fire.
- Under abusive conditions, liquid may be ejected from the battery; avoid contact. If contact accidentally occurs, flush with water. If liquid contacts eyes, additionally seek medical help. Liquid ejected from battery may cause irritation or burns.
- Do not use a battery pack or appliance that is damaged or modified. Damaged or modified batteries may exhibit unpredictable behavior resulting in fire, explosion or risk of injury.
- Do not expose a battery pack or appliance to fire or excessive temperatures. Exposure to fire or temperature above F/130°C may cause explosion.
- Follow all charging instructions and do not charge the battery pack or appliance outside of the temperature range specified in the instructions. Charging improperly or at temperatures outside of the specified range may damage the battery and increase the risk of fire.
- This product contains no serviceable parts.
- Do not modify or attempt to repair the appliance (or the battery pack) except as indicated in the instructions for use and care
CHARGING YOUR PRODUCT
-551862.png)
1 Plug in the charger, then attach the battery pack to the charger by aligning the ribs on the battery pack to the grooves in the charger.
2 Slide the battery pack into the charger. NOTE: The lights on the battery will show the state of charge. If the light on the charger flashes red, there is an error with the battery or the charger. If this occurs, disconnect and reconnect the battery or call customer service for support. Once charge is complete, lights on the battery and charger will turn off.
3 To remove the battery pack, press the latches and pull up.
NOTE: During charging, the pack and ambient temperature should be between 32 to 86° F (5 and 30° C). The charger will sense if the pack, or ambient temperature, is too cold or too hot, and will return an error code (red LED will be on) and not charge the pack.
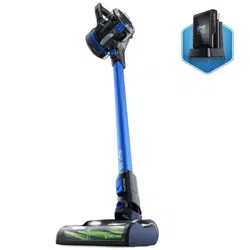
ASSEMBLY
Fully assemble product prior to use
-814350.png)
- Rock the dirt cup into the handheld.
- Push the reach wand down onto the powered nozzle until it clicks into place.
- Push the handheld down onto the reach wand until it clicks into place.
- : Fully charge battery before first use. This will take 3-4 hours. Due to federal regulations, the battery does not come fully charged.
WALL MOUNT ASSEMBLY
-716916.png)
- Choose the desired location, then place the mount on the wall at the desired height. Mark the wall anchor locations. Install the anchors and screw the mount to the wall.
- Store the vacuum by firmly pressing the product into the wall mount to secure. NOTE: Accessories can be stored by sliding them onto the top of the wall mount.
OPERATION
CAUTION: Put product away after use to prevent tripping accidents. CAUTION: To avoid injury, particularly to face and head, keep hair, loose clothing, fingers and all parts of the body away from revolving brush.
CAUTION: Not to be used for grooming a pet.
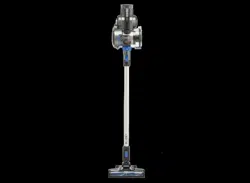
USING YOUR PRODUCT
-517859.png)
 Press to turn Machine On/Off.
 Press to turn Brush Roll On/Off. NOTE: We recommend that you turn the Powered Floorhead Brush Roll OFF for hard floors and ON for carpets. Using with the Brush Roll OFF will extend runtime.
 Boost Mode: Increases the suction power to get a deeper clean.
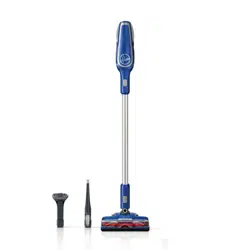
HANDHELD MODE
-154525.png)
- Press the handheld release button. Pull to separate the handheld from the reach wand
- Push the chosen accessory into the handheld until it clicks into place.
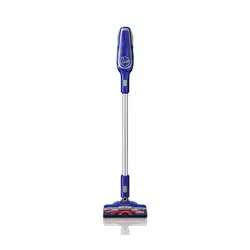
CLEANING UP HIGH
-771369.png)
- Press the powered nozzle release button and pull to remove the powered nozzle from the reach wand.
- Push the accessory into the reach wand until it clicks into place.
CAUTION: To avoid injury, particularly to face and head, keep hair, loose clothing, fingers and all parts of the body away from revolving brush.
MAINTENANCE
WARNING:To avoid serious personal injury, always remove the battery pack from the product when cleaning or performing any maintenance
This product contains no serviceable parts. If appliance is not working as it should, has been dropped, damaged, left outdoors, or dropped into water, call customer service at 1.800.406.9005 prior to continuing use.
GENERAL MAINTENANCE
IMPORTANT: Avoid using solvents when cleaning plastic parts. Most plastics are susceptible to damage from various types of commercial solvents and may be damaged by their use. Use a clean cloth to remove dirt, dust, oil, grease, etc.
EMPTYING THE DIRT CUP
- Remove the battery pack.
-463438.png)
- Push down the latch on the dirt cup to release. Tilt and lift to remove the dirt cup from the stick vac.
-561026.png)
- Hold the dirt cup over a trash bin and press the dirt cup release button to empty. Close the dirt cup, then replace it by rocking it back into place.
CLEANING THE FILTER AND CYCLONE
-771412.png)
- Pull open the lid of the dirt cup to access the filter. To clean the cyclone, lift to remove. Clean dirt and debris.
-604210.png)
- Pull the filter away and tap to remove dirt. Rinse filter under warm water until water is clear. Allow filter to dry for 24 hours before reinserting.
IMPORTANT: Do not use vacuum without the filter or cyclone in place. Do not use soap or other chemicals to clean. Dry filter completely, for up to 24 hours, before reinstalling into the product.
REMOVING AND REPLACING THE BRUSH ROLL
WARNING: Risk of personal injury - Brush roll may suddenly restart. Turn power switch off and remove battery before cleaning or servicing.
-759172.png)
1 Remove powered nozzle from reach wand. Using a coin, push and turn the brush roll lock counterclockwise to release the brush roll.
-664391.png)
2 Pull the brush roll out of the powered nozzle. To remove any threads or hair, slide the blade of a pair of scissors into the groove of the brush roll and cut along the groove.
3 Clear any dirt/debris from the end caps and inside the housing of the powered nozzle
-45553.png)
4 Re-fit the brush roll into the housing and turn the brush roll lock clockwise to lock.
THERMAL PROTECTOR
A thermal protector has been designed into your cleaner to protect it from overheating. When the thermal protector activates, the cleaner will stop running. If this happens, proceed as follows:
- Turn cleaner OFF and remove battery pack
- Empty dirt cup
- Inspect the filter and cyclone for any obstructions. Clear obstructions if present
- After the battery pack is removed and the motor cools for 30 minutes, reinstall the battery pack. The thermal pr tector will deactivate and cleaning may continue. If thermal protector continues to activate after following the above steps, call Customer Service at 1-800-406-2005.
TROUBLESHOOTING
WARNING: Risk of personal injury - Brush roll may suddenly restart. Turn power switch off and remove battery before cleaning or servicing.
FIND AVAILABLE REPLACEMENT PARTS AND ACCESSORIES AT HOOVER.COM. IF APPLIANCE IS NOT WORKING AS IT SHOULD, HAS BEEN DROPPED, DAMAGED, LEFT OUTDOORS, OR DROPPED INTO WATER, CALL CUSTOMER SERVICE AT 1-800-406-2005 PRIOR TO CONTINUING USE. SEE BEHIND THE BATTERY DOCK ON THE PRODUCT FOR MODEL NUMBER.
ACCESSORIES
-271831.png)