Loading ...
Loading ...
Loading ...
7
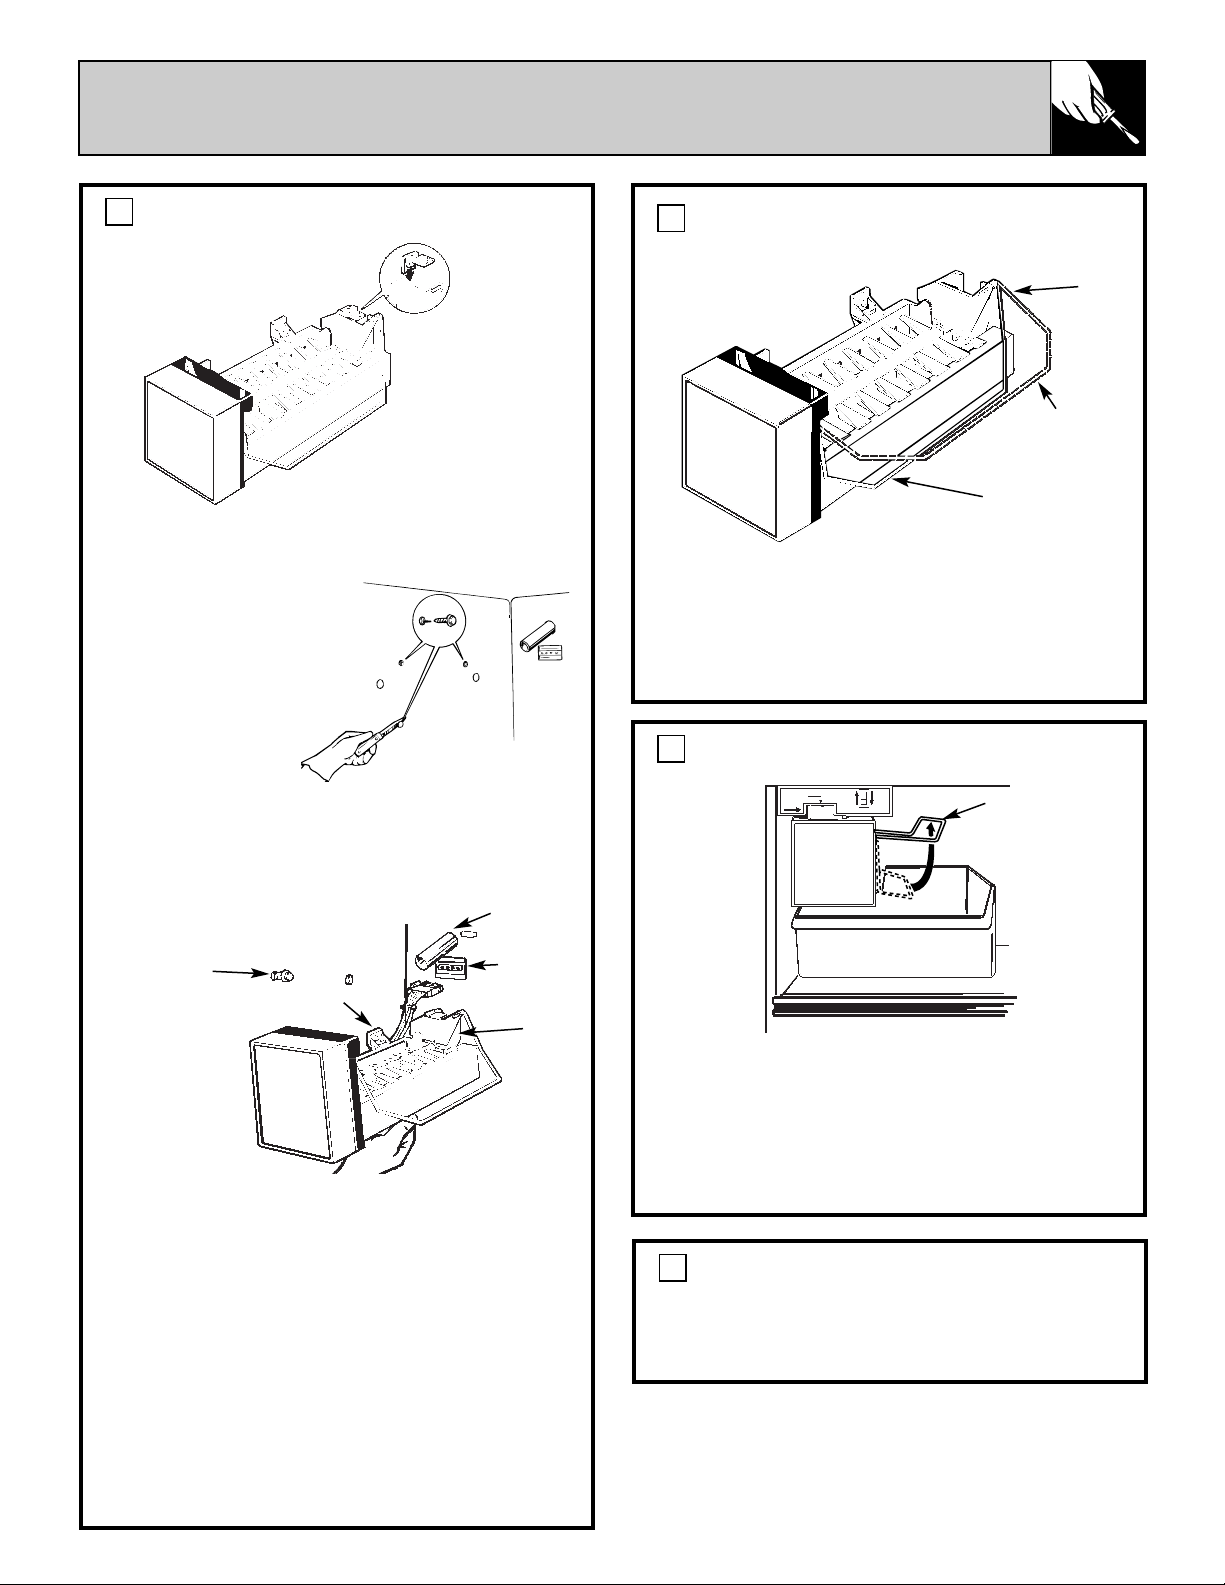
PLACE ICE STORAGE BIN ON FREEZER SHELF.
Move the ice storage bin into place directly
under the icemaker.
NOTE: Check again to make sure the icemaker
power cord is fully inserted into its outlet.
Check again to make sure the icemaker feeler
arm is in the STOP (up) position.
6
APPLY WARRANTY LABEL TO BACK OF
REFRIGERATOR.
A label is provided in the kit. On it record the
date of the installation for warranty purposes.
7
HANG THE ICEMAKER ON FREEZER WALL.
a. Slip the stainless steel clip over the wall of the
water cup.
b. Cover the tip of
a knife blade with
masking tape to
protect the inside of
the freezer. Carefully
pry out and discard
the three white
plastic buttons from
the left side of the
freezer.
c. Screw one 5/8″ icemaker mounting screw in the
top front hole. Leave the head out approximately
3/8″ for the slot in the icemaker hanger to slip
over the screw.
d. Hold the icemaker in position inside the freezer.
Insert the wire harness plug into the outlet using a
rocking motion, until the locking fingers on the
sides of the plug snap into place. The plug fits only
one way.
e. Slip the icemaker hanger over the mounting
screw, while easing the icemaker water cup toward
the end of the water fill tube. The water fill tube fits
under the stainless steel clip on the water cup. The
water fill tube must not be kinked. It should
extend approximately 1/2″ into the water cup
and must not become easily dislodged.
f. Screw in the two remaining icemaker mounting
screws. Tighten all three screws.
4
LIFT THE ICEMAKER FEELER ARM TO THE
STOP (UP) POSITION.
The icemaker should feel secure when you lift
the arm. Leave the feeler arm in the STOP (up)
position until the refrigerator is connected to the
water supply to prevent it from operating before
the water supply connection is complete.
5
Stainless
steel clip
Start this
screw first
Hangers
Water fill
tube
Feeler arm in
STOP (up)
position
Wire
harness
outlet
Water
cup
Arm up—
stops
operation
Feeler
arm
Arm down—
icemaker will
operate
The icemaker installation is now complete.
Refer to the following instructions for
connecting the icemaker to the home
water supply.
Loading ...
Loading ...
Loading ...