Loading ...
Loading ...
Loading ...
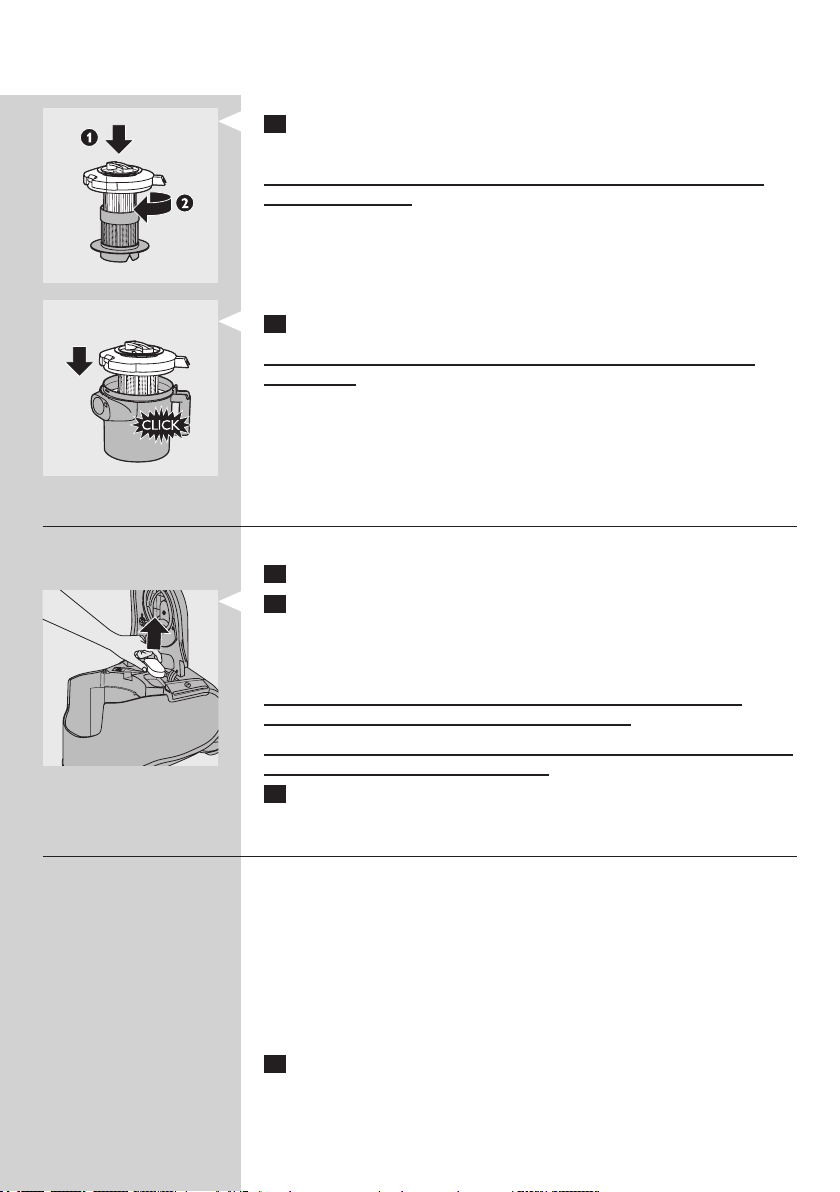
11 Put the lter cylinder back into the lter cylinder case (1) and turn it
clockwise to x it (2) (‘click’).
Make sure that the lter cylinder case is dry before you reinsert the
lter cylinder into it.
12 Put the lter cylinder unit back into the dust bucket (‘click’).
Make sure that the dust bucket is dry before you reinsert the lter
cylinder unit.
Clean the permanent motor protection lter every two months.
1 Unplug the appliance.
2 Take the motor protection lter out of the appliance and clean the
lter by tapping the dust out of it over a dustbin.
If you want to clean the motor protection lter more thoroughly, you can
rinse it under a cold tap.
Do not use washing-up liquid, ammable substances or any other
cleaning agent to clean the motor protection lter.
Make sure that the motor protection lter is completely dry before you
put it back into the lter compartment.
3 Press the clean lter rmly back into the lter compartment to
ensure that it is properly placed.
Note: To guarantee optimal dust retention and performance of the vacuum
cleaner, always replace the HEPA lter with an original Philips lter of the
correct type (see chapter ‘Ordering accessories and lters’).
Clean the washable HEPA 13 lter every 6 months. You can clean the
washable HEPA 13 lter max. 4 times. Replace the lter after it has been
cleaned 4 times.
Note: Do not clean the HEPA 13 lter in the washing machine, but follow the
procedure below.
1 Unplug the appliance.
16
Loading ...
Loading ...
Loading ...