Loading ...
Loading ...
Loading ...
7
4
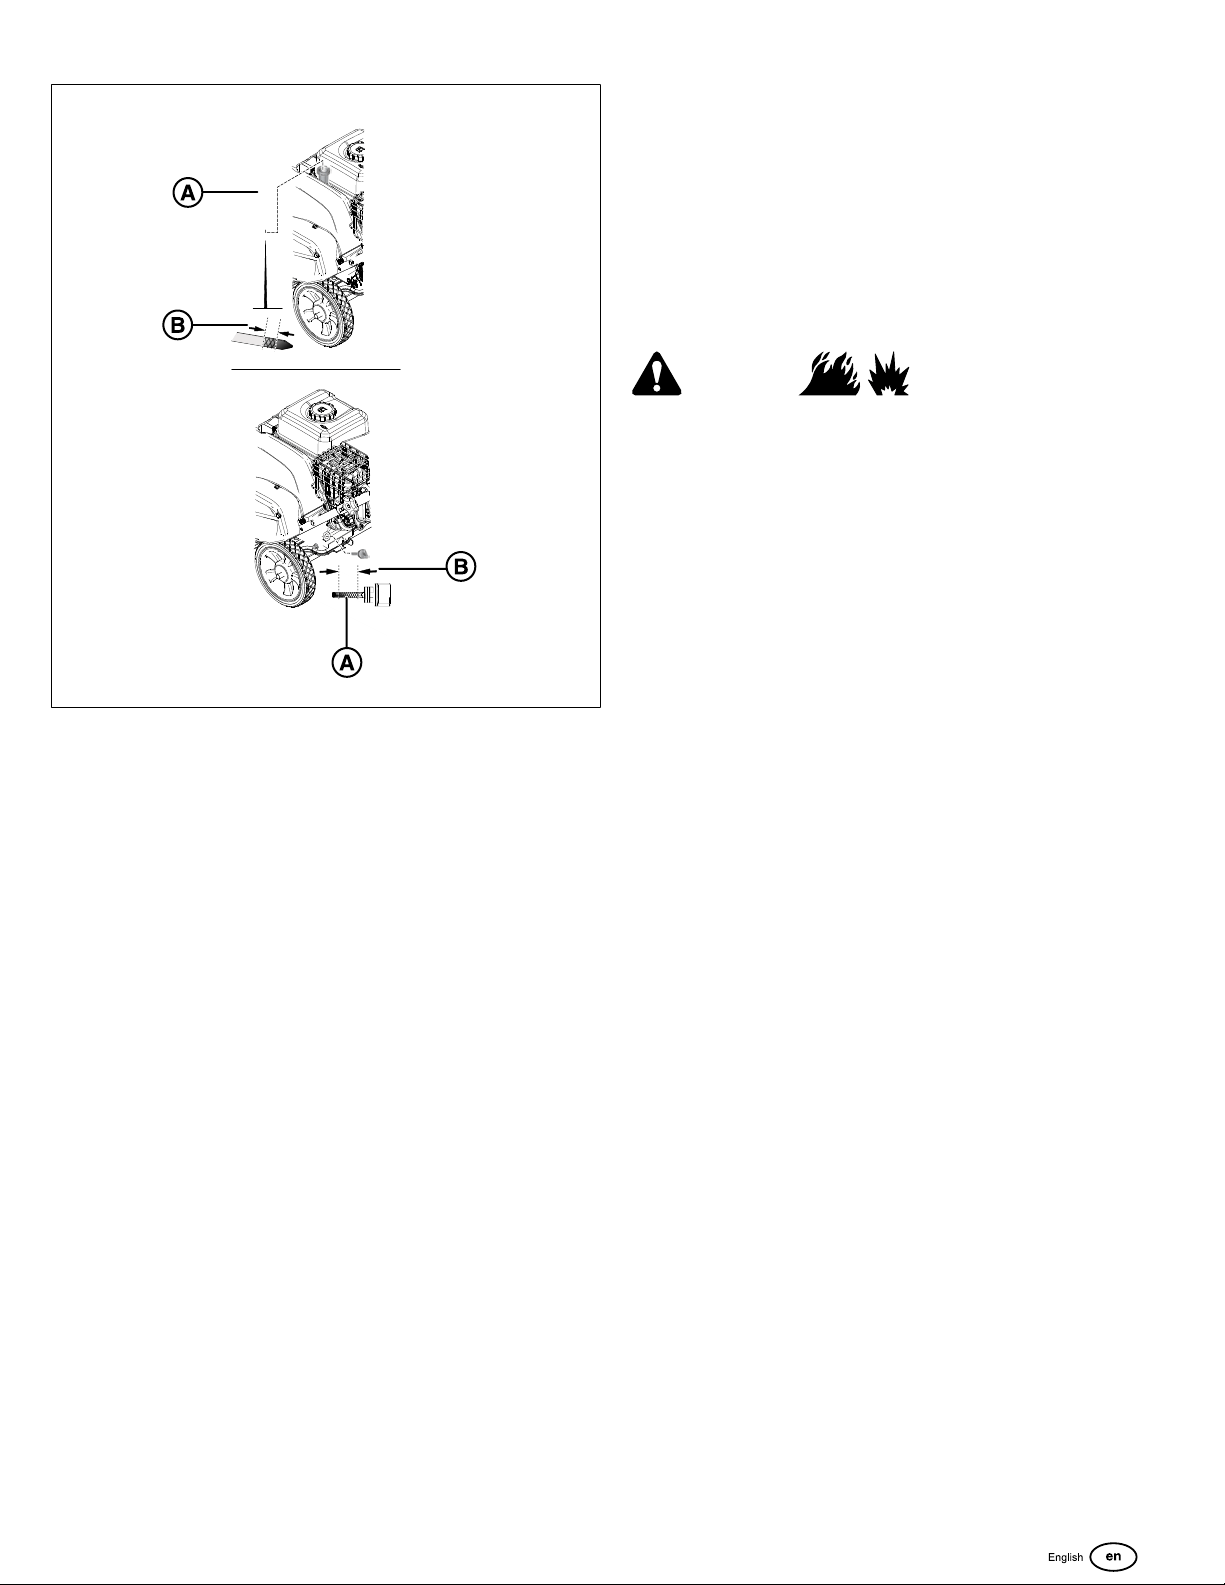
4. Install the dipstick, and check the oil level. Make sure that
the oil level is at the top of the full indicator (B).
5. Carefully add oil into the engine oil fill.Do not overfill.
6. Wait one minute. Check the oil level again.
7. When the oil level touches the top of the full indicator,
install and tighten the dipstick.
Fuel Recommendations
Fuel must meet these requirements:
• Clean, unleaded gasoline.
• A minimum of 87 octane / 87 AKI (91 RON). SeeHigh
Altitude Requirements.
• Gasoline with up to 10% ethanol (gasohol).
NOTICE Do not use unapproved gasoline, such as E15
and E85. Do not mix oil in gasoline or change the engine
to operate on alternative fuels. Use of unapproved fuels
will cause damage to engine components, which will not be
covered under the warranty.
To protect the fuel system from gum formation, mix a fuel
stabilizer into the fuel. SeeStorage.All fuel is not the same.
If start or performance problems occur, change fuel providers
or change brands. This engine is certified to operate on
gasoline. The emissions control system for this engine is EM
(Engine Modifications).
High Altitude Requirements
• At altitudes over 5,000 feet (1,524 meters), a minimum 85
octane / 85 AKI (89 RON) gasoline is acceptable.
• For carbureted engines, high altitude adjustment is
required to remain emissions compliant. Operation
without this adjustment will cause decreased
performance, increased fuel consumption, and increased
emissions. Contact a Briggs & Stratton Authorized
Service Dealer for high altitude adjustment information.
• Operation of the engine at altitudes below 2,500 feet
(762 meters) with the high altitude adjustment is not
recommended.
• For Electronic Fuel Injection (EFI) engines, high altitude
adjustment is not necessary.
Add Fuel
WARNING
Fuel and its vapors are extremely flammable and explosive.
Always handle fuel with extreme care. Failure to obey these
safety instructions can cause fire or explosion, which could
result in severe burns or death.
When Adding Fuel
• Stop the engine and let the engine cool at least 3
minutes before you remove the fuel cap.
• Extinguish cigarettes, cigars, pipes, and other sources
of ignition.
• Fill fuel tank outdoors or in well-ventilated area.
• Do not overfill fuel tank. To allow for expansion of the
fuel, do not fill above the bottom of the fuel tank neck.
• Keep fuel away from sparks, open flames, pilot lights,
heat, and other ignition sources.
• Check fuel lines, tank, cap, and fittings frequently for
cracks or leaks. Replace if necessary.
• If fuel spills, wait until it evaporates before you start the
engine. DO NOT create other ignition sources.
• Use only an approved fuel container.
1. Remove unwanted material from the fuel cap area.
2. Remove the fuel cap (A, Figure5).
3. Fill the fuel tank (B)with fuel. DO NOT fill above the
bottom of the fuel tank neck (C).
4. Install the fuel cap.
Loading ...
Loading ...
Loading ...