Loading ...
Loading ...
Loading ...
23
Cleaning and Maintenance
This oven features an automatic pyrolytic self-cleaning cycle. During this cycle, the oven reaches elevated temperatures in order to burn o soil
and deposits. An integral smoke eliminator helps reduce odors associated with the soil burn-o . A powder ash residue is left in the bottom of
the oven after completion of the self-clean cycle. The door latch is automatically activated after selecting the self-clean setting. The latch ensures
that the door cannot be opened while the oven interior is at clean temperatures.
Before starting the Self-Clean cycle:
1. Remove the oven racks, and any other items/utensils from the oven. The high heat generated during the cleaning cycle can discolor, warp,
and damage these items. DO NOT use foil or liners in the oven. During the self-clean cycle foil can burn or melt and damage the oven surface.
2. Wipe o any large spills from the oven bottom and sides. NEVER use oven cleaners inside a self-cleaning oven or on raised portions of the
door.
3. Some areas of the oven must be cleaned by hand before the cycle begins. Soils in these areas will be baked on and very di cult to clean if
not removed rst. Clean the door up to the gasket, the door frame, and up to 2 inches inside the frame with detergent and hot water. Rinse
thoroughly and dry.
Self-Clean Cycle
WARNING
ELECTRICAL SHOCK HAZARD
This range features a self-cleaning cycle. During this cycle, the
oven reaches elevated temperatures in order to burn o soil and
deposits.
A powder ash residue is left in the bottom of the oven after
completion of the self-clean cycle.
NOTE: DO NOT use commercial oven cleaners inside the oven. Use
of these cleaners can produce hazardous fumes or can damage the
porcelain nishes. DO NOT line the oven with aluminum foil or other
materials. These items can melt or burn during a self-clean cycle,
causing permanent damage to the oven.
CAUTION
DO NOT touch the exterior portions of the oven
after self-cleaning cycle has begun, since some parts
become extremely hot to the touch!
During the rst few times the self-cleaning feature is
used, there may be some odor and smoking from the
“curing” of the binder in the high-density insulation
used in the oven. When the insulation is thoroughly cured, this odor
will disappear. During subsequent self-cleaning cycles, you may
sense an odor characteristic of high temperatures.
KEEP THE KITCHEN WELL-VENTED DURING THE SELF-
CLEAN CYCLE.
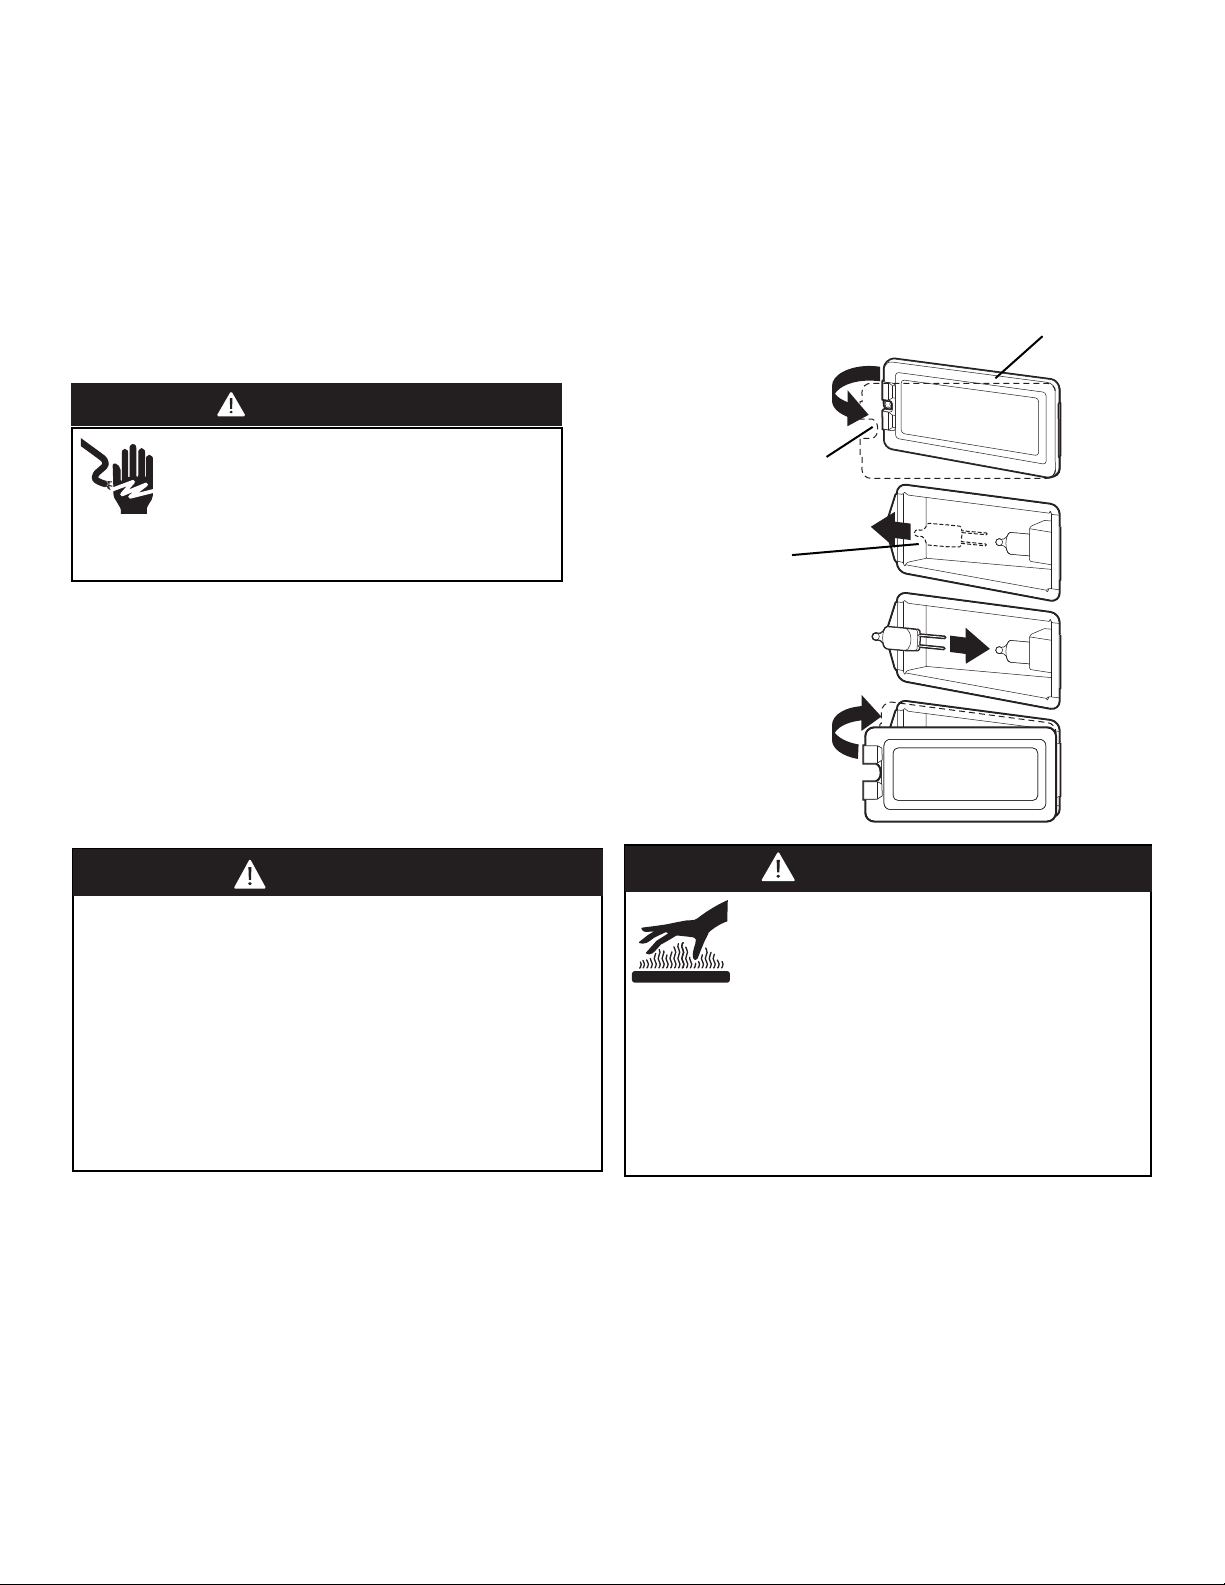
1. Unsnap glass light cover using a screwdriver in the access groove.
2. Firmly grasp light bulb and pull out.
3. Replace with halogen bulb using volt and wattage requirements listed on glass
cover.
4. Replace the light cover by snapping glass cover onto metal box.
5. Reconnect power at the main fuse or circuit breaker.
Replacing the Oven Lights
glass light cover
access groove
light bulb
WARNING
ELECTRICAL SHOCK HAZARD
Disconnect the electric power at the main fuse or
circuit breaker befor replacing the bulb.
To avoid risk of personal injury, DO NOT touch the
light bulb with bare hands. Clean o any signs of oil from the bulb
and handle with a soft cloth.
Power Failure
No attempt should be made to operate the appliance during a power failure. Make sure the oven control is in the “OFF” position. Momentary
power failure can occur unnoticed. The range is a ected only when the power is interrupted. When it comes back on, the range will function
properly without any adjustments. A “brown-out” may or may not a ect range operation, depending on how severe the power loss is. If the
range is in the self-clean cycle when the power failure occurs, wait until power is restored and allow door to unlock automatically. Turn all
controls o and restart self-clean cycle again, according to instructions.
Loading ...
Loading ...
Loading ...