Loading ...
Loading ...
Loading ...
14
Actual model may vary from images shown.
BELT
The belt is located under the bottom plate of the
vacuum and should be checked from time to time
to be sure it is in good condition.
When To Replace
How To Replace
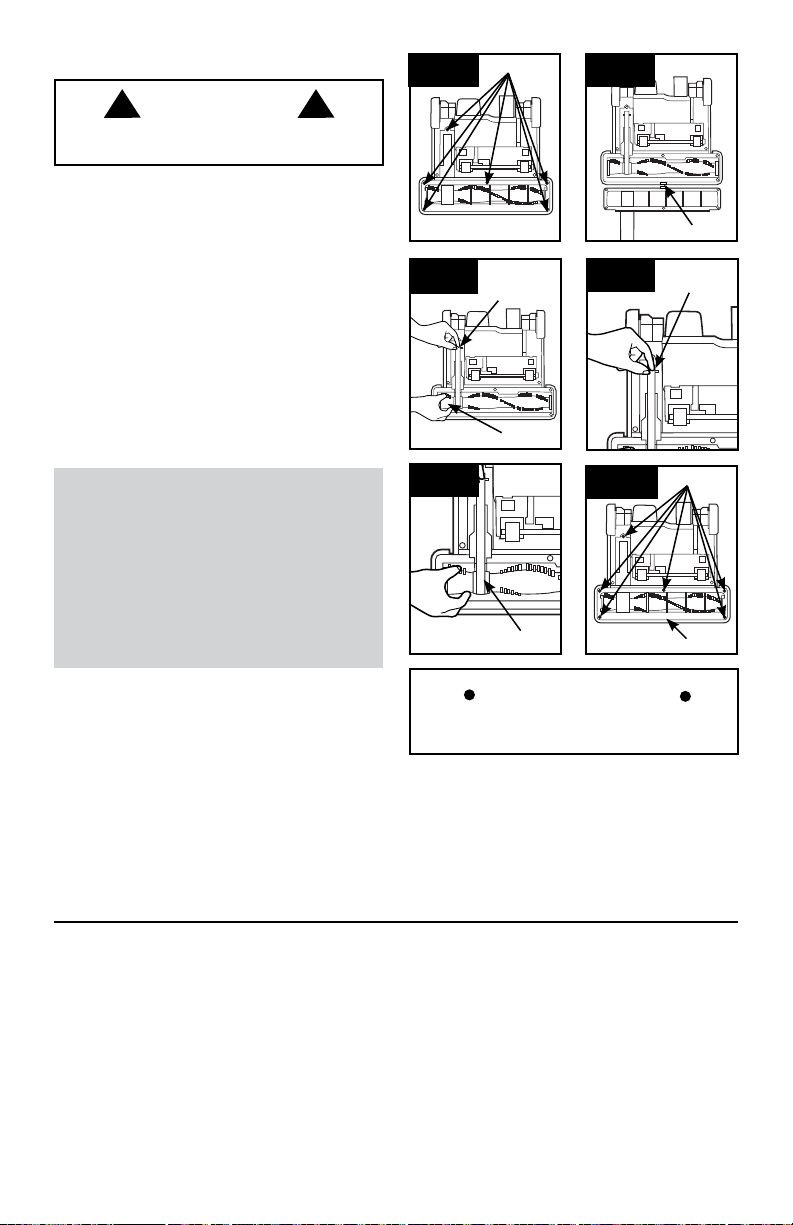
4.21 Turn vacuum over so bottom side is facing up
and remove the (6) screws (A).
4.22 Pivot out bottom plate away from hidden
latch (B).
4.23 Remove used belt from brushroll (C) then from
motor shaft (metal rod) (D) and discard.
Replace belt if it is stretched, cut or broken.
To check the belt, refer to Fig. 4.24 - 4.26.
4.23
C
D
4.24
CAUTION
! !
To reduce the risk of injury from moving parts -
Unplug before servicing.
4.24 With lettering on outside of belt, slide new belt
over motor shaft (metal rod) (E).
4.25 Then slip other end of belt around area of
brushroll without bristles (F).
With belt in place, pull and slide brushroll into nozzle
making sure that the brushroll end caps are in the
correct orientation.
4.26 Reposition bottom plate, aligning latch (B) and
fastening all (6) screws (A).
Press firmly at latch (B) area to ensure that it is
properly latched.
4.25
E
F
What to Buy: Belt
Use only genuine HOOVER
®
belts with your
vacuum.
When purchasing a new belt for models
with
Brushroll On/Off (Suction Only Mode), ask for
Flat Belt - HOOVER
®
part No. 562289001 or
AH20065.
If desired, additional belts can be purchased at
Hoover.com or 1-800-944-9200
IMPORTANT
Rotate brushroll manually to make sure belt is
not twisted.
4.21 4.22
A
4.26
A
B
B
LUBRICATION
The motor and brushroll are equipped with bearings
which contain sufficient lubrication for their lifetime.
The addition of lubricant could cause damage. Do
not add lubricant to motor or brushroll.
Loading ...
Loading ...
Loading ...