Loading ...
Loading ...
Loading ...
5
EN
INSTALLATION DIAGRAM
Section 5
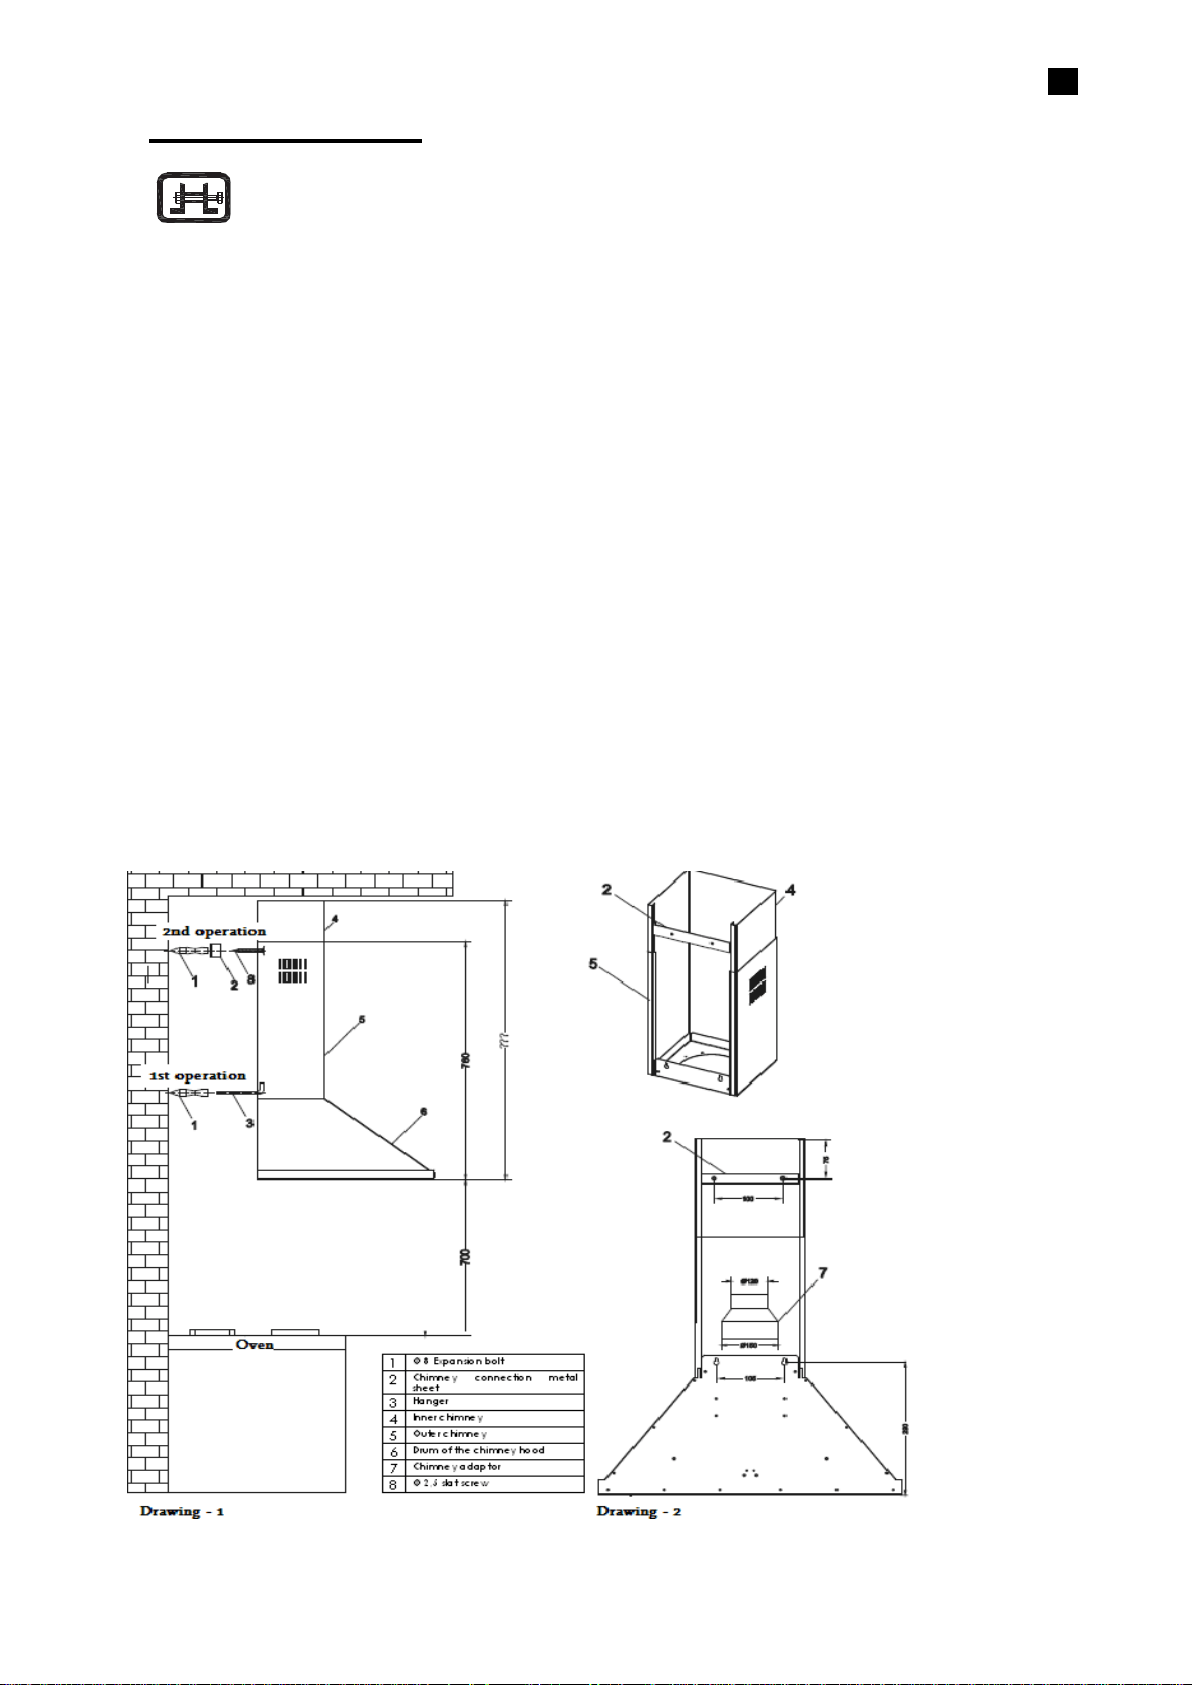
1. Draw a straight line by a measuring stick starting from the surface of the oven to 700+280:
990 mm if you want to save a space of 700 mm between the oven and the lower surface of
the chimney hood. Align the drawn line to the right and left edges. Draw a 67,5 mm axis line
from aligned center to every two sides. Make a hole by 6 mm diameter electrical drill
through two drawn points. Penetrate the expansion bolt and install the hangers.
2. Doing installation of secondary chimney of the chimney hood: draw 75 mm line from the top
surface towards the lower section. Make sure that the line is equal to right and left parts.
Draw 50 mm line each at both sides of the line and, then, make a hole through these two
lines. Penetrate an 8 mm diameter expansion bolt and tighten until 2 mm space is left in-
between of a 2,5 diameter slat screw and the expansion bolt. Later, the product is mounted
on its place and the installation will be completed by installing the inner chimney.
The operation order:
1
st
operation: Installation of hanger
2
nd
operation: Installation of chimney connection metal sheet
3
rd
operation: Hanging the chimney hood
4
th
operation: Installation of lower chimney of the chimney hood
5
th
operation: Installation of inner chimney
6
th
operation: Making electrical connection
INSTALLATION :
Loading ...
Loading ...
Loading ...