
Loading ...
Loading ...
Loading ...
9
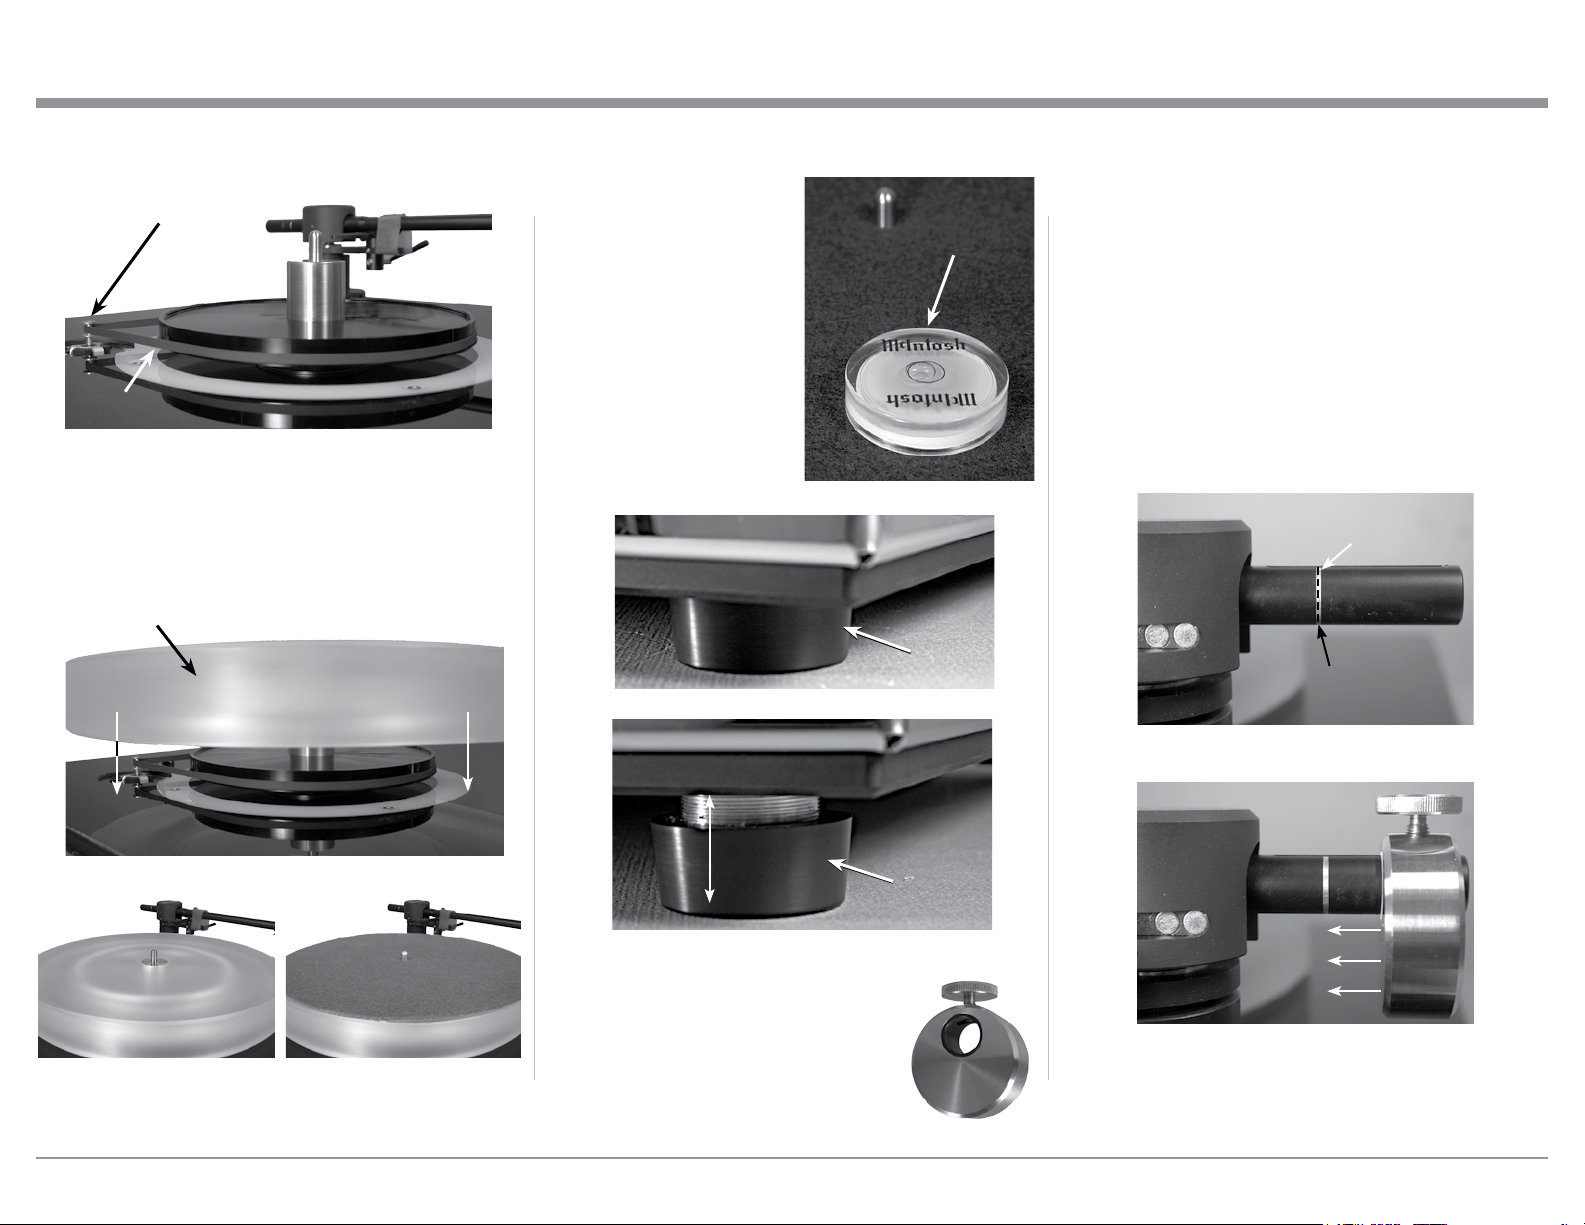
8. Next, take the Outer Platter and slowly lower it
onto the previously installed spindle/inner platter
assembly making sure to keep the Outer Plat-
ter parallel to the Turntable surface as it is being
lowered. Refer to figures 9 and 10.
9. Locate the Record Mat and place it on top of the
platter. Refer to figure 11.
Assembling the Turntable
Motor Pulley
Figure 8
Belt
Figure 12
Bubble
Level
Figure 15
10. Locate the McIntosh
Bubble Level and place
it on the Record Mat.
If the Bubble is not in
the center circle of the
Bubble Level, adjust the
height of the Turntable
Feet (by rotating them
clockwise or counter
clockwise) until it is
level. Refer to figures
12, 13 and 14.
11. Locate the Tone Arm Counter-
weight. Loosen up the knurled
knob to permit installing the
Counterweight onto the rear of the
Tone Arm. Refer to figure 15.
Figure 9
Outer Platter
Figure 10 Figure 11
Figure 13
Bottom
Foot
Bottom
Foot
Figure 14
Tur n
to adjust
height
Tur n
to adjust
height
12. Position the Counterweight on the Tone Arm so
the front surface of the Counterweight is in the
center of the Blue Point No. 2 Cartridge position
marking on the surface at the rear of the Tone
Arm. Tighten the knurled knob to secure the posi-
tion of the Counterweight. Refer to figures 16, 17
below and 18 on the next page.
Note: It is recommended to check the tracking
force pressure using the supplied Stylus
Tracking Force Gauge as outlined starting
on page 12.
Fig ure 17
Blue Point No. 2
Position Marking
Figure 16
Center of the Blue
Point No. 2 Position
Loading ...
Loading ...
Loading ...