
Loading ...
Loading ...
Loading ...
6
ASSEMBLY INSTRUCTIONS
We value your experience using Sunny Health and Fitness products. For assistance with parts or
(877-907-8669).
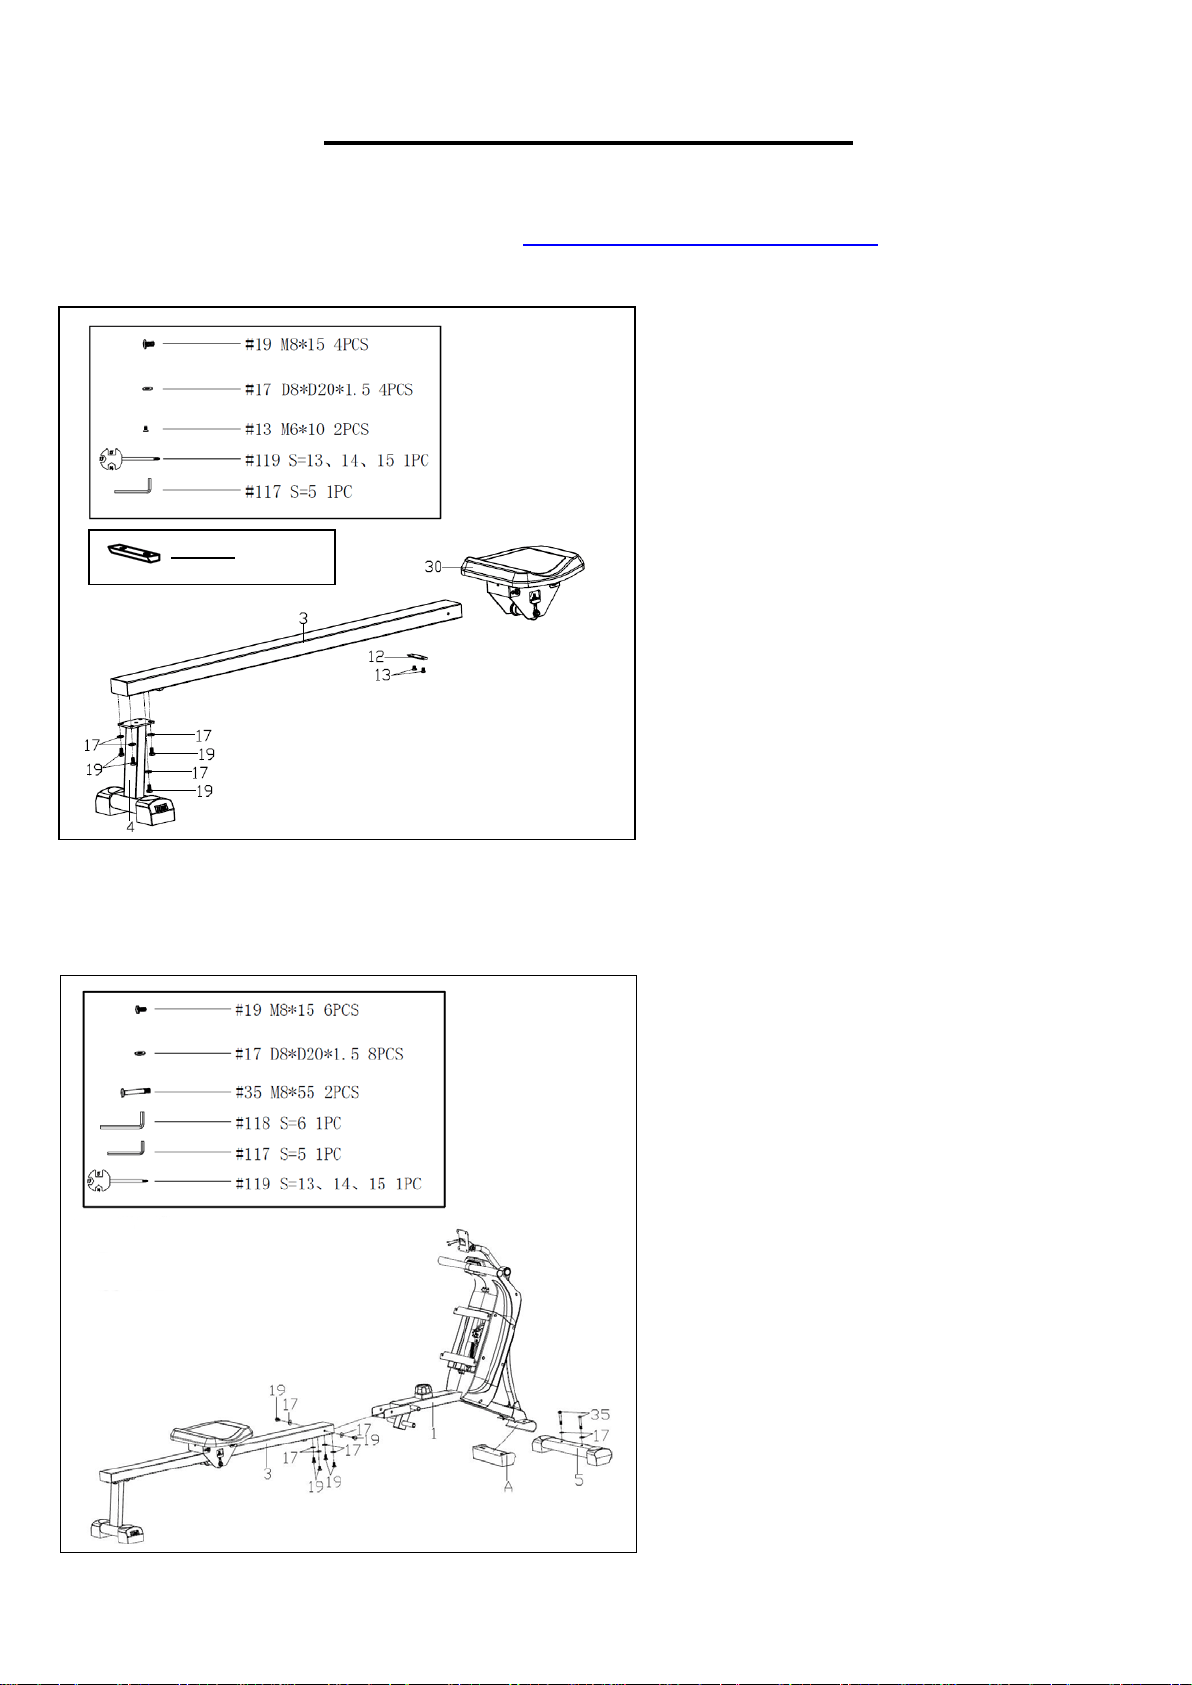
STEP 1:
Remove the pre-assembled Limit
Cushion (No. 12) and 2 Screws (No.
13) from the Slide Rail (No. 3) using
Spanner (No. 119).
Slide the Seat (No. 30) to the Slide Rail
(No. 3), make sure Seat (No. 30)
through the position of Limit Cushion
(No. 12). Then attach the Limit
Cushion (No. 12) to the Slide Rail (No.
3) with 2 Screws (No. 13) using
Spanner (No. 119).
Attach the Rear Support Tube (No. 4)
to the Slide Rail (No. 3) with 4 Screws
(No. 19) and 4 Flat Washers (No. 17)
using Allen Wrench (No. 117).
STEP 2:
Remove the Plastic Block (A) from the
Main Frame (No. 1) using Spanner
(No. 119). Attach the Front Stabilizer
(No. 5) to the Main Frame (No. 1) with 2
Screws (No. 35) and 2 Flat Washers
(No. 17) using Allen Wrench (No. 118).
Attach the Slide Rail (No. 3) to the Main
Frame (No. 1) with 6 Screws (No. 19)
and 6 Flat Washers (No. 17) using
Allen Wrench (No. 117).
#12 1PC
Loading ...
Loading ...
Loading ...