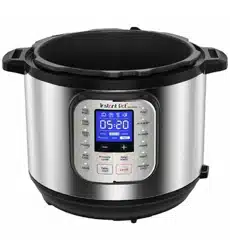
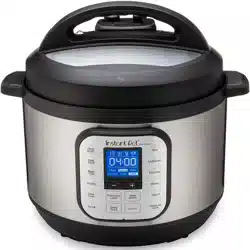
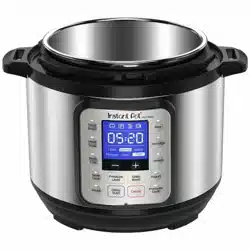
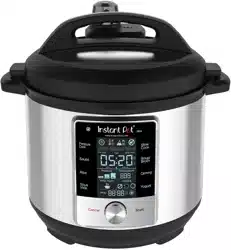
Before using the Instant Pot Nova, verify that all parts are accounted for.
Top of Lid
Bottom of Lid
Inner Pot
Instant Tip: The lid has been designed with lid fins that fit perfectly inside the handles on the left and right sides of the cooker base to help keep your countertop dry!
Cooker Base
Accessories
Sealing Rings (×2) (1x installed in lid)
Condensation Collector
Steam Rack with Handles (6, 8 and 10 Quart models only)
Steam Rack (3 Quart model only)
Detachable Power Cord (3 and 6 Quart models only)
Control Panel
1. Display
Status Icons show the cooker’s status as described below.
Timer shows countdown to Delay Start, cooking time remaining, and Keep Warm time passed in hours and minutes. Also shows Status Messages as described below.
Less – Normal – More indicate the selected Smart Program cooking time or temperature.
Pressure Level Indicator shows the selected Smart Program pressure level.
2. Smart Program Settings Keys
−/+ keys: Adjust Delay Start, cooking time and Keep Warm time.
Pressure Level: Toggles between Low and High pressure levels.
Keep Warm: Turns the Keep Warm option on or off.
Delay Start: Enables the delayed start option.
LED Indicators show the selected or active Smart Program including any options selected.
Cancel: Press Cancel at any time to return the cooker to Standby mode.
3. Smart Programs
Pressure Cooking
• Soup/Broth
• Meat/Stew
• Bean/Chili
• Poultry (not available on Duo Nova 3 Quart models)
• Rice
• Multigrain (not available on Duo Nova 3 Quart models)
• Porridge
• Steam
• Pressure Cook
Non-Pressure Cooking
• Slow Cook
• Sauté
• Yogurt
• Keep Warm
4. Status Icons
Element is heating
Pressure cooking in progress
Keep Warm On/Off
Sound On
Sound Off
Smart Program Settings
Adjust and Save Pressure Cooking Temperature
Select a pressure cooking Smart Program, then press Pressure Level to toggle between High (10.2–11.6 psi) and Low (5.8–7.2 psi) pressure levels.
Note: A higher pressure results in higher cooking temperature.
When cooking begins, the pressure level you selected is saved and remembered the next time the Smart Program is selected.
The cooking temperature may be adjusted at any time during pressure cooking by pressing Pressure Level, but adjustments made after cooking has begun will not be saved.
Adjust and Save Pressure Cooking Time
Select a pressure cooking Smart Program, then press the Smart Program button again to cycle through the Less, Normal and More cooking time options.
If desired, use the − / + buttons to further customize the time.
When cooking begins, your customizations are saved and remembered the next time the Smart Program is selected.
The cooking time may be adjusted at any time during pressure cooking, but adjustments made after cooking has begun will not be saved.
Adjust and Save Non-Pressure Cooking Temperatures
Select a non-pressure cooking Smart Program, then press the Smart Program button again to cycle through the Less, Normal and More cooking temperature levels.
When cooking begins, the temperature level is saved and remembered the next time the Smart Program is selected.
The cooking temperature may be adjusted at any time during non-pressure cooking by pressing the Smart Program button, but adjustments made after cooking has begun will not be saved.
Adjust and Save Non-Pressure Cooking Time
Select a non-pressure cooking Smart Program, then use the − / + buttons to adjust the cooking time.
The cooking time may be adjusted at any time during non-pressure cooking, but adjustments made after cooking has begun will not be saved.
Cancel and Standby Mode
When the cooker is plugged in but not in operation, the display reads OFF to indicate Standby mode.
Press Cancel to stop a Smart Program at any time. The cooker returns to Standby mode.
Turn Sound On/Off
Sound On: When in Standby, press and hold + button until display indicates S On.
Sound Off: When in Standby, press and hold − button until display indicates SOFF.
Adjust Temperature Scale: Fahrenheit and Celsius
Press both − and + buttons simultaneously twice. Default temperature unit will be displayed.
Press the + button repeatedly, to toggle between °F and °C.
Set a Delay Start Timer
Delay Start can be set to a minimum of 10 minutes or a maximum of 24 hours.
1. Select a Smart Program and adjust the settings as you desire, then press Delay Start. Note: Once Delay Start has been selected, there is no way to return to the cooking settings. To adjust Smart Program settings, press Cancel and enter new selections.
2. When the hours field flashes, use the − / + buttons to adjust the delay time. E.g., 02:00 indicates that cooking will start after 2 hours.
3. Press Delay Start again to toggle to the minutes field and follow the same process as the previous step.
4. Delay Start begins automatically after 10 seconds and the timer counts down.
5. When Delay Start ends, the Smart Program begins, and the display indicates On. Delay Start is not available with the Sauté, Sous Vide or Yogurt Smart Programs.
Automatically Keep Food Warm After Cooking
The Keep Warm setting turns on automatically after cooking on all Smart Programs except Sauté, Sous Vide and Yogurt.
When automatic warming begins, the timer begins counting from 00:00 to indicate the time passed, up to 10 hours.
To turn automatic warming off, press Keep Warm. The LED above the button dims to indicate that it is off.
Reheat Food or Keep Warm for Long Periods
When in Standby, select Keep Warm. Press Keep Warm again to cycle through Less, Normal and More warming temperature levels.
Use the − / + buttons to set a warming timer up to 99 hours and 50 minutes.
Keep Warm begins automatically after 10 seconds.
When Keep Warm completes, the display indicates End. Reset Smart Programs to Factory Default Settings
Reset Individual Smart Programs
With the cooker in Standby mode, press and hold one Smart Program button until the cooker returns to Standby and displays OFF.
The Smart Program’s pressure level, cooking time and temperature are restored to the factory default setting.
Reset All Smart Programs
With the cooker in Standby mode, press and hold Cancel until the cooker beeps.
All Smart Program pressure levels, cooking times and temperatures are restored to the factory default setting.
Cleaning Before First Use
Remove the inner pot from the cooker base and wash it with hot water and dish soap. Rinse with warm, clear water and use a soft cloth to dry the outside of the inner pot.
Note: The inner pot is dishwasher safe.
Wipe the heating element with a soft cloth to ensure there are no stray packaging particles present before returning the inner pot to the cooker base.
Note: Before cooking, always ensure the heating element is clean and dry before inserting the inner pot into the cooker base. Failure to do so may damage the cooker.
The inner pot is an integral part of product safety. Food must be placed in the inner pot, and never directly in the cooker base.
To avoid personal injury or damage to the appliance, replace a deformed or damaged inner pot. Use only authorized Instant Pot inner pots made for this model when cooking.
Overview of Pressure Control Features
Pressure Cooking Lid
The stainless steel lid included is necessary for most cooking processes, and is essential for pressure cooking. Always ensure to use the Duo Nova pressure cooking lid with the Duo Nova cooker base.
When plugged in, the cooker plays a jingle when the lid is opened and closed.
Open and Remove the Lid
Grip the lid handle and turn it counter-clockwise to align the symbol on the lid with the symbol on the rim of the cooker base, then lift the lid up and off the cooker base.
Close the Lid
Align the symbol on the lid with the symbol on the cooker base, and lower the lid onto the track. Turn the lid clockwise until the symbol on the lid aligns with the symbol on the cooker base.
The pressure cooking lid automatically seals for easy pressure cooking, but does not lock into place when closed. The lid can be removed during Pre-heating but locks into place once the cooker has pressurized.
Refer to Overview of Pressure Control Features–Float Valve for information on pressurization and depressurization.
Quick Release Button
The quick release button controls the steam release valve, sealing and venting the cooker as you desire.
Refer to Depressurizing the Cooker (Venting Methods) for details on safe depressurization
Steam Release Valve
The steam release valve sits loosely on the steam release pipe. When the cooker releases pressure, steam ejects from the top of the steam release valve.
The steam release valve is integral to product safety and necessary for pressure cooking. It must be installed before use and cleaned regularly.
Remove the Steam Release Valve
Pull steam release valve up and off steam release pipe.
The steam release valve must be installed before using the cooker. It should only be removed for cleaning, but should be cleaned frequently.
Install the Steam Release Valve
Place the steam release valve on the steam release pipe and press down firmly.
The steam release valve sits loosely on the steam release pipe when installed properly but should remain in place when the lid is turned over.
Remove
Install
Anti-Block Shield
The anti-block shield prevents food particles from coming up through the steam release pipe, assisting with pressure regulation.
As an integral part of product safety, the anti-block shield must be installed before use and cleaned frequently.
Remove the Anti-Block Shield
Grip the lid like a steering wheel and use your thumbs to press firmly against the side of the anti-block shield (pressing towards the side of the lid and up) until it pops off the prongs underneath.
Install the Anti-Block Shield
Place anti-block shield over prongs and press down until it snaps into position.
Do not attempt to operate the pressure cooker without the anti-block shield installed.
Sealing Ring
When the pressure cooking lid is closed, the sealing ring installed on the underside of the lid creates an air-tight seal between the lid and the cooker base.
The sealing ring must be installed before using the cooker and should be cleaned after each use. Only 1 sealing ring should be installed in the lid when using the cooker. Use one for sweet dishes and one for savory.
Sealing rings stretch over time with normal use. As an integral part of product safety, the sealing ring should be replaced every 12–18 months or sooner if stretching, deformation, or damage is noticed.
Remove the Sealing Ring
Grip the edge of the silicone and pull the sealing ring out from behind the circular stainless steel sealing ring rack.
With the sealing ring removed, inspect the rack to ensure it is secured, centered, and an even height all the way around the lid. Do not attempt to repair a deformed sealing ring rack.
Install the Sealing Ring
Place the sealing ring over the sealing ring rack and press it into place. Press down firmly to alleviate puckering.
When installed properly, the sealing ring is snug behind sealing ring rack and should not fall out when the lid is turned over.
Instant Tip: Silicone is porous, so it may absorb strong aromas and certain flavors. Keep extra sealing rings on hand to limit the transfer of those aromas and flavors between dishes. Visit our store to color code your cooking.
Float Valve
The float valve provides a visual indication of pressure within the cooker and appears in 2 positions
Pressurized The float valve has visibly popped up above the surface of the lid.
Depressurized The float valve has descended and the top is flush with the lid.
The float valve and silicone cap work together to seal in pressurized steam. These parts must be installed before use and should be cleaned after each use.
Remove the Float Valve from the Lid
Place one finger on the flat top of float valve, then turn the lid over. Detach the silicone cap from the bottom side of the float valve.
Remove the float valve from the top of the lid. Do not discard the float valve or silicone cap
Top
Bottom
Install the Float Valve
Drop the narrow end of the float valve into the float valve hole on the top of the lid. Place one finger on the flat top of the float valve, then turn the lid over. Firmly attach the silicone cap to the bottom of the float valve.
Do not attempt to operate the pressure cooker without the float valve and/or silicone cap properly installed in the pressure cooking lid.
Condensation Collector
The condensation collector sits at the back of the cooker base and accumulates overflow moisture from the condensation rim. It should be installed before cooking, then emptied and rinsed out after each use.
Remove the Condensation Collector
Pull the condensation collector away from the cooker base; do not pull down. Note the tabs on the cooker base and the grooves on the condensation collector.
Install the Condensation Collector
Align the grooves on the condensation collector over the tabs on the back of the cooker base and slide the condensation collector into place.
Cooking with the Duo Nova
1. Pre-Heating and Pressurization
The cooker waits 10 seconds to ensure you have finished inputting your selections, then displays On to indicate it has begun pre-heating. While the cooker pre-heats, it vaporizes liquid in the inner pot to create steam. Once enough steam has built up inside the inner pot, the float valve pops up and locks the lid of the cooker in place for safe pressure cooking.
When the float valve pops up, the silicone cap attached to the bottom of the float valve (on the underside of the lid) seals the steam inside the cooking chamber (the inner pot) and allows the pressure to rise even higher. A higher pressure means a higher cooking temperature.
While it is normal to see some steam escaping through the float valve during Pre-Heating, if you see steam escaping from around the sides of the lid, press Cancel and refer to Troubleshooting.
Note: The time it takes your cooker to pressurize is determined by a variety of factors, including food and liquid volume.
2. Cooking
After the float valve pops up, the cooker needs a few minutes to finish building pressure. When the required pressure level is reached, cooking begins. The display switches from On to the cooking countdown timer, displayed in HH:MM (hours : minutes) format.
Smart Program settings (e.g., cooking time, temperature and/or pressure level, and whether Keep Warm will come on automatically or not) can be adjusted at any time during cooking. Refer to Smart Program Settings for details.
3. Depressurization
After pressure cooking completes, follow your recipe instructions for depressurizing the cooker.
If automatic Keep Warm is on after cooking completes, the timer counts up from 00:00 to indicate the elapsed time up to 10 hours. If not, the cooker returns to Standby and displays End.
Note: The cooker cools and depressurizes faster if automatic Keep Warm is off.
See Depressurizing the Cooker (Venting Methods) for information on releasing pressure after cooking.
Depressurizing the Cooker (Venting Methods)
Always follow recipe instructions for depressurizing the cooker.
Natural Release (NR)
Leave the quick-release button in the popped-up Seal position. As the temperature within the cooker drops, the cooker depressurizes naturally over time.
Depressurization time varies based upon the volume and type of food and liquid. When the cooker has completely depressurized, the float valve drops into the lid.
Quick Release (QR)
Press the quick release button down until it clicks and locks into the Vent position.
When depressed, a stream of steam releases through the top of the steam release valve.
When the cooker has completely depressurized, the float valve drops into the lid.
If continuous spatter occurs while venting, set the cooker back to Seal by flicking the quick-release button. The button pops back up to indicate that it is sealed and stops the depressurization process. Wait a few minutes before trying to QR again. If spatter continues, use NR to safely release remaining pressure.
10-Minute NR
Leave the quick-release button in the popped-up Seal position for 10 minutes after cooking has completed, then press the quick-release button down until it clicks and locks into the Vent position. When depressed, a stream of steam releases through the top of the steam release valve.
If continuous spatter occurs while venting, set the cooker back to Seal by flicking the quick-release button. Wait an additional 5 minutes before trying to QR again. If spatter continues, use NR to safely release remaining pressure.
Using Pressure Cooking Smart Programs
Whether you are a novice cook or a culinary expert, the Duo Nova provides Smart Programs to get you cooking with the touch of a button.
The steps below follow the safest procedure for using the cooker and can be applied to the following Smart Programs: Pressure Cook, Soup/Broth, Meat/Stew, Cake*, Egg, Rice, Bean/Grain*, Porridge/Oatmeal, Steam and Sterilize.
Always inspect your Instant Pot pressure cooking lid, inner pot and cooker base carefully to ensure they are clean and in good working condition before use.
Pressure cooking liquids should be water-based, such as broth, stock, soup or juice. If using canned, condensed, or cream-based soup, add water as directed above.
1. Open and remove the lid as described in Pressure Control Features—Pressure Cooking Lid.
2. Remove the inner pot from the cooker base.
3. Add food and liquid ingredients to the inner pot. Note: Cold or frozen food items take longer to generate steam and slow down pressurization. For the fastest results, thaw frozen ingredients before cooking.
4. Insert the inner pot into the cooker base.
5. Mini and 6 Quart: Secure the power cord to the base power socket at the back of the cooker base. Ensure the connection is tight. All: Connect the power cord to a 120 V power source. The cooker goes to Standby mode and the display indicates OFF.
6. Place and close the lid as described in Pressure Control Features—Pressure Locking Lid. Note: The quick-release button will automatically pop up to the Seal position for pressure cooking.
7. Select your desired pressure cooking Smart Program.
8. Press the same Smart Program button again to cycle through Less, Normal and More time options.
9. For custom cooking, use the − / + buttons to adjust the cooking time.
10. Press Pressure Level to toggle between Low and High pressure.
Note: When pressure cooking, the pressure level controls the temperature. A higher pressure results in a higher cooking temperature.
Note: Cooking time and pressure level adjustments are saved to the Smart Program when cooking begins.
11. Press Keep Warm to toggle the automatic Keep Warm setting off or on, as you desire.
12. After 10 seconds, the display reads On and indicates that Pre-heating has begun.
13. When cooking completes, follow recipe directions to select the appropriate venting method. Refer to Depressurizing the Cooker (Venting Methods).
Instant Tip: Use the steam rack to lift foods out of the cooking liquid. This ensures even heat distribution, prevents nutrients from leeching into the cooking liquid, and stops food items from scorching on the bottom of the inner pot.
Pressure Cooking Settings
Pressure Cooking Tips
Using Non-Pressure Cooking Smart Programs
The Duo Nova is much more than a pressure cooker. These non-pressure cooking Smart Programs get you cooking quickly and easily.
Always ensure the lid is set to Vent when using non-pressure cooking programs. Press the quick-release button down until it clicks and locks in place.
The following sections provide the safest steps for using the Slow Cook, Sauté, Yogurt and Sous Vide Smart Programs.
Always inspect your Instant Pot pressure cooking lid, inner pot and cooker base carefully to ensure they are clean and in good working condition before use.
Slow Cook
Slow Cook is a non-pressure cooking program that is compatible for use with any common slow cooker recipe.
1. Remove the inner pot from the cooker base.
2. Add food and liquid ingredients to the inner pot.
3. Insert the inner pot into the cooker base.
4. Mini and 6 Quart: Secure the power cord to the base power socket at the back of the cooker base. Ensure the connection is tight. All: Connect the power cord to a 120 V power source. The cooker goes to Standby mode and the display indicates OFF.
5. Place and close the lid as described in Pressure Control Features—Pressure Locking Lid, or use a glass lid with a venting hole.
6. Press the quick-release button down until it clicks and locks into the Vent position.
7. Press Slow Cook to select the Slow Cook Smart Program.
8. Press Slow Cook again to cycle through the Less, Normal and More temperature options.
9. Use the − / + buttons to adjust the cooking time. Note: Cooking time and temperature level adjustments are saved to the Smart Program when cooking begins.
10. Press Keep Warm to toggle the automatic Keep Warm setting off and on.
11. After 10 seconds, cooking begins and the display timer counts down.
12. When cooking completes, the display indicates End if Keep Warm is turned off. If not, the timer begins counting from 00:00 up to 10 hours.
Sauté
Sauté is a non-pressure cooking program that can be used in place of a frying pan or flat-top grill.
1. Insert the inner pot into the cooker base. Do not use a lid.
2. Mini and 6 Quart: Secure the power cord to the base power socket at the back of the cooker base. Ensure the connection is tight. All: Connect the power cord to a 120 V power source. The cooker goes to Standby mode and the display indicates OFF.
3. Press Sauté to select the Sauté Smart Program.
4. Press Sauté again to cycle through the Less, Normal and More temperature options. Note: Cooking temperature adjustments are saved to the Smart Program when cooking begins.
5. After 10 seconds, the cooker displays On to indicate that it has begun heating.
6. When display switches from On to Hot, add recipe ingredients. Note: If recipe ingredients are added before the Hot message appears, it may not appear at all. This is normal.
7. When cooking completes, the display indicates End. Note: Automatic Keep Warm cannot be turned on for the Sauté Smart Program.
Deglazing the Inner Pot (Pressure Cooking After Sauté)
Sautéing meat and vegetables before pressure cooking is the perfect way to boost flavors, as sugars caramelize from the high heat of the Sauté Smart Program.
To pressure cook after using Sauté, deglaze the inner pot to ensure food items do not scorch.
To deglaze: remove food items from the inner pot and add a thin liquid (e.g., water, broth, wine) to the hot surface. Use a wooden or silicone scraper to loosen anything that may be stuck to the bottom of the inner pot.
Yogurt
Yogurt is a non-pressure cooking Smart Program made for easy fermented dairy and non-dairy recipes.
Pasteurize Milk
1. Remove the inner pot from the cooker base.
2. Add unpasteurized milk to the inner pot then insert the inner pot into the cooker base.
3. Mini and 6 Quart: Secure the power cord to the base power socket at the back of the cooker base. Ensure the connection is tight. All: Connect the power cord to a 120 V power source. The cooker goes to Standby mode and the display indicates OFF.
4. Place and close the lid as described in Pressure Control Features—Pressure Locking Lid.
5. Press Yogurt to select the Yogurt Smart Program.
6. Press the quick release button down until it clicks and locks into the Vent position.
7. Press Yogurt again to cycle to the More option. The display indicates boiL.
8. After 10 seconds the cooker begins heating.
9. When pasteurization completes, the display indicates End.
10. Remove the lid and use a thermometer to check the temperature
Add Starter Culture
1. Allow pasteurized milk to cool to just below 43°C (110°F).
2. Add a starter culture to the milk according to package instructions. Note: If using plain yogurt as a starter, ensure that it contains an active culture. Mix in 2 tbsp of yogurt per gallon of milk, or follow a trusted recipe.
3. Place and close the lid as described in Pressure Control Features—Pressure Locking Lid.
Ferment Yogurt
1. Press Yogurt to select the Yogurt Smart Program.
2. Press the quick-release button down until it clicks and locks into the Vent position.
3. Press Yogurt again to cycle to the Normal option. The display indicates 08:00.
4. Use the − / + buttons to adjust the fermentation time if desired.
5. After 10 seconds the cooker begins heating. The display timer counts up to the set time from 00:00.
6. When fermentation completes, the cooker beeps and displays End.
Yogurt Cups
Yogurt cups are a convenient way to portion out your yogurt for serving.
1. After adding the starter culture to the pasteurized milk, carefully pour the milk into your yogurt cups and seal them tightly.
2. Clean the inner pot thoroughly and place the steam rack on the bottom of the inner pot.
3. Place the sealed yogurt cups on the steam rack and add water to the inner pot until the cups are submerged halfway.
4. Follow steps in “Ferment Yogurt” above.
Care and Cleaning
Clean your Duo Nova after each use.
Always unplug your Duo Nova and let it cool to room temperature before cleaning.
Let all surfaces dry thoroughly before use, and before storage.
Part
Instruction
Cleaning Method
Accessories
• Steam Rack
• Condensation Collector
• Wash after each use.
• Never use harsh chemical detergents, powders or scouring pads on accessories.
• For dishwasher, place on top rack.
• Empty and rinse condensation collector after each use
Dishwasher Safe* and Hand Washable
Lid and Parts
• Anti-Block Shield
• Sealing Rings
• Steam Release Valve
• Float Valve •
Silicone Cap
• Wash after each use with hot water and mild dish soap and allow to air dry, or place in top rack of dishwasher.
• Remove all small parts from lid before washing.
• With steam release valve and anti-block shield removed, clean interior of steam release pipe to prevent clogging.
• To drain water from the lid after dishwashing, grasp the lid handle and hold the lid vertically over a sink, then turn it 360°— such as turning a steering wheel.
• After cleaning, store the lid upside down on the cooker base.
• Store sealing rings in a well-ventilated area to decrease residual odor of flavorful meals. To eliminate odors, add 1 cup (8 oz / 250 mL) water and 1 cup (8 oz / 250 mL) white vinegar to inner pot, and run Pressure Cook for 5–10 minutes, then QR pressure.
Inner Pot
• More acute hard water staining may require a vinegar-dampened sponge and some scrubbing to remove.
• If there is tough or burned food residue at the bottom, soak in hot water for a few hours for easy cleaning.
• Wash after each use.
• Ensure all exterior surfaces are dry before placing in cooker base.
Detachable Power Cord (3 and 6 Quart Only)
• Use a barely damp cloth to wipe any particles off power cord.
Damp Cloth Only
Cooker Base
• Wipe the inside of the outer pot as well as the condensation rim with a barely damp cloth, and allow to air dry.
• Clean cooker base and control panel with a soft, barely damp cloth or sponge.
Troubleshooting
Problem
Possible Reason
Solution
Difficulty closing lid
Sealing ring not properly installed
Reposition sealing ring, ensure it is snug behind sealing ring rack.
Float valve in the popped-up position
Gently press the float valve downward with a long utensil.
Contents in cooker are still hot
Press quick release button down until it clicks into Vent position, then lower lid onto cooker base slowly, allowing heat to dissipate.
Difficulty opening lid
Pressure inside the cooker
Release pressure according to recipe; only open lid after float valve has dropped down.
Float valve stuck at the popped-up position due to food debris or residue
Ensure steam is completely released by quick releasing pressure, then press float valve gently with a long utensil.
Open lid cautiously and thoroughly clean float valve, surrounding area, and lid before next use.
Contents may be under pressure; to avoid scalding injury, do not attempt to force lid open.
Inner pot is stuck to lid when cooker is opened
Cooling of inner pot may create suction, causing inner pot to adhere to the lid
To release the vacuum, press quick-release button down until it clicks into Vent position.
Steam leaks from side of lid
No sealing ring in lid
Install sealing ring.
Sealing ring damaged or not properly installed
Replace sealing ring
Food debris attached to sealing ring
Remove sealing ring and clean thoroughly
Lid not closed properly
Open, then close lid.
Sealing ring rack is warped or offcenter
Remove sealing ring from lid, check sealing ring rack for bends or warps. Contact Customer Care.
Inner pot rim may be misshapen
Check for deformation and contact Customer Care.
Float valve does not rise
Food debris on float valve or float valve silicone cap
Remove float valve from lid and clean thoroughly; perform Initial Test Run to check for function and record findings. Contact Customer Care.
Too little liquid in the inner pot
Check for scorching on bottom of inner pot. Add thin, water-based liquid to the inner pot according to its size:
3 Quart: 1 cup (8 oz / 250 mL)
6 Quart: 1 1/2 cups (12 oz / 375 mL)
8 Quart: 2 cups (16 oz / 500 mL)
10 Quart: 2 1/2 cups (20 oz / 625 mL)
Float valve silicone cap damaged or missing
Install or replace float valve.
Float valve obstructed by lid-locking mechanism
Tap float valve with a long utensil. If the float valve does not drop, turn the cooker off. Contact Customer Care
No heat in the inner pot
Perform Initial Test Run to check for function and record findings. Contact Customer Care.
Inner pot base may be damaged
Perform Initial Test Run to check for function and record findings. Contact Customer Care.
Minor steam leaking/hissing from steam release valve during cook cycle
Quick release button not in Seal position
Flick quick release button to ensure it is in the Seal position.
Cooker is regulating excess pressure
This is normal; no action required.
Steam gushes from steam release valve when quick release button is in Seal position
Not enough liquid in the inner pot
Add thin, water-based liquid to the inner pot according to its size:
3 Quart: 1 cup (8 oz / 250 mL)
6 Quart: 1 1/2 cups (12 oz / 375 mL)
8 Quart: 2 cups (16 oz / 500 mL)
10 Quart: 2 1/2 cups (20 oz / 625 mL)
Pressure sensor control failure
Contact Customer Care.
Steam release valve not seated properly
Flick quick release button to ensure it is in the Seal position.
Display remains blank after connecting the power cord
Bad power connection or no power
Inspect power cord for damage. If damage is noticed, contact Customer Care.
Check outlet to ensure it is powered.
Cooker’s electrical fuse has blown
Contact Customer Care.
Error code appears on display and cooker beeps continuously
Temperature is too high because inner pot is not placed in the cooker base
Press Cancel and wait for heating element to cool; ensure there are no foreign objects in cooker base; insert or reposition inner pot in cooker base and re-enter commands.
Temperature is too high because there is no water in inner pot
Check for scorching on bottom of inner pot. Add thin, water-based liquid to the inner pot according to its size:
3 Quart: 1 cup (8 oz / 250 mL)
6 Quart: 1 1/2 cups (12 oz / 375 mL)
8 Quart: 2 cups (16 oz / 500 mL)
10 Quart: 2 1/2 cups (20 oz / 625 mL)
C7 or NoPr
Heat element has failed
Contact Customer Care.
Not enough liquid
Add thin, water-based liquid to the inner pot according to its size:
3 Quart: 1 cup (8 oz / 250 mL)
6 Quart: 1 1/2 cups (12 oz / 375 mL)
8 Quart: 2 cups (16 oz / 500 mL)
10 Quart: 2 1/2 cups (20 oz / 625 mL)
Quick release button is in the Vent position
Flick quick release button to ensure it is in the Seal position.
Lid
Lid is not in the correct position for the selected program
Open and close the lid.
Do not use a lid when using Sauté.
OvHt / Burn / Food burn
High temperature detected at bottom of inner pot; cooker automatically reduces temperature to avoid overheating
Starch deposits at the bottom of the inner pot may have blocked heat dissipation.
Turn the cooker off, release pressure according to the recipe, and inspect the bottom of the inner pot.
PrSE
Pressure has accumulated during a non-pressure cooking program
Press quick release button down until it clicks into Vent position.
Occasional clicking or light cracking sound
The sound of power switching and expanding pressure board when changing temperatures
This is normal; no action needed.
Bottom of the inner pot is wet
Wipe exterior surfaces of inner pot. Ensure heating element is dry before inserting inner pot into cooker base.
#1 Can you use this for canning fruit or vegetables in jars?
No, a pressure cooker is not the same as a pressure canner. I am a certified master food preserver and if anyone tells you otherwise, they are wrong. Do not risk your health (life) and try to process food in jars in your Instant Pot or any other multipurpose appliance.
If you mean if it cooks without the lid being on, then yes, there is a saute function that you can use to brown meats and soften vegetables, etc. You can then put the lid on if you wish to continue by pressure cooking. (The lid is on or off; it is not hinged, so there is no "lid up".)
#3 Didn’t see a power cord in the box to plug in, do you have to buy separately?
No, it should have been in the box in a bag by itself
Yes, but only if you get the optional glass lid. The pressure cooker lid will eventually gum up from the oil and explode, so you don't want to do that.


 Element is heating
 Pressure cooking in progress
 Keep Warm On/Off
 Sound On
 Sound Off
 Sound On: When in Standby, press and hold + button until display indicates S On.
 Sound Off: When in Standby, press and hold − button until display indicates SOFF.


 symbol on the lid with the
  symbol on the rim of the cooker base, then lift the lid up and off the cooker base.
 symbol on the cooker base.