Loading ...
Loading ...
Loading ...
20
3.
Hang the furniture door onto the appliance door, making sure that the
brackets on the mounting bracket locate over the adjusting bolts.
4.
Use a screwdriver to adjust the gap on the lower section of the adjusting
bolts. The gap should be set to approximately 9 mm (as shown in the above
drawing).
5.
Fix the lower bracket to the bottom of the furniture door and the
underneath of the appliance door.
o
It is possible to make minor adjustments to the position of the
furniture door using the screws on the top and the bottom of the appliance
door. You should make these adjustments so that the furniture door is
level.
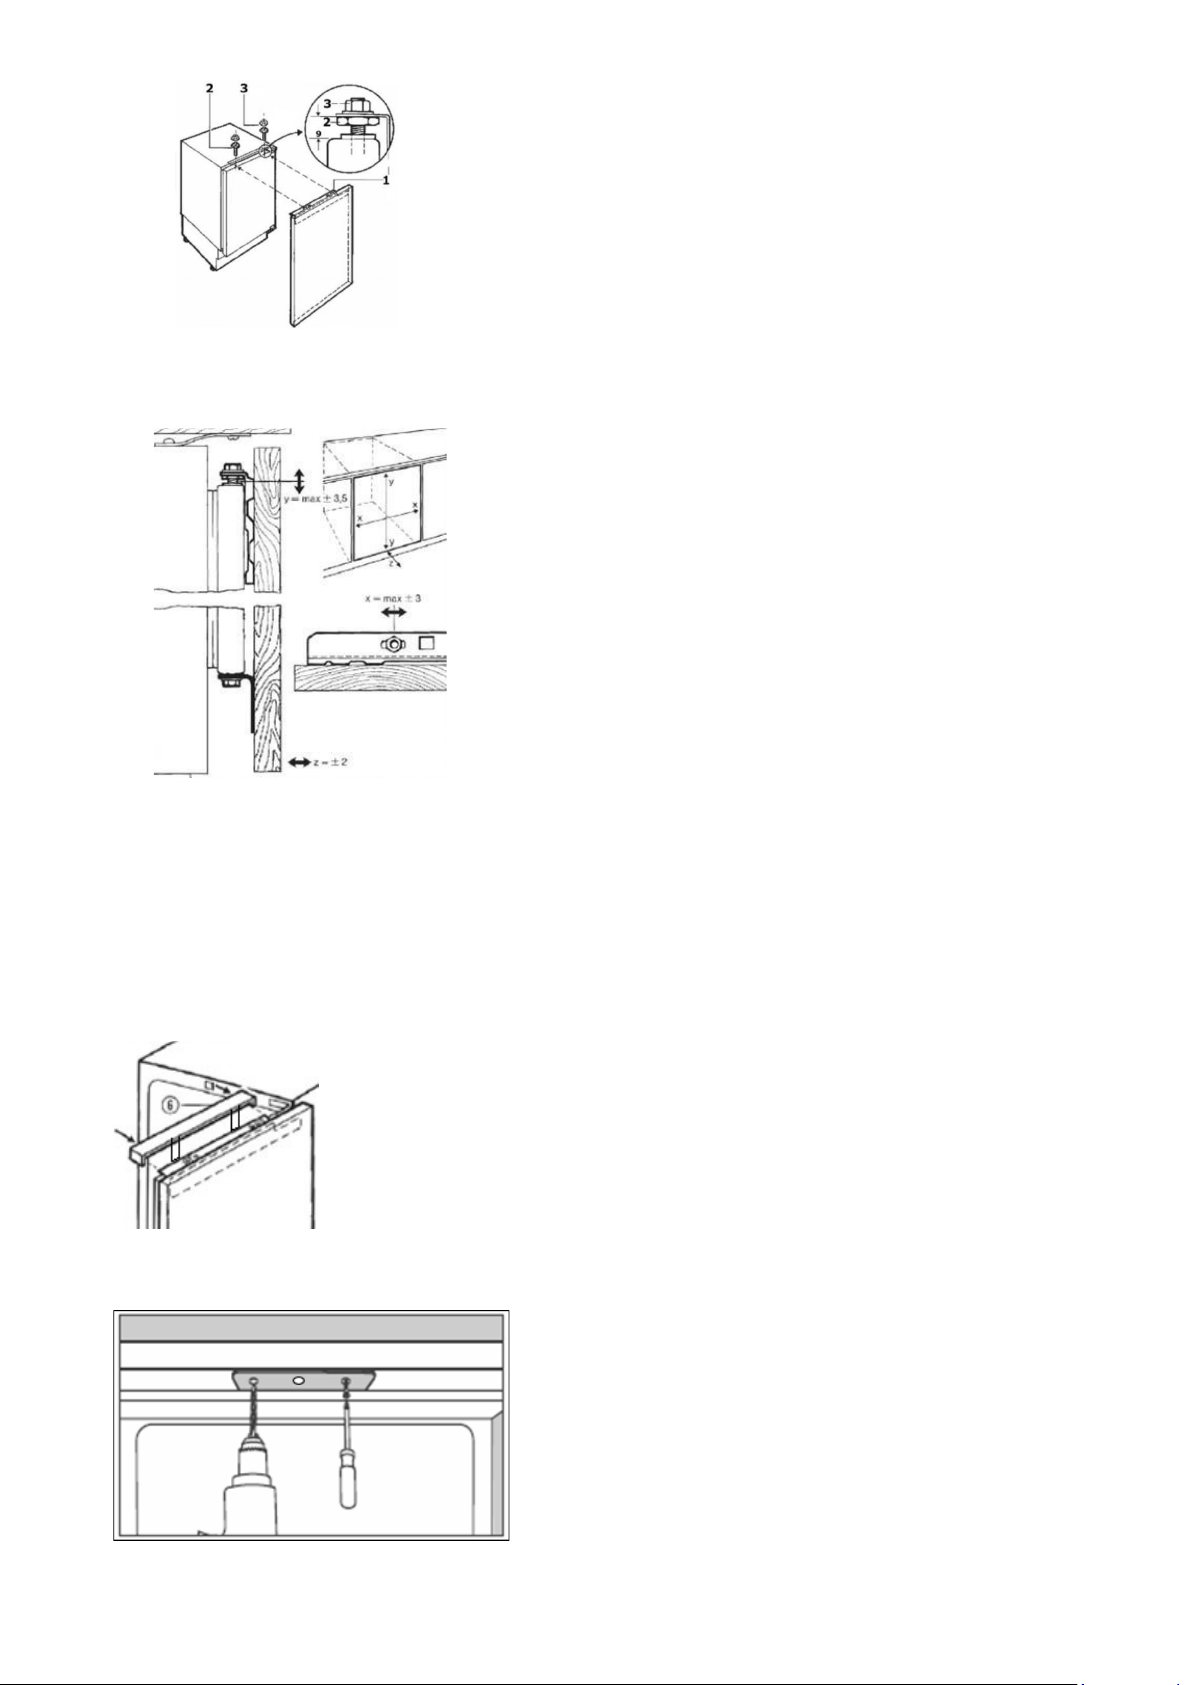
6.
Insert the cover plate to the top of the appliance, this will just clip into
place.
7.
Open the appliance door.
o
Use a suitably sized drill bit to drill through the holes in the bracket, into
the work top.
IMPORTANT: The drill bit should be appropriate for the material that your
work top is made from.
o
Secure the bracket to the underside of the worktop, using the
screws provided.
IMPORTANT: These screws should be fully tightened.
o
If the appliance is being installed under a granite worktop, use the L
shaped brackets provided to secure the fridge to the side of the cabinet. Use
a suitably sized drill bit to drill through the three holes in the bracket into the
cabinet side on the opposite side to the hinges.
o
The oval holes rest over the hinge positions which are not being used on
the front of the appliance. Use two screws to secure the bracket to the front
of the appliance.
o
Check that the door opens and shuts without snagging, as well as
checking that the door is sealing correctly.
TROUBLESHOOTING
IMPORTANT: If your refrigerator appears not to be operating properly,
before contacting the Customer Care Department, please refer to the
checklist below.
My fridge does not appear to be working/there is no power to my
appliance.
o
Check that the plug is fully inserted into the power socket.
o
Check that there is power to your mains supply (e.g. that there hasn’t
been a power cut or that the fuse hasn’t blown).
o
Check that the thermostat inside the appliance has not been turned to
the off position.
o
Check that your mains supply voltage, corresponds to the voltage
stated on the rating plate of your appliance.
My fridge appears to be performing poorly
o
Check that the appliance isn’t overloaded and that food hasn’t been packed
too tightly into it.
o
The thermostat setting is too low; you should turn the
thermostat up higher.
o
Ensure that the door is closing properly and that the door has not
been opened for a prolonged period in error.
o
Ensure that there is adequate ventilation for your appliance.
My fridge is noisy
o
The refrigerant gas that circulates the pipework of the appliance may
make a slight noise, even if the compressor is not running.
o
If the noise worsens or the appliance gets louder than normal; check
that it is levelled off correctly, that nothing is touching the rear of the fridge
and that nothing placed inside the appliance is rattling.
Ice has formed on the inner back wall of my fridge
o
Check that food has not been pushed too far back inside the
appliance, so that it is in contact with the inner back wall.
IMPORTANT: It is normal to get some ice droplets forming on the back wall
of the appliance. The formation of ice droplets does not indicate an
appliance fault.
There is water in the base of the fridge or leaking out of my fridge.
o
Follow the “The defrost drain hole” section on page 15.
DO NOT ATTEMPT TO REPAIR THE APPLIANCE YOURSELF.
Loading ...
Loading ...
Loading ...